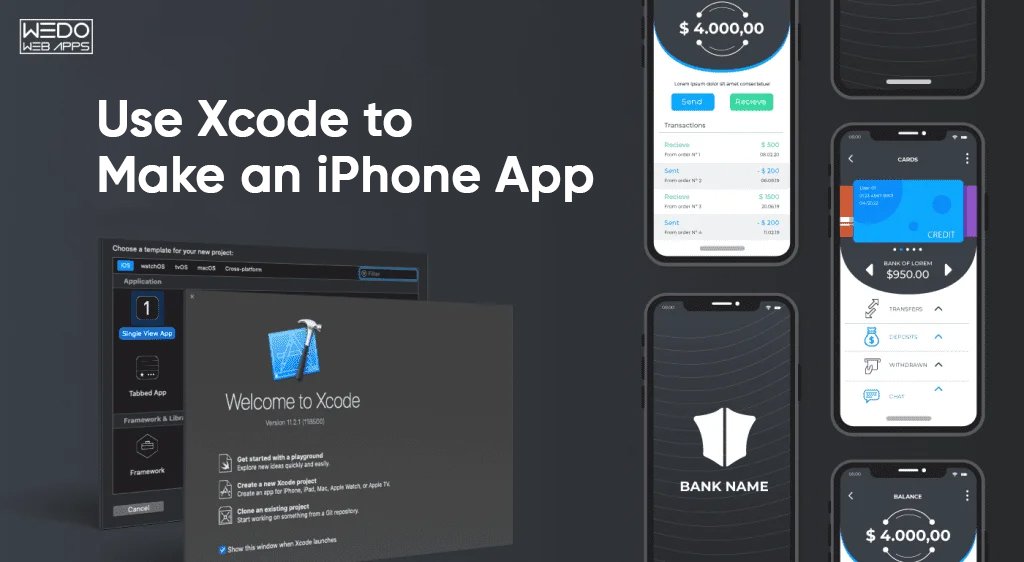
iPhone App Development
In a world where attention is currency and convenience is king, developing an iPhone app is no longer a luxury, it is a business necessity.
Whether you're launching a startup, building a new product, or expanding your company’s reach, an iOS app helps you connect with millions of high-value users, right in their pockets. Knowing how to build an app for the iPhone allows you to validate ideas faster, reduce outsourcing costs, and maintain control from day one.
And while iOS development services were once provided by seasoned engineers, today's tools, frameworks, and no-code alternatives have made the process more possible than ever.
In this blog, you will learn:
- The important technical stack and Apple ecosystem requirements
- A structured, step-by-step development process using Swift and Xcode
- How to use no-code or low-code platform for MVPs and testing
- Deployment strategies, App store compliance, and marketing best practices
- Common pitfalls to avoid when building for high-expectation iOS user base
Whether you are launching a new digital product, prototyping a mobile-first idea, or expanding your existing SaaS offering, this guide gives you the practical foundation to build and ship an iPhone app that delivers business value.
Let’s get started.
What You Need to Know Before Creating an iPhone app?
Before you jump into coding, you need to understand the ecosystem you are going to enter. Developing an iPhone app is not just about writing code, it is about solving a problem, designing intuitive interfaces, and following Apple’s ecosystem guidelines.
iPhone App Development: Who it is For?
iPhone app development is ideal for:
- Entrepreneurs wanting to launch a startup idea.
- Freelancers looking to expand their services
- Developers entering the iOS ecosystem
- Businesses digitizing services or building customer engagement apps
- Students learning mobile development skills
You do not need to be a tech genius, thanks to modern tools and no-code platforms, anyone can create an app for iPhone with the right guidance.
Why Build an iPhone App?
Are you still wondering if it is worth it? Here is why iOS apps continues to dominate:
- Revenue Potential: The app store generates more revenue per user than Android
- User Base: Over 1 billion active iPhone users globally
- Premium Audience: iOS users tend to spend more and are loyal
- Ecosystem Quality: Apple provides top-tier tools, SDKs, and support
Building an iOS app is a future-proof move if you are aiming for quality, performance, and reach.
App Store Guidelines You Must Follow
Apple maintains strict App Store Review Guidelines to ensure a safe and high-quality experience for users. Some essentials are:
- No spammy or low-quality apps
- Transparent data usage policies
- Clean, intuitive UX
- Must work without crashing or bugs.
- Adhere to Apple’s content and safety policies.
Pro Tip: Review Apple’s App Review Guidelines before you start development to avoid rejections.
Tools and Requirements to Start iOS App Development
Before you start your first line of Swift code or design your application’s interface, there are a few essential tools and requirements to set up. Apple’s development requirement is highly optimized, but you will need to meet some prerequisites to build an app for iPhone effectively.
Mac System vs Windows: What Do You Need?
To develop an app for iPhone, you will need access to a Mac. Apple’s official development tool XCode runs only on macOS.
System | Feasibility for iOS Development |
Mac | Ideally and fully supported |
Windows | Possible with workarounds like virtual machines local in the cloud. |
Tip: If you are on a Windows PC and not ready to invest in a Mac, you can explore MacStadium or MacInCloud for remote Mac access.
Install XCode - Apple’s IDE for iOS
Xcode is Apple’s official Integrated Development Environment (IDE) for building apps on iOS, macOS, iPadOS, and more. It comes with:
- A code editor
- iOS Simulator
- Interface builder
- Debugging tools
To install:
- Visit the Mac App Store
- Search for Xcode
- Click install (it is free)
Once installed, you are ready to build your first project, run app previews, and test directly on iPhone simulators.
Create an App Developer Account
To publish your app on the App Store, you need to enroll in the Apple Developer Program.
Requirement | Details |
Account Type | Individual or Organization |
Annual Fee | $99/Year (As of 2025) |
Benefits | App store submission, TestFlight beta testing, access to SDKs and documentation |
Even if you are just experimenting or learning, registering early is a good idea to access development and deployment tools.
Programming Language Options (Swift, Objective C)
Apple supports two primary languages for iOS development:
Language | Best For |
Swift | Modern, clean, beginner-friendly, Apple-recommended |
Objective C | Legacy apps or developers familiar with C/C++ |
For new developers, Swift is highly recommended. It is safe, fast, and built specifically for Apple platforms.
If you are exploring no-code platforms instead, you might not need to worry about languages, but it is always helpful to understand the basics.
Step-by-Step Process to Create Your First iPhone App
Creating iPhone apps may seem intimidating at first, but when broken down into a clear process, it is absolutely achievable, even if you are not from a coding background. Below is a detailed roadmap that takes you from a raw app idea to seeing your creation live on the app store.
Step 1 - Define Your App Idea and Target Audience
Every successful app starts with a strong, purposeful idea. Before you start building anything, ask yourself:
- What problem does my app solve? For example, if you are building a budgeting app, is it for students, families, or freelancers?
- Who is the target user? Knowing whether you are building for tech-savvy teens or working professionals will shape your app's design and functionality.
- Is there a similar app already? If Yes, what can I improve? Use platforms like the App Store, Product Hunt, or even Reddit to see what’s trending and what users are complaining about.
Tip: Do not try to build “everything”. Focus on a single powerful feature first. That is your MVP (Minimum Viable Product).
Step 2: Sketch Features and Create a Wireframe
Once your idea is validated, it’s time to put it on paper or screen. This stage is not about beauty, it is about structure.
Wireframing is like creating a skeleton of your app. You’ll sketch out major screens like:
- The home screen
- User login/registration
- Navigation menu
- Settings or features area
You can use free tools like Figma, Balsamiq, or even pen and paper for the first version.
Example: Let’s say you are building a goal-tracking app. Your wireframe might include:
- A dashboard showing daily goals
- A calendar view
- A goal creation screen with input fields
Wireframes help ensure your app is easy to navigate before any design or coding begins.
Step 3: Design the App UI (Tools to use)
With wireframes ready, you will move into designing the visual layer of your app, what users will actually interact with. Great design is not about fancy colors, it is about usability, clarity, and consistency.
Use tools like:
- Sketch: a popular Mac-based design tool tailored for iOS.
- Figma: great for collaboration and browser-based work.
- XCode’s Interface Builder: lets you drag and drop UI elements like buttons and labels.
- Stick to Apple’s Human Interface Guidelines to match the iOS ecosystem
- Use high-contrast colors and clear fonts
- Test tap areas - are buttons big enough for thumbs?
- Keep the consistent layout across all screens.
Pro Tip: Use pre-built iOS UI kits available online to speed up the process and maintain standard iPhone design patterns.
Step 4: Set Up Xcode and Your Project Environment
Now that your designs are ready, it is time to bring that to life. The first step is opening Xcode, Apple’s official development environment. When you launch Xcode, you will be prompted to create a new project. Choose the iOS App template, and then fill in key project details like:
- App Name (eg., “FocusBuddy”)
- Team (from your Apple Developer Account)
- Interface (Storyboard or SwiftUI)
- Language (Swift)
Once set, Xcode creates a workspace where you code, design files, assets, and configurations will live. At this stage, you are essentially setting the foundation of your app, just like creating a new file in Word or Google Docs, but for app development.
Beginner Tip: Stick with Storyboard + SwiftUI if you are new. SwiftUI is more modern but has a steeper learning curve.
Step 5: Code the App Using Swift
Swift is the preferred programming language for iOS app development. It’s powerful, beginner-friendly, and designed specifically for Apple devices. You will write Swift code to control how your app behaves when users interact with it.
Let’s say you have a “Start Timer” button in your productivity app. You can write a function like this in your ViewController:
@IBAction func startTimer(_ sender: UIButton) { print("Timer started!") } |
This code connects to your UI and triggers actions when the button is tapped. Over time you will build multiple functions for navigation, data input, calculations, animations, etc.
Learning Tip: Use Apple’s Swift Playgrounds for interactive practice if you are new to coding.
Step 6: Connect UI to Code
Now it is the time to bridge the gap between your UI elements and your logic. In Xcode, use the Assistant Editor to view both your Storyboard and code side by side.
From here:- Control-drag a button into your ViewController to create an IBAction.
- Control-drag a label or text to create an IBOutlet.
- Buttons
- Text Fields
- Labels
- Switches
- Table Views
Pro Tip: Always label your outlets clearly (eg., loginButton, userInputField) to avoid confusion in larger apps.
Step 7: Test Your App on Simulators and Real Devices
Before you even think about launching your app, testing is non-negotiable. Xcode comes with a built-in simulator that lets you run your app on virtual iPhones, iPads, or even different screen sizes (like iPhone SE vs iPhone 15 Pro Max).
To run the simulator:
- Choose a device from the toolbar (eg., iPhone 14)
- Press the Run Button (Play Icon)
You will see your app come to life just like it would on a real phone. But do not stop there, real device testing is essential to catch bugs that simulators miss.
To test on an actual iPhone:
- Connect it via USB
- Trust the computer on your iPhone
- Enable developer mode (from iOS 16+)
- Select the iPhone as your build target
Also Try: Apple’s TestFlight platform lets you share beta versions of your app with testers before publishing it.
Step 8: Submit to the App Store
This is the moment you have been working toward: launching your app.
Before you submit, you will need:
- App name, description, and keywords
- App icon (1024*1024 pixels)
- Screenshots for iPhone sizes
- App privacy policy URL
- Archive your build in Xcode (Product > Archive)
- Upload it to App Store Connect
- Fill in the meta data and pricing details
- Submit your Apple’s review.
Apple’s review typically takes 1-3 days. If your app violates any guidelines, like having broken features, unclear privacy use, or crashes, it will be rejected with feedback for correction.
Step 9: Market Your App for Visibility
Even the most brilliantly developed app won’t succeed if no one knows about it. Once your app is live, you need to get it in front of the right users.
Effective marketing tactics include:
- Social media promotion (Instagram, Twitter, TikTok)
- Posting on Product Hunt or Reddit
- Partnering with micro-influencers in your niche
- Running App Store Ads
- Launching on forums or niche communities
Most importantly, implement App Store Optimization (ASO) by including high-value keywords in:
- App title
- Subtitle
- Keyword field
- Add description
Pro Tip: Ask friends, beta testers, and early adopters to leave positive reviews. Rankings matter a lot in App Store ranking algorithms.
Step 10: Gather Feedback and Update
Your first release is not the end, it is the beginning of your product’s life.
Start collecting feedback from:
- In-app surveys
- App store reviews
- Social media comments
- Support emails or tickets
Track bugs using crash reporting tools like Firebase Crashlytics or Sentry, and make regular updates to improve performance, add features, and stay compatible with new iOS versions.
Apps that evolve based on user needs build loyal communities and higher retention over time.
Ready to turn your iPhone app idea into reality? Book your free iOS App Strategy Call with our experts today. We'll map out your features, timeline, and budget in a 30‑minute session. |
No-Code and Low Code iPhone App Creators
Not everyone wants to (or needs to) learn Swift or set up Xcode. If you are a non-developer, a startup founder, or someone who just wants to validate an idea quickly, no-code or low-code platforms offer a faster, simpler idea to bring your idea to life.
These platforms provide drag-and-drop interfaces, pre-built modules, and automated publishing tools, so you can focus on building your idea rather than writing code.
Best Platforms to Make an iPhone App Without Coding
Here are some of the top tools for building iPhone apps without writing a single line of Swift:
Platform | Best For | Key Features |
Adalo | MVPs, startups | Drag-and-drop builder, in-app payments, publish to iOS |
Thunkable | Educational apps, prototyping | Block-based logic, real-time testing |
Glide | Data-driven apps | Turns Google Sheets into mobile apps |
Bubble | Web apps packaged for iOS | Advanced logic, database, plugin system |
Bravo Studio | Design-to-app workflow | Turns Figma designs into native apps |
These tools are great for:
- Entrepreneurs testing a startup idea
- Small businesses creating internal tools
- Event apps, loyalty programs, or community platforms
Pros & Cons of Using App Builders vs Custom Development
While no-code platforms can save time and money, they’re not always a perfect fit—especially for apps requiring deep functionality or complex backend integrations.
Pros:- No coding knowledge required
- Fast deployment
- Ideal for prototypes and MVPs
- Budget-friendly for early-stage projects
- Limited customization (compared to native Swift apps)
- Performance may not match fully coded apps
- You’re dependent on the platform’s pricing and uptime
- Limited access to Apple APIs and advanced hardware features
If your app requires ARKit, CoreML, HealthKit, or deep camera/accelerometer integration, you’ll likely need to go the native iOS route using Swift and Xcode.
Real-World Example:
Let’s say you want to launch a local food delivery app for your city.
- With Adalo, you could design the full app interface, add user login, restaurant listings, and Stripe payments—all without coding.
- Later, if you decide to scale it nationwide or integrate machine learning-based suggestions, that’s when custom development becomes necessary.
Common Challenges in iPhone App Development (and How to Overcome Them)
Creating an iPhone app opens new doors, but it also comes with unique challenges, especially if you are doing it for the first time. From strict App Store Guidelines to technical limitations, many great app ideas fall short not because they are bad, but because the process was not planned well.
Here are the most common hurdles teams face when trying to create an app for iPhone, along with proven ways to overcome them.
1. Getting Rejected by the Apple Store
The Problem:Apple has one of the strictest app review processes in the industry. Apps can get rejected for poor performance, vague privacy policies, irrelevant content, or even small UI glitches.
How to overcome it:- Follow Apple’s App Store Review Guidelines from day one
- Use real devices to test performance and eliminate bugs
- Make sure your app has a clear purpose and provides values to users
- Include a working privacy policy link and accurate app metadata
Pro Tip: Use Apple’s TestFlight to catch issues before submitting your final build.
2. Understanding Time and Budget
The Problem:Businesses often assume iPhone apps are quick and cheap to build. But depending on features, UI complexity, and testing, even a basic app can take 4-12 weeks and a significant budget, especially with custom development.
How to Overcome it:- Start with a Minimum Viable Product (MVP), only core features first
- Use no-code platforms for quick validation
- Plan for time beyond launch: updates, marketing, bug fixes
- Set realistic expectations across your team or stakeholders
A good MVP gets you user feedback early without overinvesting upfront.
3. Navigating Apple’s Developer Ecosystems
The Problem:If you are new to iOS, setting up certificates, provisioning profiles, and build configurations in Xcode can feel overwhelming.
How to Overcome it:- Apple’s Developer Documentation is detailed, bookmark it.
- Enroll in the Apple Developer program early
- Use Xcode’s auto-manage settings for provisioning if you are unsure
- Watch free WWDC (Apple Developer Conference) videos for deep dives
If you have a team, assign this setup to someone familiar with DevOps or CI/CD.
4. Making the App Too Complicated
- Focus on solving one key problem really well
- Limit your launch versions to 3-5 core features
- Use analytics (like Firebase or Mixpanel) to learn what users actually use
- Roll out features in updates based on real user behavior
Overcomplicating your first version increases the chance of failure.
5. Testing Only on Simulators
The Problem:Xcode’s iPhone Simulator is great, but it does not always reflect how your app will perform on a real device, especially for gestures, notifications, camera, GPS, or performance.
How to Overcome it:- Test on at least one real iPhone (ideally across different screen sizes)
- Use TestFlight to beta test with friends or internal users
- Check performance on low-power mode, poor network, and different orientations
Thorough testing = fewer App Store rejections + better user experience.
6. Neglecting App Store Optimization (ASO)
The Problem:You build the app. It is on the App Store. But nobody is downloading it.
How to Overcome it:- Use relevant keywords in your app name and subtitle
- Write a clear, benefit-driven description
- Include high-quality screenshots and a video preview
- Encourage early users to leave positive reviews
ASO is like SEO for your app, get it right, and visibility improves significantly.
Cost and Time Involved in iPhone App Development
Before you dive into development, it is important to understand what kind of investment, both in terms of time and money, is required to bring an iPhone app to life. Whether you are building it yourself, working with a freelance developer, or hiring an agency, the scope and complexity of the app will directly influence the total cost and timeline.
Let’s break it down.
Cost Breakdown - DIY vs Hiring Developers
The cost of developing an iPhone app can vary greatly depending on how you approach it:
Approach | Cost Range | Ideal For |
DIY (with Xcode + Swift) | $0-$300(mainly time, Apple Developer fee, tools) | Developers, tech-savvy founders |
No-code/Low-code Platforms | $25-$200/month | MVPs, non-technical founders |
Freelancers | $3000-$15,000+ | Small to Medium Projects |
Development Agencies | $10,000-$100,000+ | Full-scale apps with complex features |
- Apple Developer Program: $99/year
- App design tools (Figma, Sketch): Free - $12/month
- Third-party integrations (eg., payment gateways, APIs)
- Backend services (Firebase, AWS, custom databases)
Pro Tip: Start with a lean MVP to validate your idea before investing heavily in a fully-featured product.
How Long Does it Take to Make an iPhone App?
Just like cost, the timeline depends on your app’s complexity, features, and development approach.
App Type | Estimated Development Time |
Simple app (to-do list, calculator) | 2-4 weeks |
MVP with user login, API, push notifications | 4-8 weeks |
eCommerce, marketplace, or social platform | 3-6 months |
Enterprise-level app with backend, dashboards, integrations | 6-12+ months |
Factors that Affect Timeline:
- Team size and expertise
- UI/UX complexity
- Number of features and platforms (iPhone only vs iPhone + iPad)
- Revisions, testing, and App Store approval time
Reminder: The timeline doesn’t end at launch. Post-launch updates, maintenance, and feature expansions are ongoing efforts that require both time and budget planning.
Conclusion: Start Building Your iPhone App With Confidence
Creating an iPhone app is not just for silicon valley startups or giant tech teams, it is for anyone with a strong idea, a clear goal, and the right roadmap.
Whether you plan to code it yourself, use a no-code builder, or partner with an experienced iPhone app development company, the process is now more accessible than ever. With Apple’s robust tools, widespread user base, and a supportive ecosystem, iOS remains one of the best platforms to launch high-quality, high-performance apps.
By following this guide, you have learned:
- What tools and skills are needed to get started
- How to build, test, and publish an app from scratch
- Ways to avoid common pitfalls
- Alternatives for non-developers and early MVPs
- Time and cost expectations for different project types.
If you are serious about turning your vision into a scalable iPhone app, now is the time. The App store is open. The market is ready. All that is missing is your app.
Whether you’re starting from scratch or scaling your next big idea, our experienced team can turn your concept into a high-performance iOS app. Hire iPhone app developers from WEDOWEBAPPS and we guarantee custom solutions tailored to your business goals, budget, and launch timeline. Talk to our experts today and let’s build something great together |