
Introduction
An app idea can take shape in minutes. Building an Android app that people actually use is a difficult challenge altogether.
What starts as a simple concept often turns into a series of important decisions.
- Which feature should come first?
- How do you turn an idea into a working product?
- What technologies should you choose?
- How much development is required before launch?
- More importantly, how do you avoid spending months building something users may never need?
The difference between a successful application and one that struggles after launch often comes down to the process behind it. A clear roadmap helps transform assumptions into validated features, design concepts into user experiences, and business goals into a product that delivers measurable results.
That is why understanding how to develop an Android app is about much more than writing code. It requires careful planning, user research, interface design, development, testing, deployment, and continuous improvement. Each stage influences the quality, performance, and long-term success of the application.
In this Android app development guide, you will learn the complete Android app development process, from validating your idea and defining requirements to launching and maintaining your application. Whether you are a startup founder, business owner, or aspiring developer, these Android app development steps will help you understand how to build android app step by step with greater clarity and confidence.

Android App Development at a Glance
Before learning the complete Android app development process, it is important to understand what Android app development involves and the key elements required to build a successful application.
Whether you are creating a customer-facing mobile app, an enterprise solution, or an on-demand platform, the development journey follows a structured framework that turns an idea into a functional Android application.
What Is Android App Development?
Android app development is the process of designing, building, testing, deploying, and maintaining applications that run on Android-powered smartphones, tablets, wearables, and other smart devices.
The goal is not only to create an application that functions correctly but also to deliver a smooth user experience, reliable performance, and long-term scalability.
How Does Android App Development Work?
A successful Android application typically moves through several stages before reaching users:
- Idea validation and market research.
- Requirement gathering and project planning.
- UI/UX design and prototyping.
- Front-end and backend development.
- API and third-party integrations.
- Quality assurance and testing.
- Google Play Store deployment.
- Ongoing maintenance and updates.
Each stage contributes to the overall success of the application and helps reduce development risks.
What Do You Need to Build an Android App?
The following components form the foundation of most Android projects:
| Requirement | Purpose |
|---|---|
| App Idea | Define the problem your application solves. |
| Android Studio | Primary development environment for Android apps. |
| Kotlin or Java | Programming languages used for development. |
| UI/UX Design | Creates a user-friendly interface and experience. |
| Backend Infrastructure | Stores, processes, and manages application data. |
| APIs and Integrations | Connects external services and functionalities. |
| Testing Tools | Identifies performance, usability, and security issues. |
| Google Play Console | Used to publish and manage Android applications. |
Quick Overview of the Android App Development Lifecycle
To build android app step by step, developers generally follow this sequence:
- Plan the application requirements.
- Research users and competitors.
- Design the user experience and interface.
- Develop the application's frontend and backend.
- Test functionality, security, and performance.
- Launch the app on the Google Play Store.
- Monitor usage and release updates regularly.
Understanding these fundamentals makes it easier to follow the detailed Android app development steps covered in the next sections.
How to Develop an Android App Step by Step
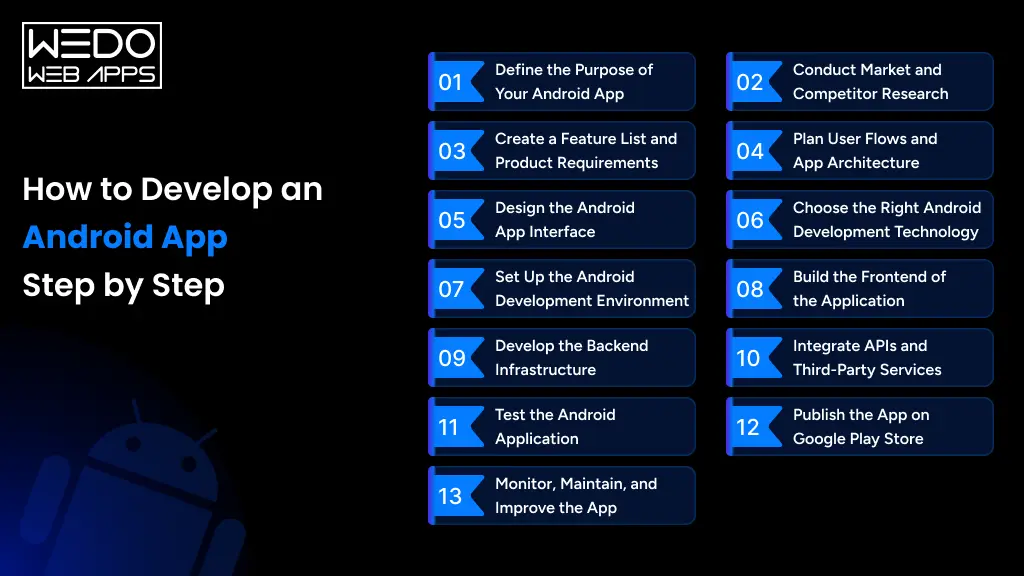
Building an Android application involves much more than development alone. Every successful app follows a structured approach that helps teams validate ideas, reduce risks, and create products that meet user expectations.
Below is a practical breakdown of the Android app development steps followed by businesses and development teams.
Step 1: Define the Purpose of Your Android App
Before starting the Android app development process, establish a clear purpose for your application. This step helps align business objectives, user needs, and development efforts from the beginning. A well-defined purpose reduces unnecessary features, prevents scope creep, and creates a stronger foundation for development.
Identify the Problem Your App Solves
Every successful Android app addresses a specific challenge or fulfills a particular need. Start by identifying the problem your users face and how your application will provide a solution.
Ask yourself:
- What challenges are users experiencing?
- How is the problem currently being solved?
- Why would users choose your application over existing alternatives?
For example, a food delivery app solves the problem of ordering meals conveniently from nearby restaurants.
Define Business Goals
Your application should support measurable business objectives beyond user engagement. Clearly defining these goals helps guide feature prioritization and project planning.
Common business goals include:
- Increasing brand visibility.
- Generating additional revenue streams.
- Improving customer retention.
- Automating internal processes.
- Expanding market reach.
When business goals are established early, development efforts remain focused on delivering meaningful outcomes.
Establish Success Metrics
Success metrics help determine whether your application is meeting its intended objectives after launch.
Some commonly tracked metrics include:
| Metric | Purpose |
|---|---|
| App Downloads | Measures initial user acquisition |
| Active Users | Tracks ongoing engagement |
| Retention Rate | Evaluates user loyalty |
| Conversion Rate | Measures completed actions or purchases |
| Session Duration | Indicates user interaction levels |
Defining measurable success indicators at the planning stage makes it easier to assess application performance and identify future improvements.
Step 2: Conduct Market and Competitor Research
One of the most important Android app development steps is conducting thorough market and competitor research. Before you build android app step by step, you need to understand whether your idea solves a genuine problem, who your competitors are, and what users expect from similar applications.
This stage helps validate your concept and supports better decision-making throughout the Android app development process.
Analyze Existing Applications
A successful Android app development guide starts with understanding the current market. Analyze applications that offer similar products, services, or features to identify what is already working and where improvements can be made.
When reviewing competitor apps, evaluate:
- Core features and functionalities.
- User interface and navigation.
- Customer ratings and reviews.
- Monetization strategies.
- Unique selling propositions.
Studying existing applications helps you understand industry standards before you develop an Android app for your target audience.
Identify Market Gaps
The next step is identifying opportunities that competitors have not fully addressed. Market gaps often reveal areas where your application can provide greater value.
Look for:
- Frequently requested features that are missing.
- Poor user experiences within competitor apps.
- Underserved customer segments.
- Complex processes that can be simplified.
- Emerging trends within your industry.
Finding these opportunities can help differentiate your application and strengthen your overall Android app development process.
Gather User Expectations
Understanding user expectations is essential when planning how to develop an Android app that attracts and retains users. Direct feedback helps ensure your applications align with real customer needs rather than assumptions.
Useful research methods include:
- User surveys
- Customer interviews
- App store reviews
- Social media discussions
- Industry forums and communities
| User Expectation | Impact on Android App Development |
|---|---|
| Easy Navigation | Improves usability and engagement |
| Fast Performance | Enhances user satisfaction |
| Data Security | Builds trust and credibility |
| Personalization | Creates more relevant user experiences |
| Reliable Functionality | Reduces user frustration |
By combining competitor analysis, market insights, and user feedback, you can make informed decisions before moving to the next Android app development steps, reducing risks and increasing the likelihood of building a successful application.
Step 3: Create a Feature List and Product Requirements
Once you have validated your idea through research, the next stage in the Android app development process is defining what your application will actually do. A well-structured feature list helps development teams prioritize functionality, manage budgets, and avoid unnecessary complexity during development.
Instead of trying to launch with every possible feature, focus on building a product that solves the primary user problem effectively.
Must Have Features
Must-have features are the core functionalities required for your application to operate and deliver value to users. Without these features, the app cannot fulfill its intended purpose.
Examples of must-have features include:
| App Type | Must-Have Features |
|---|---|
| eCommerce App | Product catalog, cart, checkout, payments |
| Food Delivery App | Restaurant listings, order placement, tracking |
| Healthcare App | Appointment booking, patient profiles |
| Fitness App | User registration, activity tracking |
| Banking App | Account access, fund transfers, security authentication |
When you develop an Android app, these features should receive the highest development priority.
Nice to Have Features
Nice-to-have features improve the user experience but are not required for the first release. These functionalities can be introduced in future updates based on user feedback and business goals.
Common examples include:
- AI-powered integrations
- Dark mode support
- Voice search capabilities
- Loyalty and rewards programs
- Social media integrations
- Advanced analytics dashboards
Adding too many secondary features during the initial phase can increase costs and extend timelines, making the Android app development process more challenging.
Create an MVP Scope
An MVP (Minimum Viable Product) includes only the essential features needed to launch and validate your application in the market. This approach allows businesses to gather real-user feedback before investing in advanced functionality.
When defining your MVP scope:
- Focus on solving one primary problem.
- Prioritize high-impact features.
- Exclude non-essential functionalities.
- Set realistic development timelines.
- Plan future feature releases.
A practical MVP helps teams build android app step by step while reducing development risks and controlling project costs. It also provides valuable insights that can guide future enhancements and product improvements.
By clearly defining product requirements and feature priorities, you establish a roadmap that supports the remaining Android app development steps and keeps the project focused on delivering measurable value.
Step 4: Plan User Flows and App Architecture
Before writing code or designing screens, it is important to establish how users will interact with your applications and how different components will work together. This stage of the Android app development process helps eliminate confusion, improve usability, and create a structured foundation for development.
A well-planned application architecture not only improves the user experience but also makes it easier to scale and maintain the app as new features are introduced.
User Journey Mapping
User journey mapping visualizes the path users take while interacting with your application. It helps identify every step required to complete a task, from opening the app to achieving a specific goal.
When mapping user journeys, consider:
- How users enter the application.
- Actions they need to complete.
- Decision points within the workflow.
- Potential friction or drop-off points.
- Desired outcomes.
For example, in an eCommerce app, a user journey may follow this sequence:
App Launch -> Product Search -> Product Details -> Add to Cart -> Checkout -> Payment Confirmation
Understanding these interactions helps the team develop an Android app that is intuitive and user-focused.
Information Architecture
Information architecture organizes content, features, and data within the application. A logical structure helps users quickly find what they need without unnecessary effort.
Key elements include:
- Content hierarchy
- Screen organization
- Category structure
- Feature grouping
- Data relationships
| Information Architecture Element | Purpose |
|---|---|
| Categories | Organize content logically |
| Menus | Simplify navigation |
| Search Functionality | Improve content discovery |
| Content Hierarchy | Prioritize important information |
| User Permissions | Control access to features |
A strong information architecture supports efficient navigation and improves overall usability.
Navigation Planning
Navigation planning defines how users move between screens and access different features within the application.
Common Android navigation patterns include:
- Bottom navigation bars
- Side navigation drawers
- Tab navigation
- Search-based navigation
- Gesture-based navigation
When planning navigation, focus on:
- Minimizing unnecessary steps.
- Keeping important actions easily accessible.
- Maintaining consistency across screens.
- Reducing user confusion.
Effective navigation planning allows teams to build android app step by step while creating a seamless user experience. It also reduces redesign efforts later in the Android app development process, saving both time and development resources.
Step 5: Design the Android App Interface
A well-designed interface can significantly influence how users perceive and interact with your application. During this stage of the Android app development process, designers transform ideas, user flows, and requirements into visual experiences that are both functional and engaging.
The objective is not only to create an attractive interface but also to ensure users can navigate the application effortlessly and complete actions without confusion. A thoughtful design approach improves usability, increases engagement, and supports long-term user retention.
Wireframes
Wireframes act as the blueprint of an application. They provide a visual representation of screen layouts, content placement, and user interactions before detailed design work begins.
Benefits of wireframing include:
- Visualizing the application structure.
- Identifying usability issues early.
- Aligning stakeholders on screen layouts.
- Reducing costly design revisions.
- Streamlining the development process.
Typical wireframe elements include:
| Wireframe Component | Purpose |
|---|---|
| Header | Displays branding and navigation |
| Content Area | Presents key information |
| Buttons | Enables user actions |
| Forms | Collects user data |
| Navigation Menu | Guides users through the app |
Wireframes help teams develop an Android app with a clear design direction before investing in high-fidelity designs.
UI Design
Once wireframes are approved, UI/UX designers create the visual interface that users will interact with daily. This phase focuses on aesthetics, consistency, and usability.
A strong UI design should prioritize:
- Clear visual hierarchy
- Consistent color schemes
- Readable typography
- Mobile-friendly layouts
- Accessible design elements
Key UI elements commonly used in Android applications include:
- Buttons and call-to-action elements
- Icons and illustrations
- Forms and input fields
- Cards and content sections
- Navigation components
Well-executed UI design plays an important role in the success of any Android app development guide, as it directly affects user satisfaction and engagement.
Material Design Principles
Material Design is Google's design system for Android applications. It provides a standardized framework that helps developers and designers create consistent user experiences across Android devices.
Core Material Design principles include:
- Simplicity and clearity
- Consistent visual patterns
- Responsive layouts
- Meaningful animations
- Accessibility-focused interactions
Some commonly used Material Design components are:
| Material Design Component | Function |
|---|---|
| App Bar | Provides navigation and actions |
| Floating Action Button | Highlights primary actions |
| Bottom Navigation | Enables quick screen switching |
| Cards | Organizes content visually |
| Dialogs | Displays important information |
Following Material Design guidelines helps teams build android app step by step while maintaining consistency, usability, and platform compatibility. It also ensures the application feels familiar to Android users, reducing the learning curve and improving the overall user experience.
Step 6: Choose the Right Android Development Technology
Selecting the right technology stack is one of the most important decisions in the Android app development process. The technologies you choose affect application performance, scalability, security, development speed, and long-term maintenance. A well-planned tech stack helps Android app developers build android app step by step while ensuring the application can support future business and user requirements.
When evaluating technologies, consider factors such as project complexity, budget, development timeline, team expertise, and future scalability needs.
Kotlin vs Java
Kotlin and Java are the two primary programming languages used for Android app development. While both are supported by Google, Kotlin has become the preferred choice for modern Android applications.
| Factor | Kotlin | Java |
|---|---|---|
| Learning Curve | Easier for modern development | Familiar to many developers |
| Code Length | Concise and readable | More verbose |
| Performance | High performance | High performance |
| Null Safety | Built-in support | Requires additional handling |
| Google Recommendation | Preferred language | Supported language |
Kotlin is often selected for new Android projects due to its modern syntax and development efficiency, while Java remains a practical option for maintaining existing applications.
Native vs Cross-Platform
Another important decision when learning how to develop an Android app is choosing between native and cross-platform development.
Native Android Development
Advantages:
- Better performance
- Full access to Android features
- Improved security
- Enhanced user experience
Best suited for:
- Enterprise applications
- Banking platforms
- High-performance mobile apps
- Feature-rich applications
Cross-Platform Development
Advantages:
- Faster development
- Shared codebase across platforms
- Lower development costs
- Easier maintenance
Best suited for:
- Startups
- MVP development
- Budget-conscious projects
- Multi-platform launches
The right approach depends on your business goals, budget, and performance expectations.
Framework and Library Selection
Frameworks and libraries simplify development by providing reusable components, reducing coding effort, and improving productivity.
Some commonly used Android development tools include:
| Tool | Purpose |
|---|---|
| Android Studio | Official Android development environment |
| Jetpack Compose | Modern UI development toolkit |
| Firebase | Backend services and analytics |
| Retrofit | API integration and networking |
| Room Database | Local data storage |
| Glide | Image loading and management |
When creating an Android app development guide for your project, choose frameworks that align with your application's requirements instead of selecting technologies based solely on popularity.
A carefully selected technology stack provides a solid foundation for the next Android app development steps, making development more efficient and reducing technical challenges as the application grows.
Step 7: Set Up the Android Development Environment
Before developers can begin coding, they need a properly configured development environment. This stage of the Android app development process ensures that all required tools, software components, and testing resources are ready for efficient development.
The setup process typically includes installing development tools, configuring software development kits (SDKs), and preparing testing environments for different Android devices.
Install Android Studio
Android Studio is Google's official integrated development environment (IDE) for Android application development. It provides everything developers need to design, code, test, and debug Android applications.
Key capabilities of Android Studio include:
- Code editor with intelligent suggestions.
- Visual layout editor.
- Performance monitoring tools.
- Debugging and testing support.
- Emulator integration.
Before starting development, ensure that:
- The latest version of Android Studio is installed.
- System requirements are met.
- Necessary plugins are configured.
- Version control tools are connected.
Android Studio serves as the primary workspace throughout the Android app development process.
Configure SDKs
The Android Software Development Kit (SDK) contains the tools, libraries, and APIs required to create Android applications.
When configuring SDKs, developers should:
- Install the latest Android SDK version.
- Add SDK platform tools.
- Configure build tools.
- Install required Android API levels.
- Enable device debugging options.
| SDK Component | Purpose |
|---|---|
| SDK Platform | Supports Android version compatibility |
| Build Tools | Compiles and packages applications |
| Platform Tools | Enable debugging and device communication |
| Emulator Packages | Supports virtual device testing |
| API Libraries | Provides Android-specific functionality |
Proper SDK configuration ensures compatibility across various Android devices and operating system versions.
Set Up Emulators and Devices
Testing is an essential part of Android app development, and developers need environments that accurately simulate real-world usage.
Most teams use a combination of:
- Android emulators
- Physical Android smartphones
- Tablets
- Foldable devices
- Different Android OS versions
Benefits of using multiple testing environments include:
- Detecting device-specific issues.
- Evaluating performance across screen sizes.
- Testing compatibility with different Android versions.
- Identifying user interface inconsistencies.
A properly configured testing environment helps developers catch issues early and improves application quality before moving to the next Android app development steps, including frontend and backend development.
Step 8: Build the Frontend of the Application
The frontend is the part of the application that users directly interact with. During this stage of the Android app development process, developers transform approved design into functional screens, interactive components, and seamless user experiences. The goal is to create an application that is visually appealing, responsive, and easy to navigate across different Android devices.
A well-developed frontend plays a major role in user satisfaction because it directly impacts usability, engagement, and retention.
User Interface Development
User interface development focuses on converting UI designs into working screens and components. Developers ensure that every visual element functions as intended while maintaining consistency throughout the application.
Common UI development tasks include:
- Building screen layouts.
- Implementing buttons and forms.
- Creating reusable components.
- Managing visual consistency.
- Optimizing responsiveness across devices.
Key UI elements often developed include:
| UI Element | Purpose |
|---|---|
| Buttons | Trigger user actions |
| Forms | Collect user information |
| Cards | Display organized content |
| Images and Icons | Improve visual communication |
| Lists and Grids | Present large amounts of data |
A structured UI development approach helps teams develop an Android app that delivers a smooth and intuitive user experience.
Navigation Components
Navigation components determine how users move between screens and access various features within the application.
Popular Android navigation support includes:
- Bottom navigation menus.
- Side navigation drawers.
- Tab navigation.
- Search-based navigation.
- Deep linking.
Effective navigation should:
- Minimize user efforts.
- Provide clear pathways between screens.
- Keep important features easily accessible.
- Maintain consistency across the application.
Poor navigation can increase user frustration and negatively impact engagement, making this a critical stage in the Android app development process.
User Interactions
User interactions define how the application responds to user actions such as tapping buttons, submitting forms, scrolling through content, or completing transactions.
Important interaction elements include:
- Touch screen gestures
- Form validations
- Loading indicators
- Confirmation messages
- Error handling
Best practices for user interactions:
- Provide immediate feedback for actions.
- Use clear success and error messages.
- Reduce unnecessary steps.
- Maintain consistent interaction patterns.
- Ensure accessibility for all users.
By focusing on interface development, navigation, and user interactions, development teams can build android app step by step while creating a user-friendly experience that encourages engagement and long-term usage.
Step 9: Develop the Backend Infrastructure
While the frontend determines how users interact with an application, the backend powers everything behind the scenes. During this stage of the Android app development process, developers create the systems responsible for storing data, processing requests, managing users, and supporting application functionality.
A reliable backend ensures that the application remains secure, scalable, and capable of handling growing user demands. Without a strong backend infrastructure, even a well-designed application can experience performance and reliability issues.
Database Setup
The database serves as the central repository for application data. It stores information that users generate while using the app.
Common data stores in Android applications include:
- User profiles
- Product information
- Transaction records
- Messages and notifications
- Application settings
Popular database options include:
| Database Solution | Best User For |
|---|---|
| SQLite | Local data storage |
| Room Database | Structured Android data management |
| Firebase Firestore | Real-time cloud applications |
| MySQL | Large-scale web and mobile applications |
| PostgreSQL | Complex and data-intensive applications |
Selecting the appropriate database is an important part of Android app development because it directly affects performance and scalability.
Authentication System
Authentication ensures that only authorized users can access specific features and data within the application.
A secure authentication system typically includes:
- User registration
- Login functionality
- Password management
- Multi-factor authentication
- Social login integration
Common authentication methods include:
- Email and password login
- OTP verification
- Google Sign-in
- Biometric authentication
- Single-Sign-On (SSO)
Implementing strong authentication measures helps protect user information and support a secure Android app development process.
Server Configuration
Servers handle requests between the application and the database, ensuring information is processed and delivered efficiently.
When configuring servers, developers focus on:
- Performance optimization
- Data security
- Load balancing
- API management
- Scalability planning
Key server considerations include:
| Configuration Area | Purpose |
|---|---|
| Hosting Environment | Supports application operations |
| Security Protocols | Protects sensitive information |
| API Gateways | Manages communication requests |
| Backup Systems | Prevents data loss |
| Monitoring Tools | Tracks server health and performance |
A properly configured server infrastructure helps teams develop an Android app that remains stable, secure, and responsive even as user demand increases.
By establishing a strong database, secure authentication system, and scalable server environment, businesses create the technical foundation required for the next Android app development steps, including integrations, testing, and deployments.
Step 10: Integrate APIs and Third-Party Services
Modern applications rarely operate as standalone systems. Most rely on APIs and third-party services to provide additional functionality, improve user experiences, and reduce development time.
During this stage of the Android app development process, developers connect the application with external platforms and services that support essential business and user requirements.
Instead of building every feature from scratch, API integrations allow businesses to accelerate development while maintaining reliability and scalability.
Payment Gateways
If your application processes transactions, integrating a payment gateway is essential. Payment gateways enable users to make secure online payments directly within the app.
Common payment capabilities include:
- Credit and debit card payments.
- UPI transactions
- Digital wallets
- Subscriptions billing
- Refund processing
When selecting a payment gateway, evaluate:
| Factor | Importance |
|---|---|
| Security Standards | Protects payment information |
| Transaction Fees | Affects operational costs |
| Supported Payment Methods | Improves customer convenience |
| Processing Speed | Enhances user experience |
| Regional Availability | Supports target markets |
A secure payment integration helps businesses develop an Android app that supports frictionless transactions and customer trust.
Push Notifications
Push notifications allow applications to communicate directly with users even when the app is not actively being used. When implemented strategically, they can improve engagement, retention, and conversion rates.
Common use cases include:
- Order updates
- Appointment reminders
- Promotional campaigns
- New feature announcements
- Account activity alerts
Best practices for push notifications:
- Keep messages relevant and timely.
- Personalize notifications where possible.
- Avoid excessive notifications frequently.
- Provide clear calls to action.
- Allow users to manage notification preferences.
Proper notification strategies can significantly improve the effectiveness of an Android app development guide focused on user engagement.
Maps and Location Services
Location-based functionality is a core requirement for many Android applications, including delivery platforms, ride-sharing apps, travel solutions, and local service marketplaces.
Maps and location integrations can support:
- Real-time tracking
- Route optimization
- Nearby business discovery
- Geofencing
- Location sharing
Popular location-based features include:
| Feature | Business Benefit |
|---|---|
| Live Tracking | Improves transparency |
| Route Navigation | Enhances operational efficiency |
| Nearby Search | Improves user convenience |
| Geolocation Services | Enable location-based experiences |
| Distance Calculation | Supports accurate service delivery |
Integrating maps and location services helps teams build android app step by step while creating more personalized and context-aware user experiences.
By integrating payment systems, notifications, maps, and other third-party services, businesses can expand application functionality without significantly increasing development complexity. These integrations play an important role in creating scalable and feature-rich Android applications.
Step 11: Test the Android Application
Testing is one of the most critical stages in the Android app development process. Even a well-designed and feature-rich application can fail if users encounter bugs, performance issues, or security vulnerabilities. The purpose of testing is to identify and resolve problems before the application reaches end users.
A comprehensive testing strategy helps ensure that the app performs reliably across different devices, operating systems, and usage scenarios. It also improves user satisfaction and reduces post-launch maintenance costs.
Functional Testing
Functional testing verifies that every feature works according to the defined requirements. Developers and quality assurance teams test user actions, workflows, and system responses to ensure expected outcomes.
Areas commonly tested include:
- User registration and login.
- Form submission.
- Search functionality.
- Payment processing.
- Notifications and alerts.
The goal is to confirm that each feature performs correctly without errors or unexpected behavior.
Usability Testing
Usability testing evaluates how easily users can navigate and interact with the application. It helps identify design issues that may create confusion or frustration.
Key usability factors include:
- Navigation simplicity
- Screen readability
- Accessibility
- User journey efficiency
- Overall user experience
Common questions asked during usability testing:
| Evaluation Area | Testing Objective |
|---|---|
| Navigation | Can users find features easily? |
| Interface Design | Is the layout clear and intuitive? |
| Accessibility | Can all users interact with the app effectively? |
| User Flow | Are tasks completed without confusion? |
| Engagement | Does the experience encourage continued use? |
A positive user experience is essential when you develop an Android app intended for long-term engagement.
Performance Testing
Performance testing measures how well the application operates under different conditions. Slow loading times, crashes, or excessive resource consumption can negatively affect user retention.
Performance testing focuses on:
- App launch speed
- Screen loading times
- Battery consumption
- Memory usage
- Network performance
Developers often test the application on:
- Different Android versions
- Multiple device models
- Various network conditions
- High user traffic scenarios
This helps ensure the app remains stable and responsive under real-world conditions.
Security Testing
Security testing identifies vulnerabilities that could expose sensitive user or business data. As cyber threats continue to evolve, security should be incorporated throughout the Android app development process, not just before launch.
Security testing typically includes:
- Authentication verification
- Data encryption validation
- API security checks
- Session management testing
- Permission and access control reviews
Important security areas include:
| Security Component | Purpose |
|---|---|
| User Authentication | Prevents unauthorized access |
| Data Encryption | Protects sensitive information |
| Secure APIs | Reduces external threats |
| Access Controls | Restricts user permissions |
| Vulnerability Scanning | Identifies potential risks |
Thorough testing helps teams build android app step by step with greater confidence, ensuring the final product delivers a reliable, secure, and high-quality experience for users.
Step 12: Publish the App on Google Play Store
After completing development and testing, the next step in the Android app development process is launching the application on the Google Play Store. Publishing an app involves more than simply uploading a file. Developers must prepare store listings, meet Google's policies, and optimize the app's presentation to attract potential users.
A successful launch ensures that your application is accessible, compliant, and positioned for maximum visibility within the Android ecosystem.
Create a Developer Account
To publish an application, you must first create a Google Play Developer account. This account allows you to manage applications, monitor performance, release updates, and communicate with users.
Before creating an account, prepare:
- Business or developer information
- Contact details
- Payment profile information
- Privacy policy documentation
- App ownership details
A developer account acts as the foundation for managing your Android app development efforts after launch.
Prepare Store Assets
Store assets play a significant role in attracting users and encouraging downloads. A well-optimized store listing helps communicate the app's value while improving discoverability.
Essential store assets include:
- App title
- App description
- App icon
- Feature graphic
- Screenshots
- Promotional videos
- Privacy policy link
| Store Asset | Purpose |
|---|---|
| App Title | Identifies the application |
| App Description | Explains features and benefits |
| Screenshots | Demonstrate app functionality |
| App Icon | Strengthens brand recognition |
| Feature Graphic | Supports promotional visibility |
| Video Preview | Improves user understanding |
When learning how to develop an Android app, many businesses overlook store optimization, even though it directly impacts app visibility and download performance.
Submit and Review Process
Once all assets and configurations are ready, the application can be submitted for review through Google Play Console.
The submission process generally includes:
- Uploading the application package.
- Completing app content declarations.
- Setting pricing and distribution preferences.
- Providing privacy and security information.
- Submitting the app for review.
Before submission, verify that:
- All features function correctly.
- Store information is accurate.
- Permissions are properly disclosed.
- Security and privacy requirements are met.
- App performance has been fully tested.
Google reviews applications to ensure they comply with platform guidelines and user safety standards. After approval, the application becomes available for download.
Successfully publishing an application makes a major milestone in the Android app development steps, but long-term success depends on continuous monitoring, maintenance, and improvements after launch.
Step 13: Monitor, Maintain, and Improve the App
Launching your application is not the end of the Android app development process. In reality, it marks the beginning of an ongoing cycle of monitoring, maintenance, and improvement. User expectations, operating system updates, security requirements, and market trends continue to evolve, making post-launch management essential for long-term success.
Regular maintenance helps ensure the application remains secure, performs efficiently, and continues to meet user needs. Businesses that actively improve their application are more likely to retain users and remain competitive in the market.
Track Analytics
Analytics provide valuable insights into how users interact with your application. By monitoring key metrics, businesses can identify opportunities for optimization and make data-driven decisions.
Important metrics to track include:
- App downloads
- Active users
- Session duration
- Retention rate
- Conversion rate
- User engagement
| Analytics Metric | What It Measures |
|---|---|
| Downloads | User acquisition performance |
| Active Users | Ongoing engagement levels |
| Retention Rate | User loyalty and satisfaction |
| Conversion Rate | Goal completion effectiveness |
| Sessions Duration | Time spent within the application |
Analytics help teams develop an Android app that evolves based on real-user behavior rather than assumptions.
Fix Bugs
Even after extensive testing, some issues may only appear when the application is used by a larger audience. Regular bug fixing is necessary to maintain stability and user satisfaction.
Common post-launch issues include:
- Application crashes
- Slow loading screens
- Device compatibility problems
- Broken integrations
- UI inconsistencies
A structured bug management process should focus on:
- Identifying issues quickly.
- Prioritizing critical problems.
- Testing fixes thoroughly.
- Releasing patches efficiently.
Addressing bugs promptly helps maintain positive user reviews and overall application performance.
Release Updates
Regular updates allow businesses to improve functionality, strengthen security, and introduce new features based on user feedback.
Reasons to release updates include:
- Adding requested features.
- Improving performance.
- Enhancing security measures.
- Supporting new Android versions.
- Refining the user experience.
Common update categories include:
| Update Type | Purpose |
|---|---|
| Feature Updates | Introduce new functionality |
| Performance Updates | Improve speed and responsiveness |
| Security Updates | Address vulnerabilities |
| Compatibility Updates | Support new Android releases |
| UI Enhancements | Improve usability and design |
Consistent updates are an important part of any Android app development guide because they help applications remain relevant and competitive over time.
By continuously tracking performance, resolving issues, and releasing meaningful updates, businesses can build android app step by step into a reliable, scalable, and user-focused product that delivers long-term value.

Android App Development Process Flow
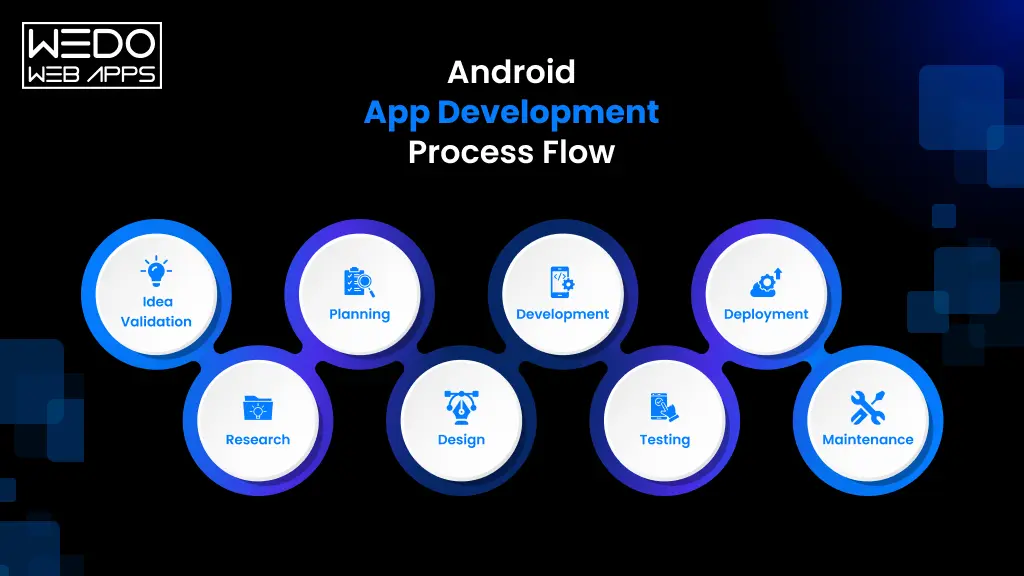
While the previous section explained how to develop an Android app in detail, it is equally important to understand how the entire workflow connects. The Android app development process is not a single activity but a sequence of interconnected stages that transform an idea into a fully functional application.
Each phase contributes to the quality, usability, and long-term success of the final product. Missing or rushing any stage can lead to delays, increased costs, or user adoption challenges.
Android App Development Lifecycle Overview
The standard Android app development process flow follows this sequence:
| Stage | Primary Overview |
|---|---|
| Idea Validation | Confirm market demand and business viability |
| Research & Planning | Define requirements and development roadmap |
| UI/UX Design | Create user-friendly experiences |
| Development | Build frontend and backend functionalities |
| Testing | Identify and resolve issues |
| Deployment | Launch the application on Google Play Store |
| Maintenance | Improve performance and release updates |
Process Flow:
Idea Validation -> Research -> Planning -> Design -> Development -> Testing -> Deployment -> Maintenance
This framework serves as the foundation of most successful Android applications.
Pre-Development Phase
This phase focuses on planning the application before development begins.
Key activities include:
- Defining business goals
- Conducting market research
- Identifying target users
- Creating feature requirements
- Designing wireframes and user flows
A strong foundation helps reduce risks during the later Android app development steps.
Development Phase
The development phase transforms designs and requirements into a working application.
This stage includes:
- Frontend development
- Backend development
- Database implementation
- API integrations
- Quality assurance testing
It is the core stage where teams develop an Android app and prepare it for launch.
Post-Launch Phase
After deployment, continuous improvements help maintain performance and user satisfaction.
Common post-launch activities include:
- Tracking analytics
- Fixing bugs
- Releasing updates
- Improving security
- Optimizing performance
Regular maintenance ensures the application remains reliable, secure, and aligned with user expectations.
Tools Used During Android App Development
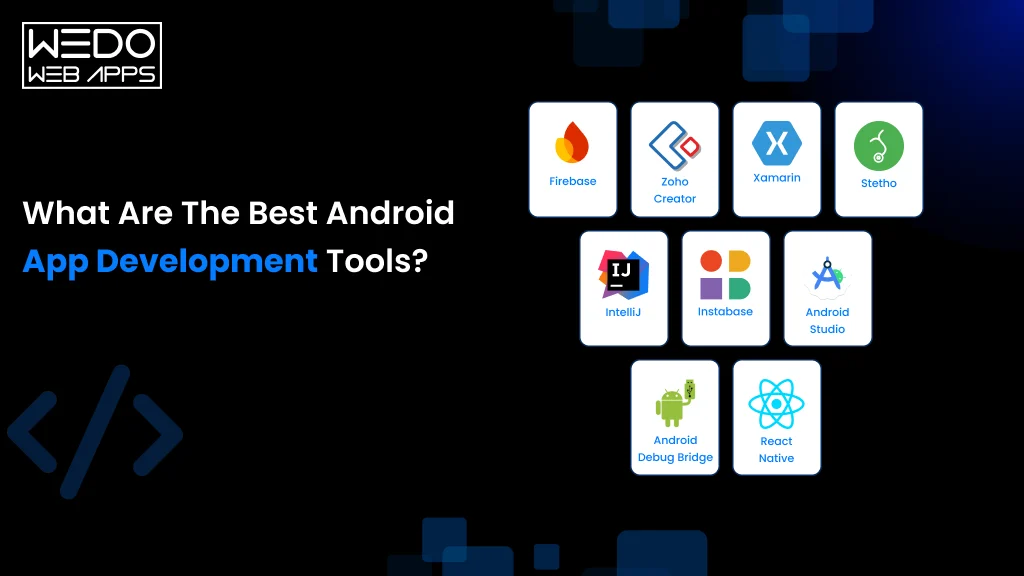
Choosing the right tools can simplify the Android app development process, improve team productivity, and help deliver a reliable application. While the exact technology stack depends on project requirements, most Android projects rely on a combination of development, design, backend, testing, and deployment tools.
Android Development Tools
These tools help developers write, manage, and optimize application code.
| Tool | Purpose |
|---|---|
| Android Studio | Official IDE for Android development |
| Kotlin | Preferred programming language for Android apps |
| Java | Widely used language for Android applications |
| Jetpack Compose | Modern toolkit for building Android interfaces |
| GitHub | Version control and code collaboration |
Design Tools
Design tools help teams create user-friendly interfaces and prototypes before development begins.
Popular options include:
- Figma
- Adobe XD
- Sketch
- InVision
These platforms support wireframing, prototyping, and design collaboration.
Backend Development Tools
Backend tools manage data, authentication, and server-side operations.
| Tool | Primary Use |
|---|---|
| Firebase | Authentication, database, and analytics |
| MySQL | Structured data storage |
| PostgreSQL | Complex data management |
| Node.js | Backend application development |
| MongoDB | Flexible document database |
Testing Tools
Testing tools help identify issues before the application is released.
Commonly used tools include:
- Espresso
- JUnit
- Appium
- Android Emulator
- Firebase Test Lab
These tools support functional, performance, and compatibility testing.
Development and Monitoring Tools
Once you develop an Android app, monitoring and maintenance become equally important.
Key deployment and monitoring tools include:
- Google Play Console
- Firebase Analytics
- Crashlytics
- Google Analytics
These solutions help track performance, user engagement, crashes, and application updates throughout the Android app development process.

Android App Development Timeline
One of the most common questions businesses ask when learning how to develop an Android app is how long the development process will take. The timeline depends on factors such as application complexity, feature requirements, integrations, design scope, and testing needs.
While every project is different, the estimates below provide a general understanding of the Android app development process timeline.
Basic Applications
Basic applications include limited features, simple user interfaces, and minimal integrations. These apps are often built to validate an idea or launch an MVP.
Examples include:
- Calculator app
- Note-taking apps
- Simple booking applications
- Informational business apps
Estimated timeline: 2 to 4 months
Medium Complexity Applications
Medium complexity apps require custom features, user authentication, databases, and third-party integrations.
Examples include:
- Food delivery apps
- Fitness applications
- Educational platforms
- Marketplace applications
Estimated timeline: 4 to 8 months
Advanced Applications
Advanced applications involve complex workflows, real-time functionality, enterprise integrations, and high scalability requirements.
Examples include:
- Banking applications
- Healthcare platforms
- Ride-hailing apps
- Enterprise management systems
Estimated timeline: 8 to 12+ months
Factors That Influence Development Timelines
Several factors can increase or decrease the time required to build android app step by step.
| Factor | Impact on Timeline |
|---|---|
| Number of Features | More features require additional development time |
| UI/UX Complexity | Advanced design increases implementation effort |
| Third-Party Integrations | Additional APIs require testing and configuration |
| Team Size | Larger teams may accelerate development |
| Testing Requirements | Extensive testing improves quality but extends timelines |
| Change Requests | Mid-project changes can delay delivery |
Understanding these timelines helps businesses plan budgets, resources, and launch strategies more effectively before starting their Android app development project.
How Much Does Android App Development Cost?
The cost of Android app development varies significantly based on the application's complexity, feature requirements, design expectations, and development approach. A simple application may require a relatively small investment, while enterprise-grade solutions often involve larger budgets due to advanced functionality, integrations, and ongoing maintenance.
Understanding the factors that influence pricing can help businesses plan their budgets more effectively and avoid unexpected expenses during the Android app development process.
Cost by App Complexity
The complexity of an application is one of the biggest factors affecting development costs.
| App Complexity | Estimated Cost Range |
|---|---|
| Basic App | $5,000-$20,000+ |
| Medium Complexity App | $20,000-$80,000+ |
| Advanced App | $80,000-$250,000+ |
The final cost depends on the number of features, custom functionality, and overall project scope.
Cost by Feature Set
Each feature adds development, testing, and maintenance effort, which directly impacts the project budget.
Common cost-driving features include:
- User authentication
- Payment gateways integration
- Real-time chat
- Push notifications
- GPS and location tracking
- AI-powered functionality
- Third-party integrations
Applications with highly customized features generally require a larger investment than standard solutions.
Cost by Development Team Type
The team you choose can significantly influence the overall cost of developing an Android app.
| Development Options | Best For |
|---|---|
| Freelancers | Small projects and MVPs |
| In-House Team | Long-term product development |
| App Development Agency | End-to-end project execution |
Each option offers a different level of expertise, project management, and scalability.
Hidden Costs to Consider
Many businesses focus only on development costs and overlook additional expenses that arise throughout the application lifecycle.
Some common hidden costs include:
- UI/UX design revisions
- Third-party service subscriptions
- Cloud hosting fees
- Security updates
- App maintenance and support
- Google Play Developer account fees
- Future feature enhancements
When budgeting for Android app development, it is important to account for both initial development and long-term operational costs. A realistic budget helps ensure smoother project execution and supports the continued growth of the application after launch.

Common Challenges During Android App Development
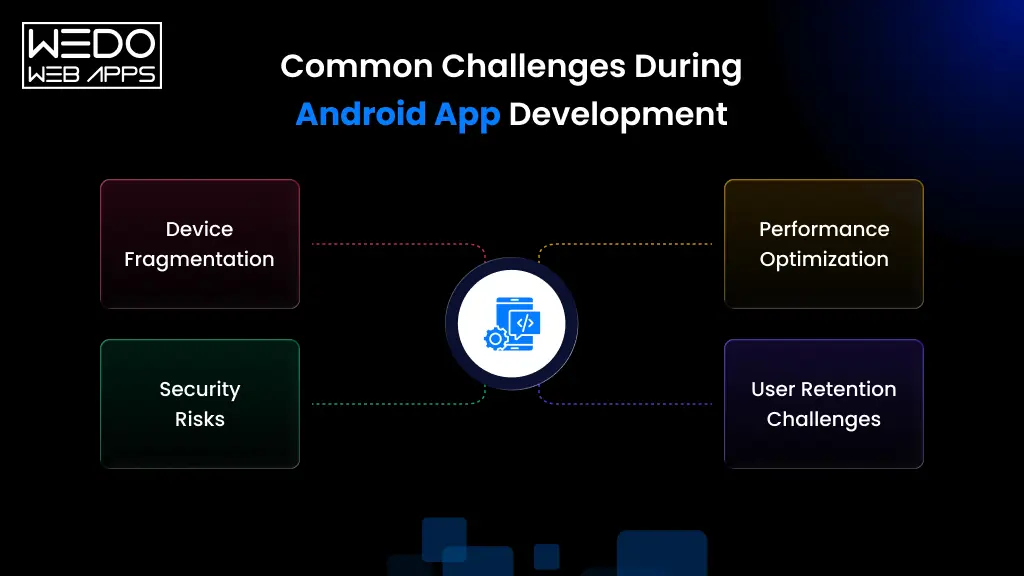
Even with a well-defined plan, teams often encounter technical and operational challenges during the Android app development process. Identifying these challenges early can help businesses reduce risks, improve development efficiency, and deliver a better user experience.
Device Fragmentation
Unlike other mobile platforms, Android runs on thousands of devices with different screen sizes, hardware configurations, and operating system versions.
Common challenges include:
- Varying screen resolutions
- Different hardware capabilities
- Multiple Android OS versions
- Device-specific compatibility issues
To address this challenge, developers must test applications across a wide range of devices and environments.
Security Risks
Security remains a major concern when businesses develop an Android app, especially when handling sensitive user information.
Key security challenges include:
- Data breaches
- Unauthorized access
- Insecure APIs
- Malware threats
- Weak authentication systems
Best practices include implementing encryption, secure authentication, and regular security audits.
Performance Optimization
Users expect applications to load quickly and operate smoothly. Poor performance can result in lower engagement and negative reviews.
Factors that affect performance include:
- Slow loading screens.
- Excessive battery consumption.
- High memory usage
- Unoptimized code
- Poor network handling
Regular performance testing helps identify and resolve these issues before launch increases.
Common scalability concerns include:
| Scalability Challenge | Potential Impact |
|---|---|
| Increased User Traffic | Slower response times |
| Large Data Volumes | Database performance issues |
| API Limitations | Service disruptions |
| Infrastructure Constraints | Reduced application stability |
Planning for scalability during the Android app development process helps support future growth without major redevelopment efforts.
User Retention Challenges
Acquiring users is only part of the equation. Retaining them often becomes the bigger challenge after launch.
Factors that influence retention include:
- User experience quality
- Application performance
- Feature relevance
- Regular updates
- Customer support responsiveness
Businesses that continuously improve their applications are more likely to maintain engagement and achieve long-term success.
By understanding these challenges, teams can build android app step by step with greater confidence and implement strategies that improve reliability, security, and user satisfaction.

Android App Development Best Practices
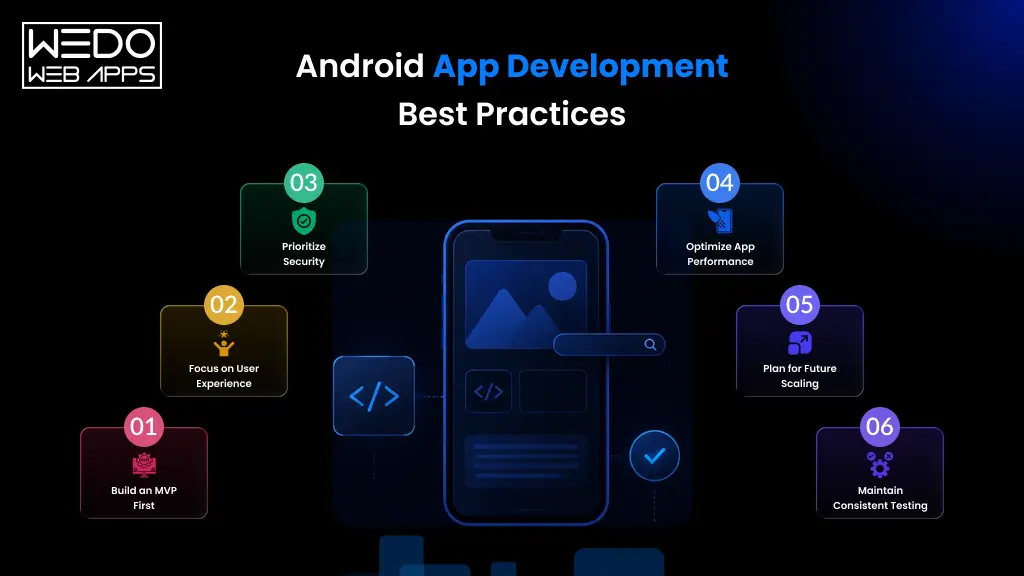
Following the proven best practices can improve application quality, reduce development risks, and increase the chances of long-term success. Whether you are learning how to develop an Android app for the first time or managing a large-scale project, these practices help create applications that are reliable, secure, and user-focused.
Build an MVP First
Many projects fail because they attempt to launch with too many features. Instead, focus on developing a Minimum Viable Product (MVP) that solves the primary user problem.
Benefits of an MVP approach include:
- Faster time to market.
- Lower development costs.
- Early user feedback.
- Reduced project risks.
- Easier feature prioritisation.
An MVP allows teams to validate assumptions before investing in advanced functionality.
Focus on User Experience
A strong user experience plays a significant role in the success of any Android app development project.
To improve usability:
- Keep navigation simple.
- Reduce unnecessary steps.
- Ensure consistent design patterns.
- Improve accessibility.
- Provide clear user feedback.
Users are more likely to engage with applications that are intuitive and easy to use.
Prioritize Security
Security should be incorporated throughout the Android app development process, not added at the end.
Important security measures include:
- Data encryption
- Secure authentication
- API protection
- Access controls
- Regular security testing
Protecting user data helps build trust and reduces potential security risks.
Optimize App Performance
Application performance directly impacts user satisfaction and retention.
Key optimization areas include:
| Performance Area | Best Practice |
|---|---|
| Loading Speed | Optimize assets and API calls |
| Memory Usage | Minimize unnecessary resource consumption |
| Battery Consumption | Reduce background activity |
| Network Requests | Implement efficient data handling |
| Code Quality | Maintain clean and optimized code |
Regular monitoring and performance testing help maintain a smooth user experience.
Plan for Future Scaling
As user demand grows, your application should be able to handle increased traffic, data, and feature requirements.
Consider planning for:
- Scalable architecture
- Cloud infrastructure
- Database optimization
- Modular development
- Future integrations
Scalability planning allows businesses to develop an Android app that can grow without major architectural changes.
Maintain Consistent Testing
Testing should occur throughout every stage of the Android app development process rather than only before launch.
A continuous testing strategy should include:
- Functional testing
- Usability testing
- Performance testing
- Security testing
- Compatibility testing
Regular testing helps identify issues early and contributes to a more stable, reliable application.
By implementing these best practices, businesses can build android app step by step while improving quality, reducing technical debt, and creating a better experience for users.
Common Mistakes to Avoid When Building an Android App
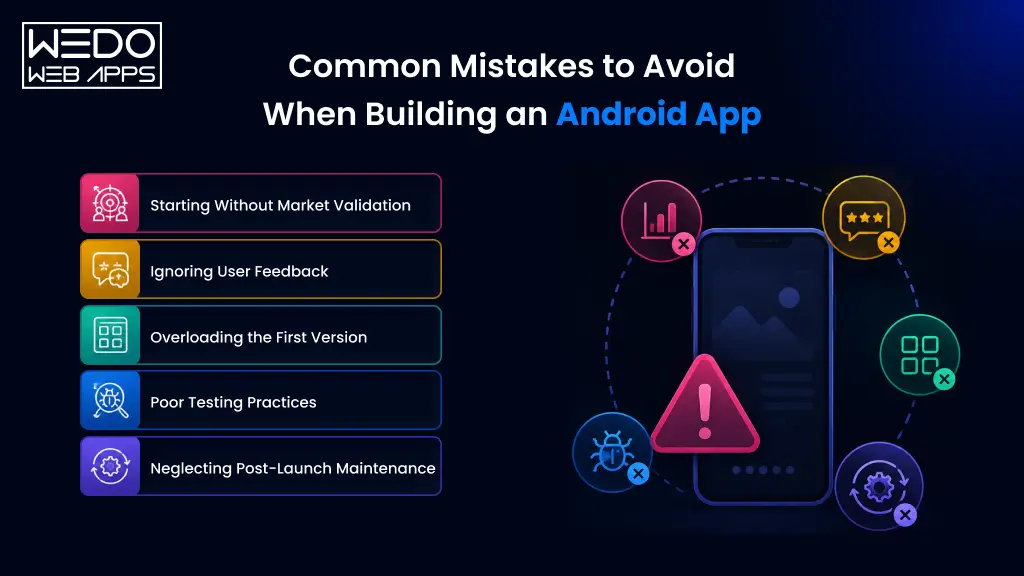
Even with a well-planned Android app development process, certain mistakes can delay launches, increase costs, and affect user adoption. Understanding these common pitfalls can help businesses and developers make better decisions throughout the project lifecycle.
Starting Without Market Validation
Many app ideas fail because they are built on assumptions rather than actual market demand. Skipping validation can result in development features that users neither need nor want.
Before you develop an Android app, make sure to:
- Research your target audience.
- Analyze competing applications.
- Validate demand through surveys or interviews.
- Identify real user pain points.
Market validation helps ensure that development efforts are aligned with genuine customer needs.
Ignoring User Feedback
User feedback provides direct insights into what is working and what needs improvement. Ignoring this information can lead to lower engagement and retention rates.
Effective ways to collect feedback include:
- App store reviews
- In-app surveys
- Customer support interactions
- User interviews
- Analytics data
Listening to users allows businesses to refine their applications and improve future releases.
Overloading the First Version
A common mistake in Android app development is trying to launch with too many features. This often increases development time, costs, and complexity.
Instead, focus on:
- Core functionality
- Essential user needs
- MVP development
- Faster time to market
- Early user validation
Launching with a focused feature set helps teams build android app step by step while reducing unnecessary risks.
Poor Testing Practices
Insufficient testing can lead to bugs, crashes, security vulnerabilities, and negative user experiences after launch.
A strong testing strategy should cover:
| Testing Type | Purpose |
|---|---|
| Functional Testing | Verify feature performance |
| Usability Testing | Evaluate user experience |
| Performance Testing | Measure speed and stability |
| Security Testing | Protect user data |
| Compatibility Testing | Ensure device support |
Comprehensive testing improves application quality and reduces post-launch issues.
Neglecting Post-Launch Maintenance
Launching an app is only one stage of the Android app development process. Applications require ongoing updates and monitoring to remain secure, compatible, and competitive.
Post-launch activities should include:
- Bug fixes
- Performance optimization
- Security updates
- Feature enhancements
- Analytics monitoring
Businesses that actively maintain their applications are more likely to retain users and achieve long-term success.

Android App Development Checklist
A structured checklist can help businesses and developers stay organized throughout the Android app development process. Use the checklist below to ensure that every critical stage is completed before moving to the next phase.
Planning Checklist
Before you develop an Android app, confirm that the planning phase covers the following:
- Define the app's purpose and target audience.
- Validate the idea through market research.
- Analyze competitor applications.
- Identify user pain points and expectations.
- Create a feature list and MVP scope.
- Define business goals and success metrics.
- Establish project timelines and budget.
- Document functional requirements.
Design Checklist
A strong design foundation improves usability and user engagement.
- Create user flow diagrams.
- Develop wireframes for key screens.
- Design intuitive navigation paths.
- Follow material design guidelines.
- Ensure accessibility considerations are included.
- Create responsive layouts for different screen sizes.
- Design interactive prototypes.
- Finalize UI design assets.
Development Checklist
This phase focuses on building the application's frontend, backend, and integrations.
- Set up Android Studio and SDKs.
- Configure project architecture.
- Develop frontend screens and components.
- Build backend services and APIs.
- Implement authentication and security measures.
- Configure databases and cloud services.
- Integrate third-party services.
Testing Checklist
Testing helps ensure application quality before launch.
- Perform functional testing.
- Conduct usability testing.
- Verify device compatibility.
- Test API integrations.
- Perform security testing.
- Evaluate app performance and stability.
- Fix identified bugs and issues.
- Complete final quality assurance review.
Launch Checklist
Before publishing your application, verify that all launch requirements are complete.
- Create a Google Play Developer account.
- Prepare app descriptions and metadata.
- Upload screenshots and graphics.
- Configure privacy policy information.
- Complete Google Play compliance requirements.
- Upload the application package.
- Perform final pre-launch testing.
- Submit the app for review and publication.
For a quick overview, follow this Android app development checklist:
Plan -> Design -> Develop -> Test -> Launch -> Monitor -> Improve
Completing each stage helps teams build android app step by step while reducing risks, improving quality, and increasing the likelihood of a successful launch.
Conclusion
Understanding how to develop an Android app requires more than learning a programming language or installing development tools. A successful application is built through a structured approach that combines planning, research, design, development, testing, deployment, and continuous improvements.
Throughout this Android app development guide, we covered the complete Android app development process, from validating an idea and defining requirements to launching and maintaining an application. Each stage plays an important role in delivering a product that meets user expectations and supports business goals.
Whether you are building a simple MVP or a feature-rich enterprise solution, following the right Android app development steps can help reduce risks, improve development efficiency, and create a better experience for users. By taking a systematic approach and focusing on continuous improvement, businesses can build android app step by step that remains competitive, scalable, and valuable over time.