How to Hire an App Developer: Your Comprehensive Guide to Tips, Tricks, and Insights

In the modern era of technology, the ubiquity of mobile apps has become integral to our daily existence. Whether you’re a business looking to expand your reach or an entrepreneur with a brilliant app idea, hiring the right app developer is crucial to turn your vision into a reality. This comprehensive guide will walk you through the process of hiring an app developer, providing valuable insights and tips along the way.

Understanding the Importance of Hiring an App Developer

  • Why Hire an App Developer?

In a digital world dominated by smartphones, hiring an app developer is not just a luxury; it’s a necessity. Mobile apps can help businesses engage customers, streamline processes, and boost revenue. Whether you’re developing an app for iOS, Android, or both, a skilled app developer is essential to bring your ideas to life.

  • The Impact of a Skilled Developer

A skilled app developer can make or break your project. They have the technical expertise to navigate the complexities of mobile app development, ensuring a smooth and successful journey from concept to launch. With the right developer on board, you can create an app that stands out in a competitive market.

  • Hire Mobile Apps Developers
  • Preparing to Hire an App Developer
  • Define Your Project Scope

Before you start searching for an app developer, you need to define your project scope. What is the purpose of your app? Who is your target audience? What features do you want to include? Clearly defining your project will help you find a developer with the right skills and experience.

  • Set a Budget

Hiring an app developer comes with a cost, so it’s essential to set a budget early on. Your budget will determine whether you can hire a freelance developer, work with an agency, or opt for in-house development. Be realistic about your financial resources and allocate funds accordingly.

  • Establish a Timeline

In the realm of app development, time holds paramount importance. Determine your project timeline and launch date. Keep in mind that rushing the development process can lead to mistakes, so balance speed with quality.

Where to Find App Developers

  • Freelance Platforms

Freelance platforms like Upwork, Freelancer, and Toptal are great places to find individual app developers. You can browse through profiles, view past projects, and hire mobile developers based on your specific requirements.

  • App Development Agencies

App development agencies offer a team of skilled professionals who can handle your project from start to finish. They provide a comprehensive solution, including design, development, testing, and maintenance.

  • Networking and Referrals

Networking events, conferences, and industry-specific forums can be valuable sources for finding app developers. Referrals from colleagues and industry contacts can also lead you to talented developers.

  • Online Job Portals

Websites like LinkedIn, Indeed, and Glassdoor list job postings from app developers actively seeking work. Posting your job vacancy on these portals can attract experienced candidates.

  • Evaluating App Developer Candidates
  • Reviewing Resumes

When reviewing resumes, look for relevant experience, technical skills, and project achievements. Pay attention to the programming languages and frameworks the developer is proficient in.

  • Conducting Interviews

Conducting interviews plays a pivotal role in the recruitment procedure. Ask technical questions to assess the developer’s problem-solving abilities and inquire about their previous projects to gauge their expertise.

  • Assessing Portfolios

A developer’s portfolio provides insights into their previous work. Examine the apps they’ve developed, paying attention to design, user interface, and functionality.

  • Hire App Programmer
  • Essential Qualities to Look for in an App Developer
  • Technical Skills

Your app developer should be proficient in the programming languages and tools required for your project. Ensure they have experience with the platforms (iOS, Android) you’re targeting.

  • Experience

Experience matters in app development. Look for developers with a track record of successful projects, especially in your industry or niche.

Read also: Cost of Hiring Dedicated Developers What You Need to Know

  • Problem-Solving Abilities

App development often involves overcoming challenges and bugs. A developer with strong problem-solving skills can navigate these obstacles efficiently.

  • Communication Skills

Effective communication is vital for project success. Ensure your developer can articulate ideas, provide updates, and collaborate with your team.

  • Red Flags to Watch Out For
  • Lack of Experience

Beware of developers with little to no experience. While they may offer lower rates, they may not have the skills to handle complex projects.

  • Poor Communication

Communication is key to a successful partnership. If a developer struggles to communicate clearly or consistently, it can lead to misunderstandings and delays.

Limited Technical Knowledge

Ensure your developer has up-to-date technical knowledge and can adapt to new technologies and trends in the app development industry.

Making the Final Decision

  • Comparing Candidates

After evaluating multiple candidates, compare their skills, experience, and compatibility with your project goals. Select the developer who aligns best with your needs.

  • Negotiating Contracts

Once you’ve chosen a developer, negotiate a contract that outlines project details, timelines, milestones, and payment terms. Be clear about expectations to avoid disputes later.

  • Hiring a Mobile App Developer

With the contract signed, you can officially hire your app developer. Collaborate closely throughout the development process to ensure your vision is realized.

Managing the App Development Process

  • Setting Milestones

Break down your project into milestones, each with specific goals and deadlines. This approach helps you track progress and ensures the project stays on schedule.

  • Effective Communication

Maintain open and regular communication with your developer. Consistent updates, meetings, and feedback sessions play a pivotal role in ensuring the success of a project.

  • Quality Assurance and Testing

Conduct comprehensive testing of your app to detect and resolve any bugs or issues. Quality assurance is a vital step before launching your app to the public.

  • App Developer Resume Insights
  • Mobile App Developer Resume
  • Mobile Application Developer Resume
  • Applications Developer Resume

Conclusion

In conclusion, hiring an app developer is a critical step in bringing your mobile app idea to life. By following the guidelines and insights provided in this comprehensive guide, you can navigate the hiring process with confidence. Remember to prioritize technical skills, experience, problem-solving abilities, and effective communication when selecting the right app developer for your project.

Now that you have a solid understanding of how to hire an app developer, you can move forward with confidence and take the next steps to make your app development dream a reality.

Additional Tips for Successful App Development

While hiring an app developer is a significant part of your journey, here are some additional tips to ensure a successful app development project:

  • Project Management: Consider using project management tools like Trello, Asana, or Jira to keep track of tasks, timelines, and team communication.
  • Design Matters: Don’t underestimate the importance of user interface (UI) and user experience (UX) design. A well-designed app can significantly impact user satisfaction and engagement.
  • Regular Updates: Stay updated with the progress of your app development by scheduling regular check-ins with your developer or development team.
  • Testing and Quality Assurance: Make sure to set aside sufficient time and resources for comprehensive testing. Beta testing with real users can help identify and address issues before the official launch.
  • Budget Flexibility: Be prepared for unexpected costs or scope changes. Having some flexibility in your budget can help accommodate unforeseen challenges.
  • Legal Considerations: Ensure you have the necessary legal agreements in place, such as non-disclosure agreements (NDAs) and contracts, to protect your intellectual property and project details.
  • Marketing Strategy: Plan your app’s marketing strategy well in advance of the launch to build anticipation and acquire users once the app is live.
  • Feedback Loop: Create a feedback loop with users to gather input and make necessary improvements after the app is launched.
  • App Store Optimization (ASO): If you plan to distribute your app on app stores, invest in ASO to improve visibility and increase downloads.
  • Security: Prioritize the security of user data and sensitive information within your app. Regularly update security protocols to protect against threats.
  • Post-Launch Support: Be prepared to provide ongoing support, updates, and bug fixes to maintain a positive user experience.
  • Scaling: Plan for scalability if your app gains popularity. Ensure that your infrastructure can handle increased user traffic and data storage requirements.

Finding the Perfect Developer for Your App

In the vast world of app development, finding the right developer can be challenging, but with the right approach, it’s entirely achievable. By following the guidelines and tips outlined in this guide, you are well-prepared to hire an app developer who will not only bring your vision to life but also Help drive the success and expansion of your mobile app.

Remember that the process of hiring an app developer is just the beginning of your app development journey. The ongoing collaboration, dedication to quality, and user-centric approach are all essential factors in creating a successful and impactful mobile app.

Now, armed with knowledge and a clear plan of action, go forth and embark on your app development adventure. Whether you’re building the next groundbreaking app or enhancing an existing one, the right developer will be your key partner in achieving your goals.

What Are The Best Examples of Web Applications? A Complete Guide

Recent years of massive technological advances have transformed communication, technology and business. Web applications developed on Web browsers play a vital role in such transformations, and can provide highly interactive experiences to users. Best website applications offer new business opportunities in many industry sectors like IT entertainment amongst others. The following are six examples of web applications and their major advantages. Lets begin with the beginning.

How Do Web Apps Work?

The website must have three components which are listed above. The following graphic shows how our website works. Please see the whole procedure on this page for a clearer picture of the web app’s functioning.

Advantages and Disadvantages of Web Applications

The pros of building a web application are discussed. Your decision can be affected depending on user needs, requirements and functionality you plan to include.

How do web applications work?

Web Application workflows generally follow this.

Web Applications vs Websites

In order to minimize costs and improve web development it is possible to go to an HTML5 template. It is easy to select from dozens of design themes, layouts, predesigned demos, or niches. Even for people who don’t know the secrets behind code it’s not difficult to edit looks. You can also access additional tools for improving your website’s functions or for periodic updates. Website applications really do have websites. Both web applications use HTML, CSS, HTML and JavaScript. The user can view both through i-Net.

What are the Advantages of Building Web Applications?

Are there some new ideas on how to make web apps? How can I propose a new idea for a website? Are there any other services available?

4 Types of Web Apps

Hundreds of different web applications have been produced that satisfy web developers. Before starting building your first website it’s necessary to understand all kinds of web apps. Is this a good time to explore web apps and websites?

Types of Web Applications

Dynamic web application is characterized by several forms, which can be single pages or several pages. The products are usually based on several aspects including designs and features. Examples commonly used are animations, and access via web portals or e-commerce websites. These may include progressive web apps (PWA) that combine mobile and web applications. PWA offers a mobile feel with speed and mobile adaptations of Web apps. From Gmail to Facebook to Microsoft Office, here are a few successful websites. Below is an excellent list.

Examples of Web App Development

After understanding everything about internet applications, it’s easy to discuss six best internet application examples. These are useful tools to learn the way web app solutions are applied to your business problem.

Static Web Application

A static web app can be found anywhere. Web applications display information using HTML, CSS and JavaScript. There is generally no personalized function in this app, and changes are generally visible once the page is loaded. If you want to develop web applications on Angular, select an expert web design agency. It is capable of delivering an array of development services which define your brand and keep your customers happy.

Google Docs Editors

Microsoft Office dominated office support digitally for nearly a decade. Most people knew MS Excel and Microsoft Word. It’s changed. When Google took the initiative the company introduced Google Docs Slides and Google Sheets as a substitute for Microsoft. This web application is part of the Office suite Google Doc Editors, which Google has developed. Googles ambitions are more extensive. It has been developed for use with Google’s Office suite. Google wants the Internet back as its primary playground.

Web apps vs mobile apps, or in other words, web-based apps vs native apps for mobile devices

Mobile apps usually have less functionality than native apps.Native applications outperform web applications in numerous aspects. Recommended reading: Web app development costs: The costs associated with mobile applications are higher than those associated with websites. While both typically start at $10,000- the latter can be $3000 for the product.

Read also: Unleashing the Power of Web Development Applications: A Comprehensive Exploration

7 Popular Examples of Web Apps

Various category websites assist in varying tasks. Web applications that were successful included Facebook, Google Mail or Netflix. Here are a few examples of web app success.

Final Words

The Internet revolutionizes the way people interact, work & conduct business. The evolution of web apps has a wide range of applications that transform businesses and provide personalized services. Apps that improve productivity or convenience democratise information and access opportunities and resources. Web application developers work with renowned companies to create web solutions that redefine digital experiences & shape the future of the internet.

Outstanding Web Application Examples

Think about what you would need to retouch a photograph without Adobe Lightroom installed on your laptop without Adobe Acrobat. Often people open a website and search for “converting pdf to jpg online” or retouching photos online. These websites shown are actually website applications examples. This is the online tool for finishing an assignment. The internet today revolves more than ever around web apps. The following are some excellent web applications example to be studied.

examples of web apps

What technologies are  used in developing web applications? 

Show some of the most powerful web apps for Android, which can change the world.

Modern web-based social media & the death of Yahoo! Messenger

Yahoo! It’s all about failure. Maybe with the increase in mobiles, some start using whatsapp instead. Yahoo Messenger’s primary battleground was once computer-based computers. In the early 90s, Yahoo Messenger was needed to be installed. However, Facebook and Twitter came to market with an online presence and people began using them to connect to social media instead. Read: 8 Steps For Creating Social Media Platform.

Functions of Web Applications

Web applications help businesses communicate more effectively. They are available as standalone websites. Contact pages are examples of an internet app where a user enters information and registers on business mailing lists. Another example of a simple web app is a shopping cart and content management system. Web applications may share information with anyone, and may serve many purposes. The software generates reports, manipulates photos and calculates the results. The ability of a web application can be understood by looking at the different types.

In which industries can web apps be used?

Businesses are moving toward digitalization. Here are some examples of applications that can be deployed via web applications.

Microsoft Office

Microsoft Office Suite includes numerous software tools such as Word, Excel, and Power Point. It must initially be installed on your computer with saved folders. Microsoft’s Office platform has grown to become among the most popular web apps. A highly-acclaimed suite of products has become an industry standard. Collaboration makes it easy to share files with friends on the Internet with ease. In addition, the suite includes collaborating tools such as Teams. And yes, along with Microsoft’s web apps, Microsoft offers desktop and mobile versions.

Web Application Examples Developed by Designveloper

We also work on several Web Application projects, including LuminPDF and CV Simply.

Installation and updates

App developers can easily update their software on their site. It’s pretty handy, though you won’t see that if it’s in maintenance mode. The desktop application needs to have manual handling. Upon completion, the update process will start. This can take hours of downloading, upgrading, and possibly even rebooting. For utilizing a desktop application the computer has to be downloaded. Web applications have more simplicity. You can use the service from your browser (Chrome, Firefox,…) immediately. I want to learn about building web applications.

Google Drive

Google Drive is another great example. These services offer free storage in the cloud. It’s possible for any smartphone to share files or other files. It has many functionality available on the Google Drive website. Google Drive has a variety of mobile applications that allow the storage, sharing, and viewing of files. Features of Google drives:

Building Your Web Application With Designveloper

Designveloper is an innovative software development company based in Vietnam. We have extensive web development and web design knowledge in many fields. Web applications have become incredibly crucial to any business today. This page provides web development examples designed by Designveloper for the clientele:

Advantages of Web Apps

Web Application Development offers a number of benefits that give businesses affordable and convenient services. Let’s list the advantages of buying an internet app.

eCommerce Platforms

Ecommerce is an application for selling products and services online. DesignerVeloper develops online shopping websites for clients in a wide assortment including fashion, beauty, and electronics. The Platform offers companies with user-friendly interfaces, advanced product search functions, as well as a secure payments gateway that ensures secure transactions.

Social Media Platforms

Social media sites are online applications which enable people to communicate, share content, and connect brands. Socialveloper Group develops websites for businesses from fashion, entertainment and education. These platforms provide an intuitive user interface and provide extensive search filters and various features for interaction with each other and the branding. Contact Designveloper today & find out about our web application development services.

What are web apps and examples?

Services provided via the web are, by definition, web applications. Web applications can be viewed by the Internet by a wide variety of means, including online form shopping cart, videostreaming and social networks, games and email.

Is Facebook a web app?

Web Application is a website with functions and interactive components and is designed to help users. Gmail is a social web application developed with dynamic functionality for users.

What is considered a web app?

Web apps are web applications that work on your browser. Businesses must communicate and provide services remotely. The company utilizes the internet to communicate with their customers in a quick, safe way.

Is Netflix a web application?

Netflix has a subscription service for watching movies on the Internet and downloading them on their computers. According to your plan, you may be able to download movies or TV shows from your iPhone, Android phone or Windows 10 device.

What is an example of a web application?

The Internet is essentially a computer application for the Internet. Web applications also include online forms, shopping carts, video streaming, social networking game sites & e-mailed messages.

Is Facebook a web application?

A website has functionality and interaction. All these web apps have dynamic features that allow users to interact with them.

What is the most popular web application?

The most used web frameworks by developers across the world in 2022: characteristics Share of respondents. VueJ 15.87%. WordPress 14.49%. ASPNET 2.75%: Flasks 12.26%. 10 more rows. • 19 Jul 2021.

examples for web applications

What are web app examples?

I’m a developer who works on LinkedIn. Evernote. Gmails. Google calendars. Messager. Google workspaces. Google Map. Amazon Prime Videos.

Is YouTube a web app?

YouTube can be found through the Internet. Web sites exist for decades, although web applications are more recent. However they appear as a synonym and are often employed interchangeably.

Is Gmail a web application?

Gmail can be accessed from the Google website. Gmail has been developed by Microsoft to provide an alternative platform and focuses on helping users to read and view email. It allows them the possibility to compose email, reply to old mail, search for mails, and arrange them in folders.

What are considered web apps?

Web applications are software that runs in Web browsers. Companies must exchange data or provide their services remotely. Their website provides easy to access information for customers in a fast and efficient manner.

What is a web application with examples?

All services on the Internet are defined as Web applications. Examples include online forms, video streaming, social media games and email.

What are three 3 examples of web applications?

How can I get good examples for my website? Google.com. Google WorkSpace is one of the largest web applications collections for Android and Netflix. Another popular streaming platform has web applications. Trella, Base Camp Windows Office, Ubers The site 8 Friends.

What are the most common types of web applications?

Web Application type, static web application. Dynamic website. The Websites for e-commerce. One-page website applications. ‘ Website Portals CMS web applications. / / www.aesdf.org / en.gr / en.gr / www.edf.gr / en.gr / Animation web application. Rich Website Applications.

What is considered a web application?

Web applications are programs running within the browser. Companies need information exchange or delivery of their services via cellular devices. They employ Internet services in order to reach clients quickly and securely.

Is Netflix an example of a web application?

Examples for a great web-based program. Some of the best websites are Facebook, Google, Amazon or Netflix. All features are web applications that you may download in stores or through downloadable apps.

Interested in learning more about website development services to create web applications? WeDoWebApps provides a comprehensive guide to web applications in this blog post.

Designing Secure Websites: Best Practices for Protecting User Data

In the digital age, businesses with no online presence cannot expect to thrive. A website is a brand’s online identity. And just as companies need to have a safe and secure brick-and-mortar store, they need the same for their websites. 

According to a report, phishing attacks increased by 61% in 2022 . In the last quarter of that year, some three million phishing attacks occurred. 

In many cases, phishing attacks were deployed after hackers acquired personal information from websites with weak security. Sensitive data was collected from customers who visited the vulnerable website. 

Consumers will not support brands with compromised security. This is why designing a secure website is crucial in attracting and keeping your audience. 

Designing Secure Websites: It’s for the Business and Its Customers

Around 42 million Americans fell victim to identity theft in 2021, according to an Identity Fraud Study. The losses from identity fraud scams reached $52 billion that year. 

The same report found that while businesses spent millions of dollars in keeping their companies secure, customer information was still left vulnerable. 

So, even when people are using VPN for iPhones and Androids to keep their data secure, their data is still unprotected. 

Securing a website is not just for the business; it’s also for its customers. 

What Are the Best Practices for Protecting User Data?

Designing a secure website is a combination of best practices from top to bottom. Even after a website goes live, the business must continue to secure its data and that of its customers. 

1. Choose a Reliable Host

How you begin will set the standard for how you secure a website—choosing a credible hosting company is paramount. Don’t just go for the most affordable hosting plan; look into credentials and security solutions. 

Features you must look for in a host include web application firewall (WAF) and denial-of-service (DDoS) protection. 

WAF is critical for e-commerce. It inspects and filters traffic between applications to prevent the following attacks:

  • Cross-site request forgery
  • Cross-site scripting
  • File inclusion
  • SQL injection

DDoS attacks increased by 74% from 2021 to 2022. According to a report, the following industries were the most vulnerable to DDoS:

  • Finance
  • Telecommunications
  • Retail
  • Entertainment
  • Insurance
  • Education
  • Logistics

2. Secure Content Management System (CMS)

CMS is an essential tool for managing website content. But it is also one of the “doors” hackers use to attack. 

Here are some tips to keep CMS secure:

  1. Secure the admin account—most attacks are done through front-end logins. 
  2. Restrict user permissions so they cannot make an impact on CMS.
  3. Implement user security policies when creating accounts. 
  4. Always keep track of site activities. 
  5. Update CMS regularly. 

3. Use Only Necessary Plugins and Extensions

Plugins provide additional functionality to websites. However, they can also slow down the system and provide opportunities for hackers. Use only plugins that are absolutely necessary to your website and business. 

Existing plugins must be managed well. They should be regularly inspected and updated—once they are outdated, they become security risks. 

4. Limit Access

Give access to specific website functions only to those who work on them. It is important to limit access levels to ensure security. 

Limiting access is not just about trust. It is also about controlling the potential for human errors. 

Aside from restricting access, separate logins for employees are critical for security and accountability. 

5. Provide Top-to-Bottom Education on Web Security

Everyone in the company must be educated about website security and the ever-present risk of cyber attacks. When employees are aware of threats, they can protect themselves and the business. 

New hires must also undergo security training during orientation. 

6. Maintain Robust Account Management 

While you want customers to easily access your website, you also want them to be secure—for their sake and yours. Strong account management is important. 

For example, require users to have a strong password. According to statistics, poor passwords caused 81% of company data breaches

Moreover, 99.9% of attacks were reportedly blocked by multi-factor authentication, making it an ideal practice in account management. 

It is also vital to provide minimal privileges to users. This means only allowing them to get what they need from the site and nothing more. For e-commerce sites, users can browse, make a purchase, and leave reviews and comments. They should not be given access to anything else to change sensitive website data. 

7. Set Up Backups

Always have backup systems so all website data stays intact in case of cyber attacks. 

Physical and digital backups are important to maintain. Choose a reliable location for your physical backups—ideally far away from your office. Install software that would routinely collect and back up data from your site. 

With these endeavors, you won’t have to worry about losing user data if your website is compromised in some way. 

8. Update All Cybersecurity Subscriptions

Cybercriminals are incredibly smart, and they only get smarter by the day—they live to defeat the latest security challenge. They also use cutting-edge technology for these attacks, such as artificial intelligence and machine learning. 

This means a traditional and outdated cybersecurity system is incredibly vulnerable to attacks. 

You must regularly update your security systems: the ones you use on your website, web applications, CMS, and all other online elements. Keep track of your subscriptions so they can be renewed faithfully. 

And every year or so, audit your overall cybersecurity system and consider adding or streamlining the strategies you have in place to protect your business, employees, and customers.

Conclusion

Securing your website is not a one-time endeavor. It begins when you design and develop the website until you launch it. And it doesn’t end when the website is launched—security systems need to be updated regularly. 

The website is your company’s online presence. You must protect its online extension and the customers that regularly use it. So, trust only the most credible web and app designers and developers to create your website. 

WeDoWebApps helps develop digital products that can help generate additional revenue for your business. Get a free consultation and quote here.

Flutter For Web: Building Responsive and High-Performance Web Applications

Flutter Web is a revolutionary technology developed by Google, which extends the power of Flutter to build high-performance and visually stunning web applications. Flutter, known for its versatility in creating native mobile apps, now allows developers to leverage the same codebase and UI framework to develop responsive and feature-rich web applications. This opens up a world of possibilities for developers, providing a seamless experience across different platforms and ensuring consistent branding and user experience.

Table of Contents

  1. Introduction to Flutter Web
  2. What is Flutter Used for?
  3. Getting Started with Flutter Web Development
  • 3.1 Installing Flutter and Flutter Web
  • 3.2 Creating a New Flutter Web Project
  1. Flutter Web App Development
  • 4.1 Building User Interfaces with Widgets
  • 4.2 Implementing Navigation and Routing
  • 4.3 State Management in Flutter Web Apps
  • 4.4 Handling Form Input and User Interactions
  1. Optimizing Performance for Flutter Web Applications
  • 5.1 Reducing App Size and Improving Load Times
  • 5.2 Utilizing Code Splitting and Lazy Loading
  • 5.3 Caching Strategies for Enhanced User Experience
  1. Deploying and Hosting a Flutter Web App
  • 6.1 Preparing the App for Deployment
  • 6.2 Choosing a Hosting Provider
  • 6.3 Deploying the App to Production
  1. Advanced Topics in Flutter Web Development
  • 7.1 Integrating Web APIs and Services
  • 7.2 Working with Websockets for Real-time Communication
  • 7.3 Progressive Web Apps (PWAs) with Flutter
  • 7.4 Accessibility and Inclusive Design
  1. Comparing Flutter Web with Other Web Development Frameworks
  • 8.1 Advantages of Flutter Web
  • 8.2 Limitations and Considerations
  • 8.3 Flutter Web vs. React, Angular, and Vue.js
  1. Frequently Asked Questions (FAQs)

1. Introduction to Flutter Web

One of the significant advantages of Flutter Web is its ability to deliver a smooth and reactive user interface, similar to native mobile apps. It uses a unique rendering engine that compiles Flutter code into optimized JavaScript, enabling it to run efficiently in web browsers. This approach allows developers to create web applications with a focus on performance and interactivity, making Flutter Web an attractive choice for modern web development.

2. What is Flutter Used for?

Flutter is a powerful and versatile UI software development kit (SDK) that serves various purposes in the world of app development. Initially, Flutter gained popularity for building natively compiled mobile applications for Android and iOS platforms. However, with the introduction of Flutter Web, it has become a compelling choice for web application development as well.

What is Flutter Used for

Flutter is used for building high-performance mobile apps that offer a native-like experience to users. It allows developers to create visually appealing and engaging interfaces using its extensive library of pre-built widgets. Additionally, Flutter’s hot reload feature enables rapid development and testing, saving valuable time during the development process.

With Flutter Web, developers can take advantage of the same capabilities for web applications. This means that a single codebase can power both mobile and web apps, reducing development effort and simplifying maintenance. Moreover, Flutter’s expressive and declarative nature makes it easy for developers to create complex UIs with ease.

3. Getting Started with Flutter Web Development

3.1 Installing Flutter and Flutter Web

Before diving into Flutter Web development, you need to set up your development environment. Installing Flutter is a straightforward process that involves downloading the SDK and adding it to your system’s PATH variable. Additionally, you will need to install the Dart programming language, which is used by Flutter.

To get started with Flutter Web specifically, you need to ensure that you have the necessary dependencies. Flutter Web requires the latest version of Flutter, so it’s crucial to keep your SDK up to date. Additionally, you will need to install the Flutter Web package, which enables web-specific development features.

3.2 Creating a New Flutter Web Project

Once you have set up your development environment, you can create a new Flutter Web project using the Flutter CLI (Command Line Interface). Run the following command at the command prompt or in the terminal to accomplish this:

flutter create my_web_app

This command will create a new Flutter Web project named “my_web_app” in the current directory. The project structure will be similar to a regular Flutter project, but it will include additional configurations and files specific to Flutter Web.

Once your project is created, you can open it in your preferred code editor and start building your Flutter Web application.

4. Flutter Web App Development

Flutter Web app development shares many similarities with traditional Flutter mobile app development. The core concepts of building UIs using widgets, handling state management, and managing user interactions remain consistent. However, there are some key considerations and differences specific to web development.

4.1 Building User Interfaces with Widgets

Widgets are the foundation of a Flutter Web app’s user interface. Flutter provides a rich set of pre-built widgets for creating various UI elements such as buttons, text fields, images, and more. These widgets can be customized to fit the app’s design and branding.

Developers may design responsive layouts with Flutter Web that can change to fit various screen sizes and orientations. By leveraging Flutter’s flexible widgets, developers can ensure that their web applications look great on both desktop and mobile devices.

Flutter Web App Development

4.2 Implementing Navigation and Routing

Navigation and routing are essential for multi-page Flutter Web applications. Flutter provides a “Navigator” widget, similar to what is used in mobile apps, that enables seamless page transitions and deep linking within the app.

In Flutter Web, developers can define routes to different pages within the app. This allows users to navigate between different sections of the application using URLs or browser history. The “Navigator” widget manages the navigation stack and enables developers to push and pop routes as needed.

4.3 State Management in Flutter Web Apps

State management is crucial for maintaining the app’s state and ensuring a smooth user experience. Flutter offers various state management solutions, and the choice of approach depends on the complexity of the application and developer preference.

Some popular state management solutions for Flutter Web include:

  • Provider: A simple and easy-to-use solution for managing app state using “ChangeNotifier” and “Provider” widgets.
  • BLoC (Business Logic Component): A more advanced approach that separates business logic from UI components using streams and sinks.
  • GetX: A lightweight and high-performance state management library that provides both state and dependency management capabilities.

Developers can choose the state management approach that best fits their application’s needs and ensures efficient data handling and updates.

4.4 Handling Form Input and User Interactions

Flutter Web supports handling form input and user interactions in a manner similar to mobile app development. Developers can use various event handlers and controllers to manage user input effectively.

When users interact with form fields, buttons, or other elements, developers can capture these interactions and respond accordingly. Flutter Web’s reactive nature enables instant updates to the user interface, providing a seamless and real-time user experience.

Flutter Web has opened up exciting opportunities for developers to create responsive and high-performance web applications using the same codebase as their mobile apps. With Flutter’s powerful widget library, state management solutions, and hot reload feature, the development process becomes efficient and enjoyable.

Whether you’re building a web application from scratch or extending your existing Flutter mobile app to the web, Flutter Web offers a robust framework for delivering top-notch user experiences. As Flutter continues to evolve and improve, we can expect even more innovative features and enhancements for building cutting-edge web applications.

5. Optimizing Performance for Flutter Web Applications

Flutter Web has revolutionized web application development, providing developers with the capability to create high-performance and visually engaging web apps. However, to ensure a seamless user experience, it is crucial to optimize the performance of Flutter Web applications. In this topic, we will explore three essential strategies to achieve optimal performance: reducing app size and improving load times, utilizing code splitting and lazy loading, and implementing caching strategies for an enhanced user experience.

5.1 Reducing App Size and Improving Load Times

Flutter Web Application Size Considerations

One of the key factors affecting web application performance is its size. Large app sizes can lead to slow load times, especially on networks with limited bandwidth. To reduce the app size, developers can employ various techniques:

  1. Minimizing Asset Sizes: Compressing images, videos, and other assets can significantly reduce the overall app size without compromising on visual quality. Using image formats like WebP, which offer better compression, is recommended.
  2. Code Optimization: Removing unnecessary code and dependencies can lead to a leaner application. Leveraging tree shaking and dead code elimination techniques help eliminate unused code, resulting in a smaller bundle size.
  3. Using Dynamic Imports: Flutter Web supports dynamic imports, enabling developers to load certain parts of the application on demand. This approach can help reduce the initial load time by loading only essential components first and deferring the loading of less critical components.

Performance for Flutter Web Applications

5.2 Utilizing Code Splitting and Lazy Loading

Code Splitting for Smaller Initial Bundle

The approach of “code splitting” entails dividing the application code into more manageable portions. Instead of bundling the entire application code into a single file, different parts of the app are bundled separately, making the initial load faster. Flutter Web allows developers to use code splitting to optimize the loading process.

Lazy Loading for On-Demand Loading

Lazy loading is an extension of code splitting that enables components or modules to load only when needed. This approach helps reduce the initial load time by deferring the loading of non-essential components until they are required. Flutter Web supports lazy loading, making it a powerful tool for optimizing web application performance.

5.3 Caching Strategies for Enhanced User Experience

Cache Management for Faster Access

Caching is the process of storing frequently accessed data locally to avoid repeated server requests. Flutter Web developers can leverage caching to improve the app’s speed and responsiveness. There are various strategies, such as:

  1. HTTP Caching: Implementing HTTP caching headers like “Cache-Control” and “ETag” allows the browser to cache resources like images, stylesheets, and scripts. Subsequent requests for the same resources can be served from the cache, reducing the load time.
  2. Service Worker Caching: Flutter Web supports Service Workers, which can intercept and cache network requests. By strategically caching assets and data, developers can create a seamless offline experience and reduce reliance on the network.
  3. Data Caching: Storing frequently accessed data, such as user preferences or API responses, in local storage or IndexedDB enhances the app’s performance by reducing the need for repeated data fetches.

Optimizing the performance of Flutter Web applications is essential to provide users with a fast and engaging experience. By reducing app size, utilizing code splitting and lazy loading, and implementing caching strategies, developers can ensure their web apps load quickly and perform efficiently. By incorporating these techniques, Flutter Web applications can deliver exceptional user experiences, making them competitive and well-received in the dynamic world of web development.

6. Deploying and Hosting a Flutter Web App

Deploying and hosting a Flutter Web app is a critical step in making your application accessible to users worldwide. It involves preparing the app for deployment, choosing a suitable hosting provider, and finally, deploying the app to production.

6.1 Preparing the App for Deployment

Before deploying a Flutter Web app, you need to ensure that the app is optimized and ready for production. Here are the essential steps to prepare your app for deployment:

Optimizing Performance for Flutter Web

  • Flutter Web Performance: Prioritize optimizing your app’s performance to ensure a smooth and responsive user experience. Utilize techniques such as lazy loading, code splitting, and caching to reduce load times and improve overall performance.
  • Flutter Web Renderer: The Flutter Web renderer plays a crucial role in rendering UI elements on the web. Optimize the renderer to minimize layout thrashing and improve rendering performance.
  • Flutter Web Demo App: Create a demo version of your app to test its performance in a real-world scenario. Identify and address performance bottlenecks before deployment.
  • Flutter Web App Example: Study existing Flutter Web App examples to learn from best practices and implement performance improvements in your app.

Flutter Web App

6.2 Choosing a Hosting Provider

Selecting the right hosting provider is essential for the success of your Flutter Web application. Consider the below factors when choosing a hosting provider:

Flutter for Web Development

  • Supported Technologies: Ensure that the hosting provider supports the technologies used in your Flutter Web apps, such as Flutter’s web renderer and the required web server.
  • Scalability: Look for a hosting provider that offers scalable solutions to accommodate potential increases in traffic as your app grows in popularity.
  • Server Locations: Choose a provider with server locations that are geographically closer to your target audience for improved load times and reduced latency.
  • Security Features: Ensure that the hosting provider offers robust security features to protect your app and user data from potential threats.
  • Cost: Consider the pricing plans and determine which one aligns best with your app’s requirements and budget.

6.3 Deploying the App to Production

After preparing the app and choosing a hosting provider, it’s time to deploy your Flutter Web app to production. Follow below steps:

Flutter Web Deployment

  • Flutter for Web Dev: Engage in continuous development and testing throughout the deployment process to catch and address any issues before they impact users.
  • Flutter Website Examples: Refer to successful Flutter website examples for inspiration and guidance on best practices during the deployment phase.
  • Flutter Website Demo: Perform a final demo of the app on the production server to ensure all features work as intended.
  • Flutter First App: If this is your first Flutter Web app deployment, seek advice from experienced developers or follow official Flutter documentation to avoid common pitfalls.

Flutter Run Chrome

  • Flutter Run Chrome: Use the “flutter run -d chrome” command to test your app in the Chrome browser locally. This allows you to identify any browser-specific issues and ensure cross-browser compatibility.

Flutter Web Demo App

  • Flutter Web Demo App: Provide a demo version of your app on your website to allow users to experience its features before deciding to use it fully.

Flutter Web App Example

  • Flutter Web App Example: Include a comprehensive example of your app’s features on the website to showcase its capabilities to potential users.

Flutter Web Performance

  • Flutter Web Performance: Monitor the app’s performance continuously after deployment and use tools like Google Lighthouse to identify performance bottlenecks.

Flutter Web Renderer

  • Flutter Web Renderer: Optimize the Flutter web renderer settings to ensure smooth rendering and minimize visual glitches.

Deploying and hosting a Flutter Web app involves several critical steps, from preparing the app for deployment to choosing the right hosting provider and finally deploying the app to production. By optimizing performance, following best practices, and continuously testing throughout the process, you can ensure a successful deployment and offer a seamless experience to your users. Remember to monitor performance post-deployment and make necessary adjustments as your app evolves. With proper preparation and execution, your Flutter Web app can reach a global audience and deliver value to users worldwide.

7. Advanced Topics in Flutter Web Development

7.1 Integrating Web APIs and Services

Flutter Web provides developers with the flexibility to integrate various web APIs and services seamlessly into their applications. Web APIs are essential for connecting with external data sources and services, enabling real-time data retrieval and interactions.

To integrate web APIs in a Flutter Web application, developers can use the HTTP package, which allows making HTTP requests to APIs. Whether it’s fetching data from a RESTful API, handling user authentication, or uploading files, the HTTP package simplifies the process of communication with web services.

Besides the standard HTTP package, developers can leverage specialized packages for specific APIs or services, such as Google Apis for accessing Google APIs or Firebase for integrating with Firebase services.

As Flutter Web applications are written in Dart, a modern and robust programming language, developers can effectively use asynchronous programming techniques like Futures and async/await to handle API calls asynchronously, ensuring smooth user experiences.

Flutter Web Development

7.2 Working with Websockets for Real-time Communication

WebSockets offer a powerful mechanism for establishing real-time, bidirectional communication between a Flutter Web application and a server. With WebSockets, developers can create dynamic and interactive web applications, such as chat applications, live dashboards, and real-time gaming platforms.

To work with web sockets in Flutter Web, developers can use packages like web_socket_channel that provide abstractions for handling web socket connections. This package enables developers to send and receive messages through WebSockets efficiently.

Flutter Web’s support for web sockets allows applications to maintain persistent connections with the server, reducing the need for repeated HTTP requests and enabling real-time updates on the client side.

Developers can implement event-based communication using WebSockets, where the server can push updates to connected clients whenever there is new data or changes on the server side. This feature is particularly beneficial for applications that require live updates, such as stock market tracking or collaborative editing tools.

7.3 Progressive Web Apps (PWAs) with Flutter

Flutter Web empowers developers to create Progressive Web Apps (PWAs), offering an enhanced user experience similar to native mobile apps while running on web browsers. PWAs combine the best of both worlds—responsive web design and mobile app features.

With Flutter’s support for PWAs, developers can create applications that work offline, load quickly even on slow networks, and provide a native-like experience to users. PWAs also offer features such as push notifications, background synchronization, and installation prompts.

To transform a Flutter Web app into a PWA, developers need to add a service worker—a script that runs in the background—to manage caching, enable offline access, and handle push notifications. Additionally, the app should meet specific criteria defined by the PWA standards for optimal performance and discoverability.

PWAs built with Flutter Web can be easily installed on users’ devices, as browsers prompt users to add the app to their home screens. This seamless installation process eliminates the need to visit an app store, making it more convenient for users to access the app.

7.4 Accessibility and Inclusive Design

Developing web applications with accessibility in mind is crucial to ensure that all users, regardless of their abilities or disabilities, can access and use the app effectively. Inclusive design principles focus on creating applications that are accessible, usable, and enjoyable for a wide range of users.

Flutter Web provides robust support for accessibility features, allowing developers to build web applications that meet Web Content Accessibility Guidelines (WCAG) standards. Developers can use semantic HTML tags, such as <button>, <form>, and <input>, to make the app’s structure more accessible to assistive technologies like screen readers.

Additionally, Flutter Web’s widget library includes accessibility properties, such as Semantics widgets, that help developers define explicit labels, roles, and states for user interface elements. This makes it easier for assistive technologies to convey the app’s content and functionalities to users with disabilities.

By incorporating accessibility features into the design and development process, developers ensure that all users, including those with visual, auditory, or motor impairments, can navigate, interact, and enjoy the Flutter Web application with ease.

8. Comparing Flutter Web with Other Web Development Frameworks

Flutter Web is a powerful tool for building responsive and high-performance web applications. With its ability to deliver a native-like user experience, it has gained popularity among developers. In this topic, we will explore the advantages and limitations of Flutter Web and compare it with other popular web development frameworks like React, Angular, and Vue.js.

Flutter Web with Other Web Development Frameworks

8.1 Advantages of Flutter Web

  1. Cross-Platform Development

Flutter Web shares a single codebase with its mobile counterpart, allowing developers to reuse a significant portion of the code. This cross-platform capability saves time and effort, as developers can focus on building features rather than managing separate codebases.

  1. Rich Widget Library

Flutter Web comes with a comprehensive set of pre-built widgets that help developers create stunning and interactive user interfaces. The widget library allows for easy customization and enhances the overall aesthetics of the application.

  1. High Performance

Flutter Web applications are known for their impressive performance. The applications are compiled to highly optimized JavaScript code, resulting in faster load times and smooth animations.

  1. Responsive Design

Flutter Web promotes responsive design principles, enabling applications to adapt seamlessly to various screen sizes and devices.

  1. Customizable UI

Developers can create custom UI components in Flutter Web using the widget framework. This flexibility allows for the implementation of unique and visually appealing designs.

  1. Strong Community Support

Flutter has a vibrant and active community, with a growing number of developers contributing to its ecosystem. This strong community support translates to frequent updates, bug fixes, and a wealth of available resources.

  1. Seamless Integration with Firebase

Flutter Web integrates smoothly with Firebase, Google’s mobile and web application development platform. This combination enables developers to implement real-time database functionality and authentication effortlessly.

  1. Access to Native Device Features

Flutter Web’s integration with Flutter’s mobile SDK provides access to native device features through plugins. Developers can leverage device-specific capabilities, enhancing the app’s functionality.

  1. Progressive Web Apps (PWAs)

Flutter Web applications can be transformed into PWAs, allowing users to install the app directly from the browser and use it offline. This enables a more app-like experience, driving user engagement.

8.2 Limitations and Considerations

  1. Limited Web-Specific Libraries

While Flutter Web offers a vast widget library, it may have fewer web-specific libraries compared to other frameworks like React and Angular. Developers may need to find workarounds or build custom solutions for certain functionalities.

  1. Growing Ecosystem

As Flutter Web is relatively new, its ecosystem is still growing. This means that some features and packages available in other web development frameworks may not yet be available in Flutter Web.

  1. Learning Curve

Developers who are new to Flutter may face a learning curve when adopting Flutter Web. Understanding the widget-based architecture and its reactive nature may take some time.

  1. Size of the Output

Flutter Web applications may produce larger JavaScript bundles compared to some other frameworks. While improvements have been made to reduce the app size, it’s still a consideration for optimizing load times.

  1. Community Size

While Flutter has a thriving community, it may not be as large as some other web development communities like React or Angular. This could affect the availability of third-party packages and resources.

8.3 Flutter Web vs. React, Angular, and Vue.js

  1. Development Approach

Flutter Web follows a declarative and reactive approach, where the UI is built using widgets, and changes to the state trigger UI updates. React, Angular, and Vue.js also adopt a similar reactive approach.

  1. Learning Curve

React, Angular, and Vue.js have been around longer, resulting in more extensive documentation and tutorials. Developers familiar with JavaScript may find it easier to learn and adopt these frameworks.

  1. Community and Ecosystem

React, Angular, and Vue.js have large and well-established communities with extensive libraries and plugins. Flutter Web’s ecosystem is still growing but has the advantage of sharing resources with Flutter’s mobile development community.

  1. Performance

Flutter Web boasts impressive performance, thanks to its compilation of optimized JavaScript code. React and Vue.js also prioritize performance, while Angular may be slightly heavier in terms of bundle size.

  1. Customization and Flexibility

Flutter Web provides a wide range of customizable widgets, allowing developers to build unique designs. React, Angular and Vue.js offer a plethora of libraries and components for customization.

  1. Cross-Platform Development

Flutter Web stands out with its ability to share code between web and mobile applications. While React Native enables cross-platform mobile development, it does not have a native web counterpart.

  1. Rendering and Reconciliation

Flutter Web’s rendering engine, Skia, performs all rendering directly to the canvas, providing a consistent experience across browsers. React, Angular, and Vue.js use the browser’s DOM for rendering.

  1. Popularity and Adoption

React, Angular, and Vue.js have a significant market share and are widely adopted by various companies and developers. Flutter Web’s popularity is steadily growing, with increasing adoption in web development projects.

Flutter Web offers a unique set of advantages with its cross-platform capabilities, hot reload, and rich widget library. However, it’s essential to consider its growing ecosystem, learning curve, and the availability of web-specific libraries when comparing it with other well-established web development frameworks like React, Angular, and Vue.js. The choice of framework ultimately depends on the project’s requirements, the developer’s familiarity with the technology, and the desired user experience.

A Thread Worth Unraveling: Instagram’s Latest Update to Its Meta Threads App

With the world growing more digitally connected, social media platforms continually evolve to better suit users’ needs. Instagram, a favorite among millions, is no exception. Instagram’s standalone messaging app, Threads, has been the talk of the cyber-town since its latest updates rolled out in July 2023. So what’s all the buzz about? Let’s dive into the Threads on Instagram App.

Breaking Down Instagram’s Threads App by Meta

Before we explore the new features, let’s take a quick refresher on what is Threads App. It was initially introduced as a ‘camera-first’ messaging app that allows users to share photos, videos, messages, Stories, and more with their Instagram ‘close friends’ list. Threads app by Meta, designed to provide more intimate connections between close friends, set the groundwork for what we now know as the newly updated Meta Threads App.

A Quick Glance at the Latest Threads Social Media App Update

The latest update promises an even more intuitive user interface, increased functionality, and enhanced user interaction capabilities. Here are the major features of the new update:

    • Increased Interactivity: Instagram Threads now supports interactive polls, quizzes, and question stickers within messages. This makes it possible to have more dynamic conversations and interactions with your friends.
  • Reaction Cam: Instagram has added a new feature called Reaction Cam. With this, users can capture and send their reactions to messages using a quick selfie or video. This is a creative way to keep the conversation lively and fun, making interactions more personal and expressive.
  • Group Messaging: The previous versions of Threads were limited to one-on-one conversations or sharing with your ‘close friends’ list. However, with this update, Instagram now allows group messaging within Meta Threads app, making it possible to create more intimate group chats apart from your regular Instagram direct messages.
  • Activity Status: The Activity Status feature lets your friends know when you’re online, similar to the Instagram Direct feature. Users can now share their status or even customize it to let their close friends know what they’re up to.
  • Seamless Integration with Instagram: A significant improvement is the better integration with the Instagram threads app. You can now view and reply to Instagram Story reactions or direct messages without having to switch apps constantly. 

Instagram Threads Social Media App features

The latest update to Instagram Threads also includes the following new features:

  • Polls: Users can now create polls in the Threads meta app, which allows them to get feedback from their friends on a variety of topics.
  • Live Location: Users can now share their live location with their friends in the Threads meta app. This is a great way to let your friends know where you are and what you’re up to.
  • Disappearing Messages: Users can now send disappearing messages in Threads. These messages will self-destruct after a set amount of time, which can help to keep your conversations private.

The Impact of Threads App Update

Instagram Threads Social Media App impacts

Instagram’s Threads meta app update aligns with its ongoing strategy to keep users engaged within its ecosystem. With these updates, Instagram is upping its game in the social media world by fostering a more connected, intimate, and interactive space for close friends to communicate.

The introduction of the Group Messaging feature competes directly with other messaging apps. Simultaneously, the enhanced integration between Threads and the Instagram app caters to users’ demand for a more seamless social media experience.

let’s delve deeper into the features and impacts of the latest Instagram Threads App update.

How do I log in to the Instagram Threads App?

Logging into the Instagram Threads app is quite straightforward. Here are the steps:

  • Instagram Threads App Download: If you haven’t already, you’ll need to download the Instagram Threads app from your device’s app store – Google Play Store for Android devices and App Store for iOS devices.
  • Open the App: Once installed, open the Threads app on your device.
  • Log in with Instagram: As Threads is a companion app to Instagram, you will need to log in using your Instagram credentials. If you’re already logged into Instagram on your device, Threads may automatically log you in with the same account. If not, you will have to manually enter your Instagram username and password.
  • Choose ‘Close Friends’: The next step will prompt you to choose your ‘close friends’ if you haven’t set up a list already on Instagram. Threads meta app is designed to allow you to interact mainly with this list of friends. You can also manage this list directly in the Instagram app.
  • Start Using Threads: Once you’re logged in and your close friend list is set up, you’re ready to start using Instagram Threads. You can send messages, photos, videos, and more to your close friends, and access all the new features that came with the latest update.

Instagram Threads App

Conclusion

Instagram’s latest update to its Meta Threads App underlines the evolution of social media toward more personal, expressive, and immersive communication. It reflects Instagram’s efforts to constantly innovate, adapt, and enhance its user experience, shaping the way we communicate online. Click here for meta threads app download.

As we continue to connect digitally, updates like these provide new ways to share, interact, and engage in the social media space. Only time will tell how users embrace these updates, but for now, Instagram’s Threads seems to be on the right track for making digital communication more personal and interactive.

React Native Hermes: A New Javascript Engine for Faster Performance

React Native has transformed the creation of mobile apps by enabling developers to develop cross-platform applications from a single codebase. React Native has grown to be a go-to framework for many developers because of its large community and rich component library. Performance, however, becomes increasingly important as applications become more complicated. Facebook released React Native Hermes, a new version that offers improved performance, to alleviate this worry. In this blog post, we will explore the features and benefits of React Native Hermes.

Here is a look at some of the latest features and improvements in React Native versions:

  • Hermes: Hermes is a brand-new JavaScript engine created to boost the efficiency of React Native applications. Although it is still in development, it has already demonstrated notable improvements in startup time, program size, and memory usage.
  • New Architecture: A new architecture in React Native is intended to boost performance and make it simpler to create intricate apps. The new architecture supports more declarative coding and is based on the React Hooks API.
  • New APIs: A number of new APIs in React Native make it simpler to create apps with a native appearance. These APIs come with new elements, stylistic choices, and APIs for interacting with native APIs.
  • Improved Tooling: Recent updates have improved the React Native toolset. This adds enhancements to the testing framework, debugger, and development server.

What is React Native Hermes?

React Native A JavaScript engine designed exclusively for React Native applications is called Hermes. It is intended to speed up startup times, consume less memory, and give users a more reliable and smooth experience. React Native Hermes substitutes its own fast and effective engine for React Native’s built-in JavaScript engine (JavaScriptCore). React Native Hermes can help developers create React Native applications with quicker startup times, less memory utilisation, and faster UI interactions.

How Fast is Hermes? 

React Native Hermes is known for its impressive speed and efficiency. By leveraging AOT compilation and static type analysis, it can achieve faster JavaScript execution, resulting in improved overall performance. The exact speed of Hermes can vary depending on various factors, such as the complexity of the application, device specifications, and specific optimizations implemented by the developer. However, in general, Hermes enables React Native applications to start up faster and provide smoother user experiences compared to the default JavaScript Core engine.

Hermes Engine and JavaScript Execution

The Hermes engine is a lightweight and efficient JavaScript engine optimized for mobile devices. It employs various techniques, such as AOT compilation and static type analysis, to deliver superior performance. By compiling JavaScript code ahead of time, Hermes eliminates the need for runtime compilation, resulting in faster startup times. Additionally, Hermes employs a compacting garbage collector that reduces memory fragmentation and improves memory utilization. These optimizations enable Hermes to provide a more consistent and efficient JavaScript execution environment.

Hermes and JavaScript Optimization

Hermes focuses on optimizing JavaScript execution to enhance the overall performance of React Native applications. By leveraging static type analysis, Hermes can make certain performance optimizations that are not possible with traditional JIT compilation engines. This leads to faster JavaScript execution, enabling React Native apps to handle complex operations more efficiently.

Hermes Build and Integration

Integrating Hermes into a React Native project is a straightforward process. To use Hermes, developers need to enable it during the build process by specifying the necessary configuration. Once enabled, the React Native packager compiles the JavaScript code using Hermes, generating optimized bytecode that is ready to be deployed to devices. Existing React Native projects can also be easily migrated to Hermes without significant code changes, making it a convenient option for optimizing performance.

react native hermes new version

Key Features of React Native Hermes

  1. Faster Startup Time:

    React Native Hermes’ capacity to significantly speed up application starting time is one of its main features. During the building project, Hermes uses an ahead-of-time (AOT) compilation to transform JavaScript code into highly efficient bytecode. As a result, JavaScriptCore no longer requires the normal Just-in-Time (JIT) compilation. The programme launches more quickly as a result, giving users a more responsive experience.

  2. Reduced Memory Usage:

    Mobile devices often have limited resources, including memory. React Native Hermes optimizes memory usage by employing a more efficient garbage collection mechanism. It uses a compacting garbage collector that reorganizes memory to reduce fragmentation and improve overall memory utilization. By reducing the memory footprint, Hermes allows applications to run smoothly even on low-end devices.

  3. Smoother UI Interactions:

    With React Native Hermes, developers can expect smoother and more consistent user interface (UI) interactions. The improved JavaScript engine ensures that UI updates and animations are executed more efficiently, resulting in a better user experience. This is particularly beneficial for complex applications with heavy UI components or animations.

  4. Better JavaScript Performance:

    Hermes leverages static type analysis to optimize JavaScript execution. It can make certain performance optimizations that are not possible with the traditional JIT compilation approach. This results in faster JavaScript execution, enhancing the overall performance of React Native applications.

Benefits of React Native Hermes

  1. Improved User Experience:

    By reducing startup time and memory usage, React Native Hermes provides a significant boost to the user experience. Applications built with Hermes start up faster and respond quickly to user interactions, leading to higher user engagement and satisfaction.

  2. Enhanced Performance on Low-end Devices:

    Mobile devices with limited resources often struggle to handle resource-intensive applications. React Native Hermes is specifically designed to address this issue. By reducing memory usage and optimizing JavaScript execution, Hermes enables smooth performance even on low-end devices, expanding the potential user base for React Native apps.

  3. Increased Development Efficiency:

    Developers may concentrate more on creating features and functionality with React Native Hermes as compared to performance optimisation. Developers may spend more time enhancing the value of their applications and less time on performance optimisation due to the enhanced performance.

  4. Compatibility and Easy Integration:

    React Native Hermes is fully compatible with existing React Native projects. It can be seamlessly integrated into new or existing projects, providing a hassle-free performance boost without requiring significant code changes.

It is important to note that the actual performance gains achieved with Hermes may vary depending on factors such as the complexity of the application, device specifications, and specific optimizations implemented by the developer. It is recommended to benchmark and test the application in various scenarios to assess the performance improvements brought by Hermes.

React 18:

React 18 introduces several new features and improvements aimed at enhancing the developer experience and performance. Some key highlights of React 18 include automatic batching, which optimizes rendering and improves performance, and React Server Components, a new approach to server-rendered components that enables more efficient data fetching and rendering. Additionally, React 18 introduces Concurrent Mode, which allows for smoother user interfaces and better responsiveness by enabling the rendering of components in a non-blocking manner. Overall, React 18 brings significant advancements to React, making it more powerful and efficient for building modern web applications.

React Native 18 New Architecture:

React Native’s new architecture, often referred to as “Fabric,” is a major reworking of the internals of React Native. It aims to improve performance, stability, and extensibility of React Native applications. The new architecture includes a more efficient threading model, enhanced bridge communication, and better handling of UI components. Fabric provides better control over the rendering pipeline, resulting in smoother animations and improved responsiveness. It also enables more seamless integration with native modules and third-party libraries. The new architecture is designed to make React Native more scalable, adaptable, and capable of handling complex UI interactions, ultimately enhancing the development experience for building cross-platform mobile applications.

Benefits of React Native Hermes

Conclusion

For developers looking to improve the performance of their React Native applications, React Native Hermes is a game-changer. Hermes gives developers the tools they need to make high-performing apps that offer a better user experience by placing a great focus on quicker startup times, decreased memory usage, and increased JavaScript performance. Both developers and users gain a great deal from React Native Hermes’ efficient resource use and enhanced UI interactions. Hermes should be taken into consideration for any React Native project seeking to attain top performance due to its compatibility and simplicity of integration.

In conclusion, React Native Hermes, with its Hermes engine and AOT compilation capabilities, provides a powerful solution for boosting the performance of React Native applications, delivering faster startup times, reduced memory usage, and smoother user interactions. Developers can explore various blogs and resources to gain deeper insights into the benefits and implementation details of Hermes in React Native projects.

How to Patent An App Idea: A Complete Guide

How to Patent An App Idea: Have you invented a unique software app or mobile phone application that you want to protect from copycats? Copyrighting your app idea can help ensure that it remains exclusively yours. However, the process of patenting a mobile phone application or software app idea can be complex and requires careful attention to detail.

To begin with, there is a procedure called the invention disclosure process that can be followed to protect software apps. There are two types of patents that can be obtained for an app: utility patents and design patents. Utility patents protect the functionality of the app, while design patents protect the visual appearance of the app. 

Additionally, it is important to consider copyright protection for your app idea. Before filing a patent application, it is crucial to conduct a thorough patent search to ensure that your app idea does not infringe on existing patents.

Filing a patent application involves going through the invention disclosure process and submitting detailed information about your app idea to the United States Patent and Trademark Office (USPTO). It is recommended to work with a software patent attorney or patent lawyer who specializes in intellectual property law to ensure that your app idea is properly protected under patent law and copyright. This procedure includes an examination process to ensure that your app idea meets all the requirements of the USPTO.

At WEDOWEBAPPS LLC, we highly recommend following a proper procedure to protect your intellectual property as early as possible in the development process. This includes conducting a thorough patent search, registering for copyright, and working with legal experts who specialize in software patents. To ensure you are fully informed, we offer a free consultation to discuss the article and answer any questions you may have.

In this article, we’ll discuss the step-by-step guide on how to patent an app idea and the importance of hiring a software patent attorney. We’ll also explain the patent search process and how it can help you determine if your invention is eligible for a utility patent. Additionally, we’ll answer common questions such as how the USPTO handles similar applications. 

What is a Patent An App Idea?

A patent for an app idea grants you legal protection for a specific novel, non-obvious, and useful aspect of your app’s functionality. While you can’t patent the general concept or the code itself (which falls under copyright), you can potentially patent the unique method or process the app uses to achieve its purpose.

Here’s Detailed Information that you need to know to understand the app patent idea:

  • What it protects: A patent prevents others from copying, using, selling, or modifying your patented app concept without your permission.
  • Requirements for patentability:
    • Novelty: The idea must be new and not previously disclosed publicly.
    • Non-obvious: It can’t be an obvious solution to a problem someone skilled in the field would easily come up with.
    • Useful: The concept must have a practical application and produce a tangible result.

Below are some essential things to keep in mind:

  • Patenting an app idea can be a complex and expensive process. Consulting with a patent attorney is highly recommended to understand the specific requirements and navigate the application process.
  • Even with a patent, enforcing your rights can be challenging and costly if someone infringes on it.
  • Consider alternative measures like keeping your idea confidential and focusing on building a strong brand and user base.

Eligibility Criteria for Patenting a Mobile App Idea

To be eligible for a patent, your mobile app idea must meet certain criteria. First and foremost, it must be novel; that is, it must not have been previously disclosed or made available to the public. This means that if you’ve already released your app or described its features in a public forum, you may no longer be eligible to obtain a patent.

Your app idea must not be obvious to someone skilled in the relevant field of technology. This means that if your idea is simply an incremental improvement on an existing technology or concept, it may not be eligible for patent protection.

Finally, your app idea must have some practical application in the real world; that is, it must be useful and serve some purpose beyond just being an abstract concept. This means that if your app idea is purely theoretical or doesn’t actually do anything useful, it may not be eligible for patent protection.

If you believe that your mobile app idea meets these eligibility criteria, you may want to consider filing a patent application with the United States Patent and Trademark Office (USPTO). Keep in mind that this process can be complex and time-consuming, so it’s important to work with a qualified patent attorney who can help guide you through each step of the process.

The Process of Obtaining a Patent for Your Mobile App Idea

The process of obtaining a patent for your mobile app idea can be complex and time-consuming. It typically involves several steps:

  1. Conducting a Prior Art Search: Before filing your patent application, it’s important to conduct a thorough search of existing patents and other sources of prior art to ensure that your invention is truly novel and non-obvious. By doing this, you can save time and money by avoiding wasting them on a failed application.
  2. Drafting Your Patent Application: Once you’ve conducted a prior art search and determined that your invention is likely to be patentable, you’ll need to draft a detailed patent application that describes your invention in full detail. This will typically include detailed descriptions of the app’s features, functionality, and technical specifications.
  3. Filing Your Patent Application: Once your patent application has been drafted, it must be filed with the USPTO.

How Can You Patent Your Mobile App Idea?

If you have a mobile app idea, you may be wondering if it’s possible to patent it. The answer is yes, but there are certain criteria that your app must meet in order to be eligible for patent protection.

Understanding Mobile Apps and Patentability

Mobile apps are considered software, which means they are generally eligible for patent protection. However, not all mobile apps will meet the requirements for patentability. In order to be patented, an app idea must be novel, non-obvious, and have a specific utility.

Novelty refers to whether or not the app idea is new and unique. If your app is too similar to an existing app or technology, it may not be considered novel enough to qualify for a patent.

Non-obviousness refers to whether or not the app idea would have been obvious to someone skilled in the field of mobile app development. If your idea is something that anyone could come up with easily, it may not meet this requirement. To ensure that your app idea is truly unique and innovative, it is recommended to consult with a software patent attorney who can assist you in obtaining a design patent or utility patent for your app.

Finally, having a specific utility means that the app must serve a particular purpose or solve a specific problem. If your idea doesn’t provide any real benefit or functionality beyond what already exists on the market, it may not be eligible for patent protection.

When Should You File for a Patent?

If you believe that your mobile app idea meets the criteria for patentability, you should consider filing for a patent as soon as possible. This is because once an app has been developed and made available on Google Play or other platforms, it may become more difficult to obtain a patent.

This is because public disclosure of an invention can make it more difficult to prove novelty and non-obviousness when applying for a patent. Therefore, if you want to protect your mobile app idea with a patent, it’s best to file before making any public disclosures about your invention.

How to Patent An Mobile App Idea?

The process of patenting a mobile app idea can be complex and time-consuming. Here’s a general guide on how to patent an app idea:

No. Patent Description Patent Details
1 Select App Patent Type Identify the Ideal Patent Category for Your Mobile App: Choose Between Provisional and Non-Provisional Patent Applications
2 Conduct App Patent Search Conduct Comprehensive Investigations to Confirm Your Mobile Application Concept is Unique. Undertake Global Patent Searches to Prevent Potential Infringement.
3 Prepare and File Your App Patent Application  Detail Your Invention and the Functionality of Your App, Incorporating Schematics and Illustrations as Needed, to Establish Its Uniqueness and Inventive Step.
4 File Provisional or Non-provisional Patent Submit Your Patent Application to the Appropriate Regulatory Body (such as the USPTO), Bearing in Mind the Various Fee Structures and Expecting an Extended Review Period.
5 Timely Response to Any Office Actions Respond promptly to any inquiries or requests for additional information from the patent examiner to prevent any hold-ups in your application’s progress.
6 Maintenance Fee After Your App is Patented Ensure timely payment of ongoing maintenance fees to maintain the validity of your app patent. Engaging a patent lawyer for navigational support through this procedure is advisable.

Why Patent an App Idea?

Protects Your Unique App Idea

Patenting your mobile app idea provides legal protection for your unique concept. It ensures that no one else can copy or steal your idea and use it as their own. By obtaining a patent, you have the exclusive right to make, use, sell, and import your app in the market. This means that anyone who wants to use your app must get authorization from you first.

A patent also gives you leverage if someone tries to infringe on your rights. If someone uses your app without permission or creates a similar version of it, you can take legal action against them and seek compensation for damages.

Prevents Others from Copying Your App

Mobile apps are easy to replicate, which makes it crucial to protect them with a patent. Without a patent, anyone can copy your idea and create an identical or similar app without facing any consequences. This puts all of the time, effort, and resources you put into developing the app at risk.

By obtaining a patent for your mobile app idea, you prevent others from copying it without permission. This ensures that only authorized parties can develop similar apps based on the original concept.

Increases the Value of Your App

Patenting an app idea adds value to it by making it more attractive to potential investors or buyers. Having a patent shows that you have taken steps to protect your intellectual property rights and have confidence in its uniqueness in the market.

Investors are more likely to invest in an app with patents because they know that there is less risk involved with infringement issues down the line. Having a patented mobile application increases its resale value if you decide to sell it later on.

Provides Legal Rights to Sue Infringers

If someone infringes upon your patented mobile application idea by creating something very similar or identical without permission from you first – then, as mentioned earlier – suing them is now possible under the law. By having a patent, you have legal rights to sue infringers and seek damages for any harm caused by their unauthorized use.

Helps Secure Funding and Investors

Patenting an app idea can help secure funding from investors because it shows that you have taken steps to protect your intellectual property rights. Investors are more likely to invest in a mobile application with patents because they know that there is less risk involved with infringement issues down the line.

Investors also tend to be more interested in patented apps because it means that the app has something unique and innovative about it. Having a patent can help your app stand out from the competition and increase its chances of being funded.

Enhances Marketability and Credibility

When you have a patented mobile application idea, it increases your credibility as an entrepreneur or business owner. It shows potential customers, partners, investors, and others in the industry that you are serious about protecting your intellectual property rights.

Having a patent also enhances the marketability of your app by making it stand out from other similar apps on the market. It gives consumers confidence that they are using something unique and innovative, which can lead to increased downloads, usage, and revenue.

Eligibility Criteria To Qualify For A Patent

1. It Must Be an Invention

In order to qualify for a patent, your app idea must be an invention. This requires that it be a brand-new and helpful procedure, device, product, material composition, or any new and helpful enhancement thereof. Essentially, this means that your app idea should not already exist on the market.

2. Your app idea needs to be new and unique.

One of the most important eligibility criteria for a patent is novelty. This means that your app idea must be new and not previously disclosed or available to the public. If someone else has already created something similar to your app idea or if you have publicly disclosed your idea before filing for a patent, then it may not meet the novelty requirement.

It’s important to conduct thorough research before applying for a patent to ensure that there are no existing patents or products similar to yours on the market.

3. It Should Be Qualified As Useful

Another criterion for eligibility is usefulness. Your app idea must have some practical application and be useful in some way. The invention must not only work as intended but also provide some kind of benefit or solve a problem. Additionally, it should be eligible for a design patent.

For example, if you have developed an app that helps people manage their finances more effectively by tracking their spending habits and offering personalized budgeting tips, then it would likely meet the usefulness requirement.

Software And App Ideas May Be Eligible For Patent Protection If They Meet These Criteria

Software and mobile applications can be patented just like any other invention as long as they meet these eligibility criteria. However, it’s important to note that obtaining a software patent can be more challenging than other types of patents due to recent changes in patent law.

To increase your chances of successfully obtaining app patents for your app development, consider working with an experienced patent attorney who can help guide you through the process and ensure that all requirements for the app store are met, including filing a provisional app.

How to Determine Whether Your App Idea Has Previously Been Patented Or Not?

Conduct a Thorough Search on the USPTO Website to Check If Your App Idea Has Already Been Patented.

The federal organization in charge of issuing patents is the United States Patent and Trademark Office (USPTO). You must perform a comprehensive search on the USPTO website to see if your app idea has previously been patented. All patents issued in the US, including those pertaining to mobile apps, are listed in the USPTO’s database.

To start your search, go to the USPTO website and click on “Patents” in the main menu. From there, you can use the “Patent Full-Text and Image Database” to search for existing patents using keywords related to your app idea. You can also use various filters such as patent type, issue date, inventor name, and assignee name to narrow down your search results.

Use Different Keyword Combinations and Variations of Your App Idea to Ensure a Comprehensive Search.

When searching for existing patents related to your app idea, it’s important to use different keyword combinations and variations of your app idea. This will help ensure that you conduct a comprehensive search and don’t miss any relevant patents that may be similar or identical to your app idea.

For example, if your app idea is related to social networking, you might want to try searching for keywords such as “social media,” “online communities,” “networking platforms,” and so on. By using different keyword combinations and variations of your app idea, you can increase your chances of finding any relevant patents that may have been missed with a narrower search.

Check for Similar Patents That May Overlap With Your App Idea, Even If They Are Not Identical.

Just because an existing patent isn’t identical to your app idea doesn’t mean it won’t affect its patentability. If there are any similar patents that overlap with your app idea, you may need to make some modifications to your app idea to avoid infringing on those patents.

To check for similar patents, you can use the USPTO’s “Patent Application Information Retrieval” (PAIR) system. This system allows you to view the status of pending patent applications and published patent applications that have not yet been granted. By reviewing these applications, you can get a better understanding of what types of inventions are already patented or pending in your field.

Look for Any Pending Patent Applications That May Affect the Patentability of Your App Idea.

It’s also important to look for any pending patent applications that may affect the patentability of your app idea. Even if an existing patent isn’t identical to your app idea, a pending application could be granted in the future and prevent you from obtaining a patent for your app idea.

To search for pending patent applications, you can use the USPTO’s “Public PAIR” system. This system allows you to view information about published and unpublished patent applications filed with the USPTO. By reviewing these applications, you can determine whether there are any pending patents that may affect the patentability of your app idea.

Consider Hiring a Patent Attorney or Agent to Conduct a Professional Patent Search and Provide Legal Advice.

If you’re unsure about how to conduct a thorough search for existing patents related to your app idea or if you need legal advice on how to proceed with obtaining a patent, it’s recommended that you hire a patent attorney or agent. These professionals have experience conducting professional searches and providing legal advice on all aspects of intellectual property law.

A good attorney or agent will help guide you through each step of the app development process and ensure that all necessary paperwork for your software app or provisional app is completed correctly and submitted on time. They can also provide valuable insights into how best to protect your intellectual property rights for your app concept beyond just obtaining a patent.

Keep in Mind That Even If Your App Idea Is Not Patented, It May Still Be Protected by Other Forms of Intellectual Property Such as Trademarks or Copyrights.

Finally, it’s important to keep in mind that even if your app idea is not patented, it may still be protected by other forms of intellectual property such as trademarks or copyrights.

Basic Steps to Follow to Patent an App Idea

Discover and Register with a Patent Lawyer

The first step in patenting an app idea is to find a qualified patent attorney or agent who can help you navigate the complex legal requirements of the patenting process. A good patent lawyer will have experience working with mobile app developers and understand the nuances of this particular industry.

Once you have found a suitable attorney, you should register with them by providing your contact information and details about your app idea. This will allow them to keep track of your progress throughout the patenting process and provide you with updates as needed.

Disclose Your Mobile App Invention

Before filing for a patent, it is important to document all aspects of your app idea in detail. This includes describing how it works, its unique features and functionalities, and any potential use cases or applications.

This invention disclosure process is critical because it helps establish a clear record of your idea’s originality and serves as evidence that you were the first to conceive of it. It also allows your attorney to prepare a strong patent application that accurately reflects the scope of your invention.

Exercise Patent Search

One of the most important steps in patenting an app idea is conducting a thorough search to ensure that no one else has already patented something similar. This involves researching existing patents in relevant fields, reviewing public databases, and consulting with experts in your industry.

A comprehensive search will help identify any potential roadblocks or challenges that may arise during the application process. It can also help refine your invention disclosure by highlighting areas where you can differentiate yourself from existing solutions on the market.

File a Provisional or Non-Provisional Patent Application

Once you have completed these initial steps, it’s time to file a provisional or non-provisional patent application with the appropriate government agency. The type of application you choose depends on several factors, including whether you want to secure priority status for your invention and whether you are willing to invest in a more comprehensive application upfront.

A provisional application provides temporary protection for your invention, giving you up to 12 months to file a non-provisional application. A non-provisional application is a more detailed and comprehensive document that includes all the necessary information about your app idea.

Submit Your Patent Application

After filing your patent application, it will undergo multiple rounds of review and examination by the patent office. This process can take several years, during which time you may need to provide additional documentation or make revisions to your application based on feedback from the examiner.

Working closely with your attorney throughout this process is critical to ensuring that everything is filed correctly and that you are meeting all necessary deadlines. It’s also important to remain patient and persistent, as obtaining a patent for an app idea can be a lengthy and complex process.

how to patent an app

How Long Does It Take to Patent an App Idea?

The Average Time to Get a Patent for an App Idea is 22 Months

The process of patenting an app idea can be lengthy, with the average time to get a patent being around 22 months. This timeline can vary depending on factors such as the complexity of the idea and the backlog of applications at the patent office. It’s important to note that this timeline is just an estimate and that it could take longer or shorter than 22 months.

Steps Involved in Patent Application Process

The patent application process involves several steps, including filing, examination, and issuance. The first step is filing a patent application with the United States Patent and Trademark Office (USPTO). This application includes a detailed description of your app idea along with any drawings or diagrams that help explain how it works.

Once your application has been filed, it will be assigned to a patent examiner, who will review it for completeness and accuracy. The examiner may request additional information or clarification before moving forward with the examination phase.

During the examination, the examiner will review your application in detail to determine whether your app idea meets all of the requirements for patentability. If there are any issues or objections raised during the examination, you may need to make changes to your application or provide additional information.

If your application is ultimately approved by the USPTO, you will receive a notice of allowance indicating that your app idea has been granted a full patent.

Factors That Affect How Long It Takes To Get A Patent

As previously mentioned, several factors can impact how long it takes to get a patent for an app idea. One major factor is the complexity of your idea; more complex ideas may require more time for examination and approval.

Another factor is the backlog of applications at the USPTO – if there are many other applications ahead of yours in line for examination, it could take longer for your application to be reviewed and approved.

Expedited options are available for an additional fee, which can reduce the time it takes to get a patent to as little as six months. However, these options may not be suitable or necessary for all app ideas.

Provisional Patent Applications

Some app developers choose to file a provisional patent application before filing a full patent application. A provisional application is less formal than a full application and serves as a placeholder while you work on developing your idea further.

Filing a provisional application does not guarantee that your app idea will be granted a full patent. However, it can provide some protection while you continue to refine and develop your idea.

What to Do If the App Idea Is Already Patented?

If you have an app idea that you want to patent, one of the first steps is to conduct a patent search. This will help you determine whether your idea has already been patented or not. However, what should you do if you find out that your app idea is already patented? Here are some things to consider:

Conduct a Patent Search to Determine If the App Idea Is Already Patented

Before applying for a patent for your app idea, it’s essential to conduct a thorough search of existing patents. This involves checking various databases and resources, such as the USPTO (United States Patent and Trademark Office) website, Google Patents, and other online resources.

If you discover that someone has already patented an app idea similar to yours, it doesn’t necessarily mean that you can’t proceed with your own patent application. You may still be able to get a patent if your idea is different enough from the existing one.

Consider Licensing the Patent from the Owner

In some cases, it may be possible to license the existing patent from its owner for app development. Licensing allows you to use someone else’s intellectual property legally while paying them royalties or licensing fees for your software app.

Licensing can be beneficial because it gives you legal access to use someone else’s intellectual property, such as an app patent, which can provide protection against potential infringement lawsuits and save significant investment in research and development costs.

Determine If The Existing Patent Is Still Valid And Enforceable

Just because there is an existing patent on an app idea does not mean it is still valid or enforceable. Patents have expiration dates and requirements for maintenance fee payments that must be paid regularly; otherwise, they become invalid.

It’s crucial that when researching existing patents on similar apps, you always check their status with the USPTO database before making any decisions about proceeding with your own application.

Consult with a Patent Attorney to Review the Existing Patent and Assess Potential Infringement Risks

If you’re unsure whether your app idea infringes on an existing patent, it’s essential to consult with a patent attorney. An experienced patent attorney can review the existing patent and assess potential infringement risks.

They can also help you determine whether your app idea is different enough from the existing one to warrant applying for your own patent.

Consider Modifying the App Idea to Avoid Infringing on the Existing Patent

If you discover that your app idea infringes on an existing patent, you may be able to modify it to avoid any infringement issues. This could involve changing certain features or functionalities of your app so that they are sufficiently different from those in the existing patent.

Modifying your app idea can be a cost-effective way of avoiding legal disputes while still being able to bring your product to market.

If Necessary, Challenge The Validity of The Existing Patent Through Legal Means

If you are involved in app development and believe that an existing patent is invalid or unenforceable, you may be able to challenge its validity through legal means. This involves filing a lawsuit against the owner of the patent and arguing that it should not have been granted in the first place.

Challenging an existing patent can be expensive and time-consuming, but it may be necessary if you want to protect your own intellectual property rights.

Filing a Provisional or Nonprovisional Patent Application: Which One is Right for You?

Choosing the Right Patent Application Process

If you have an app idea and want to protect it from being copied, then filing a patent application is a must. However, choosing the right type of patent application can be confusing. The two most common types of patent applications are provisional and nonprovisional.

What is a Provisional Patent Application?

A provisional patent application is a quick and inexpensive way to establish a filing date for your app idea. It allows inventors to secure their inventions without having to provide formal patent claims or an oath or declaration. This means that inventors can file their ideas without providing all the details about how their invention works.

Filing a provisional patent application gives inventors 12 months to file a nonprovisional patent application, which provides stronger protection for their invention. During this time, an inventor can continue working on their invention and gather more information about its potential market value before deciding whether to invest in the more expensive and time-consuming process of filing for a nonprovisional patent.

One important thing to note about provisional patents is that they are not examined by the USPTO (United States Patent and Trademark Office) and do not result in a granted patent. Instead, they serve as placeholders until the inventor files for a nonprovisional patent.

What is a Nonprovisional Patent Application?

A nonprovisional patent application provides stronger protection than a provisional one but requires more effort, time, and money. Unlike provisional patents, nonprovisional patents require inventors to provide detailed descriptions of their inventions along with formal claims regarding what makes them unique.

Nonprovisional patents undergo examination by the USPTO after filing. During this process, a patent examiner will review the application and determine whether the invention is eligible for a patent. If approved, the inventor will receive a granted patent that provides exclusive rights to their invention for up to 20 years.

Choosing Between Provisional and Nonprovisional Patent Applications

Choosing between filing a provisional or non-provisional patent application depends on several factors. If you need to secure funding or attract potential investors, then filing a provisional app can be an excellent option. It allows you to establish your invention’s priority date without having to spend time and money preparing formal claims.

On the other hand, if you have enough resources and are confident about your invention’s market value, investing in a nonprovisional patent application might be more beneficial. While it requires more effort and money upfront, it provides stronger protection for your invention and gives you exclusive rights over it for up to 20 years.

If you’re unsure about which type of application is right for you, consider seeking a free consultation with a patent attorney. They can help guide you through the process of filing for either type of patent application based on your specific needs and budget.

When Do You Need to File for a Patent?

Filing Date Determines Priority

The most important thing to remember when filing for a patent is that the filing date of your application determines the priority of your invention. This means that if someone else files a patent application for the same invention after you, but before your filing date, they will be granted the patent instead of you. Therefore, it is crucial to file for a patent as early as possible to ensure that you have priority over others who may try to claim the same invention.

Preventing Others from Claiming Your Invention

Filing for a patent early can also prevent others from claiming the same invention. Once your patent application has been filed, it becomes a public record and anyone who tries to file a similar application will be rejected based on your prior filing date. This can give you a significant advantage in the marketplace by allowing you to exclusively develop and market your app without fear of competition.

Consult with a Patent Attorney

It is important to consult with a patent attorney to determine the best time to file for a patent. An experienced attorney can help you navigate through the complex process of obtaining a patent and provide valuable advice on how to protect your intellectual property rights. They can also help you determine whether or not it is necessary or advisable to file for additional patents beyond just protecting an app idea.

Losing Your Right To File

Waiting too long to file for a patent can result in losing the right to do so. The US Patent and Trademark Office (USPTO) operates under what’s known as “first-to-file” rules, which means that whoever files first gets priority over subsequent filings regardless of who invented it first. If someone else files before you, even if they came up with their version later than yours, they could potentially block your ability to receive any patents related specifically to or broadly related to a similar subject matter.

Waiting too long can lead to a loss of novelty in your invention. Novelty is one of the requirements for obtaining a patent, and if your invention has been publicly disclosed or sold for more than one year prior to filing, you may no longer be eligible for a patent.

Patenting an App Idea: How Much Does It Cost?

Overview

Are you considering patenting your mobile app idea? If so, cost is one of the most crucial things to take into account.

Patent Costs for Mobile Apps

The cost of patenting a mobile app can vary widely, depending on several factors. One of the most significant factors is the complexity of your app. The more complex your app is, the more time and effort it will take to draft a patent application. Different types of patents have different costs associated with them.

A provisional patent application is often less expensive than a non-provisional patent application. A provisional patent application provides temporary protection for your invention while you work on finalizing your non-provisional application.

According to LegalZoom, the cost of filing a provisional patent application can range from $1,500 to $3,500. However, keep in mind that this only provides temporary protection, and you’ll still need to file a non-provisional application within 12 months if you want long-term protection.

On average, non-provisional patents can cost anywhere from $5,000 to $15,000 or more, depending on the complexity of your invention and how much work needs to be done by your attorney.

Legal Fees for Patenting an App

In addition to filing fees for patents themselves, there are also legal fees associated with drafting and submitting a patent application. Hourly rates for attorneys who specialize in intellectual property law can range from $150 per hour up to $400 or more per hour.

Your total legal fees will depend on how much work needs to be done by your attorney for the app patent. For example:

  • Drafting and submitting a provisional patent might take 10-20 hours.
  • Drafting and submitting a non-provisional patent might take 40-60 hours or more.

It’s important to work with an attorney who has experience in patent law and can help you navigate the process of applying for a patent. They can also help ensure that all costs associated with patenting your app are properly accounted for and managed.

Maintenance Fees

Once you’ve been granted a patent, there are ongoing maintenance fees that you’ll need to pay in order to keep your patent active. These fees can add up over time and typically range from several hundred dollars to several thousand dollars per year.

Maintenance fees are required at specific intervals throughout the life of your patent, so it’s essential to factor these costs into your overall budget for patenting your mobile app idea.

how to patent an app idea

How Much Time Does It Take to Patent a Mobile App?

The Average Time Required for Patenting a Mobile App

Patenting a mobile app is a complex process that requires time, effort, and resources. On average, it takes around 2-3 years to get a patent granted for a mobile app. However, the actual time required can vary based on several factors.

Factors Affecting the Time Required for Patenting

One of the most significant factors affecting the time required for patenting is the complexity of the mobile app idea. If your app idea is unique and innovative, it may require more time to conduct thorough research and draft a comprehensive patent application. Similarly, if your app idea has multiple features or claims, it may take longer to prepare and file the patent application.

Another factor that can impact the time required for patenting is the number of office actions you receive from the USPTO (United States Patent and Trademark Office). An office action is a formal letter sent by a USPTO examiner pointing out problems with your patent application. Responding to these actions can take additional time and resources.

Steps Involved in Patenting a Mobile App

The process of patenting a mobile app involves several steps. These include:

Conducting a Patent Search

Before filing your patent application, it’s essential to conduct thorough research to ensure that your idea is unique and not already patented by someone else. You can do this by conducting a comprehensive search of existing patents using online databases like Google Patents or by hiring an attorney who specializes in intellectual property law.

Drafting and Filing Your Patent Application

Once you’ve conducted your research, you’ll need to draft your patent application carefully. This document should describe your invention in detail and explain how it differs from existing technologies or ideas. After drafting your application, you’ll need to file it with the USPTO along with any necessary fees.

Responding to Office Actions

After submitting your patent application, you may receive office action from the USPTO examiner. These actions may require you to make changes or provide additional information about your invention. It’s essential to respond promptly and thoroughly to these actions to ensure that your application is approved.

Hiring a Patent Attorney or Agent

Hiring a patent attorney or agent can help expedite the process of patenting your mobile app and ensure that all legal requirements are met. A qualified attorney can assist you with conducting a thorough patent search, drafting a comprehensive patent application, and responding to office actions.

Ongoing Maintenance Fees and Legal Disputes

It’s important to note that even after obtaining a patent for your mobile app, ongoing maintenance fees and potential legal disputes can require additional time and resources. As the owner of a patented invention, you’ll be responsible for paying maintenance fees throughout the life of the patent. If someone infringes on your patent rights, you may need to engage in legal proceedings to protect your intellectual property.

Conclusion

Patenting an app idea is an essential step towards protecting your intellectual property and securing investment funding for your business. By following the basic steps and meeting eligibility criteria set by the USPTO, you can obtain exclusive rights to prevent others from copying or stealing your ideas. However, it is crucial to consult with a licensed attorney before proceeding with any legal action related to patents.
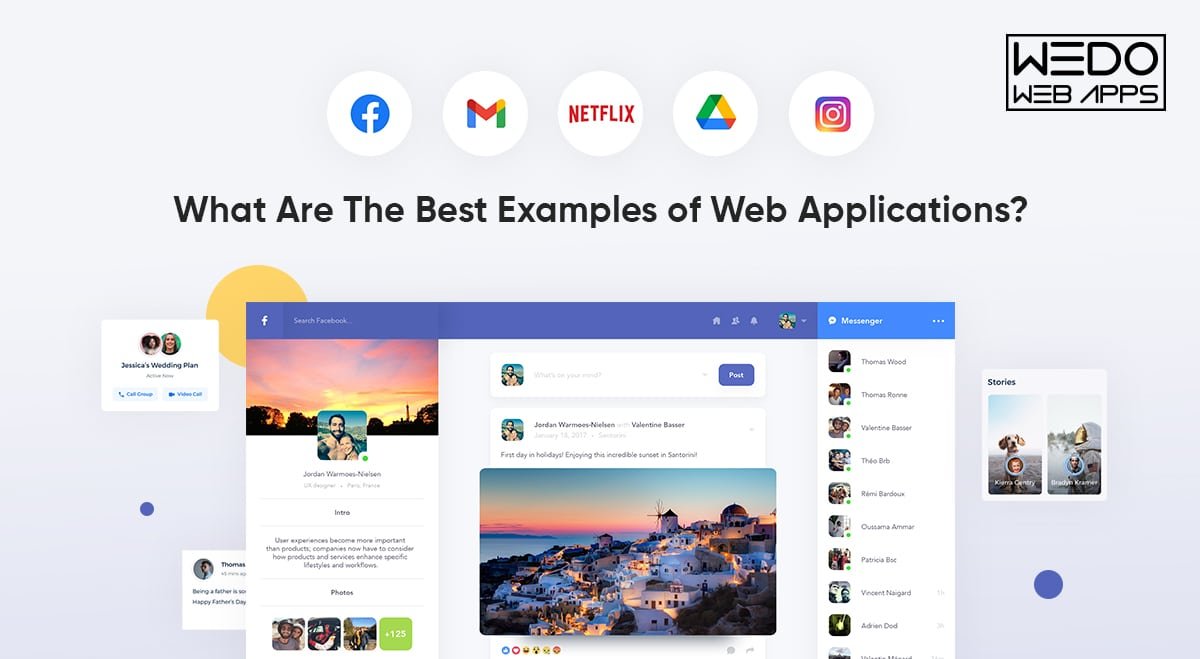
From Concept to Launch: The Real Costs of Building an App Like Instagram

Instagram has revolutionized the way we share our lives with others through photos and videos. With over a billion active users, it’s no surprise that many entrepreneurs and businesses are looking to develop their own social media app. However, building an app like Instagram is no small feat – it requires a lot of planning, resources, and most importantly, a significant investment of time and money. With the rise of new social media platforms and photo editing apps, it’s essential to keep up with the latest trends and technologies. As such, developing an android application for photo and video sharing requires a dedicated software development team, a solid app development process, and careful planning to bring your ideas to life. It’s also important to consider features like like4like to encourage user engagement and increase app usage.

With platforms like Instagram leading the way, people are more connected than ever before. Instagram, with its photo and video sharing capabilities, has revolutionized the way we interact with social networks. If you’re an entrepreneur or a business looking to build a similar application, this article will guide you through the process and shed light on the cost involved. In this blog post, we’ll explore the real costs of building an Instagram like app, from concept to launch. We’ll look at the various stages of app development for Android, the resources needed, and how to budget effectively to ensure your app is a success. Additionally, we’ll cover features such as like4like and super likes to make your application stand out in the market.

What is the Mobile App Development Cycle?

The mobile app development cycle is the process of creating a mobile app, from concept to deployment. It includes several phases, such as ideation, designing, development, testing, and deployment. The app development process typically involves a team of developers, designers, project managers, and quality assurance specialists.

The Development Process of Instagram Lite

The famous photo-sharing program Instagram now has a lighter version called Instagram Lite, perfect for those who love apps like4like and instant social networks. For consumers with sluggish internet connections or low-end devices, it is ideal because it is made to be speedier and more effective.

Here is a quick rundown of how Instagram Lite, an android app, was developed as an app with main features such as like4like and super likes.

1. Ideation

Ideation is the initial stage of the app development process for Android software. The development team brainstormed ideas for the app and came up with the concept of Instagram Lite, which includes essential features like4like hashtags. They focused on creating an app that is lightweight, fast, and efficient, with all the essential features of the main app.

2. Designing

After the ideation phase, the development team moved on to the design phase. They created wireframes and prototypes of the android app, which helped to visualize the layout, features, and functionality of the app. Users can download the app and use it to gain more likes on their social media posts through the like4like feature. The verdict is that the team did a great job in designing and developing the app.

3. Development

Once the design was finalized, the android development team started building the app. They used various technologies, such as React Native and Java, to develop the app’s backend and front end. They also integrated the app with Instagram API to provide all the essential features like4like, download, and followers.

4. Testing

After developing the android app, it went through several rounds of testing. The testing phase involved both automated and manual testing, which helped to identify and fix any bugs or issues in the app’s main features. Additionally, we tested the app’s compatibility with IG and ensured that it worked seamlessly with like4like.

5. Deployment

Deployment is the last phase of the app development cycle. The app’s main features were carefully crafted to include like4like, which allows users to easily gain Instagram likes and grow their Instagram account. The app was launched on the Google Play Store and made available to users worldwide. The development team also monitored the app’s performance and continued to make improvements, including optimizing the like4like feature for better user experience.

Essential Features of an Instagram like App

To create a successful social media platform, incorporating key features similar to Instagram is vital. Here are a few essential features to consider: like4like, marketing app, followers app, and likes.

  1. User Registration and Authentication: Allow users to create accounts using email, phone numbers, or social media accounts. 
  2. Photo and Video Upload: Enable users to upload photos and videos directly from their mobile devices. Incorporate features like filters, captions, and tagging for enhanced user engagement.
  3. Social Media Integration: Integrate with popular social media platforms, allowing users to share their posts and expand their reach beyond the app.
  4. Explore and Discover: Implement a discovery feature that recommends content based on user preferences, interests, and trending topics.
  5. Interactions and Engagement: Enable users to like, comment on, and share posts. Incorporate direct messaging functionality to facilitate private conversations.
  6. Stories and Highlights: Introduce a “stories” feature where users can share temporary content that disappears after 24 hours. Provide options to save and highlight these stories for later viewing.

The concept and planning phase of building an app

The concept and planning phase is an integral part of building an app from scratch. It lays the foundation for the entire project and sets the tone for what is to come. When it comes to creating an Instagram like app, understanding the main features, followers, likes, and account management are essential factors to keep in mind during this stage.

One of the most important considerations is market research. This involves analyzing the competition, understanding the target audience, and identifying gaps in the market that your app can fill. By doing this, you can gain a better understanding of what users are looking for in a social media app, and tailor your features and functionalities accordingly. Additionally, it’s important to consider how your app can help users gain more Instagram likes and followers, as well as manage their account effectively with an Instagram liker.

Once you have a clear idea of what you want to achieve with your app, it’s time to start identifying key features and functionalities to include. This can range from basic features like user profiles and photo sharing, to more advanced features like filters and editing tools. By mapping out these features early on, you can ensure that your app is both user-friendly and engaging. Additionally, if your app is focused on social media, it may be beneficial to include features such as Instagram likes, free Instagram, and Instagram followers to increase user engagement and attract new users.

Of course, one of the biggest considerations during the planning phase is estimating the costs of development. This includes everything from design and coding, to testing and bug fixes. Depending on the complexity of the app and its main features, likes, and followers, this can be a significant investment. It’s important to be realistic about your budget and to work with a team that has experience in building apps of a similar nature.

Finally, it’s important to consider the budget required for marketing and user acquisition post-launch. While the initial development costs are significant, it’s important to remember that building an app is only half the battle. Once the app is live, you’ll need to invest in marketing efforts to ensure that users find and download the app. This can include everything from social media ads to influencer partnerships, followers, free Instagram likes, and is a critical component of the overall success of the app.

In conclusion, the concept and planning phase is a crucial part of building an Instagram-like app that can attract many likes and followers. By conducting thorough market research to identify what features and functionalities are most popular among potential users, estimating development costs, and planning for post-launch marketing efforts, you can set your app up for success in gaining many likes and followers from day one.

Understanding the Instagram Phenomenon

Instagram, a mobile application launched in 2010, quickly gained popularity due to its user-friendly interface and unique features. It allows users to share photos and videos, apply filters, add captions, and engage with other users through likes, comments, and direct messaging. With the ability to gain followers through engaging content, Instagram Reels, a short videos feature, further elevated its appeal and opened up new possibilities for content creators.

The Cost to Build an App Like Instagram: One of the crucial considerations when developing an app like Instagram is the cost involved. Several factors affect the cost of developing an app, including:

  1. App Development Company: Collaborating with a professional app development company is essential for a successful project. The cost may vary based on the company’s expertise, location, and reputation.
  2. Features and Functionality: The complexity and number of features you want in your app will impact the development cost. A basic version may include photo and video uploading, social media account creation, and interaction capabilities. Advanced features such as stories highlights, photo editing tools, and video sharing require additional resources and expertise.
  3. Platform Compatibility: Developing an app for a single platform, like iOS or Android, is cost-effective. However, to reach a wider audience, you might consider developing for both platforms, which increases the overall development cost.
  4. App Testing and Maintenance: Rigorous testing is crucial to ensure a bug-free and seamless user experience. Additionally, ongoing maintenance and updates contribute to the overall cost.

Determining the exact cost to build an app like Instagram, which allows users to gain followers and likes, is challenging as it depends on various factors. However, a ballpark estimate for a basic version can range from $50,000 to $100,000, while more advanced versions with additional features for increasing followers and likes can exceed $250,000.

How Much Does it Cost to Develop an App like Instagram?

Millions of people share photographs and videos on Instagram every day, making it one of the most widely used social media sites in the world. But have you ever wondered how much it actually costs to develop an app like Instagram? In this section, we’ll explore the real costs involved in building an app like Instagram from concept to launch.

The initial investment required to develop an app like Instagram with features such as likes and followers can be quite significant. Designing a user-friendly interface, creating a database to store user information, and developing the app’s core functionality for these features are all critical components that require a skilled team of developers. According to some estimates, the average cost to develop an app like Instagram with likes and followers can range from $100,000 to $1.5 million, depending on the complexity of the app and the development team’s location.

In addition to the initial development costs, there are also ongoing expenses to consider. For example, server hosting, maintenance, and updates are all critical components of app development that require ongoing investment. These costs can add up quickly, especially if your app becomes popular and attracts millions of followers, likes.

Another major expense associated with app development is marketing and promotion. You’ll need to invest in advertising and other marketing strategies to attract users and build a user base. This can be a significant expense, especially if you’re competing against other well-established apps in the market. Additionally, gaining followers and increasing Instagram likes can also add to the cost of promoting your app.

To minimize costs and maximize ROI for your marketing app, there are several strategies you can consider. One option is to outsource development to affordable offshore teams that can deliver high-quality work at a fraction of the cost of local developers. You can also consider using open source tools and frameworks to reduce development costs and speed up the development process. Additionally, to increase engagement on your Instagram app, you may want to focus on getting more likes and followers.

In summary, developing an app like Instagram requires significant investment, both in terms of time and money. However, with careful planning and strategic decision-making, it’s possible to minimize costs and achieve a high ROI. By understanding the real costs involved in app development, you can make informed decisions about how to best allocate your resources and build an app that gains followers and likes from users.

How Long Does it Take to Develop an App?

The complexity and scope of an app determine how long it takes to build. While more complex apps may take months or even years to design, simpler apps may only take a few weeks. For instance, it took about six months to create Instagram App Lite, which has gained millions of likes and followers.

app development process and costs

Developing an MVP (Minimum Viable Product)

When it comes to building an app with a social media aspect, such as Instagram, the first step is to develop a Minimum Viable Product (MVP). This is a basic version of the app that includes only the most essential features, such as followers and Instagram likes. The MVP is designed to test the concept and determine whether it is worth investing more time and money into the app.

Setting up the Account Authorization

The first step in developing an MVP is to set up the account authorization. This is the process that allows users to sign up and log in to the app. This feature is essential for any app that requires user data, including followers and Instagram likes.

Create and Edit Profile

Once the user has logged in to the Instagram app, they should be able to create and edit their profile. This feature allows users to provide information about themselves and their interests, as well as gain more followers and Instagram likes. It also allows them to customize their profile picture and other details.

Creating the Messaging Feature

Messaging, Instagram likes, and followers are crucial features of any social media app. It allows users to connect with each other, communicate in real-time, and engage with their audience through likes and followers. This feature can be developed using a variety of technologies, including real-time messaging protocols and push notifications.

Uploading the Photo and Video

The ability to upload photo and video is a key feature of any social media app, including Instagram. This feature should allow users to upload media files from their device or from other sources. It should also allow users to crop, rotate, and edit their media files to attract more Instagram likes and followers.

Customizing or Editing Photos

The ability to customize or edit photos is another important feature of any social media app, especially for those who want to gain more Instagram likes and followers. This feature should allow users to apply filters, adjust brightness and contrast, and add text or other elements to their photos.

Implementing the Extra Settings

Extra settings, such as push notifications, privacy settings, and language preferences, are also essential features of any social media app, including Instagram likes and followers. These settings should allow users to customize their experience and control how they interact with the app.

Connecting with the Social Media

Integrating social media platforms, such as Facebook, Twitter, and Instagram, is an excellent way to increase user engagement and promote the app. This feature should allow users to share their content on other platforms and connect with their friends on other social media sites.

Integrating the Geo-location Feature

Integrating the geo-location feature in the Instagram app allows users to share their location with other users, potentially increasing their Instagram likes and followers. This feature can be used to find friends in the area or to discover new places to visit.

The Search Option

Finally, the search feature is an essential component of any social media app, including Instagram. This feature should allow users to search for other users, content, hashtags, likes, and followers within the app.

In conclusion, developing an MVP for an app like Instagram requires a range of essential features. These features include account authorization, profile creation and editing, messaging, media uploading and editing, extra settings, social media integration, geo-location, and search. Additionally, it is important to consider features such as followers and likes to ensure your app caters to the needs of users who value engagement metrics. By developing an MVP that includes these features, you can test your concept and determine whether it is worth investing more time and money into your app.

The App Design – UI and UX

One of the most crucial elements of any successful app is its user interface (UI) and user experience (UX). Simply put, a user-friendly interface can make or break an app, no matter how great its features are. The design of an app should be intuitive and easy to navigate, ensuring that users can quickly and easily find what they need, without getting lost or frustrated.

When it comes to app design, there is often a delicate balance between aesthetics and functionality. While a visually pleasing interface can be appealing, it’s important not to sacrifice functionality for the sake of looks. A designer must strike the perfect balance between form and function to create an app that is both beautiful and practical. This is especially important for apps that rely on followers and Instagram likes.

Hiring a professional UI/UX designer is an investment that can pay off in likes and followers. A talented designer can not only create an app that is visually stunning, but also one that is intuitive and easy to use. However, this investment comes with a cost, and it’s important to budget accordingly. The cost of hiring a professional UI/UX designer can vary widely depending on the scope of the project, but it’s important to keep in mind that a quality designer can be worth their weight in gold for increasing likes and followers.

One critical step in the app development process is user testing. Once the app design is complete, it’s important to put it in the hands of real users, including followers, to gather feedback and ensure optimal user experience. User testing can help identify any pain points or areas for improvement, allowing designers to make necessary adjustments before launching the app. Additionally, tracking Instagram likes can also provide insight into user engagement and satisfaction.

In conclusion, the design of an app is a crucial factor in its success. A user-friendly interface that strikes a balance between aesthetics and functionality can make all the difference in creating an app that followers love. Investing in a professional UI/UX designer and conducting thorough user testing can ensure that your app is well-designed and optimized for the best user experience possible, especially for those looking for Instagram likes.

Some other Additional Costs

While the initial build-out of an app is certainly a major expense, it’s important to remember that the costs of app development don’t end there. Ongoing maintenance and updates are critical to ensure that your app remains relevant and functional in a fast-paced, ever-changing technological landscape. If you want to increase your followers and Instagram likes, regular updates are necessary to keep your app up-to-date.

One of the key strategies for managing app development costs is to establish a clear plan for ongoing maintenance and updates from the outset. This can include allocating resources for regular bug fixes, security updates, and feature enhancements. Additionally, it’s important to consider the app’s followers and their needs, as well as tracking Instagram likes to ensure the app is meeting user expectations.

It’s also important to recognize the role that user feedback from followers and Instagram likes can play in shaping ongoing development efforts. By engaging with your user base and soliciting feedback on a regular basis, you can gain valuable insights into how your app is being used and identify areas where improvements or new features may be needed.

Overall, building an app like Instagram requires a significant investment of time, money, and resources to attract followers and gain likes. However, by taking a strategic approach to app development and focusing on ongoing maintenance, user feedback, and engagement, you can help ensure that your app remains a valuable tool for your audience to increase their followers and likes.

The App Development Team

When it comes to make an app like Instagram, one of the most important aspects is hiring the right app development team. The development team is responsible for bringing your app concept to life and ensuring that it is functional, user-friendly, and visually appealing. So, how do you go about finding and hiring the right development team for your app?

First and foremost, it is important to understand the average salaries of developers and designers involved in the app development process. Depending on the location and experience of the team members, salaries can vary greatly. For example, a senior iOS developer in the United States can earn anywhere from $120,000 to $200,000 per year. A UI/UX designer can earn anywhere from $70,000 to $140,000 per year.

When it comes to building an app like Instagram, you have the option of outsourcing the development work or hiring an in-house team. Outsourcing can be a cost-effective option, but it can also come with its own set of challenges. Communication can be more difficult with a remote team, and there is a risk of quality issues if the team is not properly vetted. However, with the right team, outsourcing can lead to a successful app with a large following and many likes.

On the other hand, hiring an in-house team can be more expensive, but it can also provide greater control and flexibility over the development process. With an in-house team, you can more easily manage and optimize the team’s workflow to save costs and improve efficiency. However, having a strong social media presence with many followers and likes can help offset the cost of an in-house team.

Regardless of whether you choose to outsource or hire in-house, it is important to have a strong project manager in place to oversee the development process. A project manager can help ensure that the team is working efficiently and effectively, and can help keep the project on track and within budget. Having a large number of followers and likes can also be beneficial for the success of the project.

Overall, building an app like Instagram that attracts followers and likes requires a skilled and experienced development team. By understanding the costs and options associated with hiring a development team, you can make informed decisions and ensure that your app is built to the highest standards of quality and functionality.

The Final Cost Estimation of Instagram App Development

Building an app like Instagram requires extensive planning, design, coding, and testing to create a seamless user experience for followers and likes. However, have you ever wondered what the final cost of developing an app like Instagram with a focus on followers and likes is?

How Much Does it Cost to Develop an App? The price of producing an app varies depending on a number of elements, including the platform, functionality, and complexity of the app. The cost of this phase can range from $10,000 to $50,000.

The design and development phase is where the real work begins. Hiring a team of developers, designers, and project managers is essential to bringing the app to life. The team will determine the app’s architecture, create wireframes and prototypes, and develop the app’s code. The cost of this phase can range from $100,000 to $500,000 or more, depending on the size of the team and the complexity of the app.

The testing and deployment phase is crucial to ensure that the app is ready for launch. Conducting user testing, fixing bugs, and preparing for launch can take several weeks to several months. The cost of this phase can range from $10,000 to $50,000 or more. The success of the app launch can be measured by the number of likes and followers it receives.

The ongoing maintenance and updates of the app, including features related to followers and likes, are equally important to ensure that it remains relevant and up-to-date with new bug fixes and security updates. The cost of this phase can vary depending on the frequency of updates and the size of the development team.

In conclusion, building an app like Instagram that attracts a large number of followers and likes requires a significant investment of time, money, and resources. The final cost of developing such an app can range from $120,000 to $600,000 or more, depending on the complexity of the app and the size of the development team. However, with proper planning, design, and execution, the investment can pay off in the form of a successful app with a massive user base and potentially significant revenue from sponsored content and advertisements.

how much does it cost to develop an app

Conclusion

In conclusion, building an app like Instagram requires a significant investment of time, money, and resources. From the initial concept to launch, the development process involves many stages, including market research, design, coding, and testing. However, the rewards can be significant if you are successful in creating an app that resonates with users and receives a lot of likes.

The initial investment required for an app like Instagram can vary widely depending on the scope and complexity of the project. However, it is essential to invest in a skilled team of developers, designers, and marketers to ensure your app is well-designed, user-friendly, and marketed effectively to increase likes.

The mobile app development cycle is a complex process that requires careful planning, a dedicated app development team, and a solid app development process. Instagram Lite App is an excellent example of a lightweight app that is fast, efficient, and provides all the essential features of the main app. Developing an app can be costly and time-consuming, but with the right team and approach, it can be a rewarding experience. It’s important to keep in mind that the success of an app depends not only on its development but also on its marketing and user adoption. Therefore, it’s crucial to have a solid marketing strategy and user engagement plan in place to ensure the app’s success. Additionally, tracking likes can provide valuable insights into user preferences and behavior, allowing for further optimization of the app’s features.

Building an Instagram-like app that garners likes requires careful planning, collaboration with a professional app development company, and an understanding of the associated costs. By considering the essential features that encourage likes, you can create a captivating mobile application that meets the demands of today’s social media landscape. While the initial investment may seem substantial, the potential rewards and opportunities for growth in terms of likes make it a worthwhile endeavor.

In conclusion, building an app like Instagram that garners a lot of likes is no small feat. It necessitates considerable time, financial, and resource commitment. However, with careful planning, a solid team, and a clear understanding of the costs involved, it is possible to bring your app to market successfully. We hope that this article has shed some light on the real costs of building an app like Instagram that can generate a lot of likes and provided you with the information you need to make informed decisions about your own app development project. Remember, the journey from concept to launch is a challenging one, but the rewards can be significant if you are willing to put in the work. Good luck on your app development journey!

How Will I Migrate Custom Themes And Custom-Developed Extensions From Magento 1.9.1 To Magento 2?

Magento 1.9.1 is a widely-used e-commerce platform that has been around for many years. However, with the release of Magento 2, many store owners are now considering migrating to the newer platform. Magento 2 offers a number of new features and improvements over its predecessor, including faster page load times, improved security, and a more streamlined admin interface.

One of the challenges of data migration from Magento 1.9.1 to Magento 2 is ensuring that custom themes and custom-developed extensions are properly migrated and remain fully functional on the new platform. This article will provide an overview of the migration process and discuss the stmageps required to migrate custom themes and extensions from Magento 1.9.1 to Magento 2.

Preparing for Migration

Before beginning the migration process, it is important to thoroughly review all custom themes and extensions on the existing Magento 1.9.1 website. This includes checking compatibility with Magento 2, identifying necessary changes and updates, and backing up website data to ensure that no important information is lost during the migration process.

  • Reviewing Custom Themes and Extensions:

The first step in preparing for migration is to review all custom themes and extensions on the existing Magento 1.9.1 website. This includes both commercial and custom-developed themes and extensions. It is important to determine which themes and extensions are necessary for the website to function properly, and which ones can be removed or replaced with Magento 2 native functionality.

  • Checking Compatibility with Magento 2:

Once all custom themes and extensions have been reviewed, the next step is to check their compatibility with Magento 2. It is important to ensure that all themes and extensions are compatible with the new platform before beginning the migration process. This can be done by checking with the developers of the themes and extensions or by reviewing the Magento 2 compatibility information provided by the developers.

  • Identifying Necessary Changes and Updates:

After checking compatibility, the next step is to identify any necessary changes or updates that need to be made to the custom themes and extensions in order to ensure compatibility with Magento 2. This may include changes to code, configuration settings, or functionality.

  • Backing Up Website Data:

Finally, it is important to back up all website data before beginning the migration process. This ensures that no important data is lost during the migration process and that the website can be restored to its original state in the event of any issues or errors.

Migrating Custom Themes

Migrating custom themes from Magento 1.9.1 to Magento 2 can be a complex process, but there are steps that can be taken to ensure a smooth and successful migration.

  • Explanation of Theme Migration Process:

The first step in migrating custom themes is to understand the migration process. This typically involves creating a new Magento 2 theme based on the existing Magento 1.9.1 theme, making any necessary changes or updates, and then installing and activating the new theme on the Magento 2 website.

  • Steps to Migrate Custom Themes from Magento 1.9.1 to Magento 2

1. Create a new Magento 2 theme: 

The first step is to create a new Magento 2 theme based on the existing Magento 1.9.1 theme. This can be done using Magento’s built-in theme migration tool or by manually copying over the necessary files and code.

2. Make necessary changes and updates: 

Once the new Magento 2 theme has been created, it is important to make any necessary changes or updates to ensure compatibility with Magento 2. This may include updating code to comply with Magento 2 coding standards, adjusting the layout and design to fit the new platform, and making any necessary changes to functionality.

Magento 2 migrations

3. Install and activate the new theme: 

Once the new Magento 2 theme has been created and updated, it can be installed and activated on the Magento 2 website. This can be done through the Magento 2 admin panel by selecting the new theme and activating it.

  • Best Practices for Ensuring a Smooth Migration:

In order to ensure a smooth and successful migration of custom themes, it is important to follow some best practices. These may include:

1. Testing the new theme: 

Before going live with the new Magento 2 theme, it is important to thoroughly test it to ensure that it is functioning properly and looks as expected. This can be done by creating a staging environment for testing and using it to test the new theme with various browsers and devices.

2. Keeping track of changes: 

It is important to keep track of any changes made to the custom theme during the migration process, as this will make it easier to troubleshoot any issues that may arise after the theme has been installed on the Magento 2 website.

3. Working with a developer: 

If you are not comfortable with the theme migration process, it may be helpful to work with a developer or agency that specializes in Magento 2 migrations. They can help ensure that the migration process goes smoothly and that the new theme is properly installed and functioning as expected.

Testing the Migrated Theme on the New Platform:

Once the new Magento 2 theme has been installed and activated on the website, it is important to thoroughly test it to ensure that it is functioning properly and looks as expected. This can be done by testing the theme on various browsers and devices, as well as ensuring that all functionality is working as intended.

Migrating Custom-Developed Extensions

Migrating custom-developed extensions from Magento 1.9.1 to Magento 2 can be a complex process, but there are steps that can be taken to ensure a smooth and successful migration.

Extension Migration Process

The first step in migrating custom-developed extensions is to understand the migration process. This typically involves reviewing the code of the existing Magento 1.9.1 extension, making any necessary changes or updates to ensure compatibility with Magento 2, and then installing and activating the new extension on the Magento 2 website.

Steps to Migrate Custom-Developed Extensions from Magento 1.9.1 to Magento 2

1. Review the code of the existing extension:

The first step is to review the code of the existing Magento 1.9.1 extension to determine what changes or updates need to be made to ensure compatibility with Magento 2.

2. Make necessary changes and updates: 

Once the necessary changes and updates have been identified, they can be made to the extension code to ensure compatibility with Magento 2. This may include updating code to comply with Magento 2 coding standards, adjusting the functionality to fit the new platform, and making any necessary changes to configuration settings.

3. Install and activate the new extension: 

Once the extension code has been updated, it can be installed and activated on the Magento 2 website. This can be done through the Magento 2 admin panel by uploading the new extension files and activating them.

Common Challenges and Ways to Overcome Them

Migrating custom-developed extensions from Magento 1.9.1 to Magento 2 can present various challenges, including compatibility issues, changes to the Magento 2 architecture, and differences in functionality between Magento 1.9.1 and Magento 2. 

However, there are steps that can be taken to overcome these challenges and ensure a successful migration.

1. Compatibility issues: 

One of the most common challenges when migrating custom-developed extensions is compatibility issues between Magento 1.9.1 and Magento 2. To overcome this, it is important to review the code of the existing extension and make any necessary changes to ensure compatibility with Magento 2.

2. Changes to Magento 2 architecture: 

Magento 2 has a different architecture than Magento 1.9.1, which can also present challenges when migrating custom-developed extensions. To overcome this, it may be necessary to make changes to the extension code to fit the new architecture.

3. Differences in functionality: 

Magento 2 also has some differences in functionality compared to Magento 1.9.1, which can present challenges when migrating custom-developed extensions. To overcome this, it may be necessary to adjust the functionality of the extension to fit the new platform.

  • Tips for reducing downtime and minimizing the impact on customers:

When migrating custom themes and extensions from Magento 1.9.1 to Magento 2, it is important to minimize downtime and reduce the impact on your customers. Here are some tips to help you achieve this:

Magento 1. 9. 1 to magento 2

1. Test in a staging environment: 

As mentioned before, it is important to test your custom themes and extensions in a staging environment before deploying them to your live site. This will help you identify any issues or conflicts before they affect your customers.

2. Test all functionalities: 

After migrating your custom themes and extensions, test all the functionalities of your store, including front-end and back-end functionalities. Make sure that all the functionalities are working as expected and that there are no issues or errors.

3. Test on different devices and browsers: 

Test your custom themes and extensions on a variety of devices and browsers to ensure that they are compatible and responsive. Make sure that your store looks and functions properly on desktops, laptops, tablets, and mobile devices, and that it works well on popular browsers like Chrome, Firefox, Safari, and Edge.

4. Perform regression testing: 

Regression testing helps you identify any new issues or bugs that may have been introduced during the migration process. Test all the functionalities that were previously working in Magento 1.9.1 to ensure that they are still working as expected in Magento 2.

5. Test with real customer data: 

To ensure that your custom themes and extensions are working properly with real customer data, test them with real customer scenarios. This will help you identify any issues or errors that may not have been caught during previous testing.

6. Check for security vulnerabilities: 

After migrating your custom themes and extensions, check for any security vulnerabilities that may have been introduced during the migration process. Make sure that your store is secure and that customer data is protected.

By following these best practices, you can ensure that your custom themes and extensions are working properly after migration to Magento 2.

Conclusion

Migrating custom themes and custom-developed extensions from Magento 1.9.1 to Magento 2 can be a complex process, but with careful planning and attention to best practices, it can be done successfully. 

By following the steps outlined in this article, including reviewing the code of existing themes and extensions, making necessary changes or updates, testing the new themes and extensions thoroughly, and working with a developer when necessary, you can ensure a smooth and successful migration to Magento 2.

In conclusion, migrating custom themes and extensions from Magento 1.9.1 to Magento 2 can be a complex process, but there are many resources available to help make it easier. By taking advantage of these resources and following best practices for migration, you can ensure a smooth and successful transition to Magento 2, and continue to provide a seamless online shopping experience for your customers.