Introduction
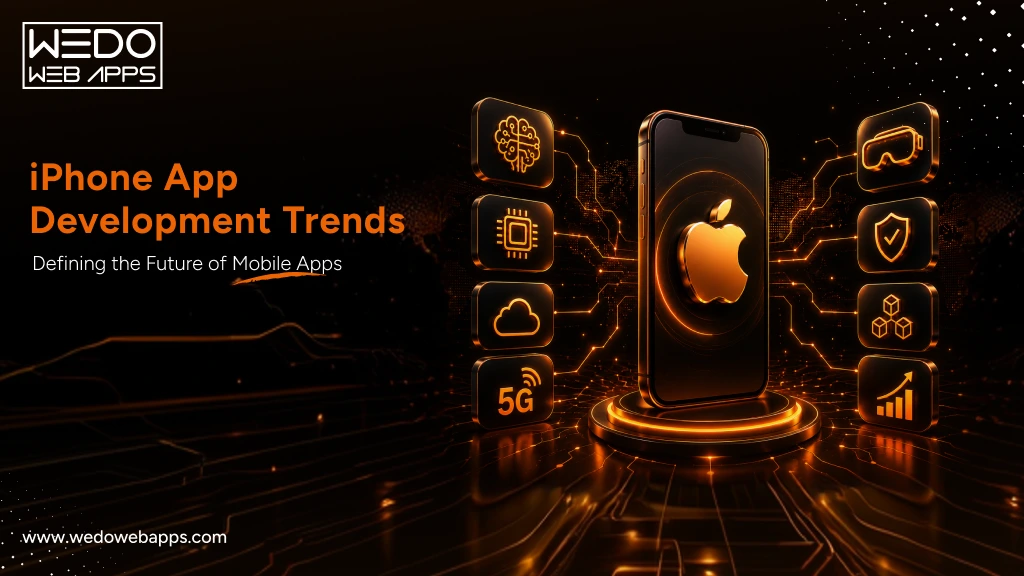
A few years ago, most businesses approached iPhone app development with relatively simple goals: build a functional mobile app, launch it on the App Store, and improve customer accessibility. Today, that approach is no longer enough. User expectations have evolved dramatically, Apple’s ecosystem has become far more intelligent, and the competition for user attention is stronger than ever. Modern users now expect iOS applications to deliver personalized experiences, seamless performance across devices, AI-driven interactions, and stronger privacy protections, all within a single ecosystem.
This shift is transforming the future of iPhone app development for startups, enterprises, and digital-first brands. Businesses are no longer investing in apps only for mobile presence; they are building scalable digital products designed to improve retention, customer engagement, operational efficiency, and long-term revenue growth. As Apple continues expanding technologies like Apple Intelligence, Vision Pro, SwiftUI, HealthKit, and on-device AI capabilities, the latest iPhone app trends are creating entirely new opportunities for companies willing to innovate early.
At the same time, evolving user behavior is pushing businesses to rethink how iOS applications should function in 2026 and beyond. Users expect apps to understand preferences in real time, integrate smoothly across Apple devices, prioritize privacy, and deliver faster, more intuitive experiences. This is why keeping up with current iOS app development trends and emerging iOS app technologies has become a strategic necessity rather than a technology upgrade alone.
In this blog, we will explore the top iPhone app development trends shaping 2026, how these mobile app trends for iOS are influencing business decisions, and what companies should prioritize when building future-ready iOS applications.
Why iOS App Development Still Matters for Businesses in 2026
iOS continues to dominate the premium mobile app market, making it one of the strongest platforms for businesses investing in long-term digital growth. While many technologies continue to evolve, companies still prioritize iPhone applications because of the value Apple users bring to businesses.
Higher User Spending and Better ROI
iPhone users consistently show:
- Higher in-app purchase behavior
- Better subscription retention
- Stronger engagement rates
- Higher average customer lifetime value
For startups and enterprises, this makes iOS app development a more profitable long-term investment strategy.
Apple Users Expect Premium Digital Experiences
Modern Apple users expect apps to deliver:
- AI-powered personalization
- Faster loading experiences
- Smooth cross-device synchronization
- Strong privacy controls
- Minimalistic and intuitive interfaces
This is one of the biggest reasons why the latest iPhone app trends are heavily focused on performance, intelligence, and user experience optimization.
The Apple Ecosystem Creates Long-Term Retention
Unlike standalone mobile experiences, Apple’s ecosystem encourages continuous user engagement across devices.
Businesses now build iOS applications that integrate with Apple Watch, iPad, MacBook, Vision Pro, AirPods, and CarPlay.
This ecosystem-driven approach is shaping the future of iPhone app development because users increasingly expect connected experiences instead of isolated mobile interactions.
Privacy Has Become a Competitive Advantage
Privacy is no longer just a compliance requirement; it directly impacts user trust and brand reputation.
Apple’s privacy-focused ecosystem supports:
- Secure authentication
- Controlled data sharing
- On-device processing
- Transparent app permissions
- Safer payment experiences
For industries like fintech, healthcare, and eCommerce, these emerging iOS app technologies help businesses strengthen customer confidence.
Businesses are Prioritizing Scalable iOS Applications
Modern companies are no longer building apps only for market presence. They are investing in scalable digital products that support:
- Customer retention
- Subscription growth
- AI integration
- Omnichannel experiences
- Long-term operational efficiency
This shift is driving many of the current mobile app trends for iOS.
Why This Matters for Decision Makers
For business leaders, following iOS app development trends is no longer only about staying updated with technology. It is about understanding:
- Which iOS technologies improve user retention
- How Apple’s ecosystem impacts scalability
- Which app features increase long-term ROI
- What users will expect from future mobile experiences
Companies that align early with these shifts are often better positioned to build future-ready digital products and maintain a competitive advantage in the evolving iOS market.

iOS App Development Trends Businesses Must Know

Apple Intelligence and On-Device AI are Reshaping iPhone Apps
Artificial Intelligence is no longer an experimental feature in the iOS ecosystem. In today’s time, AI is becoming one of the biggest drivers behind modern user experiences, operational efficiency, and app personalization. With Apple Intelligence expanding across devices, businesses are now rethinking how iPhone applications should interact with users, process data, and deliver real-time experiences.
This shift is rapidly becoming one of the most important iOS app development trends for businesses planning future-ready applications.
AI-Powered Personalization is Becoming Standard
Modern iPhone users now expect applications to understand preferences, behavior, and usage patterns automatically.
Businesses are using AI for:
- Personalized product recommendations
- Adaptive user interfaces
- Smart content suggestions
- Predictive search experiences
- Customized onboarding journeys
These features improve:
- User engagement
- Session duration
- Customer retention
- Conversion rates
This is why AI-driven personalization is shaping the future of iPhone app development across industries like eCommerce, streaming, fintech, and fitness.
On-Device AI is Changing User Expectations
One of Apple’s biggest competitive advantages is its focus on on-device intelligence instead of cloud-dependent processing.
Benefits of on-device AI include:
- Faster response times
- Better privacy protection
- Reduced server dependency
- Improved app performance
- Real-time processing capabilities
For businesses, this means applications can now deliver intelligent experiences while maintaining stronger privacy standards, a major factor influencing emerging iOS app technologies.
AI is Improving App Functionality Across Industries
Different industries are using Apple Intelligence in different ways.
eCommerce Apps
- Personalized product feeds
- Smart recommendations
- Visual product search
- Predictive customer behavior analysis
Healthcare Apps
- Real-time health monitoring
- AI-assisted diagnostics
- Personalized wellness insights
- Smarter patient engagement
Finance Apps
- Fraud detection
- AI-powered budgeting
- Spending predictions
- Intelligent financial insights
SaaS and Productivity Apps
- Workflow automation
- AI-generated summaries
- Smart scheduling
- Predictive task management
These practical use cases are making AI one of the most impactful mobile app trends for iOS today.
Privacy-Focused AI is Becoming a Business Priority
Unlike many AI ecosystems that rely heavily on cloud data collection, Apple is positioning intelligence around a privacy-first architecture.
This allows businesses to build applications that offer:
- Smarter experiences without excessive data collection
- Better compliance readiness
- Improved customer trust
- Secure personalization
For enterprise decision-makers, this balance between AI capabilities and privacy protection is becoming a major investment consideration.
What Businesses Should Consider Before Integrating AI
Before implementing AI-powered features, companies should evaluate:
- Whether AI improves actual user experience
- How much personalization users expect
- Data privacy and compliance requirements
- Scalability of AI infrastructure
- Long-term maintenance and optimization needs
Many businesses are now shifting from “adding AI features” to building AI-driven app experiences strategically.
Why This Trend Matters in 2026
The latest iPhone app trends clearly show that users increasingly prefer applications that feel:
- Smarter
- Faster
- More predictive
- More personalized
- Less dependent on manual interaction
As Apple continues expanding its AI ecosystem, businesses that adopt intelligent iOS experiences early will likely gain stronger engagement, retention, and competitive differentiation in the coming years.

Spatial Computing and Vision Pro are Expanding the Future of iPhone App Development
The introduction of Apple Vision Pro is pushing businesses to think beyond traditional mobile interfaces. Instead of designing apps only for screens, companies are now exploring immersive and spatial experiences that combine digital content with real-world interaction.
While still evolving, spatial computing is already becoming one of the most discussed emerging iOS app technologies for businesses planning long-term digital innovation.
What is Spatial Computing in the Apple Ecosystem?
Spatial computing allows users to interact with digital applications in a more immersive environment using:
- Gesture controls
- Eye tracking
- Voice interaction
- 3D interfaces
- Real-world spatial awareness
This creates experiences that go far beyond conventional mobile app interactions.
Industries Already Exploring Vision Pro Opportunities
Although adoption is still growing, several industries are actively investing in spatial experiences.
eCommerce and Retail
- Virtual product visualization
- Immersive shopping experiences
- Interactive product demos
- AR-based purchasing journeys
Real Estate
Companies are using spatial computing for:
- Virtual property walkthroughs
- Interactive architecture previews
- Remote property showcasing
Healthcare
Healthcare apps are exploring:
- Medical visualization
- Surgical training simulations
- Interactive patient education
Education and Training
Organizations are investing in:
- Immersive learning environments
- Real-time simulations
- Interactive skill training
These use cases are expanding the scope of modern iPhone app development trends far beyond traditional mobile functionality.
Why Businesses Should Pay Attention Early
Not every business needs a Vision Pro app today. However, companies should still monitor how spatial computing may impact future customer expectations.
Early adoption advantages may include:
- Stronger brand differentiation
- Higher engagement experiences
- Innovation positioning
- Better customer interaction models
- Competitive advantage in emerging markets
This is especially relevant for brands focused on premium digital experiences.
Spatial Experiences Will Depend on Ecosystem Integration
One important shift in the future of iPhone app development is that apps will increasingly work across interconnected Apple devices instead of functioning independently.
Businesses may eventually build experiences connected across:
- iPhone
- Vision Pro
- Apple Watch
- iPad
- Mac
- AirPods
This ecosystem-driven approach is becoming a major factor in current mobile app trends for iOS.
Challenges Businesses Should Consider
Despite the opportunities, spatial app development still comes with challenges.
Businesses must evaluate:
- Development costs
- User adoption rates
- Hardware accessibility
- UX complexity
- Long-term scalability
For many companies, the smarter approach is preparing their app architecture for future compatibility instead of immediately investing in full immersive experiences.
Why This Trend Matters in 2026
The latest iPhone app trends show a larger shift happening across the Apple ecosystem; apps are moving from flat interfaces toward more intelligent, immersive, and interactive experiences.
As Apple continues investing in Vision Pro and spatial computing technologies, businesses that start understanding these changes early may be better prepared for the next generation of iOS user experiences.
SwiftUI Is Becoming the Standard for Modern iOS App Development
A few years ago, SwiftUI was viewed as a newer framework with limited adoption. In 2026, that has changed significantly. Many businesses and development teams now prefer SwiftUI for building scalable, modern, and performance-focused iOS applications.
As Apple continues expanding support for SwiftUI across its ecosystem, the framework is becoming one of the most important iOS app development trends shaping modern application architecture.
Why SwiftUI Is Growing So Rapidly
SwiftUI helps developers build applications faster while maintaining consistency across Apple devices.
Some of the biggest advantages include:
- Faster UI development
- Cleaner code structure
- Easier maintenance
- Better scalability
- Improved cross-device compatibility
For businesses, this often translates into shorter development cycles and lower long-term maintenance efforts.
Better Integration Across the Apple Ecosystem
One major reason behind SwiftUI’s adoption is its ability to support seamless experiences across:
- iPhone
- iPad
- Apple Watch
- Mac
- Vision Pro
Instead of building separate interface systems for different devices, businesses can create more unified digital experiences within Apple’s ecosystem.
This flexibility is becoming increasingly important as mobile app trends for iOS continue shifting toward ecosystem-driven experiences.
Faster Development and Easier Iteration
Modern businesses need faster product launches and continuous feature improvements.
SwiftUI supports this through:
- Real-time previews
- Simplified UI updates
- Faster prototyping
- Reusable components
- Improved development workflows
For startups, especially, this can help accelerate MVP launches and reduce time-to-market.
Improved User Experience and Performance
User expectations around app performance continue increasing every year.
SwiftUI helps improve:
- App responsiveness
- Animation smoothness
- Interface consistency
- Adaptive layouts
- Accessibility support
These improvements directly impact:
- User retention
- Engagement quality
- Customer satisfaction
This is why many companies now view SwiftUI adoption as part of their long-term iPhone app development strategy.
SwiftUI Is Supporting Emerging iOS Technologies
As Apple introduces newer technologies like:
- Apple Intelligence
- Spatial computing
- Vision Pro integration
- Advanced widgets
- Interactive app experiences
SwiftUI is increasingly becoming the preferred framework for implementing modern Apple ecosystem features.
This makes it highly relevant to the future of iPhone app development.
Businesses Still Need Strategic Technology Decisions
Despite its advantages, SwiftUI may not always be the perfect solution for every project.
Businesses should evaluate:
- Existing app architecture
- Legacy UIKit dependencies
- App complexity
- Scalability requirements
- Team expertise
- Long-term feature roadmap
In many cases, companies now use a hybrid approach combining SwiftUI with existing UIKit infrastructure.
Why SwiftUI Matters in 2026
The latest iPhone app trends clearly show that businesses are prioritizing:
- Faster development
- Better performance
- Cross-device consistency
- Future-ready app architecture
As Apple continues evolving its ecosystem, SwiftUI is likely to remain one of the core technologies influencing emerging iOS app technologies and next-generation application experiences.
Privacy-First App Development Is Becoming a Competitive Advantage
Privacy is no longer just a technical requirement in iOS app development. In 2026, it has become a major business differentiator influencing user trust, app adoption, and long-term customer retention.
As users become more aware of how their data is collected and used, businesses are under increasing pressure to build transparent, secure, and privacy-focused digital experiences. This shift is making privacy-first architecture one of the most important iOS app development trends today.
Apple’s Privacy Ecosystem Is Changing User Expectations
Apple has consistently positioned privacy as a core part of its ecosystem.
Features like:
- App Tracking Transparency (ATT)
- Privacy Nutrition Labels
- On-device processing
- Secure authentication
- Mail privacy protection
have fundamentally changed how businesses approach iPhone app development.
Users now expect applications to clearly explain:
- What data is collected
- Why data is needed
- How information is stored
- How their privacy is protected
Privacy Now Directly Impacts User Trust
Modern users are more likely to engage with apps that demonstrate:
- Transparent permissions
- Secure payment systems
- Responsible data handling
- Minimal data collection
- Strong authentication methods
For businesses, this directly affects:
- App installs
- Customer loyalty
- Brand credibility
- User retention
This is especially important for industries like:
- Fintech
- Healthcare
- Ecommerce
- SaaS
- Insurance
where trust heavily influences customer decisions.
On-Device Processing Is Becoming More Important
One of the biggest emerging iOS app technologies is the growing use of on-device intelligence.
Instead of sending all user data to cloud servers, modern iOS applications increasingly process information directly on the device.
Benefits include:
- Faster app performance
- Reduced server dependency
- Better privacy protection
- Lower security risks
- Improved user confidence
This trend is becoming even more important as Apple expands AI capabilities across its ecosystem.
Security Features Are Evolving Beyond Passwords
The latest iPhone app trends are also changing how businesses approach authentication and app security.
Modern iOS applications now integrate:
- Face ID authentication
- Biometric verification
- Passkeys
- Multi-factor authentication
- Device-level encryption
These features help businesses create safer user experiences without adding friction to the customer journey.
Compliance Is Becoming Part of Product Strategy
Privacy regulations continue expanding globally, making compliance an important business consideration during app development.
Businesses now need to consider:
- GDPR compliance
- Data storage practices
- User consent management
- Regional privacy regulations
- Secure API infrastructure
This is one reason why companies are prioritizing scalable and security-focused mobile app trends for iOS instead of short-term feature development alone.
What Businesses Should Prioritize
Before building or scaling an iOS application, companies should evaluate:
User Trust Factors
- How much data is truly necessary?
- Are permissions clearly explained?
- Is the user experience privacy-friendly?
Security Infrastructure
- Is sensitive data encrypted?
- Are APIs secure?
- Is authentication modernized?
Long-Term Scalability
- Can the app adapt to future privacy regulations?
- Is the architecture built for evolving Apple standards?
Why Privacy-First Development Matters in 2026
The future of iPhone app development is becoming closely tied to user trust and responsible data practices.
Businesses that prioritize privacy-focused app experiences are more likely to:
- Build stronger customer relationships
- Improve retention rates
- Reduce compliance risks
- Create long-term brand credibility
As Apple continues strengthening its privacy ecosystem, companies that adapt early to these evolving expectations will likely gain a significant competitive advantage in the iOS market.
AI-Powered Personalization Is Redefining User Experience in iOS Apps
Generic mobile experiences are rapidly disappearing. In 2026, users expect iPhone applications to adapt to their behavior, preferences, and usage patterns in real time. This growing demand for smarter experiences is making AI-powered personalization one of the fastest-growing iOS app development trends across industries.
Businesses are no longer using personalization only for recommendations. Modern iOS applications now use AI to improve engagement, retention, customer journeys, and overall user satisfaction.
Users Expect Apps to “Understand” Their Preferences
Modern users prefer applications that feel:
- More relevant
- Faster to navigate
- Personalized to their behavior
- Predictive instead of reactive
This is why businesses are integrating AI-powered personalization into:
- Home feeds
- Product recommendations
- Search experiences
- Notifications
- Content suggestions
- User onboarding flows
These capabilities are becoming central to the future of iPhone app development.
How Different Industries Are Using AI Personalization
Ecommerce Apps
Businesses personalize:
- Product recommendations
- Shopping suggestions
- Dynamic pricing offers
- Cart recovery experiences
Streaming and Entertainment Apps
Platforms optimize:
- Content recommendations
- Watch history analysis
- Personalized playlists
- Viewing behavior predictions
Fitness and Health Apps
Applications adapt:
- Workout recommendations
- Health insights
- Personalized wellness goals
- User activity tracking
Fintech Apps
Financial applications provide:
- Spending insights
- Smart budgeting suggestions
- Personalized financial alerts
- Predictive transaction monitoring
These practical use cases are shaping many of today’s latest iPhone app trends.
AI Personalization Improves Business Metrics
Businesses are increasingly investing in intelligent personalization because it directly impacts performance indicators.
Potential benefits include:
- Higher user engagement
- Longer session duration
- Improved customer retention
- Increased conversions
- Better subscription renewals
- Stronger customer loyalty
For startups and enterprises alike, personalization is becoming a long-term growth strategy instead of just a UX enhancement.
Real-Time Data Is Becoming More Valuable
One major shift in emerging iOS app technologies is the growing use of real-time behavioral analysis.
Modern applications can now adapt experiences based on:
- User activity patterns
- Location behavior
- Purchase history
- Device usage
- Interaction frequency
- Engagement timing
This allows businesses to create highly responsive digital experiences within the Apple ecosystem.
Privacy Still Remains Critical
Even though personalization is expanding rapidly, businesses must balance intelligence with responsible data usage.
Companies should prioritize:
- Transparent data collection
- Permission-based personalization
- On-device processing when possible
- Secure user data handling
- Ethical AI implementation
This balance between personalization and privacy is becoming a defining factor in modern mobile app trends for iOS.
What Businesses Should Consider Before Implementing AI Personalization
Before integrating AI-driven experiences, businesses should evaluate:
User Experience Goals
- Will personalization improve usability?
- Does it reduce friction for users?
Data Readiness
- Is there enough behavioral data available?
- Is the data structured properly?
Scalability
- Can personalization systems scale with growth?
- Will AI recommendations improve over time?
Privacy Compliance
- Are data practices aligned with Apple policies?
- Is user consent handled transparently?
Why This Trend Matters in 2026
The future of iPhone app development is increasingly centered around intelligent and adaptive experiences.
As users continue expecting applications to become more personalized, businesses that invest in AI-powered engagement strategies early may achieve:
- Stronger retention
- Higher customer satisfaction
- Better monetization opportunities
- Greater competitive differentiation
This is why AI-powered personalization is quickly becoming one of the most impactful iOS app development trends shaping the next generation of mobile experiences.
Cross-Platform vs Native iOS Development in 2026: What Businesses Should Choose
One of the biggest questions businesses still ask before building an app is whether to choose native iOS development or a cross-platform framework like Flutter or React Native. In 2026, this decision will have become even more important as user expectations, AI integration, and Apple ecosystem experiences continue evolving.
The right choice often depends on business goals, scalability requirements, budget, and the type of user experience a company wants to deliver.
What Is Native iOS App Development?
Native iOS development involves building applications specifically for Apple devices using technologies like:
Native apps are designed specifically for the Apple ecosystem, allowing businesses to fully utilize iPhone hardware, iOS features, and Apple technologies.
What Is Cross-Platform App Development?
Cross-platform frameworks allow developers to build a single codebase that works across:
- iOS
- Android
- Other platforms
Popular frameworks include:
This approach is often used to reduce development time and launch apps faster across multiple operating systems.
Native vs Cross-Platform: Key Business Differences
| Factor | Native iOS Development | Cross-Platform Development |
|---|
| Performance | Higher performance optimization | Good performance, but may vary |
| Apple Feature Integration | Faster access to the latest iOS features | Sometimes delayed compatibility |
| UI/UX Experience | More polished Apple-native experience | Shared UI limitations possible |
| Development Cost | Higher initial investment | Lower upfront development cost |
| Scalability | Strong long-term scalability | Depends on framework complexity |
| Maintenance | Separate platform maintenance | Unified codebase maintenance |
| Time-to-Market | Longer development cycle | Faster launch speed |
Why Many Businesses Still Prefer Native iOS Development
As the latest iPhone app trends continue evolving around:
- AI-powered experiences
- Spatial computing
- Apple Intelligence
- Advanced animations
- Real-time processing
- Privacy-first architecture
Many businesses still prefer native iOS development for better control and deeper Apple ecosystem integration.
Native apps often provide:
- Better performance
- Smoother animations
- Faster feature adoption
- Improved security
- Stronger long-term flexibility
This is especially important for:
- Fintech platforms
- Healthcare applications
- Enterprise solutions
- High-performance consumer apps
Why Cross-Platform Development Is Still Growing
Despite native advantages, cross-platform frameworks remain highly attractive for:
- Startups
- MVP launches
- Budget-conscious businesses
- Faster market validation
Businesses choose cross-platform development because it can:
- Reduce development costs
- Speed up launch timelines
- Simplify multi-platform deployment
- Support faster iteration cycles
This makes cross-platform development one of the most practical mobile app trends for iOS-focused startups entering competitive markets.
AI and Emerging Technologies Are Influencing This Decision
One major shift in the future of iPhone app development is that newer Apple technologies increasingly favor native ecosystem integration.
Features involving:
- Apple Intelligence
- Vision Pro
- Advanced device interactions
- On-device AI
- Hardware-level optimization
often work more efficiently within native iOS environments.
This is influencing many businesses to adopt hybrid strategies where:
- Core experiences remain native
- Secondary modules use cross-platform frameworks
What Businesses Should Evaluate Before Choosing
Before selecting a development approach, companies should assess:
Business Goals
- Is speed-to-market the priority?
- Is long-term scalability more important?
User Experience Expectations
- Does the app require premium performance?
- Will advanced Apple integrations be needed?
Budget and Resources
- What is the available development budget?
- Can separate platform teams be supported?
Future Scalability
- Will the app expand with AI features later?
- Is ecosystem integration part of the roadmap?
Why This Decision Matters in 2026
The future of iOS app development is becoming more experience-focused, AI-driven, and ecosystem-connected.
Businesses choosing the right development approach early are often better positioned to:
- Scale efficiently
- Reduce technical limitations
- Improve user retention
- Adapt to emerging iOS app technologies faster
Instead of choosing based only on cost, companies are increasingly making development decisions based on long-term product strategy and future digital growth.

Wearables, HealthTech, and Connected Ecosystems Are Expanding iOS App Capabilities
The iPhone is no longer the center of the Apple ecosystem alone. In 2026, businesses are increasingly building connected experiences across Apple Watch, AirPods, iPad, Vision Pro, and other smart devices to improve engagement and deliver more continuous user interactions.
This shift toward ecosystem-driven experiences is becoming one of the most important iOS app development trends shaping modern mobile applications.
Users Now Expect Connected Experiences
Modern users switch between multiple Apple devices throughout the day.
They expect apps to work seamlessly across:
- iPhone
- Apple Watch
- iPad
- Mac
- AirPods
- Vision Pro
This growing demand for continuity is pushing businesses to rethink how iPhone applications should function within broader digital ecosystems.
Apple Watch Integration Continues to Grow
Apple Watch remains one of the biggest drivers behind wearable-focused app development.
Businesses are using Apple Watch integration for:
- Real-time notifications
- Fitness tracking
- Health monitoring
- Contactless payments
- Quick task management
- Remote app controls
These capabilities help brands increase daily user engagement beyond traditional app sessions.
HealthTech Is Becoming a Major Growth Area
Health-focused applications are rapidly evolving due to Apple’s expanding healthcare ecosystem.
Modern healthcare and wellness apps now support:
- Heart rate monitoring
- Sleep tracking
- Activity analysis
- Medication reminders
- Personalized wellness insights
- Remote patient engagement
This makes HealthTech one of the fastest-growing segments influencing the future of iPhone app development.
Connected Ecosystems Improve User Retention
One major reason businesses invest in ecosystem integration is improved customer retention.
Connected app experiences can increase:
- Daily interaction frequency
- User convenience
- Long-term engagement
- Subscription retention
- Brand loyalty
For many companies, ecosystem connectivity is becoming a competitive advantage rather than just an additional feature.
IoT and Smart Device Integration Are Expanding
Emerging iOS app technologies are also enabling stronger integration with:
- Smart home devices
- Connected vehicles
- Wearable accessories
- Voice assistants
- Enterprise IoT systems
Industries actively using connected ecosystems include:
- Healthcare
- Logistics
- Smart retail
- Automotive
- Fitness
- Hospitality
This broader connectivity is shaping many current mobile app trends for iOS.
Businesses Must Prioritize Cross-Device User Experience
Building connected ecosystems requires more than simply syncing data across devices.
Businesses must ensure:
- Consistent UI experiences
- Real-time synchronization
- Smooth performance
- Secure data handling
- Low-friction interactions
Poor ecosystem experiences can quickly reduce user trust and retention.
Challenges Businesses Should Consider
While connected ecosystems offer major opportunities, they also introduce additional complexity.
Businesses should evaluate:
- Device compatibility requirements
- Security infrastructure
- Battery optimization
- Real-time synchronization challenges
- Long-term scalability
This is especially important for enterprise and healthcare applications handling sensitive user data.
Why This Trend Matters in 2026
The latest iPhone app trends clearly show that users increasingly prefer experiences that move seamlessly across devices instead of staying limited to a single screen.
As Apple continues expanding its ecosystem, businesses investing in connected and wearable-friendly applications may gain:
- Stronger engagement
- Higher retention
- Better user convenience
- Long-term ecosystem loyalty
This is why ecosystem-driven experiences are becoming one of the most influential iOS app development trends shaping the next generation of digital products.
Subscription-Based iOS Apps Continue to Dominate Revenue Models
The way businesses monetize mobile applications has changed significantly over the last few years. Instead of relying only on one-time purchases, many companies are now focusing on recurring revenue models through subscriptions, premium memberships, and service-based app experiences.
In 2026, subscription-driven platforms continue to shape some of the most profitable iOS app development trends across industries.
Why Subscription Models Work So Well in the Apple Ecosystem
Apple users are generally more comfortable with:
- In-app purchases
- Premium app experiences
- Paid memberships
- Recurring subscription services
This makes the iOS ecosystem highly favorable for businesses building:
- SaaS applications
- Streaming platforms
- Fitness apps
- Learning platforms
- Productivity tools
- Wellness services
For many companies, subscription-based apps provide more predictable long-term revenue compared to traditional monetization models.
Businesses Are Prioritizing Long-Term Customer Value
Modern app strategies are shifting from:
to:
- Long-term customer retention
This changes how businesses approach iPhone app development.
Companies now focus heavily on:
- Continuous feature improvements
- Personalized engagement
- Ongoing content delivery
- Loyalty-building experiences
- Community-driven ecosystems
These strategies directly support recurring subscription growth.
AI and Personalization Are Improving Subscription Retention
One major reason subscription apps continue growing is the use of AI-powered engagement strategies.
Businesses are using personalization for:
- Smart content recommendations
- Adaptive onboarding
- Personalized notifications
- Usage-based feature suggestions
- Retention-focused engagement campaigns
These intelligent experiences help reduce subscription churn and improve customer lifetime value.
Freemium Models Are Still Highly Effective
Many businesses are combining free experiences with premium upgrades.
Popular monetization structures include:
- Free basic access with premium features
- Limited feature trials
- Usage-based subscriptions
- Tiered pricing models
- Exclusive premium content
This approach helps companies:
- Increase app adoption
- Reduce entry barriers
- Improve conversion opportunities
Freemium models remain one of the most practical mobile app trends for iOS-focused startups.
App Store Policies Continue Influencing Monetization Strategies
Apple’s App Store ecosystem still plays a major role in subscription-based app development.
Businesses must carefully consider:
- App Store commission structures
- In-app purchase guidelines
- Subscription renewal flows
- User cancellation experiences
- Payment transparency requirements
Strong monetization strategies now depend heavily on balancing revenue optimization with user trust.
Industries Seeing Strong Subscription Growth
Fitness and Wellness
- Workout memberships
- Meditation platforms
- Health coaching subscriptions
SaaS and Productivity
- Collaboration tools
- AI-powered workflow platforms
- Cloud-based productivity services
Entertainment and Media
- Streaming subscriptions
- Premium content access
- Creator economy platforms
Education and Learning
- Skill development apps
- Language learning subscriptions
- Professional certification platforms
These industries continue driving many current iOS app development trends.
What Businesses Should Prioritize Before Building Subscription Apps
Before launching a subscription-based iOS application, businesses should evaluate:
User Retention Strategy
- What keeps users subscribed long-term?
- Is there continuous value delivery?
Pricing Structure
- Is pricing aligned with perceived value?
- Are premium tiers clearly differentiated?
Engagement Optimization
- How will users stay active?
- Are personalization systems included?
Scalability
- Can the subscription model evolve with growth?
- Is the app prepared for feature expansion?
Why Subscription Models Matter in 2026
The future of iPhone app development is increasingly connected to recurring engagement and long-term customer relationships.
Businesses investing in subscription-driven iOS experiences are often better positioned to:
- Generate predictable revenue
- Improve customer retention
- Build stronger brand loyalty
- Scale sustainably over time
As digital services continue evolving, subscription ecosystems will likely remain one of the most influential emerging iOS app technologies shaping modern app business models.
Low-Code Development and AI-Assisted Workflows Are Accelerating iOS App Development
The process of building iPhone applications is changing rapidly. In 2026, businesses are no longer relying only on traditional development workflows. AI-assisted coding tools, automation platforms, and low-code technologies are helping teams build, test, and launch applications faster than ever before.
These advancements are becoming some of the most practical iOS app development trends for startups and enterprises looking to reduce development time while maintaining scalability.
Businesses Want Faster App Launches
Modern companies often face pressure to:
- Validate ideas quickly
- Launch MVPs faster
- Reduce development costs
- Accelerate feature releases
- Adapt to changing market demands
This is why many businesses are exploring low-code and AI-assisted development strategies.
AI-Assisted Development Is Improving Productivity
AI-powered development tools are helping teams automate repetitive tasks and improve coding efficiency.
Development teams now use AI for:
- Code generation
- Bug detection
- Automated testing
- UI suggestions
- Documentation support
- Workflow optimization
These capabilities help developers focus more on product innovation and user experience.
Low-Code Platforms Are Supporting Faster MVP Development
Low-code technologies are becoming increasingly popular for:
- Prototype validation
- Internal business applications
- Workflow automation tools
- Early-stage startup products
Benefits often include:
- Faster development cycles
- Reduced initial costs
- Simplified updates
- Faster experimentation
For startups, this can significantly reduce time-to-market during early product stages.
Automation Is Improving App Maintenance
Beyond development itself, automation is also improving:
- App testing
- CI/CD workflows
- Performance monitoring
- Crash detection
- Security analysis
- Deployment management
These systems help businesses scale iOS applications more efficiently while reducing operational overhead.
AI Tools Are Not Replacing Strategic Development
Despite rapid AI adoption, businesses still require experienced development teams for:
- Scalable architecture planning
- Security implementation
- Advanced integrations
- Performance optimization
- Complex user experiences
- Ecosystem-level app strategy
AI-assisted workflows work best when combined with strong technical expertise and product planning.
Low-Code Does Not Fit Every Business Model
While low-code platforms offer speed advantages, they may not always support:
- Complex app functionality
- Advanced scalability
- Custom AI integrations
- High-performance experiences
- Deep Apple ecosystem integration
This is why many businesses use low-code tools selectively instead of relying on them entirely.
How AI and Automation Are Shaping the Future of iPhone App Development
The latest iPhone app trends show that businesses increasingly value:
- Faster iteration cycles
- Smarter development workflows
- Reduced operational friction
- Efficient scaling processes
As competition grows, the development speed itself is becoming a strategic advantage.
What Businesses Should Evaluate Before Choosing AI-Assisted Development
Before adopting low-code or AI-driven workflows, companies should assess:
Product Complexity
- Will the app require advanced customization?
- Are ecosystem integrations important?
Scalability Goals
- Can the chosen platform support long-term growth?
- Will future AI features be supported?
Development Flexibility
- Is vendor lock-in a risk?
- Can workflows evolve later?
Security and Compliance
- Are security standards enterprise-ready?
- Is compliance infrastructure supported?
This Trend Matters in 2026
The future of iPhone app development is becoming faster, smarter, and increasingly automation-driven.
Businesses that strategically combine:
- AI-assisted development
- Scalable architecture
- Automation workflows
- Human expertise
may gain significant advantages in:
- Time-to-market
- Product iteration
- Operational efficiency
- Long-term scalability
This is why AI-assisted workflows and low-code development are becoming major emerging iOS app technologies influencing how modern applications are built and scaled.
What Businesses Should Prioritize Before Investing in iOS App Development?
Following the latest iPhone app trends is important, but successful iOS applications are rarely built around trends alone. Businesses that see long-term growth from mobile products usually focus on scalability, user experience, technology alignment, and future adaptability before development even begins.
In 2026, strategic planning will have become just as important as technical execution in the future of iPhone app development.
Define the Core Business Objective First
Before selecting technologies or features, businesses should clearly identify what the application is expected to achieve.
Common business goals include:
- Customer engagement
- Revenue generation
- Subscription growth
- Operational efficiency
- Brand expansion
- Customer retention
Clear product goals help companies avoid unnecessary development costs and feature overload.
Prioritize User Experience Over Feature Quantity
Many businesses still make the mistake of focusing heavily on features instead of usability.
Modern iOS users expect:
- Fast navigation
- Minimal friction
- Personalized experiences
- Smooth performance
- Clean interfaces
- Cross-device consistency
In many cases, simpler and better-optimized applications outperform feature-heavy platforms.
Build for Scalability From the Beginning
Scalability is becoming increasingly important as mobile applications evolve faster.
Businesses should evaluate whether their app architecture can support:
- Future AI integrations
- Growing user traffic
- Subscription expansion
- Ecosystem connectivity
- Multi-device experiences
- Advanced analytics systems
Scalable infrastructure reduces future redevelopment challenges and supports long-term business growth.
Choose the Right Technology Stack Strategically
Technology decisions directly impact:
- App performance
- Development speed
- Maintenance costs
- Scalability
- Future integrations
Businesses should carefully assess:
- Native iOS development needs
- Cross-platform requirements
- Backend infrastructure
- AI readiness
- Security capabilities
This is especially important as emerging iOS app technologies continue evolving rapidly.
Security and Privacy Should Be Early Priorities
Privacy-first development is no longer optional in the Apple ecosystem.
Businesses must prioritize:
- Secure authentication
- Encrypted data handling
- Compliance readiness
- Secure APIs
- Permission transparency
Strong security planning improves both user trust and long-term product stability.
Plan Beyond the Initial App Launch
One of the biggest mistakes companies make is treating app development as a one-time project.
Successful iOS applications require:
- Continuous optimization
- Feature updates
- User behavior analysis
- Performance monitoring
- Retention improvements
- Ongoing scalability planning
Modern mobile app trends for iOS increasingly reward businesses that continuously evolve their applications.
AI Readiness Is Becoming Essential
As Apple Intelligence and AI-driven experiences expand, businesses should prepare their applications for:
- Personalization systems
- Predictive experiences
- AI-powered automation
- Real-time recommendations
- Intelligent workflows
Even if AI features are not implemented immediately, scalable infrastructure preparation is becoming increasingly valuable.
Questions Businesses Should Ask Before Starting Development
Product Strategy
- What long-term business problem will the app solve?
- Is the app aligned with customer expectations?
Technical Planning
- Can the infrastructure support future growth?
- Is the app prepared for evolving Apple technologies?
User Experience
- Will the app reduce friction for users?
- Is retention strategy included early?
Post-Launch Scalability
- Who will maintain and optimize the app later?
- How will analytics and feedback improve the product?
Why Strategic Planning Matters in 2026
The latest iPhone app trends clearly show that successful apps are no longer defined only by design or functionality. Businesses now compete on:
- User experience quality
- AI readiness
- Ecosystem integration
- Privacy standards
- Scalability
- Long-term adaptability
Companies that prioritize these factors early are often better positioned to build future-ready iOS applications capable of growing alongside evolving user expectations and Apple’s rapidly changing ecosystem.

How to Choose the Right iOS App Development Partner in 2026

Choosing the right development partner has become far more important as iOS applications grow more complex, AI-driven, and ecosystem-focused. Businesses are no longer looking only for coding expertise; they want strategic partners who understand scalability, user experience, emerging technologies, and long-term product growth.
As modern iOS app development trends continue evolving rapidly, the right development team can directly influence how successfully an application adapts to future market demands.
Look Beyond Basic Development Capabilities
Many agencies can build an app, but not every team can build a scalable and future-ready digital product.
Businesses should evaluate whether a development partner understands:
- Product strategy
- Business goals
- User retention
- Scalability planning
- Ecosystem integration
- Long-term app evolution
The future of iPhone app development increasingly depends on combining technical execution with strategic thinking.
Evaluate Experience With Modern iOS Technologies
The latest iPhone app trends are heavily centered around:
- AI-powered personalization
- SwiftUI
- Apple Intelligence
- Wearable ecosystems
- Privacy-first architecture
- Cross-device experiences
Businesses should assess whether a development company has experience working with emerging iOS app technologies instead of relying only on outdated development practices.
Scalability Should Be a Core Discussion
One of the biggest long-term app challenges is scalability.
Before choosing a partner, businesses should ask:
- Can the app infrastructure handle future growth?
- Is the architecture prepared for AI integration?
- Can new features be added efficiently later?
- Will the app support ecosystem expansion?
Scalable planning is becoming one of the most important mobile app trends for iOS-focused businesses.
User Experience Expertise Matters More Than Ever
Modern iOS users expect:
- Fast interfaces
- Personalized experiences
- Smooth performance
- Minimal friction
- Seamless device transitions
A strong iOS app development partner should understand how user experience directly affects:
- Retention
- Engagement
- Conversion rates
- Subscription growth
This is especially important in highly competitive industries like fintech, healthcare, ecommerce, and SaaS.
Communication and Collaboration Are Critical
Long-term app success often depends on how effectively teams collaborate during development.
Businesses should evaluate:
- Communication processes
- Project transparency
- Agile workflows
- Reporting structure
- Post-launch support systems
A strong partnership should feel collaborative rather than transactional.
Security and Privacy Expertise Should Not Be Overlooked
As privacy-focused app development becomes more important, businesses should ensure their development partner understands:
- Secure architecture planning
- Data protection practices
- Compliance readiness
- Secure API implementation
- Apple privacy guidelines
Security mistakes can significantly impact both user trust and long-term scalability.
Post-Launch Support Is Increasingly Important
Successful iOS applications require ongoing optimization after launch.
Businesses should confirm whether the development partner supports:
- Performance monitoring
- Feature updates
- Scalability improvements
- Analytics tracking
- Security updates
- AI feature expansion
Modern iOS applications evolve continuously, especially as Apple introduces new ecosystem capabilities each year.
Questions Businesses Should Ask Before Hiring
Technical Expertise
- What iOS technologies does the team specialize in?
- Do they work with modern Apple frameworks?
Product Scalability
- How do they approach future scalability?
- Can the app evolve with changing technologies?
Industry Experience
- Have they worked on similar business models?
- Do they understand the target audience?
Long-Term Support
- What happens after launch?
- Is ongoing optimization included?
Why the Right Development Partner Matters in 2026
The latest iPhone app trends clearly show that businesses need more than short-term app development support. They need partners capable of helping them navigate:
- AI-driven innovation
- Ecosystem expansion
- Privacy-first development
- User experience optimization
- Long-term scalability
Companies that choose strategic iOS development partners early are often better positioned to build adaptable, future-ready applications that continue delivering business value as technology and user expectations evolve.

Conclusion
The iOS ecosystem is evolving far beyond traditional mobile app experiences. From Apple Intelligence and AI-powered personalization to spatial computing, wearable ecosystems, and privacy-first architecture, the latest iPhone app trends are reshaping how businesses approach digital product development in 2026.
For startups, enterprises, and growing brands, keeping up with these iOS app development trends is no longer only about technology adoption. It is about building scalable, future-ready applications that improve user engagement, strengthen customer retention, and support long-term business growth. As user expectations continue rising across the Apple ecosystem, businesses that invest early in emerging iOS app technologies may gain a significant competitive advantage in increasingly experience-driven markets.
At the same time, successful iOS applications will depend on more than following trends alone. Businesses must prioritize:
- Scalable architecture
- User-centric experiences
- Privacy and security
- AI readiness
- Cross-device compatibility
- Long-term adaptability
The future of iPhone app development will continue moving toward more intelligent, connected, and personalized digital experiences. Companies that strategically align with these mobile app trends for iOS today will likely be better positioned to adapt, scale, and innovate as Apple’s ecosystem continues evolving in the years ahead.


 Sharing Project Details
 Let's have a call
 Got Questions? Let’s Chat!