skip to content

Flutter App Development Cost in 2026: Complete Pricing Guide

Introduction

How much does it actually cost to turn your app ideas into a real product?

If you are also exploring Flutter, this is likely the first question on your mind. And you are right to ask it early.

The Flutter app development cost in 2026 usually falls between $15,000 and $150,000+, depending on what you build. A simple MVP with core features sits on the lower end. A feature-rich platform with integrations, real-time systems, or AI capabilities can move well beyond that range.

This gap is exactly why many businesses struggle to plan their budget. The cost of Flutter app development is not fixed. It changes based on your app’s complexity, design expectations, and the development team you choose.

For startups, getting this clarity early can save both time and money. It helps you decide what to build first and how to scale later. Without it, the cost to develop a Flutter app can quickly go beyond expectations.

In this guide, you will get a structured breakdown of the Flutter app price. From app types and real-world scenarios to factors that influence the final Flutter app cost, everything is explained in a way that helps you plan your investment with confidence.

Because when you understand the number from the start, every product decision becomes more controlled and practical.

Let’s start with the most important question. What does it typically cost to build a Flutter app today?

Get Free Cost Estimate

Why Flutter is a Cost-Effective Choice for App Development

Flutter helps businesses control the Flutter app development cost without limiting product quality.

A single codebase allows developers to build apps for Android and iOS together. This reduces development hours and keeps the cost of Flutter app development lower compared to building separate native apps.

The development process is faster. Teams can launch features quickly, which reduces overall effort and helps to manage the Flutter app price more efficiently.

Flutter also works well for MVPs and long-term products. You can start with a basic version and scale it as your business grows. This flexibility helps to keep the cost to develop a Flutter app within a practical range while planning future expansion.

In simple terms, Flutter allows you to build more with less investment, making it a practical choice for startups and growing businesses managing their Flutter app cost.

What is the Average Cost to Develop a Flutter App in 2026?

The average Flutter app development cost in 2026 ranges from $15,000 to $150,000+. This wide range exists because every app is built with different goals, features, and technical requirements.

For businesses evaluating investment, this number alone is not enough. You need to understand what falls under each cost range and what you actually get at each level of spending.

Quick Cost Range Overview

Here’s the structured view of the cost to develop a Flutter app based on complexity, features, and business use:

TypeCostTimelineBest ForIncludes
Basic Flutter App$15,000 to $40,0006 to 10 weeksEarly-stage startups testing an idea
  • Simple user flows
  • Basic UI components
  • Limited backend logic
  • Minimal third-party integrations
Mid-Level Flutter App$40,000 to $80,00010 to 16 weeksGrowing startups or small businesses
  • User authentication and profiles
  • API integrations
  • Payment systems
  • Admin dashboards
  • Improved UI and responsiveness
Complex Flutter App$80,000 to $150,000+4 to 8 monthsFunded startups or enterprises
  • Real-time features
  • AI or data-driven functionalities
  • Advanced security functionalities
  • Advanced security layers
  • High-performance backend system
  • Scalable architecture

Why Flutter App Development Cost Varies

The cost of Flutter app development changes because no two applications are built the same way. Even small differences in requirements can significantly affect the final budget.

Here are the key factors that influence the Flutter app price:

  1. Feature Scope: The more features you add, the more development time is required. For example, adding real-time chat or AI recommendations can increase the overall Flutter app cost.
  2. Design Complexity: A simple design using standard components costs less. A custom-designed interface with animations and branding increases the cost to develop a Flutter app.
  3. Backend Development: Apps that require a custom backend system, databases, or cloud infrastructure will have higher development costs compared to apps using ready-made backend services.
  4. Third-party Integrations: Payment gateways, analytics tools, maps, and messaging services add both development effort and ongoing costs.
  5. Development Team Location: Hiring a developer in regions like India is more cost-effective compared to US or Europe. This directly impacts the total Flutter app development cost.

To put it simply, the cost works like a sliding scale. A focused MVP keeps your investment low and helps you launch faster. As you add features, integrations, and scalability, the Flutter app price increases accordingly.

Understanding these cost layers early helps you plan your budget more accurately and avoid unexpected expenses during development.

Flutter App Development Cost Breakdown by App Type

Flutter App Development Cost Breakdown by App Type

The Flutter app development cost becomes much clearer when you look at it based on the type of app you are planning to build. Each category represents a different level of complexity, user experience, and business goals.

Instead of thinking in numbers alone, it helps to understand what each level actually delivers.

Basic Flutter Apps (MVP or Internal Tools)

This is where most startups begin.

A basic app focuses on solving one specific problem with limited features. It is built to test an idea quickly and gather real user feedback without a large upfront investment.

You can expect:

  • Simple user flows with minimal screens.
  • Basic UI without heavy customization.
  • Limited backend or database logic.
  • Essential integrations only.

From a cost perspective, this keeps the cost to develop a Flutter app at the lower end because the development scope is controlled.

A good example would be an MVP for a new service where the goal is validation, not perfection.

Mid-Level Apps (eCommerce, Booking, Dashboards)

Once your idea is validated, the next step is building a product that users can actively engage with.

Mid-level apps introduce more structure and functionality. These apps are designed for real users and often include multiple user roles, integrations, and smoother user experiences.

You can expect:

  • User authentication and profile management.
  • API integrations for dynamic data.
  • Payment system and transactions.
  • Admin dashboards for control and analytics.
  • Better UI with improved usability.

At this stage, the cost of Flutter app development increases because the app is no longer just functional. It needs to be reliable, interactive, and scalable for growing users.

Complex Apps (Fintech, AI, Real-Time Systems)

This is where apps move from products to full platforms.

Complex apps require advanced architecture, strong security, and the ability to handle large volumes of users and data. These are built for businesses that need performance, scalability, and long-term growth.

You can expect:

  • Real-time features such as chat or live tracking.
  • AI or data-driven functionalities.
  • Advanced security and compliance layers.
  • Multi-user roles with permission control.
  • Scalable backend infrastructure.

Here, the Flutter app cost reflects more than just development time. It includes system design, performance optimization, and long-term reliability.

Each category is not separate. It is a progression. Most successful products do not start as complex platforms. They begin as simple versions, produce their value, and then expand.

This approach helps you manage the Flutter app price in stages instead of making a large investment upfront.

Know exactly what your app will cost

Flutter App Cost Table (Detailed Pricing Overview)

By now, you have a clear idea of how the Flutter app development cost changes based on app type.

This section brings everything together in a structured format so you can quickly estimate your budget from different angles.

Cost by App Type

This view helps you understand what you can expect based on the kind of products you are building.

App TypeKey FocusEstimated CostTimeline
Basic (MVP)Core functionality, idea validation$15,000 to $40,0006 to 8 weeks
Mid-LevelUser engagement, integrations$40,000 to $80,00010 to 16 weeks
ComplexScalability, performance, security$80,000 to $150,000+4 to 8 months

Cost by Development Stage

The cost to develop a Flutter app also depends on how far you take your product in the first phase.

Development StageWhat It IncludesCost Impact
MVPCore features onlyLower initial investment
Growth StageFeature expansion, integrationsModerate increase
Full ProductScalability, performance optimizationHigher total cost

Cost by Region

Where your development team is located plays a major role in the overall Flutter app price.

RegionAverage Hourly RateCost Impact
India$20 to $50Most cost-effective
Eastern Europe$40 to $90Balanced pricing
US/UK$80 to $150+Higher investment

What This Means for Your Budget

The cost of Flutter app development is not just about one number. It is a combination of what you build, how much you build, and who builds it.

A simple way to think about it:

  • App type defines your base cost.
  • Development stage defines how much you invest now vs later.
  • Team location defines your overall spending efficiency.

When you combine these three factors, you get a much more realistic view of your total Flutter app cost.

This structured approach helps you plan better and avoid unexpected budget increases as your project moves forward.

Get a precise Flutter app quote. We break down cost by feature, not by guesswork.

Book a Free Call

Flutter MVP Development Cost and Timeline for Startups

For most startups, building everything at once is not the right approach. That is why many begin with an MVP.

An MVP, or Minimum Viable Product, focuses on launching a usable version of your app with only the most important features. This helps you validate your idea without committing to a high Flutter app development cost from the start.

What a Flutter MVP Includes

A Flutter MVP is built with a clear goal. Launch fast and learn from real users.

Instead of adding every feature, the focus stays on care functionality.

A typical MVP includes:

  • Essential user flows to complete one main action.
  • Basic UI that is clean and functional.
  • Simple backend or database setup.
  • Limited integrations, such as login or basic APIs.

For example, if you are building a booking app, the MVP would include search, selection, and booking. Advanced filters or recommendations can come later.

This approach helps to keep the cost to develop a Flutter app within a manageable range.

Cost to Develop a Flutter MVP

The cost of Flutter app development for an MVP usually falls between $15,000 and $40,000.

This range depends on:

  • Number of core features.
  • Level of UI customization.
  • Backend requirements.
  • Development team location.

A well-planned MVP avoids unnecessary complexity. This ensures your Flutter app price stays aligned with your initial business goals.

Typical Development Timeline

Speed is one of the biggest advantages of building an MVP with Flutter.

A standard timeline looks like this:

  • Planning and requirement finalization: 1 to 2 weeks
  • UI design and prototyping: 1 to 2 weeks
  • Development and integration: 3 to 5 weeks
  • Testing and launch: 1 to 2 weeks

This means most MVPs can be launched within 6 to 10 weeks.

Why Start with an MVP

Starting small gives you more control over your Flutter app cost.

  • You reduce initial investment.
  • You validate your idea with real users.
  • You avoid building features that users may not need.

Think of it like testing a product in a small market before expanding. Once you have feedback and traction, you scale your app step by step.

This phased approach makes the Flutter app development cost more predictable and aligned with business growth.

Real-World Flutter App Cost Examples (Startup Scenarios)

Understanding the Flutter app development cost becomes easier when you see how it applies to real products. Instead of looking at ranges alone, these examples show what businesses typically build within a fixed budget.

Each scenario reflects a common startup use case and how the cost to develop a Flutter app is distributed.

Booking App Development Cost (Approx. $35,000)

A booking app is often the starting point of service-based startups.

Key features included:

  • User registration and login.
  • Search and filtering options.
  • Booking and scheduling system.
  • Payment gateway integration.
  • Basic admin panel.

Timeline: 8 to 12 weeks

Why this cost range: The Flutter app price stays moderate because the app focuses on structured workflows rather than complex logic. Most features are predictable and can be built using standard integrations.

AI Productivity App Cost (Approx. $55,000)

This type of app focuses on improving user efficiency using data or AI integration of features.

Key features included:

  • User dashboard and task management.
  • AI-based suggestions or automation.
  • API integration for AI services.
  • Data storage and analytics.
  • Clean and responsive UI.

Timeline: 10 to 16 weeks

Why this cost range: The cost of Flutter app development increases due to AI integration and backend processing. These features require additional development effort and testing.

Fintech App Development Cost (Approx. $90,000)

Fintech apps are among the most complex and sensitive applications.

Key features included:

  • Secure user authentication.
  • Payment and transaction systems.
  • KYC verification process.
  • Real-time data handling.
  • Admin controls and reporting.

Timeline: 4 to 6 months

Why this cost range: The Flutter app cost is higher due to strict security requirements, compliance standards, and reliable backend systems. Every feature must be built with precision and tested thoroughly.

What You Can Learn from These Examples

These scenarios show a clear pattern:

  • Simpler workflows keep the Flutter app development cost lower.
  • Advanced features like AI and real-time systems increase the budget.
  • Security and compliance significantly impact the Flutter app price.

Most importantly, you do not need to build everything at once. Start with a focused version, validate it, and expand based on user needs.

This approach helps you manage the cost to develop a Flutter app without taking unnecessary risks early on.

cost to develop a Flutter app

Flutter App Development Cost for Fintech Apps and Compliance

Fintech apps are different from standard applications. They deal with sensitive user data, financial transactions, and strict guidelines. Because of this, the Flutter app development cost for fintech products is usually higher than for other app types.

This is not just about adding features. It is about building trust, security, and compliance into every layer of the app.

Security Requirements and Their Cost Impact

Security is the foundation of any fintech app. Even a small gap can lead to serious risks.

Common security implementations include:

  • End-to-end data encryption.
  • Multi-factor authentication.
  • Secure APIs and token-based access.
  • Fraud detection mechanisms.
  • Data protection and storage standards.

Each of these adds development time and testing effort. This directly increases the cost of Flutter app development, but it is necessary for user trust and platform stability.

Compliance Costs (KYC, PCI DSS, GDPR)

Fintech apps must follow industry regulations based on the region they operate in.

Key compliance requirements include:

  • KYC (Know Your Customer) for identity verification.
  • PCI DSS for secure payment processing.
  • GDPR or similar data protection regulations.

Meeting these standards involves documentation, integrations, and regular audits. These factors increase the Flutter app price, but they are essential to operate legally and securely.

Banking and Payment Integrations

Most fintech apps rely on external systems to function.

Common integrations include:

  • Payment gateways and wallets.
  • Banking APIs.
  • Transaction processing systems.
  • Real-time financial data services.

These integrations require careful implementation and testing. They also introduce ongoing costs, which add to the total Flutter app cost over time.

Why Fintech Apps Cost More

The cost to develop a Flutter app in fintech is higher because you are not just building features. You are building a system that handles money, data, and compliance at scale.

  • Security layers increase development effort.
  • Compliance requirements add complexity.
  • Integrations require precision and reliability.

Think of it like building a secure vault instead of a regular room. The structure is similar, but the level of protection and planning is far more advanced.

For businesses entering fintech, it is important to plan the Flutter app development cost with these factors in mind. Cutting corners in this space can lead to bigger issues later, both technically and legally.

Key Factors That Affect Flutter App Development Cost

Key Factors That Affect Flutter App Development Cost

By now, you have seen different cost ranges and examples. To plan accurately, you need to understand what actually drives the Flutter app development cost.

Each of these factors below directly impacts how much time, effort, and budget your app will require.

App Complexity and Feature Scope

This is the most important factor when estimating the cost to develop a Flutter app.

Apps with basic functionality cost less. As you add advanced features, the development effort increases.

Features that impact cost include:

  • User authentication and profile management.
  • Real-time features like chat or live tracking.
  • Payment processing and transaction systems.

The broader your feature set, the higher the overall Flutter app cost.

UI/UX Design Complexity

Design plays a key role in both user experience and development effort.

A simple interface built with standard templates keeps the Flutter app price lower. Custom designs with unique layouts, branding, and animations require more design and development time.

Design levels:

  • Template-based UI for faster development.
  • Custom UI for brand consistency.
  • Advanced UI with animations and transitions.

Platform Coverage (Mobile, Web, Desktop)

Flutter allows you to build apps for multiple platforms, but each platform adds additional work.

If your app is limited to mobile, the cost of Flutter app development stays lower. Expanding to the web or desktop increases development, testing, and optimization efforts.

Backend Development and Architecture

The backend manages data, user interactions, and system logic.

Using ready-made solutions such as Backend-as-a-Service can reduce the Flutter app development cost. Building a custom backend with a scalable architecture increases both cost and development time.

Backend options:

  • BaaS for faster and cost-effective setup.
  • Customer backend for flexibility and scalability.

Third-Party Integrations

Most apps rely on external services to function efficiently.

Integrating APIs such as payment gateways, analytics tools, or communication services adds to the Flutter app price. Some services also introduce ongoing costs.

Development Team Location and Structure

Your choice of development team significantly affects the cost to develop a Flutter app.

Common options include:

  • Freelancers for smaller projects.
  • Agencies for structured development.
  • In-house teams for long-term projects.

Hiring in regions like India is more cost-effective compared to the US or Europe, which directly impacts the total Flutter app cost.

Security and Compliance Requirements

Apps that handle sensitive data require strong security measures.

Adding features such as encryption, secure authentication, and compliance standards increases the cost of Flutter app development, especially for industries like Fintech or healthcare.

Each of these factors works together to define your final budget. Understanding them early helps you prioritize features and manage your Flutter app development costs more effectively.

optimize your Flutter app cost

Flutter vs React Native Cost Comparison for Startups

Flutter vs React Native Cost Comparison for Startups

Choosing the right framework is not just a technical decision. It directly affects your budget, timeline, and long-term maintenance. For many startups, the comparison often comes down to Flutter and React Native.

Both are strong cross-platform frameworks, but their impact on the Flutter app development cost and overall investment can differ based on your project needs.

Development Cost and Time Comparison

Flutter uses a single codebase with a rich set of built-in components. This reduces dependency on external libraries and speeds up development.

React Native relies more on third-party libraries, which can sometimes increase development efforts.

What this means for cost:

  • Flutter can reduce the development hours, helping control the cost to develop a Flutter app.
  • React Native may require additional setup and integration effort in some cases.

For startups working with limited budgets, faster development often translates into better cost efficiency.

Maintenance and Long-Term Cost

Building the app is only one part of the investment. Ongoing maintenance also impacts the total Flutter app cost.

Flutter offers more consistency across platforms, which makes updates and bug fixes easier to manage. React Native apps may require more platform-specific adjustments over time.

Cost impact:

  • Flutter can reduce long-term maintenance effort.
  • React Native may involve additional work for platform-specific issues.

Which is More Cost-Effective for Startups

From a startup’s perspective, the goal is to build fast, launch early, and scale efficiently.

Flutter is often preferred when:

  • You want faster development with a single team.
  • You need a consistent UI across platforms.
  • You want to manage the Flutter app price within a controlled budget.

React Native can still be a good option if your team already has strong JavaScript expertise or specific project requirements.

Both frameworks can deliver quality apps, but Flutter often provides better control over the cost of Flutter app development due to faster development cycles and simpler maintenance.

For startups focused on speed and cost efficiency, Flutter is usually the more practical choice.

Flutter Developer Rates by Region (India vs US vs Europe)

The location of your development team has a direct impact on Flutter app development cost. The same app can cost significantly different amounts depending on where your developers are based.

Understanding regional pricing helps you make a smarter decision based on your budget and project needs.

Cost of Hiring Flutter Developers in India

India is one of the most preferred destinations for outsourcing app development or hiring Flutter developers.

Average hourly rate: $20 to $50

Why businesses choose India:

  • Cost-effective development without compromising quality.
  • Large pool of experienced Flutter developers.
  • Flexible hiring models for startups and growing businesses.

For startups, this option helps reduce the cost to develop a Flutter app while still maintaining development speed and quality.

Cost in the US and Western Markets

Developers in the US, UK, and Western Europe typically charge higher rates.

Average hourly rates: $80 to $150+

What you get at this cost:

  • Strong communication and local collaboration.
  • Access to experienced teams for complex projects.
  • Higher operational and development costs.

This significantly increases the overall Flutter app price, especially for long-term projects.

Offshore vs Onshore Development: What Works Better

Choosing between offshore and onshore development depends on your priorities.

Offshore (India, Eastern Europe):

  • Lower development cost
  • Suitable for startups with budget constraints
  • Requires proper communication and project management

Onshore (US, UK):

  • Easier collaboration
  • Faster communication
  • Higher Flutter app cost

What This Means for Your Budget

The development location can change your total cost of Flutter app development by two to three times.

  • Offshore teams help you stay within budget.
  • Onshore teams offer closer collaboration but at a higher price.

For many startups, a hybrid approach works well. You can manage strategy locally while outsourcing development to control the Flutter app development cost effectively.

What You Get at Different Flutter App Budget Levels

Understanding the Flutter app development cost becomes easier when you look at it from a budget perspective. Instead of guessing what your investment will deliver, this section shows what you can realistically expect at different price points.

$30,000 Budget

At this level, the focus is on building a functional MVP that can be launched quickly.

What you typically get:

  • Core features built around a single use case.
  • Basic but clean UI.
  • Simple backend setup.
  • Limited third-party setup.

Best suited for:

Startups testing an idea or entering the market for the first time.

At this stage, the cost to develop a Flutter app is controlled by keeping the scope limited and focused.

$50,000 to $80,000 Budget

This range allows you to build more complete and user-ready products.

What you typically get:

  • Multiple features and user flows.
  • User authentication and profile management.
  • Payment gateway integration.
  • API-based architecture.
  • Improved UI and user experience.

Best suited for:

Startups and businesses are launching a product for real users.

Here, the cost of Flutter app development reflects a balance between functionality and scalability.

$100,000+ Budget

At this level, you are building a scalable platform rather than just an app.

What you typically get:

  • Advanced features such as real-time systems or AI.
  • Strong backend architecture for scalability.
  • High-level security and performance optimization.
  • Multi-user roles and complex workflows.

Best suited for:

Funded startups, enterprises, or businesses with long-term growth plans.

The Flutter app cost in this range includes not just development but also system design and future scalability.

How to Approach Your Budget

Your budget should align with your business stage, not just your idea.

  • Start small if you are validating a concept.
  • Invest more once you see traction.
  • Scale features based on user demand.

This approach helps you manage the Flutter app price step by step instead of committing to a large upfront investment.

In simple terms, your budget defines how much of your product you build today and how much you plan for tomorrow.

Flutter App Maintenance and Ongoing Costs

Building your app is only the first step. To keep it running smoothly, you need to plan for ongoing expenses as well.

The Flutter app development cost does not end at launch. Maintenance, updates, and scaling all contribute to the long-term Flutter app cost.

Monthly and Annual Maintenance Cost

Most businesses spend 15% to 25% of the initial development cost annually on maintenance.

What this includes:

  • Bug fixes and performance improvements.
  • OS and device compatibility updates.
  • Minor feature updates.
  • Security patches.

For example, if your initial cost to develop a Flutter app was $40,000, your yearly maintenance could range between $6,000 and $10,000.

Hidden Costs You Should Plan For

Some costs are not obvious during development but become important after launch.

Common hidden costs include:

  • Cloud hosting and server changes.
  • Third-party API subscriptions.
  • Analytics and monitoring tools.
  • App store fees and renewals.

These ongoing expenses directly affect the total Flutter app price over time.

Scaling Cost as Your App Grows

As your user base increases, your app needs to handle more traffic and data.

Scaling may require:

  • Upgrading server infrastructure.
  • Improving backend performance.
  • Adding new features based on user demand.
  • Enhancing security measures.

This is where the long-term cost of Flutter app development evolves. The more your app grows, the more resources it requires.

What This Means for Your Budget

Many businesses focus only on development and overlook maintenance.

A better approach is to plan both upfront and ongoing costs together.

  • Development cost builds your app.
  • Maintenance costs keep it running.
  • Scaling cost supports growth.

When you account for all three, your Flutter app development cost becomes more predictable and easier to manage over time.

How to Estimate Your Flutter App Development Cost

How to Estimate Your Flutter App Development Cost

Estimating the Flutter app development cost is not about guessing a number. It is about breaking your idea into measurable components so you can assign realistic time, effort, and budget to each part.

A structured estimation helps to avoid under-budgeting or over-investing early.

Step 1. Define Your App Goals

Start with a clear product vision.

Ask:

  • What problem does your app solve?
  • Who will use it?
  • What is the primary action users should complete?

These steps help you avoid unnecessary features that increase the cost to develop a Flutter app without adding real value.

Example:

If your goal is booking services, your core focus should be search, selection, and booking. Not advanced analytics or AI at the start.

Step 2. Break Down Features into Modules

Instead of listing features broadly, divide them into smaller modules.

Common modules include:

  • User authentication
  • Dashboard or home screen
  • Search and filters
  • Payments or transactions
  • Notifications

Each module requires design, development, and testing. The more modules you include, the higher the Flutter app cost.

Tip:

Classify features into:

  • Must-have (for launch)
  • Nice-to-have (post-launch)

Step 3. Define Technical Requirements

Your technical choices directly impact the cost of Flutter app development.

Consider:

  • Will you use a simple backend or a custom-built system?
  • Do you need real-time features?
  • Are third-party integrations required?

Example:

Using ready-made backend services can reduce initial cost, while custom architecture increases flexibility but also increases budget.

Step 4. Estimate Development Time

Once the feature and technical scope are clear, estimate how long each module will take.

A typical breakdown looks like:

  • UI/UX design: 15% to 20% of total effort
  • Frontend development: 30% to 40%
  • Backend development: 20% to 30%
  • Testing and deployment: 15% to 20%

More time means a higher Flutter app price, especially if you are working with hourly rates.

Step 5. Apply Hourly Rates Based on Region

Multiply estimated hours by developer rates.

Example calculation:

  • Total estimated effort: 800 hours
  • Developer rate: $30 per hour

Estimated cost: $24,000

This step gives you a practical estimate of the cost to develop a Flutter app based on real effort.

Step 6. Add Buffer for Unexpected Costs

Every project has uncertainties.

Add a buffer of 10% to 20% to your estimate to cover.

  • Scope changes
  • Additional features
  • Technical challenges

This ensures your total Flutter app development cost stays realistic.

Example: Estimating a Mid-Level App

Let’s say you are building a mid-level booking app:

  • Features: Authentication, search, booking, payments
  • Backend: API-based system
  • Timeline: 12 weeks
  • Team: Offshore agency

Estimated cost range: $35,000 to $60,000

This aligns with typical market pricing and gives you a realistic expectation of the Fluuter app cost.

What This Means for Your Planning

A proper estimation is like creating a blueprint before construction.

  • It helps you control your budget.
  • It prevents feature overload.
  • It aligns development with business goals.

When you break your app into clear components, the Flutter app development cost becomes predictable instead of uncertain.

Cost-Saving Strategies for Flutter App Development

Cost-Saving Strategies for Flutter App Development


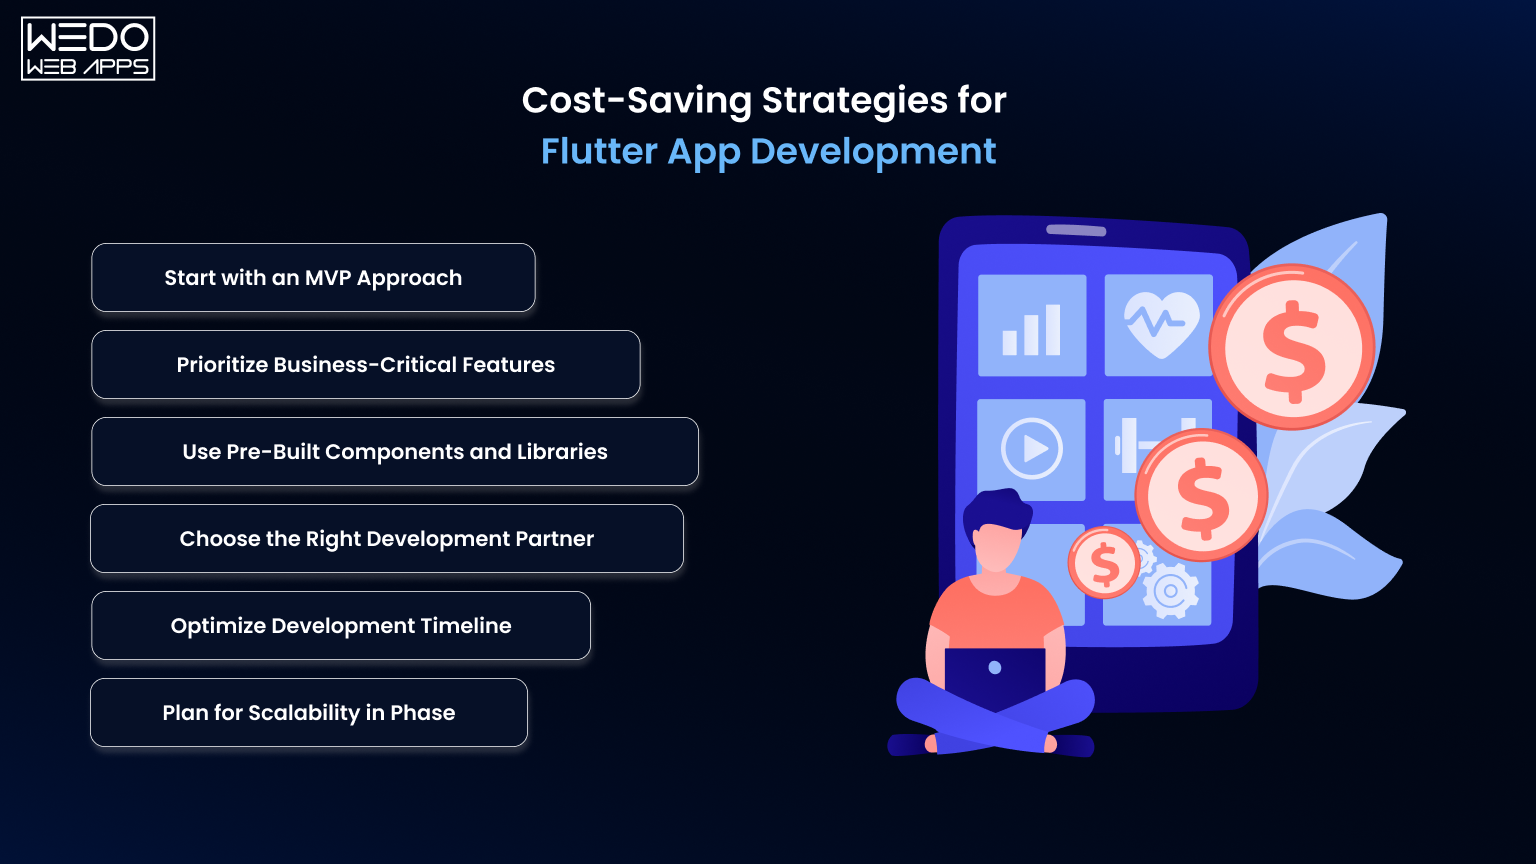
Managing the Flutter app development cost is not just about reducing expenses. It is about making smarter decisions, so you get the best outcome within your budget.

Here are practical strategies that help you control the cost to develop a Flutter app without affecting quality.

Start with an MVP Approach

Building everything at once increases risk and cost.

Start with a Minimum Viable Product that includes only the most important features. This allows you to launch faster and validate your idea before investing more.

Impact on cost:

  • Reduces initial Flutter app cost.
  • Avoids spending on unused features.
  • Helps you invest based on real user feedback.

Prioritize Business-Critical Features

Not every feature needs to be built in the first version.

Focus on what directly supports your business goal and user needs.

How to approach this:

  • Identify must-have features for launch.
  • Delay advanced or optional features.
  • Build in phases instead of all at once.

This keeps the cost of Flutter app development aligned with actual business value.

Use Pre-Built Components and Libraries

Flutter has a strong ecosystem with reusable components.

Instead of building everything from scratch, use existing libraries for common functionalities.

Examples:

  • UI components
  • Authentication systems
  • Payment integrations

This reduces development time and lowers the overall Flutter app price.

Choose the Right Development Partner

Your development team can either control or increase your costs.

An experienced team will:

  • Estimate accurately.
  • Avoid unnecessary rework.
  • Deliver within timelines.

Choosing the right partner helps you manage the Flutter app development cost more effectively.

Optimize Development Timeline

Time directly costs, especially with hourly billing.

Ways to optimize:

  • Finalize requirements before development.
  • Avoid frequent scope changes.
  • Maintain clear communication with the team.

A well-managed timeline helps to keep the Flutter app cost predictable.

Plan for Scalability in Phase

Instead of building a fully scalable system from day one, scale gradually.

  • Start with a basic infrastructure.
  • Upgrade as user demand grows.

This approach spreads the cost to develop a Flutter app over time and reduces initial investment.

What This Means for Your Budget

Cost-saving is not about cutting corners. It is about building smart.

  • Focus on what matters first.
  • Use available resources efficiently.
  • Scale based on real demand.

When you follow these strategies, the Flutter app development cost becomes easier to manage while still delivering a strong product.

Is Flutter Worth the Cost for App Development in 2026?

After understanding the full Flutter app development cost, the real question is whether the investment delivers value.

The answer depends on what you expect from your app. For most startups and businesses, Flutter offers a strong balance between cost, speed, and scalability.

Where Flutter Justifies Its Cost

Flutter is not just about saving money upfront. It helps to reduce overall development effort across the product lifecycle.

Key advantages include:

  • Single codebase for multiple platforms reduces duplication.
  • Faster development cycles lower the total project cost.
  • Consistent UI across devices improves user experience.
  • Easier updates help to control the long-term Flutter app cost.

This means the cost of Flutter app development often delivers more output compared to traditional approaches.

ROI from a Business Perspective

The real value of any app lies in how quickly it reaches users and starts generating returns.

Flutter helps in:

  • Faster time to market.
  • Lower initial investment for MVPs.
  • Easier scaling as your business grows.

For startups, this makes the cost to develop a Flutter app more manageable and aligned with growth stages.

When Flutter Makes the Most Sense

Flutter is a strong choice if:

  • You want to launch on Android and iOS together.
  • You are working with a limited or controlled budget.
  • You plan to start with an MVP and scale gradually.
  • You need a consistent user experience across platforms.

In these scenarios, the Flutter app price remains justified because you reduce both development time and future costs.

When to Reconsider

While Flutter fits most use cases, there are situations where alternatives may be considered:

  • Highly platform-specific applications.
  • Projects requiring deep native integrations.
  • Extremely complex hardware-level interactions.

Even in these cases, the decision should be based on technical needs, not just the Flutter app development cost.

Final Thoughts

The Flutter app development cost is not just an expense. It is an investment in how fast you can launch, how well your app performs, and how easily you can scale.

If your goal is to build a high-quality app without doubling development effort, Flutter offers a practical path. It helps you move from idea to launch faster while keeping the cost to develop a Flutter app under control.

For most startups and growing businesses, this balance makes the cost of Flutter app development a smart and sustainable choice.

Now the real question is how much it costs. It is how efficiently you want to build.

If you are planning your app, this is the right time to get clarity on your budget and scope.

  • Get a tailored Flutter app cost estimate based on your ideas and features.
  • Know your exact investment, timeline, and roadmap before you start.

The sooner you define your budget, the faster you can move from planning to launch.

Start Your Project

Multi-Vendor Marketplace Platform: Feature, Cost, & Development Guide

Introduction

What if your platform did not just sell products, but allowed hundreds of sellers to build their own businesses within it?

This is exactly what a multi-vendor marketplace platform enables, where multiple sellers operate independently while everything is managed under one system. Instead of running a single online shop solution, businesses are now moving towards building a scalable multi-vendor eCommerce website that supports multiple vendors, products, and transactions in one place.

A modern multivendor eCommerce platform is not just about maintaining a list of products. It requires a structured workflow for vendor management, commission handling, and payment processing to ensure smooth operations across all users.

For businesses planning to build a marketplace app, one of the first considerations is understanding the marketplace app development cost. The total cost of building a marketplace website depends on features, technology stack, and whether the solution is basic or part of full-scale multi-vendor eCommerce marketplace development.

This guide explains how to approach, how to create a multi-vendor marketplace website, what features matter most, and how different decisions impact the final development cost and scalability of your platform.

Validate your idea before investing in development

What is a Multi-Vendor Marketplace Platform?

A multi-vendor marketplace platform is a system where multiple sellers can register, list their products, and manage their own stores within a single platform. Instead of a single seller controlling everything, the platform brings together different vendors while the owner manages the overall system, transactions, and rules.

This model powers platforms like Amazon and Etsy, where growth comes from multiple sellers working under one structured ecosystem.

Meaning of Multi-Vendor eCommerce Marketplace

A multi-vendor eCommerce marketplace allows different sellers to operate independently while sharing the same storefront environment. Customers can browse products from multiple vendors, compare options, and complete purchases through a single checkout system.

The platform owner earns revenue through commissions, listing fees, or subscription models, while maintaining control over operations.

How a Multi-Vendor eCommerce Website Works

A multi-vendor eCommerce website follows a simple but structured flow:

  • Vendors register and set up their stores.
  • Products are listed and managed individually by sellers.
  • Customers browse and place orders from multiple vendors.
  • Payment is processed and split between vendors and platform owners.
  • Vendor fulfills orders and manages delivery.

This system becomes efficient when you build a marketplace app with proper automation for orders, payments, and commissions.

Types of Multi-Vendor Marketplace Models

Different business goals lead to different marketplace structures. The most common models include:

ModelsDescriptionExample
B2C Marketplace ModelBusinesses sell products directly to customers through multiple vendors.Retail-focused platforms with wide product categories.
B2B Marketplace ModelBusinesses sell bulk products or services to other businesses.Wholesale or industrial supply platforms.
C2C Marketplace ModelIndividuals sell products or services to other individuals.Resale and peer-to-peer selling platforms.
Service-Based Marketplace ModelVendors offer services instead of physical products.Freelance, booking, or on-demand service platforms.

Each model influences how you approach multi-vendor eCommerce marketplace development, especially in terms of features, workflows, and user experience design.

Why Businesses Are Moving Toward Marketplace Models

Businesses are shifting toward a multivendor eCommerce platform because it allows them to:

  • Scale without holding inventory.
  • Earn from multiple vendors through commissions.
  • Expand product offerings quickly.
  • Build a network-driven business model.

This makes it a preferred approach for startups and enterprises planning to build a marketplace app.

Key Benefits of a Multi-Vendor Marketplace Platform

A strong multi-vendor marketplace platform offers:

  • Centralized control with decentralized selling.
  • Automated commission tracking.
  • Flexible vendor management.
  • Higher scalability compared to single-store systems.
  • Multiple revenue streams for platform owners.

Understanding the marketplace structure and benefits allow to make the actual decision.

Essential Features of a Multi-Vendor Marketplace Platform

The success of a multi-vendor marketplace platform depends on how well its features are structured for three key users: customers, vendors, and admins. Each group interacts with the platforms differently, so the features must be designed to keep operations smooth while supporting growth.

Instead of adding everything at once, focus on features that directly impact usability, vendor management, and revenue flow when you build a marketplace app.

Customer Side Features

These features define how buyers interact with your multi-vendor eCommerce website. A smooth customer experience directly impacts conversions and retention.

Key customer features include:

  • Advanced product search and filters: Helps users quickly find products across multiple vendors.
  • Cart and unified checkout system: Allows purchasing from different sellers in a single order.
  • Order tracking and history: Gives transparency after purchase.
  • Reviews and ratings system: Builds trust between buyers and vendors.
  • Wishlist and saved items: Encourages repeat visits and future purchases.

Vendor Dashboard Features

Vendors are the backbone of any multivendor eCommerce platform. A strong dashboard helps them manage their business without relying on the admin.

Important vendor features:

  • Product management system: Add, edit, and organize product listings easily,
  • Inventory and stock control: Prevent overselling and track availability.
  • Order management dashboards: Accept, process, and update orders.
  • Earnings and payout tracking: Clear visibility of revenue and commissions.
  • Store customization options: Allow vendors to manage branding and presentation.

Admin Panel Features

The admin controls the entire multi-vendor eCommerce development system. This panel ensures smooth operations and platform governance.

Core admin features include:

  • Vendor onboarding and approval system: Control who can sell on the platform.
  • Commission management system: Set and adjust platform fees.
  • Order and transaction monitoring: Track all activities across the platform.
  • Dispute and refund management: Handle conflicts between buyers and vendors.
  • Analytics and reporting dashboards: Monitor performance, sales, and growth.

Advanced Marketplace Features

Once the core system is stable, advanced features can improve scalability and user experience.

Key advanced features:

  • Multi-language and multi-currency support: Expand reach to global markets.
  • AI-based product recommendations: Improve product discovery and conversions.
  • Integrated notification system: Real-time updated via email, SMS, or in-app alerts.
  • Mobile app compatibility: Extend platform access across devices.

Every feature of eCommerce you add increases the overall cost of building a marketplace website. A basic feature set helps launch faster, while advanced features increase both complexity and the marketplace app development cost.

That is why most businesses start with an MVP and gradually expand based on user demand and platform growth.

Talk to experts about features tech stack and cost

Marketplace Features Comparison Table

Choosing the right approach for your multi-vendor marketplace platform is not just about cost. It is about how well the platform supports essential features like vendor management, commission handling, and scalability over time.

Different solutions, such as Magento, WooCommerce, and custom-built systems, offer varying levels of flexibility. This comparison will help you understand what you actually get when you build a marketplace app using each option.

Feature Comparisons Across Marketplace Platforms

FeaturesMagento MarketplaceWooCommerce MultivendorCustom Marketplace
Vendor DashboardAdvanced and scalablePlugin-based functionalityFully customizable
Product ManagementStrong and flexibleModern with pluginsTailored to business needs
Commission EngineBuilt-in configuration optionsDepends on pluginsFully custom logic
Payment Split SystemRequires third-party integrationPlugin-supportedCustom-built integrations
Order ManagementRobust and enterprise-readyBasic to moderateFully optimized workflow
Review & RatingsBuilt-in supportPlugin-basedFully customized
Analytics & ReportingAdvanced insightsLimited without extensionsCustom dashboards
ScalabilityHighMediumVery High
CustomizationModerate to highLimited by pluginsUnlimited flexibility
Development CostHighLow to mediumHigh

What This Comparison Means for Your Business

  • Magento is suitable for businesses that need a stable and scalable multivendor eCommerce platform with strong built-in capabilities.
  • WooCommerce works well for smaller projects or MVPs with limited budgets.
  • Custom development is ideal when you want full control over features and long-term scalability in your multi-vendor eCommerce marketplace development.

How to Choose the Right Platform

Your decision should depend on:

  • The complexity of your marketplace.
  • Your budget and expected marketplace app development cost.
  • The level of customization required.
  • Long-term scalability plans.

If your goal is to launch quickly, a plugin-based system may work. But if you are planning a scalable multi-vendor eCommerce website, investing in a more flexible solution can provide better results over time.

Vendor Onboarding Workflow for Marketplace Platforms

A strong vendor onboarding process decides how quickly your multi-vendor marketplace platform can grow. If onboarding is slow or complicated, vendors drop off before they even start selling. If it is too loose, the platform risks low-quality sellers and poor customer experience.

The goal is simple. Make it easy for the right vendor to join, while keeping enough control to maintain platform quality.

Step-by-Step Vendor Onboarding Process

A structured onboarding flow ensures consistency across your multi-vendor eCommerce website.

Typical onboarding steps include:

  • Vendor Registration: Sellers create accounts with basic business details.
  • Profile and Store Setup: Vendors add store information, branding, and contact details.
  • Verification and Approval: Identity checks and document validation before activation.
  • Product Listing Setup: Identify checks and document validation before activation.
  • Go Live and Start Selling: Approved vendors can begin receiving orders.

This process should be simple enough to encourage signups, but controlled enough to protect platform standards.

Automated Vendor Onboarding for Scale

As your multivendor eCommerce platform grows, manual onboarding becomes a bottleneck. Automation helps reduce delays and improve efficiency.

Automation can include:

  • Auto-approval rules for selected vendor categories.
  • Predefined product listing templates.
  • Real-time document verification.
  • Guided onboarding dashboards.

When you build a marketplace app, adding automation early can save time and reduce operational effort as vendor numbers increase.

Common Vendor Onboarding Challenges

Even well-designed systems face issues during onboarding. Some common challenges include:

  • Incomplete vendor profiles: Missing details delay approval and listing.
  • Fake or low-quality sellers: Weak verification can impact trust.
  • Approval delays: Manual processes slow down vendor activation.
  • Product quality inconsistency: Poor listings affect the overall platform experience.

Addressing these early issues improves the quality of your multi-vendor eCommerce marketplace development and builds long-term trust.

How Onboarding Impacts Marketplace Growth

A smooth onboarding workflow directly affects:

  • Number of active vendors on the platforms.
  • Product variety and availability.
  • Customer trust and experience.
  • Overall platform scalability.

A well-optimized onboarding system helps you scale faster without increasing operational complexity or the cost of building a marketplace website unnecessarily.

Build a trusted system vendors want to join

Marketplace Commission Engine Development

The commission engine is the revenue backbone of any multi-vendor marketplace platform. It defines how much the platform earns from every transaction and how payouts are distributed to vendors.

Without a well-structured commission system, even a feature-rich multi-vendor eCommerce website can struggle to generate consistent revenue. That is why this component needs to be planned early when you build a marketplace app.

What is a Commission Engine in Marketplace Platforms

A commission engine is the logic that automatically calculates the platform’s share from each order placed on the marketplace.

Every time a customer makes a purchase:

  • The total value is calculated.
  • The platform deducts its commission.
  • The remaining amount is assigned to the vendor.

This process runs in the background and is a core part of any multivendor eCommerce platform.

Types of Commission Models

Different marketplaces use different revenue models based on their business goals.

Common commission structures include:

Commission ModelDescription
Percentage-Based CommissionA fixed percentage is deducted from each sale.
Fixed Fee per OrderA flat fee is charged regardless of order value.
Subscription-Based ModelVendors pay a monthly or yearly fee to sell.
Hybrid ModelCombination of commission + subscription or listing fees.

Choosing the right model depends on how you plan to scale your multi-vendor eCommerce marketplace development.

How Commission Calculation Works

A simple commission flow looks like this:

  • Customer places an order.
  • Total order value is recorded.
  • Platform commission is calculated.
  • Remaining amount is allocated to the vendor.

This entire process is automated when you build a marketplace app with a proper commission engine.

Advanced Commission Rules for Better Control

As your marketplace grows, basic commission models may not be enough. Advanced rules allow more flexibility and control.

Examples include:

  • Category-based commission rates.
  • Vendor-specific commission tiers.
  • Seasonal or promotional commission adjustments.
  • Performance-based incentives for top vendors.

These strategies help optimize revenue without increasing the overall cost of building a marketplace website significantly.

Why Commission Engine Impacts Marketplace Profitability

A well-designed commission system directly affects:

  • Platform revenue generation.
  • Vendor satisfaction and retention.
  • Pricing competitiveness.
  • Long-term scalability of the platform.

If the commission is too high, the vendor may leave. If it is too low, the platform may struggle to sustain operations.

A properly planned commission engine ensures your multi-vendor marketplace platform remains profitable while still attracting and retaining quality vendors.

Marketplace Payment Split Integration (Stripe Connect Explained)

Handling payments correctly is one of the most critical parts of any multi-vendor marketplace platform. Since multiple vendors are involved, the system must ensure that transactions are split accurately and payouts are handled without delays.

A well-maintained payment system not only improves trust but also keeps operations smooth across your multi-vendor eCommerce website.

What is Payment Split in Multi-Vendor eCommerce Platforms?

Payment split is a mechanism where a single customer payment is automatically divided between the platform and the vendor.

In a typical flow:

  • Customer pays the full order amount.
  • The platform deducts its commission.
  • The remaining balance is assigned to the vendor.
  • Payout is processed based on defined timelines.

This process is essential when you build an on-demand marketplace solution that handles multiple vendors and transactions.

How Stripe Connect Works for Marketplace Platforms

Stripe Connect is designed to manage platforms in marketplace systems where multiple parties are involved.

Here is how it works within a multivendor eCommerce platform:

  • Vendor onboarding: Sellers create or connect their payment accounts directly through the platform.
  • Payment collection: The platform collects the full payment from the customer at checkout.
  • Automatic split calculation: Commission is deducted based on predefined rules.
  • Fund distribution: The remaining amount is routed to the vendor’s account.
  • Payout management: Vendors receive payments based on scheduled or instant payout settings.

This entire process runs in the background, reducing manual effort and ensuring accuracy across your multi-vendor eCommerce marketplace development.

Alternative Payment Gateway Option

While Stripe is widely used, other payment solutions can also support split transactions:

  • PayPal for global transactions.
  • Razorpay for regional payment handling.
  • Adyen for enterprise-level marketplaces.

This choice depends on your business needs and the expected marketplace app development cost.

Why Payment Integration Impacts Development Cost

Payment systems involve more than just integration. They require secure transaction handling, compliance, and automation.

This directly affects the cost of building a marketplace website due to:

  • Payment gateway setup and configuration.
  • eCommerce website security and compliance requirements.
  • Automated payout logic.
  • Transaction monitoring systems.

A well-structured payment split system ensures your multi-vendor marketplace platform handles transactions effectively while maintaining trust between buyers, vendors, and platform owners.

Build a marketplace tailored to your business needs

How to Build a Marketplace App Like Amazon or Etsy

Building a successful multi-vendor marketplace platform is not about adding every feature at once. It is about following a structured approach where each step supports scalability, usability, and long-term growth.

If you plan to build a marketplace app, the process should focus on clarity, execution, and gradual expansion instead of complexity from day one.

Step 1. Define Your Marketplace Model

Start by identifying what type of marketplace you want to build.

Ask for:

  • What products or services will be offered?
  • Who are your target users?
  • How will vendors interact with the platform?

This step sets the direction for your entire multi-vendor eCommerce marketplace development.

Step 2. Plan Core Feature and Workflow

Before development begins, define the essential features your multi-vendor eCommerce website will need.

Focus on:

  • Vendor registration and management.
  • Product listing system.
  • Order and checkout flow.
  • Commission and payment structure.

Starting with a clear feature set helps control the marketplace app development cost.

Step 3. Choose the Right Technology Approach

Your technology decision will impact performance, scalability, and development time.

Options include:

  • Pre-built platforms for faster launch.
  • Plugin-based systems for moderate customization.
  • Fully custom solutions for long-term scalability.

This choice directly affects the cost of building a marketplace website.

Step 4. Design User Experience for All Roles

A marketplace has three main users: customers, vendors, and admins.

Your design should ensure:

  • Easy navigation for customers.
  • Simple dashboard for vendors.
  • Clear control panel for admins.

A well-designed multivendor eCommerce platform reduces friction and improves engagement.

Step 5. Develop Core Marketplace Features

Begin with an MVP approach.

Focus on:

  • Product management
  • Vendor dashboard
  • Order processing
  • Payment and commission logic

This allows you to launch faster and refine based on real user behavior.

Step 6. Integrate Payment and Commission Systems

A marketplace cannot function without proper transaction handling.

Ensure:

  • Payment split functionality is implemented.
  • Commission engines are configured.
  • Vendor payouts are automated.

This is a key part of building a reliable multi-vendor marketplace platform.

Step 7. Testing, Launch, and Scaling

Before going live:

  • Test all workflows across users.
  • Fix performance and usability issues.
  • Ensure payment and order flows work correctly.

After launch, scale gradually by adding features and vendors based on demand.

Skipping steps or rushing development can increase errors, delays, and overall marketplace app development costs.

A structured process ensures:

  • Faster time to market
  • Better user experience
  • Controlled development cost
  • Scalable growth

Following these steps gives you a clear path to how to create a multi-vendor marketplace website that is stable, scalable, and ready for long-term success.

Start with essential features and scale step by step

Platform Options for Multi-Vendor Marketplace Development

Choosing the right platform is one of the most important decisions in multi-vendor eCommerce marketplace development. It directly affects performance, flexibility, scalability, and the overall marketplace app development cost.

There is no single solution that fits every business. The right choice depends on your goals, budget, and how much control you want over your multi-vendor marketplace platform.

Magento Multi-Vendor Marketplace

Magento is often chosen for large-scale and enterprise-level marketplaces.

Best suited for:

  • Businesses are planning long-term growth.
  • Complex product catalogs.
  • High traffic platforms.

What you get:

  • Strong built-in features
  • High scalability
  • Advanced product and vendor management

Things to consider:

  • Higher development and maintenance costs.
  • Requires experienced developers.

Magento works well when your multi-vendor eCommerce website needs strong performance and flexibility at scale.

WooCommerce Multivendor Marketplace

WooCommerce is a popular choice for startups and small to mid-sized marketplaces.

Best suited for:

  • Quick launches
  • Budget-friendly projects
  • MVP marketplace setups

What you get:

  • Easy setup with plugins
  • Lower initial cost
  • Large ecosystem of extensions

Things to consider:

  • Limited scalability compared to enterprise solutions
  • Heavy dependency on plugins

It is a practical option if you want to build a marketplace app quickly without a large upfront investment.

Custom Multi-Vendor Marketplace Development

Custom development offers full control over your platform.

Best suited for:

  • Unique business models
  • High customization needs
  • Long-term scalability

What you get:

Things to consider:

  • Higher initial cost of building a marketplace website
  • Longer development timeline

This approach is ideal when your multivendor eCommerce platform requires specific functionality that pre-built solutions cannot provide.

How to Choose the Right Platform

Your decision should be based on:

  • Budget and expected marketplace app development cost
  • Required level of customization
  • Scalability needs
  • Time to launch

If you are testing an idea, start small. If you are building for scale, invest in a more flexible solution from the beginning.

Quick Comparison Summary

  • Magento: Best for large, scalable marketplace.
  • WooCommerce: Best for small to mid-level marketplaces.
  • Custom Development: Best for full control and unique requirements.

Selecting the right platform sets the foundation for your multi-vendor marketplace platform and determines how easily it can grow as your business expands.

Multi-Vendor Marketplace Development Tech Stack

The technology stack defines how your multi-vendor marketplace platform performs, scales, and handles multiple users at the same time. A well-chosen stack ensures that your multi-vendor eCommerce website runs smoothly as vendors, products, and transactions increase.

When planning to build a marketplace app, your tech decisions should support flexibility, performance, and future growth instead of just short-term convenience.

Frontend Technologies

The frontend is what users interact with, including customers and vendors.

Common frontend choices:

  • React.js – Fast, responsive interface for dynamic marketplaces.
  • Vue.js – Lightweight and easier to manage for growing platforms.

A strong frontend improves navigation, product discovery, and overall user experience in your multivendor eCommerce platform.

Backend Technologies

The backend manages logic, workflows, and data processing.

Popular backend options:

  • Node.js – Handles real-time operations and high traffic efficiently.
  • Laravel (PHP) – Structured and widely used for eCommerce platforms.
  • Python-based frameworks – Suitable for scalable and data-driven systems.

The backend plays a key role in managing vendors, orders, and commissions within your multi-vendor eCommerce marketplace development.

Database and Infrastructure

Your database and hosting setup determine how well your platform handles growth.

Common choices include:

  • MySQL or PostgreSQL for structured data.
  • Cloud hosting solutions for scalability.
  • Content delivery networks for faster load times.

A reliable infrastructure reduces downtime and supports consistent performance.

Mobile App Development Options

Many businesses extend their multi-vendor marketplace platform to mobile users.

Options include:

  • Native apps – Better performance and user experience.
  • Cross-platform apps – Faster development and lower cost.

Mobile apps improve accessibility and user engagement, especially for marketplaces with frequent transitions.

Choosing the right tech stack may reduce the initial cost of building a marketplace website, but it can limit growth later. On the other hand, a scalable architecture requires higher upfront investment but supports long-term expansions.

Marketplace App Development Cost (2026 Breakdown)

Understanding the marketplace app development cost is one of the most important steps before starting your multi-vendor marketplace platform. The cost is not fixed. It depends on the level of complexity, features, and the approach you choose for your multi-vendor eCommerce marketplace development.

Instead of looking at a single number, it is better to break the cost into clear tiers based on what you are planning to build.

Cost by Complexity Level

The cost of building a marketplace website varies depending on how advanced your platform is.

Marketplace TypeEstimated Cost RangeBest ForKey Feature Included
Basic MVP Marketplace$30,000-$60,000Startups validating an ideaVendor registration, product listing, basic checkout, simple admin control
Mid-Level Marketplace$60,000-$120,000Growing businesses scaling operationsAdvanced vendor dashboard, commission handling, payment integration, order tracking, analytics
Enterprise Marketplace$120,000-$200,000+Large-scale marketplace platformsCustom workflows, advanced analytics, scalable infrastructure, and a high-performance system

Feature vs Cost Comparison

Several factors influence the final cost of building a marketplace website:

Feature/CapabilitiesBasic MarketplaceMid-Level MarketplaceEnterprise Marketplace
Vendor DashboardBasicAdvancedFully customized
Product ManagementLimitedModerateFully flexible
Commission EngineSimple rulesConfigurableAdvanced logic
Payment SystemStandard integrationSplit payment supportAutomated payout system
Order ManagementBasic trackingDetailed trackingFull workflow automation
Analytics & ReportsMinimalStandard reportsAdvanced insights
ScalabilityLowMediumHigh
Customization LevelLimitedModerateUnlimited

Development Cost Breakdown Table

To understand where your budget goes, here is a typical breakdown:

Development ComponentCost Impact LevelDescription
UI/UX DesignMediumWireframes, user flow, and interface design
Frontend DevelopmentHighCustomer and vendor interface
Backend DevelopmentHighCore logic, database, and system workflows
Payment & CommissionMedium to HighPayment integration and commission automation
Testing & DeploymentMediumQuality checks and launch preparation

Hidden Costs You Should Plan For

Beyond development, there are ongoing costs in multi-vendor eCommerce marketplace development that many businesses overlook:

  • Platform maintenance and updates
  • Hosting and infrastructure
  • Vendor onboarding and support
  • Marketing and user acquisition

Planning for these ensures your multivendor eCommerce platform remains stable and scalable after launch.

Key Takeaway

  • A simple multi-vendor eCommerce website can launch with a lower budget.
  • A scalable multivendor eCommerce platform requires higher investment but supports growth.
  • The final cost of building a marketplace website depends on how advanced your features and workflows are.

A clear understanding of cost helps you plan your multi-vendor marketplace platform more effectively and avoid unexpected expenses during development and scaling.

Start with essential features and scale step by step

Timeline for Multi-Vendor Marketplace Development

The timeline for building a multi-vendor marketplace platform depends on how complex your features are and how structured your development process is. While many businesses focus only on cost, the timeline is equally important because it impacts launch speed, testing, and overall execution.

If you plan to build a marketplace app, it is better to understand how time is distributed across different stages instead of expecting a fixed deadline.

Development Timeline Breakdown

Development StageEstimated DurationWhat Happens in This Stage
Planning & Requirements Analysis2-3 weeksDefine business model, features, and workflow for your multi-vendor eCommerce website.
UI/UX Design3-5 weeksCreate wireframes, user journeys, and interface designs.
Core Development8-16 weeksBuild frontend, backend, and core features of the multivendor eCommerce platform.
Integration Phase3-6 weeksAdd payment systems, commission logic, and third-party tools.
Testing & QA2-4 weeksFix bugs, test workflows, and ensure system stability.
Deployment & Launch1-2 weeksFinal setup, server deployment, and go-live.

Timeline Based on Marketplace Complexity

Marketplace TypeEstimated TimelineBest For
Basic MVP Marketplace3-6 monthsQuick launch and idea validation
Mid-level Marketplace6-9 monthsGrowing platforms with more features
Enterprise Marketplace9-12+ monthsLarge-scale, fully customized systems

Factor That Impacts Development Time

Several factors can increase or reduce the timeline of your multi-vendor eCommerce marketplace development.

  • Number of features and customization level.
  • Choice of technology and platform.
  • Complexity of payment and commission systems.
  • Size and experience of the development team.
  • Number of AI integrations required.

A more complex multi-vendor marketplace platform will naturally take longer to develop.

How to Reduce Development Time

If speed is a priority, you can:

  • Start with an MVP instead of a full-scale platform.
  • Use pre-built modules where possible.
  • Focus only on essential features at launch.
  • Plan workflows clearly before development begins.

This helps you build a marketplace app faster without unnecessarily increasing the marketplace app development cost.

Key Takeaway

  • Faster timelines are possible with limited features.
  • Scalable platforms require more time but offer long-term value.
  • A structured approach ensures fewer delays and better results.

Planning your timeline properly ensures your multi-vendor eCommerce website is launched on time while maintaining quality and scalability.

Monetization Models for Multi-Vendor Marketplaces

A multi-vendor marketplace platform is not just about connecting buyers and sellers. It is about building a system that generates consistent revenue as the platform grows.

Choosing the right monetization strategy early helps you recover the marketplace app development cost and scale your multi-vendor eCommerce marketplace development in a sustainable way.

Commission-Based Revenue Model

This is the most widely used model in any multi-vendor eCommerce website.

How it works:

  • A percentage is charged on every transaction.
  • The platform earns from each order placed.

Why it works:

  • Revenue grows with platform activity.
  • No upfront cost for vendors.
  • Easy to manage within the system.

This model is ideal if you want a predictable income while you build a marketplace app.

Subscription-Based Model

In this model, vendors pay a recurring fee to sell on your platform.

How it works:

  • Monthly or yearly subscription plans.
  • Different tiers with added benefits.

Why it works:

  • Fixed and predictable revenues.
  • Attract serious sellers.
  • Reduces dependency on transaction volume.

It is commonly used in multivendor eCommerce platform setups focused on long-term vendor relationships.

Listing Fees and Featured Products

This mode charges vendors for visibility and product placement.

How it works:

  • Fees for listing products.
  • Extra charges for featured listings.

Why it works:

  • Additional revenue stream.
  • Encourage vendors to promote products.
  • Improves product visibility.

Hybrid Monetization Model

Most successful marketplaces combine multiple revenue streams.

Common combinations:

  • Commission and subscription.
  • Commission and featured listings.

Why it works:

  • Diversified revenue.
  • Higher earning potential.
  • Flexibility based on vendor behavior.

Monetization Comparison Table

Monetization ModelHow It WorksRevenue StabilityBest For
Commission-BasedEarn from each transitionMedium to highGrowing marketplace
Subscription-BasedRecurring vendor feesHighStable vendor base
Listing FeesCharge per product or listingLow to mediumHigh product volume platforms
Hybrid ModelA combination of multiple modelsHighScalable marketplaces

Choosing the Right Monetization Strategy

Your monetization model should depend on:

  • Type of multi-vendor marketplace platform.
  • Vendor acquisition strategy.
  • Expected transaction volume.
  • Overall cost of building a marketplace website.

A well-planned strategy ensures your platform remains profitable while attracting quality vendors.

Key Takeaway

  • Start simple with commission-based revenue.
  • Add additional models as your platform grows.
  • Align monetization with user experience.

A strong monetization strategy ensures your multi-vendor eCommerce website not only grows in users but also generates consistent revenue over time.

Upgrade performance features and scalability

Challenges in Multi-Vendor Marketplace Development

Building a multi-vendor marketplace platform is not just about adding features and launching quickly. It involves managing multiple vendors, transactions, and user expectations at the same time. Without proper planning, these challenges can impact performance, user trust, and overall growth.

Understanding these challenges early helps you make better decisions during your multi-vendor eCommerce marketplace development process.

Managing Multiple Vendors Efficiently

Handling multiple sellers on a single multi-vendor eCommerce website can become complex as the platform grows.

Common issues include:

  • Inconsistent product quality across vendors.
  • Delays in order processing.
  • Lack of standardization in listings.

How to handle it:

  • Set clear vendor guidelines.
  • Use approval systems for listings.
  • Provide a structured vendor dashboard.

Payment and Payout Management Issues

Payments are one of the most sensitive parts of any multivendor eCommerce platform.

Challenges include:

  • Delayed vendor payouts.
  • Incorrect commission calculations.
  • Handling refunds and cancellations.

How to handle it:

  • Use automated payment split systems.
  • Define clear payout schedules.
  • Maintain transparent transaction records.

Maintaining Product Quality and Trust

Customer trust depends on consistent quality across your platform.

Challenges include:

  • Fake or low-quality products.
  • Misleading product descriptions.
  • Poor vendor service.

How to handle it:

  • Enable reviews and ratings.
  • Monitor vendor performance.
  • Remove non-compliant sellers.

Scaling the Platform Without Performance Issues

As your platform grows, performance can become a major concern.

Challenges include:

  • Slow loading speed.
  • System crashes during high traffic.
  • Difficulty handling large data volumes.

How to handle it:

  • Use scalable infrastructure.
  • Optimize database and backend systems.
  • Plan performance improvements early.

Balancing Cost and Feature Expansion

Many businesses struggle to decide when to add new features.

Challenges include:

  • Increasing marketplace app development cost.
  • Overbuilding features early.
  • Delayed time to market.

How to handle it:

  • Start with an MVP.
  • Add features based on user demand.
  • Track ROI before investing further.

Challenge vs Solution Overview

ChallengeImpact on PlatformSuggested Solution
Vendor management complexityPoor user experienceStructured onboarding and guidelines
Payment handling issuesLoss of trustAutomated payout and commission system
Product quality inconsistencyCustomer dissatisfactionReviews, monitoring, and vendor control
Scalability issuesPerformance dropCloud infrastructure and optimization
Rising development costBudget constraintsMVP approach and phased development

Key Takeaway

  • Challenges are part of every multi-vendor marketplace platform.
  • Early planning reduces long-term issues.
  • Structured systems improve scalability and trust.

Addressing these challenges properly ensures your multi-vendor eCommerce website grows steadily without operational or performance issues.

Future Trends in Multi-Vendor eCommerce Platforms (2026)

The structure of a multi-vendor marketplace platform is evolving as user expectations and technology continue to shift. What worked a few years ago is no longer enough to stay competitive. Businesses that adapt early can build a stronger multi-vendor eCommerce website that attracts both vendors and customers.

Understanding these trends helps you plan your multi-vendor eCommerce marketplace development with a long-term perspective instead of short-term fixes.

AI-Based Personalization

Modern marketplaces are moving toward AI-based personalized user experiences.

What is changing:

  • Product recommendations based on user behavior.
  • Smart search results tailored to preferences.
  • Automated suggestions for vendors.

Why it matters:

  • Improves user engagement.
  • Increases conversion rates.
  • Helps customers find relevant products faster.

Headless Marketplace Architecture

A headless approach separates the frontend from the backend.

What this means:

  • Frontend can be customized independently.
  • Backend handles core marketplace logic.

Benefits:

  • Faster performance.
  • More flexibility in design.
  • Easier updates without affecting the entire system.

This approach is gaining attention in advanced multivendor eCommerce platform setups.

Mobile-First Marketplace Experience

More users now prefer mobile over desktop.

Key focus areas:

  • Mobile-optimized interfaces.
  • Faster loading times.
  • Smooth navigation and checkout.

For businesses planning to build a marketplace app, mobile-first design is no longer optional.

Automation in Vendor and Order Management

Automation is reducing manual effort across marketplace operations.

Examples include:

  • Automated vendor onboarding workflows.
  • Smart inventory updates.
  • Real-time order tracking systems.

This improves efficiency without increasing the cost of building a marketplace website significantly.

Multi-Currency and Global Expansion

Marketplaces are no longer limited to one region.

What is changing:

  • Support for multiple currencies.
  • Global vendor onboarding.
  • Region-specific pricing.

This allows a multi-vendor marketplace platform to expand beyond local markets.

Data-Driven Decision Making

Analytics is becoming central to marketplace growth.

Key insights include:

  • Vendor performance tracking.
  • Customer behavior analysis.
  • Sales and conversion metrics.

These insights help optimize platform performance and control the marketplace app development cost over time.

Key Takeaway

  • Marketplaces are becoming more intelligent and user-focused.
  • Flexibility and scalability are becoming essential.
  • Early adoption of trends gives a competitive advantage.

Keeping these trends in mind ensures your multi-vendor eCommerce website remains relevant, scalable, and ready for future growth.

Conclusion

Building a multi-vendor marketplace platform requires the right mix of features, technology, and cost planning. A well-structured multi-vendor eCommerce website is not just about launching fast, but about creating a system that can scale with vendors and users over time.

If you plan to build a marketplace app, start with essential features, control the marketplace app development cost, and expand based on real demand with dedicated eCommerce developers. A focused approach ensures your multivendor eCommerce platform grows without unnecessary complexity or cost.

Get your marketplace cost estimate within 24 hours

Static vs Dynamic Website with Detailed Comparison and SEO Insights

Static vs Dynamic Website Understanding the Core Differences

Ever noticed how some sites load like lightning and feel reliable, while others seem slow, clunky, even if the design looks perfect? The key often lies in the structure, whether it is a static website or a dynamic website.

If you are thinking what is the difference between static and dynamic websites is, it comes down to how your website delivers the content. A static website shows the same content to every visitor and loads instantly, making it ideal for speed and simplicity. A dynamic website generates content that visitors easily adapt to and offers flexibility, interactivity, and advanced functionality. This is the core of the static vs dynamic website debate and deciding which approach fits your business goals.

Understanding the static website vs dynamic website functioning and its impact on SEO is important. As a dynamic site offers more features, a static setup can often outperform in speed, reliability, and search performance. Later in this guide, we will cover SEO for static websites and explain how to make the website perform well in search results while comparing it to the dynamic alternatives.

 By the end of this guide, you will clearly understand which website type suits your needs, when a hybrid website makes sense, and how to optimize your site for performance, control, and search visibility.

Understanding Static and Dynamic Websites

When you are choosing between a static vs dynamic website for your business, it is important to understand the difference between them and the attached web development approaches. The static website vs dynamic website is not technically different; it also differs by speed, user expectations, and search performance.

By understanding the difference, you can make an informed decision about the type of website that fits their goals, resources, and growth plans. The choice between a static website vs dynamic website can influence everything from page speed to SEO performance.

Let’s know about each type.

What Does a Static Website Mean for Business

A static website is a simple, fast, and reliable option for a business. It shows the same content to every visitor, which makes it ideal for you if you do not need the pressure of frequent updates to the website content. Key points:

  • Loads quickly and provides a smooth user experience.
  • Easy to host and maintain accurately.
  • More secure because it does not rely on the databases.
  • Perfect for portfolios, small business sites, and landing pages.

What Does a Dynamic Website Mean for Businesses

A dynamic website is an interactive and flexible option. Content changes depend on the visitor’s actions and stored data. Key advantages:

  • Personalized experience for each user.
  • Easy to update regularly with content management systems.
  • Supports complex functionalities like eCommerce, blogs, and booking systems.
  • Ideal for businesses that need growth, engagement, and frequent content updates.

Quick Comparisons

FeatureStatic WebsiteDynamic Website
Content UpdatesManual and infrequentAutomatic, real-time
SpeedVery fastSlightly slower due to database queries
SecurityHighRequires more precautions
Ideal ForPortfolios and small business pageseCommerce, blogs, SaaS platforms
MaintenanceLowMedium to High

By knowing this difference, you can easily decide which type of website aligns with your business goals. The choice between a static website vs dynamic website influences the speed, SEO performance, and long-term growth.

Choose Static vs dynamic website

How Static Websites Work

Static Websites Work

A static website is built with fixed HTML, CSS, and sometimes JavaScript files. Each page exists as a separate file on the server, so when the visitor opens it, the server delivers the page exactly as it was created. This simplicity is what makes a static website fast, secure, and easy to manage.

Let’s know about the website processes in depth:

Structure and File-Based Delivery

The main difference in delivery between static vs dynamic websites lies in how the content is served:

  • Each page is a separate file on the server.
  • Content is pre-written and displayed exactly as it is stored.
  • No database or server-side processing is needed.
  • Ideal for pages that rarely change.

This is an important point in static website vs dynamic website, as the dynamic websites generate the content on demand, which adds complexity but allows interactivity.

Typical Use Cases with Real Examples

Static websites work best for small businesses or projects that do not require frequent updates. Common examples include:

  • Portfolio pages and online resumes.
  • A small business website that has fixed information.
  • Campaigns or promotions of landing pages.
  • Informational service or product pages.

These use cases show why static websites are suitable options when simplicity, speed, and reliability are the top priorities.

Benefits of Using a Static Website

The advantages of a static website include:

  • Faster Page Loading: Minimum files added to the website make the static website lightning fast.
  • Lower Hosting Cost: Requires fewer servers and resources to run the website.
  • Enhanced Security: Less prone to database or server-side attacks.
  • SEO-friendly: Clean code and fast speed improve the search performance, which is an essential factor for SEO for static websites.

Limitations That You Should Know

Even though a static website offers many benefits, it also has some limitations, which are:

  • Difficult to Update: Every change requires manual editing of files.
  • Limited Scalability: Adding many pages can be a difficult task.
  • Less Interactivity: Cannot provide personalized content or advanced functionality without any extra development.

These are the basic limitations that a static website comes with. For better clarity, you can also hire web developers.

A static website is ideal if you value speed, reliability, and low-maintenance websites. But it also comes with limitations in scalability and interactivity.

So if you are trying to decide between a static website vs dynamic website, ask yourself:

  • Does my website need frequent updates or user-specific content?
  • Are speed and simplicity more important than interactivity?
  • How critical is SEO performance for my business goals?

Understanding these points clearly will help you in making a clear choice and setting the foundation for a site that works efficiently and supports growth.

Ready to explore how a dynamic website works and when it might be the better choice? Let’s move to the next.

How Dynamic Websites Work

Dynamic Websites Work

A dynamic website generates the content in real time, responding to user interactions, database queries, or other triggers. Unlike a static website, which serves on pre-built pages, a dynamic website can display different content for different users. This makes it ideal for interactive, personalised, or frequently updated platforms.

Let’s know about the dynamic website working.

Content Generation with Databases

A dynamic website effectively relies heavily on the databases and server-side scripts to generate the content:

  • Pages are built on demand using programming languages like PHP, Python, or JavaScript.
  • Content can change depending on the user’s behavior or inputs.
  • Frequently used for blogs, eCommerce stores, membership portals, and social platforms.
  • Support features like login systems, product filters, and interactive forms.

This is the primary difference in operation between static websites and dynamic websites.

Common Use Cases with Real Examples

Dynamic websites are suitable for businesses that need interactivity and regular updates. Example includes:

  • eCommerce platforms like Amazon or Shopify.
  • Blogs with regular content updates.
  • Social media platforms such as Facebook or Instagram.
  • SaaS application that adjusts content with the help of active users.

These examples show why a dynamic website is a suitable option if you require flexibility, engagement, and scalability.

Benefits of Using a Dynamic Website

Some of the important advantages of a dynamic website include:

  • Personalized Experience: Content is easily maintained according to the user.
  • Easy Content Management: Updates are fast and simple with the CMS platform.
  • Advanced Functionality: Smooth integration of features like eCommerce, forms, and memberships.
  • Scalable: Grow with your business without the need for any major redevelopment.

Limitations You Should Know

Despite the various benefits, dynamic websites do come with different challenges, which are:

  • Slower Page Load: Reduce the speed of the page with database queries and server-side processing.
  • Higher Cost: Requires more complex development and hosting.
  • Maintenance Needs: Regular maintenance keeps the website up to date, and security measures are necessary.

A dynamic website is perfect if you need interactivity, personalized content, and frequent updates. But if speed, simplicity, and low maintenance are on your list of priorities, then a static website might be the better choice.

So when you are comparing static vs dynamic websites, consider:

  • Does your business need interactivity or personalized features?
  • How often will your content need updates or changes?
  • Can your budget and hosting handle the complexity of a dynamic setup?

Understanding these factors will help you choose the right website type and set a solid foundation for performance, user experience, and SEO.

There are over 75% of websites that are dynamic for good reasons.

Are you curious to see who side-by-side comparison of static vs dynamic websites and which one truly fits with your business needs? Let’s explore that next.

Dynamic website higher engagement

Static vs Dynamic Website: A Detailed Comparison

Static vs dynamic website overview

Static vs dynamic websites serve different purposes with different advantages and disadvantages.

Understanding about the key difference between the static and dynamic setup becomes much clearer when you look at how each of these websites works and how it helps in meeting the specific business need.

The comparison here shows you how the static website vs dynamic website differ in terms of technical aspects and practical performance, which allows it to have a direct impact on user experience, maintenance, SEO strength, and long-term growth.

Let’s look at each factor in depth to know how both differ from each other and which one is more suitable for your business.

1. Content Delivery Approach

A static website store helps in fixing the HTML pages that are displayed exactly as they are saved. There is no processing that occurs once a user clicks a link.

A dynamic website builds pages at the moment of the request. It pulls the content from the database and uses the script to create the final outcome for the website.

This difference affects everything from load time to how personalized your page can appear.

2. Speed and Performance

Static page loads quickly because the server only needs to deliver a ready-to-upload file. This works well for businesses that need strong loading speed without any need for additional processing.

Dynamic pages take extra time because the server must run smooth queries and assemble the content before displaying. When the site receives high traffic, this can become noticeable.

Maintaining the speed of the website matters as it results in user retention, mobile experience, and SEO. This is why most companies compare static vs dynamic website performance before choosing the right app.

3. Security Aspects

Static sites have a lower risk level because they do not rely on databases or complex backend logic. They cannot run the script on the server, which reduces the chances of any attacks.

Dynamic sites have more components that need continuous monitoring, such as the database, login systems, and the user input field. This requires ongoing security practices and regular updates.

The security of the website should match the scale and nature of your business. A simple site may not need advanced protection, but a dynamic platform does.

4. Ease of Updates and Management

A static site needs manual updates unless supported by a website builder or headless CMS. This can feel limited with access when frequent changes are required.

Dynamic site allows easy edits through the dashboards. You can publish blogs, change the product details, and update the media without touching the code.

If your website relies more on constant content updates, then dynamic management becomes a practical advantage.

5. Design Flexibility

Static sites support a responsive website and fast performance, but have limited interactive features.

Dynamic sites offer a wider range of options, including user accounts, product filters,  booking systems, and content that adjusts based on user activity.

This flexibility helps businesses in meeting more engaging and customizable experiences.

6. Cost Considerations

Static sites usually have lower hosting and website development costs since the structure is simple for the website.

Dynamic sites cost more because they require the database setup, scripts, and ongoing improvements.

Businesses often start with a static site and move towards dynamic setups as their needs expand.

7. Suitability for Large Sites

Static sites work well for small to medium projects such as portfolios, business information pages, and landing pages.

A dynamic site supports a large ecosystem, such as marketplaces, new publications, and membership platforms.

If you are planning to scale your business, then the dynamic architecture gives you more space to grow.

Now that you have clearly understood how each feature gives an impact on performance and management, it is now easy for you to choose between a static vs dynamic website. Think about your content volume, future updates, and user expectations. The right decision will support both your brand and your long-term goals.

In the next section, we will look over a quick comparison table to have more clarity.

Static vs Dynamic Websites Quick Comparison Table

A quick comparison of static vs dynamic websites will help you to review the main difference at a glance. This table highlights what is difference between static and dynamic website in terms of performance, cost, and content control.

FeaturesStatic WebsiteDynamic Website
How Pages are DeliveredEach page is a fixed HTML file shown the same way every time.Each page is created when a user requests it using scripts and database queries.
SpeedLoads faster because files are prebuilt.Slow down in heavy traffic because of database processing.
UpdatesManual edits are required with a static site generator or headless CMS.Content update can be done with the help of the admin panel.
Interaction LevelLimited, suitable for content that does not need user actions.Supports login systems, filters, and dashboards.
SecurityLower risk because no database is used.Higher due to the use of advanced features.
CostLower development and hosting costs.Higher because it needs functionality and servers.
Hosting RequirementsCan be hosted on the basic server.Need a server that supports scripts.
ScalabilityWorks well for small and medium-sized business websites.Fits a large and growing site with frequent updates.
SEO StrengthStrong speed and clean structure support good indexing.More flexible for large content strategies.
Best FitPortfolio, company information pages, and brochures.eCommerce blogs, forums, or membership platforms.

This table gives you a simple overview that helps all, whether you are business owners, developers, or marketers, to evaluate what fits with your goals.

Dynamic website higher engagement

SEO for Static Websites: What Works and What Does Not

Understanding SEO for a static website helps you make the right choice to have long-term visibility. Static pages can perform well when the content is stable, but they also come with limitations that should be considered.

But let’s just look at how SEO matches with a static website.

Why Search Engines Respond Well to Static Pages

SEO for a static website usually shows how strong results appear in search engines, and a static website loads quickly.

  • Static pages usually have clean code.
  • They do not wait for database queries, which reduces the delays.
  • The content stays consistent, which helps search engines identify the main topic.
  • Works well for pages that target clear search intent, like service descriptions, location pages, or any content.

Challenges in SEO for Static Websites

Even though the SEO for a static website can be effective, static pages still face some challenges.

Common challenges include:

  • Slow content update when the site grows.
  • Limited flexibility for large-scale SEO.
  • Hard to manage the content because every update needs to be done manually.
  • Adding a new section takes more time.
  • No built-in tool for structured data unless added manually.

Ways to Improve SEO Performance for Static Sites

Improving SEO for static website is possible with a few adjustments. The goal is to keep the structure clean while making each page more informative and easier for the search engine to understand.

Helpful practices:

  • Use HTML headings properly for a clear topic hierarchy.
  • Add description titles and meta descriptions.
  • Compress images to maintain a quick load time.
  • Add internal links that guide users to related topics.
  • Included FAQ sections to match common search patterns.
  • Consider a static site generator that supports partial automation.

These steps help a static site stay competitive even when the content pool grows.

How Dynamic Sites Handle SEO Differently

When comparing static vs dynamic website SEO, dynamic sites work in more adaptable ways. Content is generated based on user actions or stored data, which gives more freedom for the various updates.

A dynamic structure allows marketers to publish new pages quickly, which supports large-scale SEO plans. They also provide built-in tools such as schema support, plugins, and analytics integrations.

Key differences:

  • A dynamic site allows faster content expansion.
  • SEO tasks can be automated through the CMS tools.
  • Personalized content helps in matching the specific search behavior.
  • Better suited for a brand that constantly changes information.

This understanding will allow you to know about SEO for a static website, which allows you to make an effective choice to maintain the website’s performance.

Which Website Type Should You Choose

Which Website Type Should You Choose

Selecting between a static structure and a dynamic structure becomes easier when you match your website needs with the strengths of each option.

When a Static Website Is the Better Option

A static website will work better when the content remains steady, and the priority is speed.  For your project, you can find the best web development company so that there is no need for frequent edits or user-driven actions.

You can consider a static build when:

  • You want a simple presence for a local business.
  • You want your service to stay consistent throughout the year.
  • Your main focus is on fast loading and low maintenance.
  • You need a clear layout for building the portfolio or brochures.
  • You do not need any login system or advanced features on your website.

A static site supports smaller teams and reduces long-term upkeep. This makes it a strong and better choice for a business starting with limited updates.

When a Dynamic Website Fits the Requirements

A dynamic website works well when you regularly change the information on your website. It also supports websites that need user action or support the large content flow.

You can consider a dynamic format when:

  • You run an online store that needs product updates.
  • You publish articles more frequently.
  • You need a contact form or user accounts.
  • You offer tools like a calculator or search filters.
  • You expect your site to scale over time.

A dynamic build offers more room for growth and support features that keep the content updated.

When a Hybrid Setup Saves Time and Money

A mixed structure helps when the static vs dynamic website decision is not clear for you. The hybrid website combines the fast loading of static delivery with the flexibility of dynamic features.

Situation where a hybrid setup works well:

  • When you want a fast-loading homepage but a dynamic blog page.
  • When you need a simple service page and a custom dashboard.
  • When there is a need for a lightweight structure, plus specific tools.
  • When you want performance benefits without losing the interactivity.

A hybrid setup will have both speed and functionality, with moving only in one direction.

Website Structure Selection

Hybrid Websites: A Mix of Static Delivery and Dynamic Features

Hybrid website structure overview

A hybrid website combines the strengths of both website formats. It also helps you understand everything to make a stable choice to grow your business. Let’s know how the hybrid website actually works.

How Hybrid Architecture Works

Hybrid architecture blends pre-rendered static pages with the selective dynamic elements.

Here it shows how it usually functions:

  • Important pages, such as the homepage, service details, and loading pages, load as the static output.
  • Dynamic parts, such as dashboard, product updates, or form-driven features, load on demand.
  • Content can be easily managed with the help of CMS while still delivering the static speed.
  • User experiences a quick loading of the website with the interactive touchpoints.

This setup allows businesses to build a reliable framework without slowing down the user journey.

Situations Where Hybrid Sites Offer Value

The hybrid site solves several challenges that appear in the full static and dynamic builds. They work especially well when:

  • You want fast performance with flexible content.
  • Need a static header and footer, but dynamic content blocks.
  • Want static category pages with dynamic product availability.
  • Want to publish static blogs for speed by using the dynamic editor.
  • Want better control over the routine.

This combination supports both efficiency and functionality in a predictable structure.

Example of Hybrid Site Implementations

The common examples of hybrid sites used in the projects are:

  • An e-learning platform that stores the lessons as static pages with dynamic quizzes.
  • Product-based businesses that show static descriptions and dynamic stock details.
  • Service brand that builds static landing pages with dynamic CRM integrations.
  • Media sites that display static articles and dynamic comment sections.

This discussed format helps you to maintain a consistent experience with your website while keeping the process simple to manage.

Best Platforms for Building Static, Dynamic, or Hybrid Sites

Before moving towards the development processes, it is important that you understand the right development tool based on the structure you want to build. The discussed tools here give you clear guidance on static websites and dynamic websites, allowing you to choose which is relevant.

Tools Commonly Used for Static Sites

Tools for Static Sites

A static site works best with the help of a platform that generates the fixed files and delivers the results quickly. Popular options include:

  • Jekyll: Used for blogs and lightweight business websites.
  • Hugo: For maintaining the speed and performance with the use of simple templates.
  • Eleventy: Mostly preferred by the web developer who wants flexibility without any complex setup.
  • Gatsby: Suited for static builds that still need CMS connections.
  • Netlify CMS: Effective for managing the content without turning the site into a full dynamic system.

These are the common platforms that support a reliable build while keeping the maintenance predictable.

Tools for Dynamic Development

Dynamic web development tools

Dynamic sites require the support of frameworks that facilitate database management, user interactions, and content updates. Common choices include:

  • WordPress: Used widely by small to enterprise-level businesses.
  • Drupal: For managing the structured content and secure configurations.
  • Laravel: For building strong and secure custom applications.
  • Node.js Frameworks: Used for including the interactive features.
  • Django: For secure and database-driven builds that scale.

These tools are suitable if you expect to have frequent updates, user activity, or an automated workflow.

Tools for Hybrid Builds

Tools for hybrid website builds

Hybrid sites need solutions that offer static rendering with dynamic abilities. Some of the most effective tools include:

  • Next.js: Ideals for pre-rendering static pages while supporting the dynamic routes.
  • Nuxt: For teams that prefer to have a Vue-based approach.
  • Astro: Known for shipping minimal JavaScript and blending the different frameworks.
  • Headless CMS: Options like Strapi or Sanity are used to feed content into a static website.

These allow you to have fast loading of web pages, editable content, and scalable features.

Your Next Step Towards a Better-Performing Website

When selecting between a static vs dynamic website, it is important that you understand how each one serves a different purpose. A static site offers speed and reliability for businesses that want a simple presence. A dynamic site supports features that change based on user actions or frequent content updates.

You can compare both through the lens of the content delivery, update with flexibility, security needs, and future scalability. Knowing about the picture becomes clearer. Your decision should match how often you plan to edit your content, plan to maintain the user experience, and the technical resources available to you.

If your business needs quick loading and predictable maintenance, static pages fit well. And if you need active content or a personalized experience, a dynamic build supports all your needs. A mix of both can also work if you want fast loading with modern interaction.

And if you want to build the website from scratch, then a company that offers web development services will offer you support and guide you with all the steps.

Get expert help website type

Magento Support and Maintenance Services for Secure, High-Performance Stores

Introduction

When your Magento store is a core part of your business, stability and reliability are non-negotiable. You need confidence that your store is secure, monitored, and technically sound at all times, without relying on reactive fixes or uncertain support.

Our Magento support and maintenance services provide ongoing technical coverage for Magento stores that cannot afford downtime, performance issues, or unresolved risks. We take responsibility for the day-to-day health of your store, ensuring updates are managed, issues are addressed promptly, and your platform remains stable as your business grows.

With a dedicated support structure and experienced Magento specialists, you gain long-term assurance that your store is maintained consistently, protected proactively, and supported by a team that understands the operational demands of running a business-critical eCommerce platform.

Talk to a Magento Expert

Our Magento Support and Maintenance Services

Our Magento support and maintenance services are structured to give store owners complete technical coverage without uncertainty. We act as your ongoing support partner, handling the operational responsibilities required to keep your store stable, secure, and consistently available.

Our services include:

  • Magento maintenance services for ongoing store stability and performance.
  • Magento support services for day-to-day technical issues and resolutions.
  • Magento website maintenance services covering updates, fixes, and monitoring.
  • Magento store support for business-critical incidents and operational needs.
  • Magento technical support from experienced Magento specialists.
  • Ongoing Magento maintenance to ensure continuity as your store evolves.

Each service is delivered with a focus on reliability, clear responsibility, and proactive oversight, so you always know who is accountable for your store’s technical health.

Request a Magento Support Plan

What Our Magento Maintenance Covers

Our Magento maintenance coverage is designed to remove technical uncertainty and reduce operational risk. Every aspect of your store’s ongoing health is monitored and managed to ensure consistent performance and security.

Our coverage includes:

  • Security patching and vulnerability resolution.
  • Magento core, extension, and theme updates.
  • Performance monitoring and optimization.
  • Bug fixing and technical issue resolution.
  • Compatibility management across versions and integrations.
  • Continuous store health monitoring.

By maintaining full visibility into your Magento environment, we ensure potential issues are addressed early, updates are handled safely, and your store remains stable as your business grows.

Why Ongoing Magento Support Matters

Magento stores operate in a constantly changing technical environment. Updates, security environments, and performance demands evolve continuously, and unmanaged gaps can introduce unnecessary risk over time.

Ongoing Magento support ensures your store remains protected, responsive, and reliable without placing pressure on internal teams. With consistent oversight, potential issues are identified early, updates are applied safely, and critical incidents are handled before they affect customers or revenue.

By maintaining continuous technical support, businesses reduce operational uncertainty, avoid unplanned downtime, and gain the assurance that their Magento store is supported by specialists who understand the importance of stability, scalability, and long-term performance.

Our Magento Maintenance Process

Our Magento maintenance process is designed to provide clarity, accountability, and consistent results. Each step is structured to proactively support your store with minimal disruption to your business operations.

Our process includes:

  • Initial store assessment and onboarding.
  • Identification and prioritization of technical issues.
  • Continuous monitoring and proactive maintenance.
  • Safe implementation of updates and fixes.
  • Ongoing support with clear communication and escalation paths.

This structured approach ensures your Magento store remains stable, secure, and supported at every stage, without uncertainty or reactive firefighting.

Discuss Your Magento Maintenance Requirements

Who This Service is For

Our Magento support and maintenance services are built for businesses that depend on their online store and require consistent technical reliability. This service is ideal for:

  • Growing eCommerce businesses managing increasing traffic and complexity.
  • Established Magento store owners who need dependable ongoing support.
  • Enterprises operating business-critical Magento platforms.
  • Brands that cannot afford downtime, security gaps, or performance issues.
  • Teams without dedicated in-house Magento maintenance resources.

If your store plays a key role in revenue generation and customer experience, this service provides the stability and assurance needed to support long-term growth. If you belong to any of the above categories, this Magento website maintenance checklist is for you.

Why Businesses Trust Us for Magento Maintenance

Businesses trust us for Magento maintenance because we focus on consistency, accountability, and long-term reliability. Our approach is built around structured processes, experienced Magento specialists, and a clear understanding of the operational demands of running a business-critical eCommerce store.

We provide dedicated support backed by proven workflows that prioritize stability, security, and performance. By taking full responsibility for ongoing maintenance and technical support, we help businesses reduce risk, avoid unexpected disruptions, and maintain confidence in their Magento platform.

Our long-term client relationships reflect our commitment to dependable service, transparent communication, and sustained store performance, qualities that matter when Magento reliability directly impacts business outcomes.

Conclusion

Reliable Magento maintenance is not about occasional fixes. It is about ongoing responsibility, consistency, and trust. When your store is central to your business, you need assurance that every technical aspect is handled proactively and professionally.

Our Magento store support and maintenance services are designed to remove operational risk, reduce technical uncertainty, and ensure your Magento store remains secure, stable, and high-performing over time. With structured processes, dedicated support, and clear accountability, we help businesses maintain confidence in their eCommerce platform while focusing on growth.

If you are looking for dependable, ongoing Magento support from a team that understands the importance of stability and performance, we are here to help.

Talk to a Magento development expert or request a personalized support plan to ensure your store is consistently maintained and ready for what’s next.

Talk to Magento Expert

Shopify Plus to Magento 2 Migration: Step By Step Guide

As e-commerce evolves, businesses must constantly improve their online stores to stay competitive.

If you’re a Shopify Plus user looking to take your store to the next level, migrating to Magento 2 could be the solution you’re looking for.

Businesses of all sizes choose Magento 2 because of its powerful ecommerce platform, which offers greater customization, flexibility, and scalability.

It requires thoughtful planning and execution to migrate Shopify data to Magento 2.

Here we will discuss the benefits of migrating to Magento 2, the challenges you may encounter, and the steps for data migration you must take to ensure a successful migration.

Why Choose Magento 2 Over Shopify Plus?

For small businesses, the new Shopify store is a perfect choice. But for midsized and large companies, Magento is a better option. Why? Here are the Top 7 reasons to choose Magento 2 as your eCommerce companion:

Reason #1: Popularity

Magento 2 is gaining popularity over Shopify Plus because of its robust features, flexible customization options, and scalability. A large enterprise prefers it due to its better control over product management, SEO, and checkout processes.

Reason #2: Extremely Elastic

Compared with Shopify Plus, Magento 2 has more elasticity and flexibility. Thanks to its open-source architecture, Magento 2 lets businesses customize their online stores according to their specific needs. 

Reason #3: Advanced Customization Opportunities

The advanced customization options available in Magento 2 are several steps ahead of Shopify Plus. Using Magento, businesses will help you reach the targeted global audience and expand your customer base to users with different authenticities and languages. 

Reason #4: Extended Mobile commerce Technology

Compared to Shopify Plus, Magento 2 offers an extensive range of ecommerce websites features for mobile commerce. The Shopify-magento migrations allows seamless integration of various extensions for Magento 2 to avail mobile-friendly and responsive design that makes your online store rank high on SERPs. 

Reason #5: Numerous Third Party Extensions

There are several third-party extensions for Magento 2, making it a robust and diverse alternative to Shopify Plus. Businesses can expand their online store’s capabilities and offer a user-friendly and avail various extensions in marketing, payments, shipping, and customer support. 

Due to Magento 2’s support for several third-party extensions, businesses can customize and expand their online stores more quickly than Shopify. These were some of the reasons why you should make the switch. But the question is: How? 

In the next section, we will read about the step-by-step guide and know how to do shopify-magento migration and  what are the 2 options available for it. 

How To Do Shopify-Magento Migration? 2 Different Options With Steps

For those without much technical knowledge, the migration process may seem difficult. However, the difficulty depends on the method of migration you choose.

  1. Manual Shopify-Magento Migration:  One of the cheapest option to migrate your site from Shopify to Magento is Manual migration. Here you can manually export and import data and have full control of the process. 
  2. Automated Migration: Here you can use various tools like Cart2Cart, LitExtension or Firebear Studio to export Shopify to Magento site automatically. These extensions allow converting data as products and product categories. 

However, for customized elements like design, apps, custom code, shipping rules, payment rules, and security, you need to switch back to manual migration.  

Thus, you should prefer manual migration if you have more than one entity or elements in your online store. Otherwise, you’ll spend a lot of time working monotonously and could make serious mistakes.

Alternatively, you can hire Magento developers to migrate the data for you. Although this may be quite expensive, there will probably be fewer errors.

1. Manual Shopify-Magento Migration

Manual migration involves exporting all data from your Shopify website to CSV files and importing them into Magento. The CSV files will include data about products, categories, customers, manufacturers, orders, etc. 

You only need to remember that each CSV file can hold data up to 9000 rows. Thus, your data should be processed through automated tools if it exceeds the size limit.

Step 1: Click on Magento admin panel, tap on System and select the Import / Export profiles to export the data. 

Step 2: Import Shopify CSV files that only include support data, i.e., Advanced Pricing, Products, Customers and Addresses, and Customers Main File. 

Step 3: To import unsupported data, copy and paste it from your old website to your current site. 

Although Manual Shopify-magento migration will help your ecommerce website builder platform in data migration, you need to put extra effort into fixing the relationship between data tables.

2. Automated Migration

For automated migration, you can choose any popular extension. Even if you need advanced coding skills, this Magento plugin will help you migrate the shop. Let’s now discuss how the extension can help you relocate.

Step #1: Install Adobe Commerce (aka Magento)

  1. Firstly, install Adobe Commerce (which is called Magento) to migrate from Shopify and ensure your system meets the requirements and download the latest version from Magento Commerce. 
  2. To know more about the installation process, check the infographic illustrated below:

Install Adobe Commerce

Step #2: Perform a Readiness Check & Add a Database

  1. Run a readiness check to ensure everything is ready to migrate. However, if any problem arises during the inspection, you will be notified about it. 
  2. Add databases to store the data and fill all the required details of your database like name of the database, server host, username, and password, as well as the password for the database.

Step #3: Configure the future Magento store

Configure your site settings once you have finished working with your database. This step includes:

  1. Web configuration, in which you need to enter the URL of the website domain and the admin address of the website. You can also select HTTPS options here, add Magento and add your encryption key here.
  2. Storefront customization, which includes adjusting default settings, such as language, currency, and time zone, can also add advanced configurations to your store by adding modules such as Amazon payment and Magento Admin Analytics.
  3. Admin account creation, where you specify your user name, email address, and password. From here, you can manage the backend of your ecommerce website.

Step #4: Export Store Data From Shopify

  1. Begin the manual migration from Shopify to Magento 2 and create a backup of your data. Extract all the data of your old site from Shopify admin panel. 
  2. Select the appropriate tabs on the right and then click the Export button at the top of the page. After that you will receive an email containing all the necessary data.

Shopify plus

Note: Select “CSV for Excel, Numbers, or other spreadsheet programs.”

Step #5: Import Data into Adobe Commerce

  1. Go to your Adobe Commerce account, select the “System” section on the left sidebar, then select “Import.” Fill in all the fields and upload the CSV file to your account.
  2. After filling out the form, run the data check for your ecommerce store. You can start importing data migration if the data shown is valid.

Now you know the step-by-step guide of migrating your data from Shopify Plus to Magento 2. But are you not curious to know which is the right option to bein your Shopify-Magento migration. 

Well. we reccommend manual migration if you have multiple entities in your online store. Otherwise, you’ll spend a lot of time working monotonously and could make serious mistakes. 

You can also hire a Magento specialist to handle the migration. The professional can review your requirements, provide a more accurate quote, and inform you of any issues that needs your attention.

This may be the easiest way to go because you can keep them as a consultant to assist you in learning Magento for ecommerce platforms and dealing with things you couldn’t migrate (like aesthetics).

However, another thing you should be aware of while shifting from Shopify Plus to Magento 2 Migration is the time you will spend in the process. In our next section, we will discuss more about it.  

The Time You Will Spend When Migrating To Magento 2 From Shopify

Switching your eCommerce site from Shopify Plus to Magento 2 can be a time-consuming and cautious process. Depending on the size and complexity of your store, migration to Magento 2 will take time. 

Approximately 3 to 6 months are needed for the complete migration to Magento 2. The cost of migration depends on the features of your ecommerce website. Although there is no set cost for the Shopify-magento migrations, it can range from a few thousand dollars to tens of thousands. Consult a specialist and get a customized  estimate for the migration.

Before you come to a decision, know that Magento for ecommerce stores should have a clear strategy for the process. You also need the right resources and expertise to complete the project on time. 

Lastly, consider the cost of migration and the potential benefits you can access with Magento 2 as today Brands are looking for affordable and easy-to-scale ecommerce website provider. 

But unfortunately, there is a rift between brands in choosing the right platform to grow their online store. This has resulted in more buzz around Shopify Plus vs Magento commerce. 

Thus, let’s look at how different they are from the pricing point of view.   

Learn the best practices for importing product reviews while following our step-by-step guide for migrating from Shopify Plus to Magento 2.

Shopify Plus vs Magento Commerce 2: Pricing & Should You Really Migrate?

Shopify Plus and Magento Commerce 2 cost roughly the same amount in terms of the base price ($22,000 vs. $24,000, respectively) per year when compared to each other. 

Here are the pricing models of each platform:

  • Magento Commerce 2 Pricing

For businesses with gross annual revenue of less than $1,000,000 and less than $22,000 annually, Magento Commerce 2’s price starts at $22,000 annually. 

Then, depending on how much ROI your business is earning and the gross market value of the merchandise you are selling, the price of your Magento online store progresses.

Magento is a platform-as-a-service business used to create and manage online stores. Despite this, Magento Theme 2 does not include hosting and IT fees. As a result, companies need to purchase them separately to grow their business. 

If an online store wants to adopt a responsive magento theme, custom magento theme, third-party plugins, and app integrations, they must spend more money.  

Medium size enterprises can expect to pay $100 per month or more for hosting — the price of a server depends on the organization’s size. That means large companies will pay significantly more for hosting their websites to run them smoothly. 

Another vital aspect which you should adopt magento for ecommerce store is that it works efficiently even during spikes in traffic. So like, when you are running flash sales or Black Friday sales, even then, your website will run smoothly and load pages faster.

Using Magento Commerce Cloud’s cloud-based software, the cloud server costs $500 per month in addition to the software cost.

Also, consider the cost of IT, as Magento 2 offers more extensive and personalized options to modify their core code to Magento Commerce 2 software and meet the needs of your online store.

These custom magento theme stores generally cost around $5,000 monthly, whether you create it with your in-house IT teams or outsource the work to a third-party organization.

But it shouldn’t matter because Magento 2 offers businesses access to a wide range of open-source apps with advanced features to create unique and innovative e-commerce stores.  

Thus, although Magento’s pricing excludes more hidden costs in general, unlike Shopify Plus, it does not charge a transaction fee for processing your payments. Even so, the overall cost of ownership for a Magento shop is usually higher than Shopify Plus, but you’re getting more customization and flexibility.

  • Shopify Plus Pricing

Each month, Shopify Plus costs $2,000, or $24,000 yearly, with an additional fee for high-volume businesses. While Shopify Plus is a more budget-friendly option for companies looking to create an e-commerce store, there are distinct benefits to using Magento 2 that may justify its higher cost.

Shopify Plus is a SaaS platform that includes hosting, and IT support for its users, which can assist businesses in saving money and time. 

However, its lack of flexibility to customize its base code like Magento 2 can limit the ability of businesses to tailor-made stores satisfying the business’s unique needs. 

Magento 2 migration

Moreover, Shopify Plus requires businesses to pay extra developer costs for custom app integration, which can be more expensive for complex or unique apps. 

At some point, you might anticipate that Shopify Plus is a more budget-friendly platform for creating customized websites. But the twist in the tale is Magento 2 is an open-source platform that allows businesses to modify their core code and tailor their functionalities to meet data migration requirements.

Not just that by adding extensions for Magento 2 and Magento commerce cloud you can build an e-commerce platform with more flexible and customizable options. 

However, ultimately, companies should carefully evaluate both platforms, choose the one that caters to their needs, and help them create the best online stores for their business.

To make your choice more manageable, we have created a list of why brands choose Magento 2 over Shopify Plus. You will read more about it in the next section! Let’s go!

Conclusion

For businesses looking to improve their online stores, migrating from Shopify Plus to Magento 2 can be challenging but rewarding. To create a more tailored and scalable e-commerce platform, carefully plan and implement the migration so that you can take advantage of Magento 2’s advanced ecommerce websites features and customization options. 

Work with experienced developers and WEDOWEBAPPS LLC migration experts to address potential challenges and costs to ensure a smooth transition. Migrating to Magento 2 can help your business thrive in the fast-paced, competitive e-commerce world with the right approach.

Considering a new platform? Learn the reasons to choose a Magento web development company in our step-by-step guide for migrating from Shopify Plus to Magento 2.

Magento 2 Extensions: Best Magento Add-Ons For Your Store Growth

Introduction

Magento, out of the box, is a powerful eCommerce platform.

But no successful Magento store runs on core features alone.

Every high-performing Magento store relies on a carefully selected set of Magento 2 extensions and Magento add ons to extend functionality, improve user experience, and support business growth.

Whether it is improving search, simplifying checkout, optimizing SEO, enhancing performance, or automating marketing, the right extension in Magento can directly influence how customers interact with your store, and whether they convert.

For startups, SMBs, and enterprises, the challenge is not finding extensions. It is knowing which Magento 2 extensions actually add business value and which ones slow the store down.

This guide walks you through the best extensions for Magento 2, including must-have categories, free Magento 2 extension options, and practical insights into Magento 2 extensions installation. You will also learn how to choose the right add-ons for your business and when to involve Magento experts for setup and optimization.


Magento 2 extensions consultation for store growth

What Are Magento 2 Extensions (and Magento Add Ons)?

A Magento 2 extension is a software component that adds new features or extends existing functionality of a Magento store.

Simply put, an extension in Magento allows you to customize how your store works without modifying core code.

Magento add ons can be used to:

  • Improve user experience
  • Add marketing and sales tools
  • Enhance store performance
  • Strengthen security
  • Automate operations

These extensions plug directly into your Magento store and expand its capabilities.

Magento Core vs Magento 2 Extensions

Magento core provides essential eCommerce functionality such as:

  • Product management
  • Cart and checkout
  • Customer accounts
  • Order management

However, most advanced features, such as one-page checkout, advanced SEO, smart search, or loyalty programs, come from Magento 2 extensions.

This modular architecture is what makes Magento highly flexible.

How Magento Add Ons Work

Magento add ons are built using Magento’s extension framework.

They:

  • Integrate with existing store features
  • Can be enabled or disabled easily
  • Are upgrade-friendly when built correctly

This allows businesses to add functionality without rebuilding their entire store.

Why Extensions Are Central to Magento Store Customization

No two Magento stores are exactly the same.

Extensions make it possible to:

  • Tailor stores to business needs
  • Support different industries
  • Scale functionality as the business grows

This is why selecting the right Magento 2 extensions is a strategic decision, not just a technical one.

Key Takeaway: Magento 2 extensions are the building blocks that transform a standard Magento installation into a fully customized, growth-ready eCommerce platform.

Why Magento 2 Extensions Are Essential for Store Growth

Magento provides a strong foundation, but extensions are what turn that foundation into a competitive advantage.

The right combination of Magento 2 extensions and Magento add ons helps businesses improve customer experience, increase operational efficiency, and drive higher conversions.

Here’s how extensions directly support store growth:

Improve User Experience and Navigation

Extensions enhance how customers browse and interact with your store.

Examples:

  • Advanced search and filtering
  • Product sliders and quick view
  • Personalized recommendations

Better UX leads to longer sessions and higher conversions.

Increase Conversion Rates

Many best extensions for Magento 2 focus specifically on removing friction in the buying process.

Such as:

  • One-step checkout
  • Guest checkout
  • Smart upsells and cross-sells

These extensions help convert more visitors into buyers.

Support Marketing and SEO Efforts

Magento add ons allow deeper control over:

  • Meta tags and URLs
  • Structured data
  • Email marketing automation
  • Promotions and discounts

This helps attract qualified traffic and convert it effectively.

Enhance Store Performance

Performance-focused extensions help with:

  • Caching
  • Image optimization
  • Lazy loading

Fast stores provide better experiences and rank higher.

Improve Security and Reliability

Security extensions add:

  • Firewall protection
  • Malware scanning
  • Login protection

They protect customer data and business reputation.

Automate Operations

Extensions can automate:

  • Inventory sync
  • Order processing
  • Customer notifications

Automation reduces manual work and errors.

Key Takeaway: Magento 2 extensions are not optional add-ons. They are growth enablers that directly influence sales, scalability, and customer satisfaction.

Categories of Magento 2 Extensions You Should Know

With thousands of Magento 2 extensions available, understanding the main categories helps you quickly identify what your store actually needs.

Below are the most important extension categories for modern Magento stores.

UX & Navigation Extensions

Improve how customers browse your store.

Examples:

  • Advanced search
  • Layered navigation
  • Product filters
  • Quick view

These extensions enhance discoverability and reduce bounce rates.

Checkout & Payment Extensions

Focus on simplifying purchases.

Examples:

  • One-step checkout
  • Guest checkout
  • Additional payment gateways
  • Buy-now-pay-later integrations

Checkout-focused Magento add ons directly impact conversions.

SEO & Marketing Extensions

Support traffic acquisition and promotion.

Examples:

  • SEO optimization tools
  • URL management
  • Email marketing integrations
  • Coupon and promotion tools

These help attract and convert visitors.

Performance & Speed Extensions

Optimize store speed.

Examples:

  • Cache management
  • Image optimization
  • Lazy loading

Speed affects both SEO and user experience.

Security Extensions

Protect your store.

Examples:

  • Firewall
  • CAPTCHA
  • Malware scanning

Security builds customer trust.

Analytics & Reporting Extensions

Provide insights into store performance.

Examples:

  • Enhanced reports
  • Customer behavior tracking
  • Sales dashboards

Data-driven decisions lead to better growth.

Key Takeaway: Understanding extension categories helps you build a balanced Magento ecosystem that supports growth.

Best Extensions for Magento 2 (Curated List)

There is no single “best” extension that fits every store. The best Magento 2 extensions are those that solve specific business problems and improve customer experience, conversions, or efficiency.

Below is a curated list of must-have extension types most Magento stores benefit from.

SEO Optimization Extension

Purpose: Improve visibility in search engines.

Typical capabilities:

  • Meta tag management
  • XML sitemap generation
  • Rich snippet support
  • Canonical URLs

Business value: Higher organic traffic and better rankings.

One-Step Checkout Extension

Purpose: Simplify checkout process.

Typical capabilities:

  • Single-page checkout
  • Guest checkout
  • Address auto-fill
  • Real-time validation

Business value: Lower cart abandonment and higher conversions.

Advanced Search & Filter Extension

Purpose: Improve product discovery.

Typical capabilities:

  • Smart search suggestions
  • Attribute-based filtering
  • Category filters
  • Price sliders

Business value: Faster product discovery and better UX.

Product Reviews & Ratings Extension

Purpose: Build trust.

Typical capabilities:

  • Verified buyer reviews
  • Star ratings
  • Review moderation
  • Photo reviews

Business value: Increased buyer confidence and conversions.

Email Marketing Integration Extension

Purpose: Automate communication.

Typical capabilities:

  • Abandoned cart emails
  • Welcome sequences
  • Promotional campaigns
  • Customer segmentation

Business value: Improved retention and repeat sales.

Performance Optimization Extension

Purpose: Speed up website.

Typical capabilities:

  • Full-page caching
  • Image optimization
  • Lazy loading

Business value: Faster site, better SEO, better UX.

Security Extension

Purpose: Protect store.

Typical capabilities:

  • Firewall
  • Malware scanning
  • Login protection

Business value: Data protection and trust.

Key Takeaway: The best extensions for Magento 2 are those aligned with your business goals, not just popular listings.


Magento extensions optimization by experts for store growth

Free Magento 2 Extensions Worth Installing

Not every extension needs to be paid.

There are many free Magento 2 extension options that can add meaningful functionality, especially for startups and early-stage stores.

However, free extensions should be chosen carefully.

Common Use Cases for Free Extensions

Free Magento 2 extensions are often suitable for:

  • Basic SEO enhancements
  • Simple checkout improvements
  • Basic security features
  • Small UX enhancements

They work well when requirements are simple.

Examples of Free Extension Types

  • Basic SEO tools
  • Simple cache management
  • Contact form enhancements
  • Basic review extensions

These can cover foundational needs.

Advantages of Free Magento 2 Extensions

  • No upfront cost
  • Faster deployment
  • Good for testing functionality

Limitations of Free Extensions

  • Limited features
  • Minimal customization
  • Little or no support
  • Slower updates

As stores grow, these limitations become more noticeable.

When to Upgrade to Paid Extensions

Consider premium extensions when you need:

  • Advanced functionality
  • Reliable support
  • Better performance
  • Long-term scalability

Key Takeaway: Free Magento 2 extensions are a good starting point, but serious growth usually requires premium or custom solutions.

How to Choose the Right Magento 2 Extensions for Your Business

Choosing extensions based only on popularity often leads to performance issues and unnecessary costs.

The right approach is to select Magento 2 extensions based on business goals and technical fit.

Start With Business Objectives

Ask:

  • Do you want more conversions?
  • Better SEO?
  • Faster performance?
  • Easier operations?

Your goals determine extension priorities.

Check Compatibility With Your Magento Version

Extensions must support:

  • Your Magento version
  • PHP version
  • Other installed extensions

Compatibility issues cause conflicts.

Evaluate Performance Impact

Poorly built extensions can slow your site.

Look for:

  • Lightweight code
  • Caching support
  • Performance reviews

Review Vendor Reputation and Support

Choose extensions from vendors who:

  • Provide documentation
  • Offer regular updates
  • Provide support

Support matters long-term.

Consider Scalability

Ensure the extension can handle growth.

  • Large catalogs
  • High traffic
  • Advanced configurations

Balance Free vs Paid Extensions

Free works for basics. Paid works for advanced needs.

Key Takeaway: Choosing fewer, high-quality Magento add ons is better than installing many low-quality ones.

Magento 2 Extensions Installation: What Businesses Should Know

Installing a Magento extension is not just about uploading files. Improper Magento 2 extensions installation can break functionality, slow performance, or create security vulnerabilities.

Understanding the basics helps businesses avoid costly mistakes.

Common Installation Methods

Magento 2 extensions are typically installed via:

  • Composer (recommended)
  • Magento Marketplace
  • Manual upload

Composer-based installation is the most reliable and update-friendly.

Check Server and System Requirements

Before installation, verify:

  • PHP version compatibility
  • Magento version compatibility
  • Required libraries

Skipping this step often causes errors.

Always Take a Backup First

Backups protect your store if something goes wrong.

Backup:

  • Files
  • Database
  • Media

Never install extensions on production without a backup.

Test in a Staging Environment

Extensions should be tested on a staging site before going live.

Testing helps identify:

  • Conflicts
  • Layout issues
  • Performance impact

Verify Functionality After Installation

After installation:

  • Clear cache
  • Reindex data
  • Test affected features

Confirm everything works as expected.

Keep Extensions Updated

Outdated extensions create security and compatibility risks.

Schedule regular updates.

Key Takeaway: Proper Magento 2 extensions installation protects your store’s stability and performance.

Common Mistakes When Installing Magento Extensions

Many Magento store issues do not come from the extensions themselves, but from poor selection, improper installation, or lack of maintenance.

Avoiding these mistakes can save businesses significant time, money, and lost revenue.

1. Installing Too Many Extensions

Every extension adds code, database queries, and dependencies.

Problems caused by excessive extensions:

  • Slower page speed
  • Higher server load
  • Increased conflict risk
  • Difficult troubleshooting

Only install extensions that deliver measurable business value.

2. Choosing Extensions Based Only on Price

Free or cheap extensions may look attractive, but they often lack:

  • Advanced features
  • Ongoing updates
  • Reliable support

Low-quality extensions can cost more in the long run through fixes and downtime.

3. Ignoring Compatibility Checks

Extensions must be compatible with:

  • Your Magento version
  • PHP version
  • Theme
  • Other installed extensions

Skipping compatibility checks is one of the biggest causes of site crashes.

4. Installing Directly on Live Store

Installing extensions directly on production without testing is risky.

Potential outcomes:

  • Broken checkout
  • Layout issues
  • White screen errors

Always test on a staging environment first.

5. Skipping Full Backups Before Installation

Without backups, rollback becomes difficult if something fails.

You should always back up:

  • Database
  • Files
  • Media

Backups protect your business from major downtime.

6. Using Poorly Coded or Abandoned Extensions

Extensions with:

  • No recent updates
  • No documentation
  • No support channel

pose security and stability risks.

Check vendor reputation and update history.

7. Not Monitoring Performance After Installation

Some extensions quietly slow down websites.

After installation:

  • Check page load times
  • Monitor server usage
  • Review frontend behavior

Performance monitoring is essential.

8. Ignoring Security Updates

Outdated extensions are common attack vectors.

Security patches must be applied regularly.

9. Overlapping Functionality

Installing multiple extensions that perform similar tasks creates conflicts.

Example:

  • Two SEO extensions
  • Multiple cache tools

Use one well-built extension per function.

10. Lack of Documentation and Change Tracking

Not documenting installed extensions makes future troubleshooting difficult.

Maintain a record of:

  • Installed extensions
  • Versions
  • Customizations

Key Takeaway: Most Magento extension problems are avoidable. Careful selection, proper testing, and ongoing maintenance are essential for stable store performance.

Why Businesses Hire Experts for Magento 2 Extensions

Magento 2 extensions can significantly improve store functionality, but only when they are selected, installed, and configured correctly.

Many businesses attempt to manage extensions internally and later face performance issues, conflicts, or security risks. This is why startups, SMBs, and enterprises choose to work with Magento experts.

For stores with custom workflows, large catalogs, or advanced integrations, working with a dedicated Magento development team can help ensure a smoother and more reliable migration experience.

Experts Help Select the Right Extensions

Professionals evaluate:

  • Business goals
  • Store architecture
  • Existing extensions
  • Performance constraints

This prevents unnecessary or incompatible installations.

Secure and Correct Installation

Experts follow best practices for:

  • Composer-based installation
  • Version control
  • Server configuration

This reduces technical risks.

Extension Customization

Out-of-the-box extensions rarely match business needs perfectly.

Experts customize:

  • Features
  • Layouts
  • Workflows

Customization ensures better fit.

Conflict Resolution

Professionals quickly identify and fix conflicts between extensions, themes, and Magento core.

This minimizes downtime.

Performance Optimization

Experts optimize:

  • Caching
  • Database queries
  • Code structure

Ensuring extensions do not slow the store.

Ongoing Maintenance

Magento experts:

  • Apply updates
  • Patch security issues
  • Monitor performance

This keeps the store stable long-term.

Key Takeaway: Hiring Magento experts turns extensions into business assets, not technical liabilities.


Magento 2 extensions installation and customization by experts

Conclusion: Turn Magento 2 Extensions into a Growth Advantage

Magento 2 extensions are more than optional add-ons. They are essential building blocks that shape how your store functions, performs, and converts.

From improving user experience and checkout flow to strengthening SEO, security, and performance, the right Magento 2 extensions and Magento add ons directly influence business growth.

However, success does not come from installing as many extensions as possible.

It comes from:

  • Choosing the right extensions
  • Installing them correctly
  • Customizing them for your business
  • Maintaining them over time

For businesses that want reliable results, working with experienced Magento Development Services providers ensures extensions are implemented strategically, securely, and with performance in mind.

If your goal is to build a scalable, high-performing Magento store, investing in professional Magento expertise is one of the smartest decisions you can make.


Magento 2 extensions optimization and expert setup for stores

WooCommerce Ecommerce Platform: Evolution, Trends, and Future Outlook

Introduction

WooCommerce has become one of the most widely used platforms for running online stores. From small businesses to growing brands, many merchants rely on it to manage products, payments, and day-to-day operations without depending on complex or costly systems. What began as a simple WordPress extension now supports a significant share of eCommerce websites worldwide.

The steady rise of the WooCommerce eCommerce platform reflects a larger shift in how online stores are built. Businesses today prefer flexible tools, ownership of their data, and the freedom to customise their store as needs change. WooCommerce has grown alongside these expectations, expanding its capabilities and eCommerce platform ecosystem year after year.

Looking at its evolution, core features, and current trends helps build clarity on why it remains an effective part of eCommerce conversions. By the end of this blog, you will understand how it compares with other platforms available to online stores today.

The Growth of WooCommerce: From Plugin to Platform

WooCommerce started as a simple WordPress plugin created to add basic selling functionality to existing websites. At that time, launching an online store often required custom software development. WooCommerce offered a practical alternative by allowing businesses to turn a regular WordPress site into a store with minimal setup.

Its growth was closely tied to WordPress itself. As WordPress became one of the most widely used content management systems, WooCommerce benefited from the same user base. Installation was straightforward, updates were easy to manage, and store owners could build on a familiar environment instead of learning an entirely new system. This strong connection helped WooCommerce spread quickly among website owners.

Early adoption increased as developers and agencies began creating themes, plugins, and integrations around the platform. Payment gateways, shipping tools, marketing extensions, and design templates expanded its capabilities. This growing community played a major role in the WooCommerce evolution, transforming it from a basic add-on into a complete WooCommerce eCommerce platform suitable for different types of WooCommerce for online stores.

Several milestones marked this progress. eCommerce feature updates improved scalability, the ecosystem of extensions expanded, and ongoing support from the WordPress community strengthened reliability. Over time, WooCommerce moved beyond small stores and became capable of supporting more complex eCommerce operations.

Today, it stands not just as a plugin but as a mature platform that many businesses consider when evaluating eCommerce solutions.


WooCommerce Store Development Consultation

Key Features That Drove Adoption of WooCommerce

Key WooCommerce features

WooCommerce gained consistent traction because it addressed practical business needs. Instead of limiting how stores operate, the platform gives merchants flexibility and control over their setup. These capabilities made it easier for businesses to launch, manage, and expand their online stores without depending on complex systems with the WooCommerce development services.

Below are the core WooCommerce features that supported this steady adoption.

Flexible Store Customisation

One of the main reasons businesses prefer WooCommerce is the ability to shape the store according to their specific requirements. The platform does not restrict design or functionality, which allows teams to create a shopping experience that matches their brand.

  • Modify layouts, themes, and checkout flows.
  • Add or remove features based on business needs.
  • Avoid fixed templates or rigid structures.

Wide Extension and Plugin Ecosystem

As the platform grew, developers began contributing tools and integrations that extended its capabilities. This ecosystem allows store owners to add features without heavy development work.

  • Payment gateways for multiple regions.
  • Shipping and tax management tools.
  • Marketing, analytics, and automation plugins.
  • Thousands of third-party integrations.

This expanding ecosystem played a direct role in the WooCommerce evolution, helping it move beyond basic selling functionality.

Open Source Control and Ownership

WooCommerce operates as open source software, which gives businesses full ownership of their store environment. This control is often important for brands that want long-term flexibility.

  • Host the store on preferred servers.
  • Access and manage store data freely.
  • Customise the code when advanced changes are required.
  • Avoid dependency on a single provider.

Seamless Integration with WordPress

Because WooCommerce works inside WordPress, many teams can manage both content and eCommerce from one place. This setup simplifies daily operations and reduces the learning curve.

  • Manage products and pages in the same dashboard.
  • Combine blogging, SEO, and selling easily.
  • Use existing WordPress themes and tools.

This integration makes the WooCommerce eCommerce platform practical for businesses that rely heavily on content marketing.

Scalability for Growing Online Stores

Businesses often start small and expand gradually. WooCommerce supports this growth by allowing stores to add functionality over time instead of migrating to a new system.

  • Launch quickly with basic features.
  • Add tools as traffic and orders increase.
  • Support different types of WooCommerce for online stores, from small catalogs to larger inventories.

Together, these features explain why WooCommerce moved from a simple plugin to a widely adopted ecommerce solution. Its focus on flexibility and control continues to shape current WooCommerce trends across the market.

Trends Shaping WooCommerce in Modern Ecommerce

Ecommerce Trends 2026

Online selling is growing quickly, and businesses now expect more from their ecommerce platform. They want speed, flexibility, easier integrations, and the freedom to adapt as their store expands. These expectations directly influence how the WooCommerce eCommerce platform evolves and why more brands continue adopting it.

Recent WooCommerce trends show steady improvements that help store owners manage operations better and deliver smoother buying experiences.

Market Trends Influencing Adoption

The eCommerce market has shifted toward platforms that offer ownership and flexibility instead of fixed structures. Businesses prefer systems they can customise without ongoing platform restrictions.

WooCommerce fits this need because it runs on WordPress and gives complete control over store setup.

  • Full access to code and customisation.
  • No mandatory monthly platform fees.
  • Wide plugin ecosystem.
  • Freedom to choose hosting and tools.

These factors explain why the WooCommerce eCommerce platform remains a strong choice for many online sellers.

Growing Use Among Small and Mid-Sized Online Stores

Startups and growing businesses often need an affordable solution that can scale step by step. WooCommerce supports this approach by allowing stores to start simple and expand features as needed.

Instead of paying for advanced capabilities upfront, businesses can add them gradually.

  • Low initial setup costs.
  • Easy product and catalog management.
  • Scales from small shops to large inventories.
  • Suitable for niche and local brands.

This flexibility has increased adoption among small and mid-sized WooCommerce for online stores use cases.

Headless, AI, and Mobile First Strategies

Modern commerce now goes beyond basic storefronts. Brands expect faster interfaces, smarter tools, and better mobile performance. WooCommerce has adapted to support these technical needs.

It integrates easily with modern architectures and intelligent systems.

  • Headless commerce using APIs for custom frontends.
  • AI-powered product recommendations and search.
  • Marketing automation tools.
  • Mobile-friendly checkout experiences.
  • Responsive themes for all devices.

These capabilities align with current WooCommerce trends focused on performance and personalisation.

Changing Ecommerce Expectations Driving Platform Updates

Customer behaviour has changed. Shoppers expect fast pages, simple navigation, secure payments, and smooth experiences across devices. Platforms must evolve regularly to meet these standards.

WooCommerce benefits from an active open source community that releases updates based on real store requirements.

  • Frequent feature improvements.
  • Security updates.
  • New extensions and integrations.
  • Better compatibility with modern tools.

This continuous improvement shapes the future of WooCommerce and keeps it relevant as eCommerce demands grow.


We design, develop WooCommerce

Comparing WooCommerce With Other Platforms

Comparing WooCommerce With Other Platforms

Businesses evaluating eCommerce options often compare WooCommerce with other widely used platforms such as Shopify, Magento, and BigCommerce. Understanding differences in adoption trends, flexibility, and ecosystem size helps decision makers select the right platform for their store’s needs.

Below is a neutral breakdown of key aspects.

Adoption Trends

WooCommerce has grown steadily due to its open source model and WordPress integration. Other platforms have different adoption patterns based on business type and size.

  • WooCommerce: Widely adopted by small and mid-sized stores, with over 5 million active websites.
  • Shopify: Strong adoption among small to medium merchants, especially for ease of setup.
  • Magento: Popular with large enterprises and high-volume stores.
  • BigCommerce: Used by mid-market businesses with multi-channel selling needs.

Flexibility and Customisation

Platform flexibility affects store design, workflow, and long-term growth options.

  • WooCommerce: High customisation through plugins, themes, and open source code.
  • Shopify: Limited backend access. Flexibility mostly appears through apps and themes.
  • Magento: Very flexible, but requires technical expertise to implement.
  • BigCommerce: Offers configurable features, less open than WooCommerce, more managed solution.

Ecosystem and Extensions

A strong ecosystem supports features, integrations, and ongoing platform development.

PlatformPlugin or Extension AvailabilityCommunity SupportThird-Party Integration
WooCommerce5000+ pluginsLarge global developer community.Payment gateways, shipping, marketing, and analytics.
Shopify4500+ appsActive community forums.Multi-channel, POS, and marketing tools.
Magento3000+ extensionsDeveloper-heavy.Enterprise integrations and B2B features.
BigCommerce1000+ appsGrowing community.Payment and marketing tools.

The comparison shows that each platform has a specific niche.

  • WooCommerce excels in flexibility and ecosystem size for small to mid-sized stores.
  • Shopify prioritises simplicity and quick setup.
  • Magento suits enterprise stores requiring full technical control.
  • BigCommerce fits mid-market businesses needing managed solutions.

This neutral comparison highlights WooCommerce vs other platforms from an adoption, flexibility, and ecosystem perspective without any service promotion.

Challenges and Considerations for Businesses

Key challenges in WooCommerce

While WooCommerce provides flexibility and a widely adopted eCommerce solution, businesses should be aware of certain challenges before implementing it. Understanding these considerations helps store owners plan technical resources, growth strategies, and maintenance requirements effectively.

Technical Management and Hosting Requirements

WooCommerce is self-hosted, which means businesses must manage hosting, updates, and security. While this gives control, it also requires planning and technical knowledge.

  • Choosing reliable hosting for speed and uptime.
  • Regularly updating WordPress, WooCommerce, and plugins.
  • Managing backups and security internally.
  • Troubleshooting custom code or plugin conflicts.

Performance and Scaling

The platform’s performance depends heavily on hosting, plugins, and site optimisation. Businesses with large inventories or high traffic need additional technical planning.

  • Optimising themes and plugins for speed.
  • Using caching and performance tools.
  • Ensuring server resources match traffic and product catalog size.
  • Seeking support from WooCommerce developers for complex scaling needs.

Plugin Compatibility and Maintenance

WooCommerce relies on third-party extensions for advanced features. While this adds flexibility, it introduces potential maintenance challenges.

  • Ensuring plugins remain compatible after updates.
  • Monitoring for conflicts that could disrupt functionality.
  • Some advanced plugins require a paid license.
  • Ongoing management is required to maintain smooth operations.

Limited Out-of-the-Box Enterprise Features

WooCommerce is ideal for small and mid-sized stores but lacks some enterprise functionality by default. Businesses requiring complex operations may need additional tools or development.

  • Multi-currency and advanced tax handling often need plugins.
  • B2B or wholesale features may require customisation.
  • Advanced reporting or analytics is usually done through third-party tools.
  • Some enterprise-grade tools are natively available in platforms like Magento.

Understanding these challenges and considerations ensures businesses can use WooCommerce effectively. The platform remains a highly flexible WooCommerce eCommerce platform suitable for a variety of WooCommerce for online stores, but proper planning for technical management, scaling, and maintenance is key to long-term success.


choose right eCommerce platform

The Future of WooCommerce

WooCommerce continues to evolve alongside changing business and customer expectations. Understanding emerging trends and the platform’s future direction helps businesses plan long-term strategies and anticipate new opportunities.

Expansion of the Ecosystem

The WooCommerce ecosystem is expected to grow further, driven by developers, agencies, and third-party service providers. This expansion will provide more tools, integrations, and specialised solutions.

  • Increasing number of extensions for marketing, shipping, and analytics.
  • New themes and design options for diverse industries.
  • Developer contributions that improve performance and security.
  • Stronger support for multi-channel and omnichannel selling.

Emphasis on Performance and Scalability

Future updates will continue addressing performance and scalability needs as online stores grow in size and traffic.

  • Better optimisation tools for speed and reliability.
  • Support for larger product catalogs and high-traffic volume.
  • Cloud hosting and managed performance solutions.
  • Enhanced caching, image optimisation, and mobile responsiveness.

Adoption of Modern Technologies

Emerging technologies like AI, headless commerce, and automation are becoming increasingly relevant for online stores. WooCommerce is adapting to these trends.

  • AI-powered product recommendations and search.
  • Automated marketing workflows and analytics insights.
  • Headless setups for custom frontend experiences.
  • Integration with emerging eCommerce tools and platforms.

Growing Role Among Small and Mid-Sized Stores

WooCommerce is expected to maintain its popularity among SMBs due to its flexibility and cost efficiency. Businesses will continue to choose it for stores that need scalability without high initial costs.

  • Affordable setup with control over features and hosting.
  • Ability to customise stores to specific business needs.
  • Gradual scalability for growing catalogs and customer base.
  • Strong community support for guidance and troubleshooting.

The future of WooCommerce looks focused on ecosystem growth, performance improvements, and adoption of modern ecommerce technologies. It remains a flexible and reliable WooCommerce eCommerce platform for a wide variety of WooCommerce for online stores, supporting both small businesses and growing brands.

Conclusion

Choosing an ecommerce platform is one of the first major decisions any online business makes. The right system should match current needs while leaving room to grow over time.

WooCommerce has steadily moved from a simple WordPress plugin to a widely adopted WooCommerce eCommerce platform used by millions of WooCommerce for online stores. Its open architecture, growing ecosystem, and expanding WooCommerce features continue to attract businesses that value flexibility and control. At the same time, comparisons like WooCommerce vs other platforms show that every solution serves different operational needs.

From its early WooCommerce evolution to the latest WooCommerce trends, the platform has adapted to performance demands, integrations, and modern shopping behaviour. This steady progress shapes the future of WooCommerce and keeps it relevant for startups, mid-sized brands, and growing online stores alike.

Explore our eCommerce development services to see how we help businesses launch and scale online stores with clarity and confidence.


Upgrade eCommerce Store

ReactJS Vs. VueJS- Which framework is ruling the market?

A Little Introduction on ReactJS vs VueJS

Are you also among those who have no idea which framework will work better – ReactJS vs VueJS?

As you must be aware that both are powerful JavaScript frameworks and are trusted by many businesses. You know that ReactJS is known for its offered flexibility and the vast ecosystem, while on the other hand, Vue.js is the best option for its simplicity and smooth learning curve. 

When it comes to React vs Vue performance, the choice is not just about which among the two is most popular. It is more about how well each framework scales, performs, and supports your team’s skills.

It is important to know about the major differences between Vue and React to know about the fact that which delivers better performance and maintains long-term growth with your business needs.

In this guide, we will break down Vue.js vs React by knowing about their similarities, differences, and performance to maintain accuracy. By the end of this blog, you will know which ReactJS vs VueJS framework is best for your next project.

What is ReactJS?

ReactJS is an open-source JavaScript library which is prepares by Facebook. This is widely used to have a faster and dynamic user interface in mobile app development. It follows a structured approach and makes development process more organized and scalable.

A major reason why businesses often compare React vs Vue performance is because of React’s virtual DOM.  Instead of reloading the entire web page can result in fast rendering and a smooth user experience.

Apart from speed, ReactJS also has a strong ecosystem that gives support to various libraries like React Router and Redux, which makes it a more adaptable choice for a project. It is actively adopted by React developers to maintain accuracy.

Key Features of ReactJS

  • Component-based structure for advanced development.
  • Virtual DOM that improves performance.
  • Has a rich ecosystem and supports advanced libraries.
  • Strong community support with regular updates.
  • Flexibility in developing both web and mobile applications.

Strength of React

  • Performance: Virtual DOM allows have fast rendering and responsiveness.
  • Scalable: Suitable for both small apps and large enterprise platforms.
  • Future-ready: Give a guarantee of long-term support and innovation.
  • Availability: Makes the hiring React Expert easier.
  • Ecosystem: Includes a wide range of tools that maintain accuracy.

What is VueJS?

Vue.js is considered to be a progressive JavaScript framework that was created by Evan You. This is specifically designed to build modern and responsive user interfaces. Vue is lightweight and straightforward, which makes it simpler for developers to adopt and integrate into a project.

The available approachable syntax and clear documentation make it a better choice among startups and developers that require to have limited resources.

When businesses compare Vue.js vs React, one of the first things that comes to mind is the smooth learning curve. A VueJS developer

Vue also includes built-in solutions for adding features like state management and routing, which require dependability compared to React. This streamlined approach not only improves the profitability but also makes the apps more reliable in the long run.

Key Features of Vue.js

  • Reactive data binding for maintaining a dynamic user interface.
  • Component-based architecture for preparing modern applications.
  • Built-in solution that follows routing and state management.
  • Lightweight and fast in comparison with other frameworks.
  • Detailed documentation that makes it simple to adopt for beginners.

Key Strengths of Vue.js

  • Beginner-friendly: Easy to learn and can be implemented easily with minimal setup needs.
  • Fast Learning Curve: Supports faster learning and is easily accessible.
  • Lightweight Performance: Small bundle size that ensures faster loading.
  • Built-in Tools: Offers routing and start management support that maintains reliability.
  • Community-driven: Maintained by an open-source community and ensures regular improvements.

ReactJS vs VueJS: Similarities

Diagram comparing ReactJS and VueJS component architectures

Before knowing about the difference between ReactJS vs VueJS. At first, you are supposed to know about the common factors for building modern web applications. Making the strong choice between Vue.js vs React starts with knowing about the similarities.

Let’s have a close look at the various similarities:

1. Component-Based Architecture

Both React and Vue are component-driven frameworks. It follows the structured improve code reusability and make the application easier to scale and manage.

2. Virtual DOM for Better Performance

A key factor in the React vs Vue performance is the shared use of the virtual DOM. By updating the various elements. Both frameworks ensure that faster development and a smooth user experience are maintained.

3. Flexibility in Development

It does offer flexibility in maintaining the project structure. Developers can integrate third-party libraries or native tools while maintaining the accuracy for meeting project needs.

4. Strong Ecosystem and Tooling

Both ReactJS and Vue.js offer easy access to powerful developer tools with browser extensions to make the process of development more efficient.

5. Large and Supportive Communities

React offers the benefit of a meta corporation, while Vue is driven by a strong open-source community. Both frameworks give access to tutorials to handle development with ease.

6. Cross-Platform Capabilities

Both frameworks go beyond developing traditional web apps. React offers React Native app development, and Vue integrates tool such as NativeScript to maintain versatility.

These are the common Vue.js vs React similarities when comparing the offered services and maintaining the efficiency of the processes.

An image with a button to talk to an expert for help choosing between ReactJS and VueJS

Difference Between Vue and React

Comparison chart highlighting key differences between VueJS and ReactJS

To know which one of the Vue.js vs React frameworks is best for your business, you start by understanding the difference. Both framework has their separate strength when it comes to performance, scalability, and learning curve. 

Understanding these differences is key to deciding which framework best fits your business needs.

Let’s begin with a quick comparison of Vue.js vs React, and then we will discuss that in brief.

FactorReactJSVue.js
Learning CurveSteeper, requires JSX and ecosystem knowledgeEasier to adopt, beginner-friendly syntax
PerformanceStrong for large-scale, complex appsGreat for smaller to mid-sized apps
Ecosystem & ToolingVast but relies on third-party librariesOffers built-in tools for routing and state management
ScalabilityExcellent for enterprise-level projectsSuitable for small to mid-sized projects
Community & SupportBacked by Meta with a massive developer communityOpen-source with a smaller but highly active community
Mobile DevelopmentUses React Native for cross-platform appsRelies on NativeScript and Capacitor for integrations

Let’s discuss each difference between Vue and React in detail.

1. Learning Curve and Ease of Adoption

  • VueJS: Known for its offered simplicity and beginner-friendly syntax. This makes the developer have a clear understanding of JavaScript.
  • ReactJS: Offers more with more flexibility, but requires having an additional understanding of JSX and various third-party libraries, which makes the learning process slow.

2. Performance and Rendering Speed

  • VueJS: Deliver with strong performance while maintaining a more efficient project with accuracy. This difference often drives the React vs Vue performance better.
  • ReactJS: It gives support to the virtual DOM and different algorithms that make it a fast handling framework for managing complex applications.

3. Ecosystem and Tooling

  • VueJS: Offers the support is more specific support for handling the various management and routing. This makes the framework easy to set up and maintain with a growing community.
  • ReactJS: It supports a vast ecosystem while maintaining the inclusion of various third-party libraries. Also, give freedom to handle higher complexity with ease.

4. Scalability and Application Size

  • VueJS:VueJS technology is a common framework that is adopted for lightweight projects, MVPs, or developing a mid-sized platform.
  • ReactJS: Best option for developing the enterprise-grade application that requires to have inclusion of complex features. But still, it offers flexibility with a large ecosystem.

5. Community and Support

  • VueJS: The framework is community-driven and is a highly active option to maintain scalability, but supports a smaller ecosystem.
  • ReactJS: Maintain strong long-term community support, and can be extended to the global community.

6. Mobile Development Capabilities

  • VueJS: Depended on the integrated tools like NativeScript or Capacitor, which are less mature than React Native.
  • ReactJS: Offers support for React Native, which is a widely used solution for cross-platform app development.

These are among the differences between Vue and React, which you need to understand before choosing between the ReactJS vs VueJS framework as per your development needs.

React vs Vue Performance

Performance effectively decides the outcome in the ReactJS vs VueJS framework comparison. Both rely more on the virtual DOM for their user experience. And efficiency is dependent on the complexity of the project and the need for scalability. 

Understanding the difference between Vue and React in performance helps businesses make an informed decision. 

Rendering Speed and Virtual DOM Efficiency

  • ReactJS: Known for its simply optimized algorithm. React re-renders only things that are necessary. This makes it an effective choice when handling the UI updates.
  • VueJS: Uses a virtual DOM, but it is lighter in size. Vue often provides faster initial rendering. For smaller apps, Vue performs better in the speed in comparison with React.

Handling Large-Scale Applications

  • ReactJS: With offered strong ecosystem and flexibility, React effectively maintains the scalability of the project. It is suited for large-scale applications for handling complex management requests.
  • VueJS: Works efficiently for all mid-size applications, but for complex development, it may require additional libraries. This is one option where Vue.js vs React shows a clear difference in scalability.

Mobile Development (React Native vs NativeScript/Vue Alternatives)

  • ReactJS: Provide React Native support, which is suitable for cross-platform mobile development. Give the benefit of reusing logic across web development and mobile applications to improve performance and efficiency.
  • VueJS: Relies more on tools such as NativeScript or Capacitor for mobile apps. It is less compatible than React Native for making stronger mobile-focused projects.

When knowing about React vs Vue performance, React tends to be more effective for large-scale projects and mobile app development. Vue is more efficient for handling smaller projects and lightweight applications. This makes the ReactJS vs VueJS framework decision more effective as per your project scope and future scalability needs.

A call-to-action button to hire expert developers for end-to-end ReactJS and VueJS application development.

Use Cases of React and Vue

When comparing the business project requirement with ReactJS vs VueJS framework, the decision should be made on the need for scalability and the team’s expertise. Each framework has its own strength that makes it a suitable choice for meeting specific needs. 

By understanding the use of Vue.js vs React framework, it is important that, at first, you narrow down their use cases.

Here are the details on when you use ReactJS vs VueJS

When to Choose ReactJS

  • Enterprise-level Applications: React’s components are effectively used for developing large-scale platforms like Saas or marketplace, as it supports an effective ecosystem.
  • Cross-platform Development: With React Native, businesses can easily build a high-performing mobile app that shares logic with web apps.
  • Complex State Management: Applications that can easily handle the data updates and allow for smooth integration of dashboards or financial platforms. 
  • Long-term Scalability: If your business is aiming to expand the application over time while maintaining the focus on flexibility and effective support.

When to Choose VueJS

  • Startups or Small Businesses: Vue is simple and lightweight, which makes the development faster and cost-efficient.
  • Quick MVP Development: For testing an idea or launching the product prototype, Vue is best for maintaining the long-term results efficiently.
  • Progressive Integration: The Existing application can easily adopt Vue without completely rebuilding, and make the application which is appealing to your business.
  • User-friendly Interfaces: Vue is often chosen for maintaining the more focus on clean UI and a smoother user experience without the need for heavy performance.

In the Vue.js vs React comparison, React specifically stands out in maintaining the scalability of the complex application. On the other hand, Vue is preferred to maintain speed, simplicity, and cost efficiency. For matching with the various business needs, it is effective to make the choice of ReactJS vs VueJS framework that scales with your business goals.

Pros and Cons of ReactJS vs VueJS

When analyzing ReactJS vs VueJS, you should often look at the advantages and disadvantages to know which framework is best suitable as per your project needs. 

Here is the breakdown of Vue.js vs React comparisons in terms of their development approach, performance, scalability, and support.

Pros and Cons of React

In the ReactJS vs VueJS comparison, React stands out because of its maintained scalability, ecosystem, and performance. But with the advantages are there occur some challenges as well, which are being discussed below.

Pros of ReactCons of React
Supports component-based architecture, encouraging modular and reusable codeSteeper learning curve for beginners compared to Vue
Optimized with a virtual DOM for smooth and consistent UI updatesRequires additional setup for complex applications
Rich ecosystem with tools like React Router and React NativeComplex libraries require learning additional tools and expertise
Backed by Meta with a strong global communityFrequent updates may require ongoing maintenance
Suitable for enterprise-level and large-scale applicationsComplex state management can increase setup time
Supports efficient cross-platform app developmentMobile apps may require third-party optimization

Pros and Cons of Vue

When comparing Vue.js vs React for their framework support and other aspects. Vue is valued for its simplicity, smooth learning curves, and fast rendering. But it does have limitations in terms of scalability and ecosystem size, which are discussed here in the table.

Pros of VueCons of Vue
Simple syntax makes it beginner-friendly and easy to adoptLimited flexibility for large-scale application development
Lightweight framework enables faster renderingMay slow down when handling heavy updates
Built-in tools like Vue CLI simplify developmentSmaller community and fewer enterprise-level resources than React
Active community with clear documentationSmaller ecosystem compared to React
Effective for small to mid-sized business applicationsScaling beyond mid-size apps may require third-party support
Easily integrates with NativeScript or Capacitor for mobile projectsLess mature mobile ecosystem compared to React Native

When you want to make the choice betweenReactJS technology vs VueJS technology, make sure that you know about the different benefits and limitations to make a better decision for your project needs.

Which Framework Should You Choose?

The difference between Vue and React allows you to be clearer about the attached strengths and expectations towards meeting your business goals. Instead of depending on the various aspects to you should make a decision in terms of scalability, complexity, and supported libraries for your project needs.

Choose ReactJS if:

  • You want to build an enterprise-level application to support better development.
  • Need support of React Native for cross-platform needs.
  • Your team can handle a steeper learning curve for long-term scalability.
  • You want to have easy access to the larger ecosystem and community support.

Choose VueJS if:

  • You are a startup or small business looking for quick development.
  • A lightweight, easy-to-learn framework that fits with your team’s expertise.
  • You are required to build an MVP or prototype rapidly.
  • Progressive integration into an existing app is your priority.

If you are comparing ReactJS vs VueJS, think of React as a robust choice when you need to have a complex and scalable system. Vue is a simple and agile project to maintain easily. 

You should carefully evaluate the technical requirements, available skills, and long-term plans before deciding between Vue.js vs React.

ReactJS vs VueJS Framework: Key Takeaways

The ReactJS vs VueJS framework is not about which one is better, but the discussion is more about which is more suitable as per your preferred business needs. React is effective for handling large-scale applications, complex state management, and cross-platform development.

Vue is more accurate when it comes to having faster setups, simpler integration, and ease in handling smaller projects of an MVP.

In short, the difference between Vue and React is more than just about the speed. Choose React if you require to have long-term scalability and flexibility. Choose Vue if there is a need for quick development and simplicity, as per your business needs.

Call-to-action button to start a free consultation for your business needs regarding ReactJS and VueJS