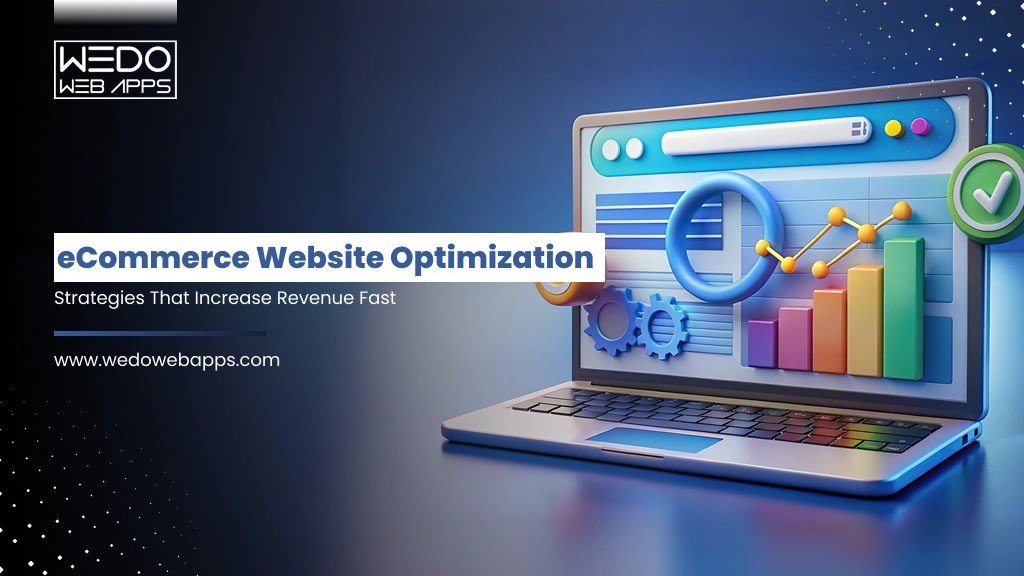
skip to content

BigCommerce Headless Development With NextJS for Scalable eCommerce

Introduction

Is your eCommerce platform limiting speed, flexibility, or growth?

If your storefront is tightly coupled with your backend, you are already hitting invisible growth ceilings. Most eCommerce businesses don’t realize this early. They start simple. You launch quickly, customize a theme, plug in a few tools, and everything works. Until growth begins to expose cracks. Pages slow down, custom features become harder to implement, and even small changes start requiring disproportionate effort. What once felt like a solution gradually turns into a constraint.

This is where many businesses hit an invisible ceiling. Not because demand is not there, but because their platform cannot keep up with it.

Headless commerce is emerging as a response to this exact problem.

Instead of relying on a tightly coupled system where frontend and backend are locked together, a headless approach separates them. This allows businesses to build faster, more flexible storefronts without being restricted by backend limitations. And in that shift, BigCommerce headless paired with NextJS has become a preferred stack for teams that want both scalability and control.

But adopting headless is not just about following a trend. It is a decision that impacts how you build, scale, and optimize your eCommerce experience long-term.

In this guide, you will get a clear, practical understanding of how BigCommerce headless development works, from architecture and APIs to frontend setup, checkout integration, performance, and SEO. More importantly, you will be able to evaluate whether this approach actually makes sense for your business.

And if you are already considering this shift, working with an experienced BigCommerce development company like WEDOWEBAPPS can help you avoid the common pitfalls that slow teams down during implementation.

Talk to a Headless Commerce Expert

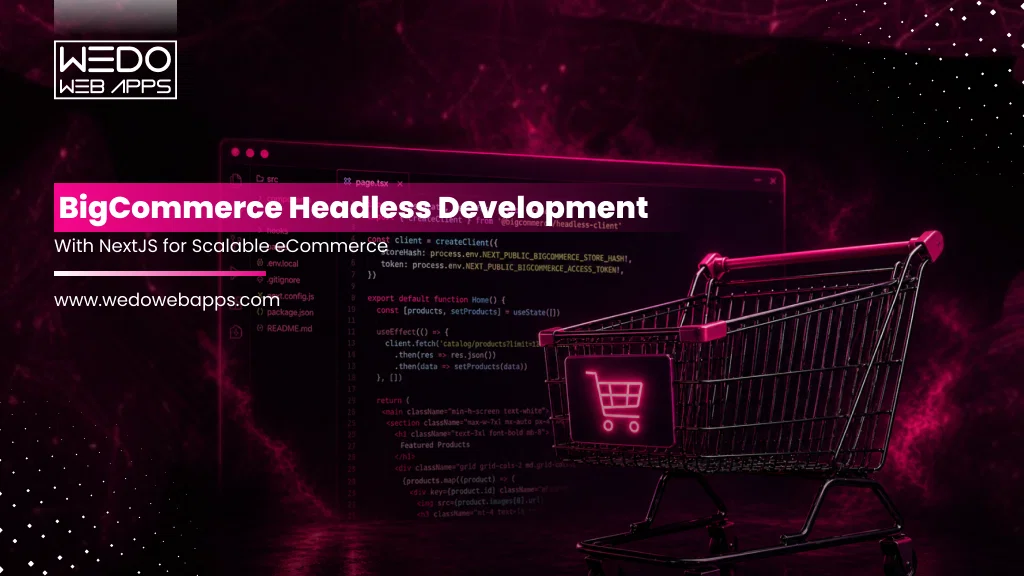
What is BigCommerce Headless (And Why Businesses Are Moving to It)

At a surface level, Headless commerce sounds like a technical upgrade. In reality, it is a response to a very practical business problem – lack of flexibility.

In a traditional eCommerce setup, your frontend (what users see) and backend (where products, orders, and logic live) are tightly connected. That means every design change, feature update, or performance improvement is limited by what the platform allows.

This works fine until your business needs something the platform was not built for.

That is when teams start facing friction:

  • Custom experience becomes difficult or expensive
  • Performance optimization hits platform limits
  • Omnichanne; expansion feels restricted
  • Marketing ideas get blocked by technical constraints

Headless commerce removes that dependency.

Instead of relying on a fixed frontend, you build your own while using the platform purely as a backend via APIs. This gives you full control over how your storefront behaves, looks, and performs.

Where BigCommerce Fits in a Headless Setup

BigCommerce is particularly strong in headless commerce because it was built with APIs at its core.

It allows you to:

  • Manage products, categories, and orders from the backend
  • Expose data through APIs (GraphQL + REST)
  • Integrate with any frontend framework, like NextJS

So instead of forcing your business into a predefined structure, BigCommerce becomes a flexible commerce engine.

What Changes When You Go Headless?

This shift is simple in concept but powerful in impact.

Instead of this:

Traditional Commerce: Frontend + Backend tightly connected

You move to this:

Headless Commerce: Custom Frontend (NextJS) + API-driven Backend (BigCommerce)

This separation unlocks:

  • Faster page performance
  • Unlimited UI/UX customization
  • Easier integration with third-party tools
  • Better scalability as your business grows

Why Businesses are Actively Moving to Headless in 2026

This is not just a developer trend; it is a business-driven shift.

Companies are moving to BigCommerce headless because they need:

  • Speed -> Faster sites directly improve conversion rates
  • Flexibility -> Build experiences that match their brand, not templates
  • Scalability -> Handle growth without rebuilding the system
  • Omnichannel Readiness -> Sell across web, mobile, apps, and more

And importantly, they want to future-proof their technology decisions.

The Real Decision You Are Making

Choosing headless is not about technology; it is about control.

  • Do you want to adapt your business to your platform?
  • Or adapt your platform to your business?

If your roadmap includes advanced customization, performance optimization, or rapid scaling, headless becomes less of an option or more of a necessity.

This is where working with a specialized NextJS development Company or a team experienced in headless architecture, like WEDOWEBAPPS, can significantly reduce risk and accelerate implementation.

BigCommerce Headless Architecture Explained (How it Actually Works)

Before you decide whether headless is right for you, you need to understand one thing clearly:

Where does everything live, and how does it connect?

Because this is where most businesses either gain clarity or get overwhelmed.

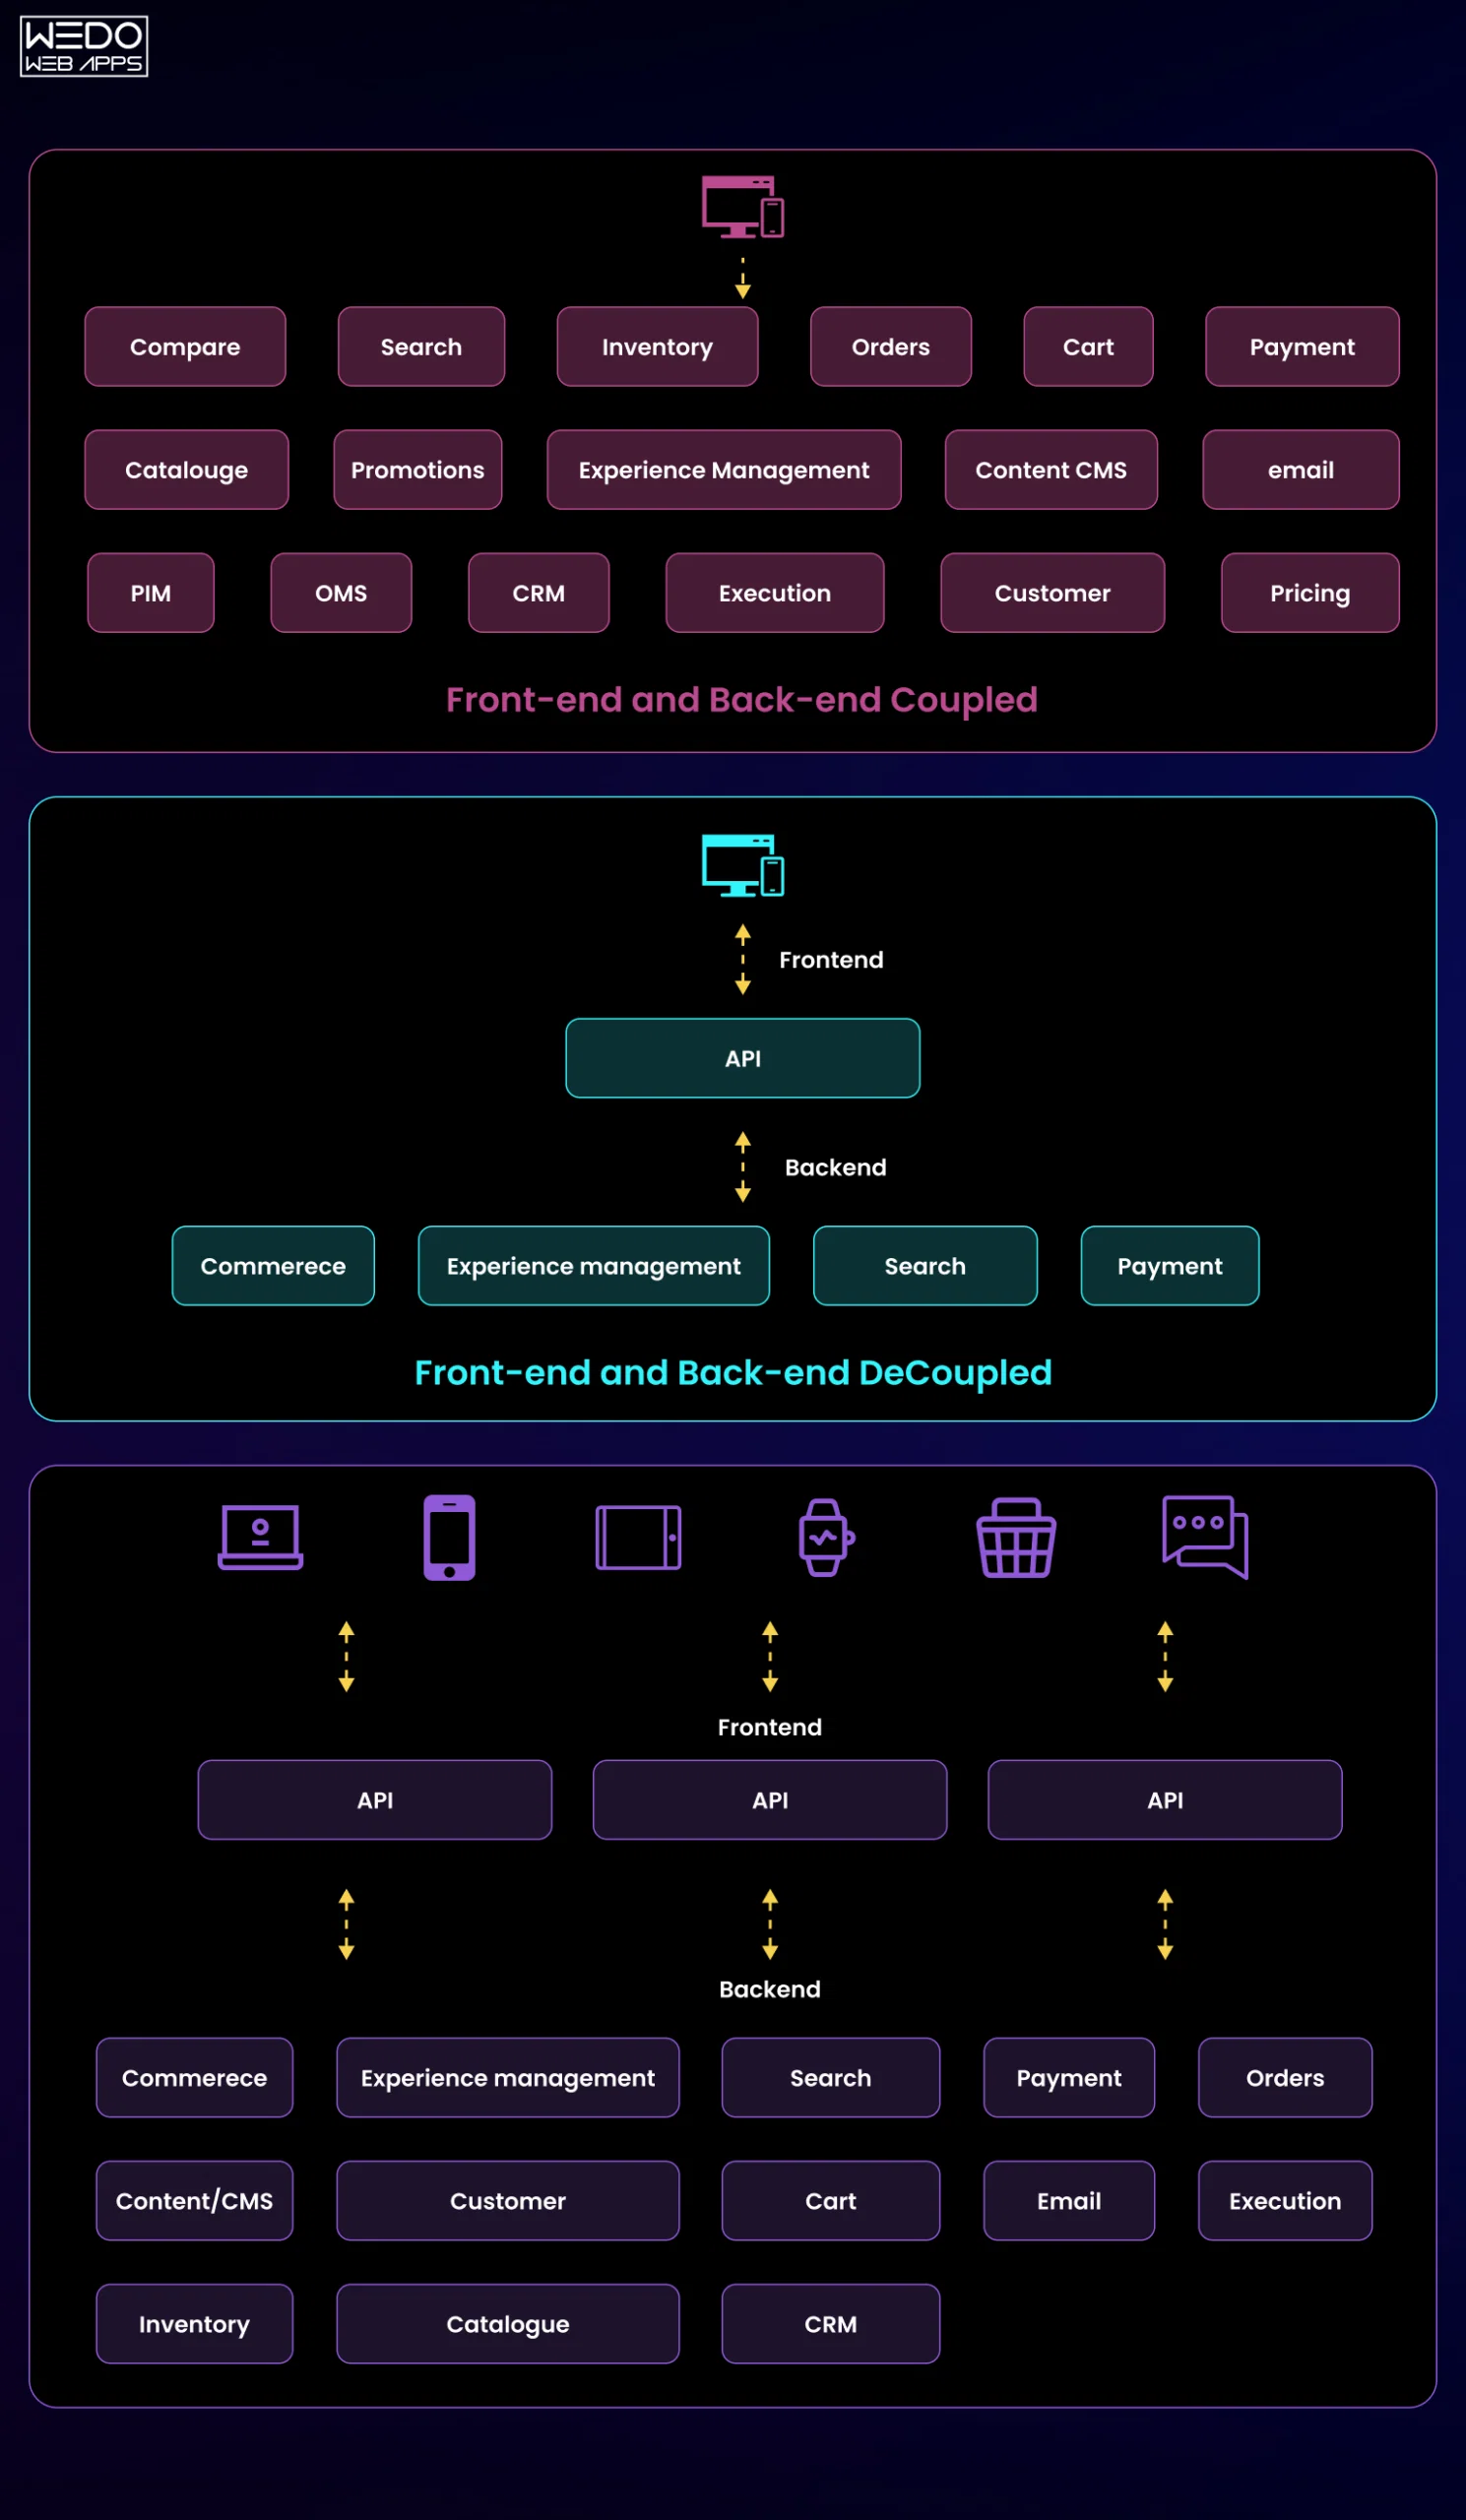
The Simplified View (Without Overengineering It)

In a headless BigCommerce setup, your system is split into three clear layers:

  • Frontend (NextJS) -> What users see and interact with
  • Backend (BigCommerce) -> Where products, carts, orders, and logic live
  • APIs (GraphQL / REST) -> The bridge connecting both

Instead of relying on a monolithic system, everything communicates through APIs.

Visualizing the Structure

BigCommerce Headless Architecture Explained

Breaking it Down (What Each Layer Actually Does)

  1. Frontend – NextJS (Your Customer Experience Layer)

This is where your entire storefront lives.

  • Product pages
  • Category listings
  • Landing Pages
  • UI/UX Interactions

NextJS gives you:

  • Server-side rendering (better SEO)
  • Static generation (faster performance)
  • Flexibility to build any experience you want

Themes no longer limit you; you are building your storefront from scratch.

  1. Backend – BigCommerce (Your Commerce Engine)

BigCommerce handles everything critical behind the scenes:

  • Product catalog
  • Inventory
  • Pricing
  • Orders
  • Customer data

The key difference? You are not using its frontend anymore, only its capabilities.

  1. API Layer – The Connector (Where the Magic Happens)

This is what makes headless work.

  • GraphQL Storefront API -> Fetch products, categories, carts
  • REST APIs -> Additional operations when needed
  • Checkout APIs -> Manage checkout flows

Your frontend calls these APIs to:

  • Display products
  • Add items to cart
  • Manage checkout

API Layer The Connector

How a Typical User Journey Works (Step-by-Step Flow)

Here is what happens when a user visits your site:

  • User opens your storefront (NextJS frontend loads instantly)
  • Frontend requests product data via GraphQL API
  • BigCommerce sends structured product data
  • Frontend renders the page dynamically
  • User adds product to cart > API call updates cart
  • Checkout is triggered via the Checkout API

All of this happens in milliseconds, but the architecture behind it is what enables speed and flexibility.

Why This Architecture Matters for Business Growth

This is not just a technical improvement; it directly impacts outcomes:

  • Faster pages -> Better conversion rates
  • Custom UX -> Higher engagement
  • API flexibility -> Easier integrations (CRM, ERP, AI Tools)
  • Scalable frontend -> No rebuild when you grow

Where Most Implementations Go Wrong

Here is the honest part: this setup is powerful, but not trivial.

Common mistakes:

  • Poor API structuring -> Slow performance
  • Over-fetching data -> unnecessary load times
  • Weak frontend architecture -> hard to scale later
  • Checkout misconfiguration -> conversion drop

This is why businesses often choose to Hire BigCommerce Development Company instead of building everything in-house, especially when performance and scalability are critical.

Teams like WEDOWEBAPPS focus on structuring this architecture correctly from day one, so you don’t end up rebuilding it later.

BigCommerce Headless API Overview (What You Actually Need to Use)

Once the architecture is clear, the next question most teams ask is:

“Which APIs do we actually need, and how complex is this going to get?”

The honest answer: You don’t need everything. But you do need to use the right APIs in the right places.

Because this is where many headless projects either stay efficient or become unnecessarily complicated.

Start With This Mental Model

Think of BigCommerce APIs as three functional layers:

  • Storefront APIs (GraphQL): Power your frontend experience
  • Management APIs (REST): Handle backend/admin operations
  • Checkout APIs: Control the checkout experience

Each serves a different purpose. Mixing them incorrectly leads to performance issues and messy architecture.

1. GraphQL Storefront API (Your Primary Workhorse)

If you are building a NextJS storefront, this is the API you will use the most.

It allows you to fetch:

  • Products
  • Categories
  • Variants
  • Pricing
  • Cart data

The biggest advantage?

Instead of making multiple requests, you can fetch exactly the data you need in a single query.

That is a major reason why the BigCommerce GraphQL Storefront API is preferred for headless builds; it keeps your frontend fast and efficient.

Example: Fetching Products with GraphQL

</> GraphQL

query getProducts {

site {

products(first: 5) {

edges {

node {

entityId

name

prices {

price {

value

currencyCode

}

}

defaultImage {

url(width: 500)

}

}

}

}

}

}

Using It in NextJS

</> JavaScript

const fetchProducts = async () => {

const res = await fetch(process.env.BC_GRAPHQL_ENDPOINT, {

method: “POST”,

headers: {

“Content-Type”: “application/json”,

“Authorization”: `Bearer ${process.env.BC_STOREFRONT_TOKEN}`,

},

body: JSON.stringify({

query: `query {

site {

products(first: 5) {

edges {

node {

entityId

name

}

}

}

}

}`

}),

});

const data = await res.json();

return data;

};

2. REST APIs (Use Only When Necessary)

BigCommerce still provides REST APIs, but in a headless setup, they are not your primary tool.

They are typically used for:

  • Admin-level operations
  • Catalog management
  • Order management
  • Store configuration

Important: Using REST APIs for frontend data fetching is a common mistake. It increases latency and reduces performance.

3. Checkout APIs (Where Things Get Serious)

This is where your implementation directly affects revenue.

BigCommerce provides:

  • Hosted checkout (default, simpler)
  • Checkout Channel API (for headless setups)

With headless checkout, you can:

  • Control the checkout UI
  • Customize flows
  • Integrate third-party payment or logic

But it also adds complexity, which we will break down in the next section.

Authentication Basics (Without Overcomplicating It)

You will mainly deal with:

  • Storefront API Token -> For frontend requests
  • API Credentials (Client ID, Secret) -> For backend/admin calls

Always:

  • Store keys in environment variables
  • Avoid exposing sensitive credentials on the client side

The Real Mistake Most Teams Make

They try to use:

  • Too many APIs
  • Or the wrong API for the job

Which leads to:

  • Slower performance
  • Hard-to-maintain code
  • Increased development time

A clean implementation focuses on:

  • GraphQL for storefront
  • REST only when required
  • Checkout APIs with clear intent

What This Means for You as a Buyer

You don’t need to master every API.

But you do need to ensure:

  • Your architecture is clean
  • Your data fetching is optimized
  • Your checkout flow is reliable

Because these directly impact:

  • Page speed
  • User experience
  • Conversion rates

This is where working with a BigCommerce Development company like WEDOWEBAPPS helps; you avoid trial and error and build a system that is efficient from day one.

Get Custom Headless Architecture Plan

Next.js eCommerce Starter Template Setup (Step-by-Step That Actually Scales)

At this stage, most teams make a critical mistake.

They jump straight into coding without thinking about structure. And what starts as a simple setup quickly becomes difficult to scale, maintain, or optimize.

So instead of just “getting it running,” this section focuses on setting it up the right way from the beginning.

What You Are Actually Building Here

You are not creating a NextJS app; you are building a scalable frontend layer that:

  • Communicates with BigCommerce APIs
  • Handles dynamic product data
  • Supports SEO and performance out of the box

That means your setup decisions matter more than your code volume.

Step-by-Step Setup (Clean, Practical, No Fluff)

Step 1 – Initialize Your NextJS Project Properly

Start with a clean, production-ready setup using the latest NextJS version.

</> Bash

npx create-next-app@latest bigcommerce-headless-store

cd bigcommerce-headless-store

npm install

Choose:

  • App Router (recommended)
  • TypeScript (for scalability)
  • ESLint (for code consistency)

Step 2 – Set Up Environment Variables (Don’t Skip This)

Create a .env.local file:

</> env

NEXT_PUBLIC_BC_GRAPHQL_ENDPOINT=https://your-store.mybigcommerce.com/graphql

BC_STOREFRONT_TOKEN=your_storefront_api_token

This ensures:

  • Secure API access
  • Clean configuration management across environments

Step 3 – Create a Central API Layer (Avoid Scattered Fetch Calls)

Instead of calling APIs everywhere, create a dedicated folder:

/lib/api.js
</> JavaScript

export async function fetchGraphQL(query, variables = {}) {

const res = await fetch(process.env.NEXT_PUBLIC_BC_GRAPHQL_ENDPOINT, {

method: “POST”,

headers: {

“Content-Type”: “application/json”,

“Authorization”: `Bearer ${process.env.BC_STOREFRONT_TOKEN}`,

},

body: JSON.stringify({ query, variables }),

});

return res.json();

}

This keeps your code:

  • Reusable
  • Maintainable
  • Easy to scale

Step 4 – Structure Your Project for Growth (Not Just MVP)

A scalable folder structure looks like:

/app

/products

/category

/components

/lib

/styles

Why this matters:

  • Clear separation of concerns
  • Easier feature expansion
  • Better team collaboration

Step 5 – Set Up Dynamic Product Routing

Use dynamic routes to handle product pages:

/app/products/[slug]/page.js
</> JavaScript

export async function generateStaticParams() {

// Fetch product slugs from BigCommerce

}

This allows:

  • SEO-friendly URLs
  • Scalable product page generation

Step 6 – Connect Your First Product Data

Use your API layer to fetch and render products:

</> JavaScript

import { fetchGraphQL } from “@/lib/api”;

export default async function ProductsPage() {

const data = await fetchGraphQL(`

query {

site {

products(first: 10) {

edges {

node {

name

entityId

}

}

}

}

}

`);

return (

<div>

{data.data.site.products.edges.map(({ node }) => (

<p key={node.entityId}>{node.name}</p>

))}

</div>

);

}

Step 7 – Test Before You Scale

Before adding complexity:

  • Check API responses
  • Validate rendering
  • Ensure environment variables work

This avoids debugging chaos later.

What Most Teams Get Wrong at This Stage

They:

  • Hardcode API calls
  • Ignore folder structure
  • Skip environment configuration
  • Build without scalability in mind

And then hit problems when:

  • Adding new features
  • Scaling product catalogs
  • Optimizing performance

The Smarter Approach

Treat your setup as infrastructure, not just initialization. Because this foundation will determine:

  • How fast can you build new features
  • How easy your code is to maintain
  • How well your storefront performs

This is why many businesses choose to work with a NextJS development company like WEDOWEBAPPS, so the setup is done right from day one, not reworked later.

BigCommerce GraphQL Product Queries (Practical, Scalable Implementation)

By now, your NextJS setup is ready.

But here is where things start to directly impact performance, scalability, and user experience:

How you fetch and structure your product data.

Most teams underestimate this part. They either:

  • Over-fetch data (slow pages)
  • Under-structure queries (multiple API calls)
  • Or build logic that does not scale with catalog growth

Let’s fix that.

What You Actually Need From the GraphQL API

At a business level, your storefront needs to answer three things efficiently:

  • What products should be shown?
  • What details does the user need to make a decision?
  • How fast can this data be delivered?

GraphQL helps you control all three, if used correctly.

A Clean Product Listing Query (What “Good” Looks Like)

Instead of pulling unnecessary data, focus only on what your UI needs.

</> GraphQL

query getProductList {

site {

products(first: 12) {

edges {

node {

entityId

name

path

prices {

price {

value

currencyCode

}

}

defaultImage {

url(width: 400)

altText

}

}

}

}

}

}

Why This Query Structure Matters

This is not just about syntax; it is about performance.

You Are:

  • Limiting product count (first : 12)
  • Fetching only required fields
  • Structuring data for direct UI rendering

Which means:

  • Faster page loads
  • Less frontend processing
  • Better scalability as your catalog grows

Fetching Product Details (For PDP Pages)

When a user clicks a product, you need deeper data, but still controlled.

</> GraphQL

query getProductBySlug($path: String!) {

site {

route(path: $path) {

node {

… on Product {

entityId

name

description

prices {

price {

value

currencyCode

}

}

images {

edges {

node {

url(width: 800)

}

}

}

}

}

}

}

}

Using It in NextJS (Dynamic Product Pages)

</> JavaScript

import { fetchGraphQL } from “@/lib/api”;

export async function getProduct(path) {

const data = await fetchGraphQL(

`query getProductBySlug($path: String!) {

site {

route(path: $path) {

node {

… on Product {

entityId

name

}

}

}

}

}`,

{ path }

);

return data.data.site.route.node;

}

Pagination (Where Most Stores Break at Scale)

If your catalog grows, loading everything at once will slow your site.

Use cursor-based pagination:

</> GraphQL

query getPaginatedProducts($cursor: String) {

site {

products(first: 12, after: $cursor) {

pageInfo {

hasNextPage

endCursor

}

edges {

node {

entityId

name

}

}

}

}

}

This allows:

  • Infinite scrolling
  • Load-more buttons
  • Better performance on large catalogs

The Hidden Performance Lever: Query Discipline

Most performance issues in headless builds don’t come from frameworks, they come from poor data querying.

Avoid:

  • Fetching full product objects everywhere
  • Repeating queries across components
  • Making multiple API calls for related data

Instead:

  • Centralize queries
  • Reuse fragments
  • Fetch only what each page needs

What This Means for Your Business

Better query design directly impacts:

  • Page speed -> affects conversions
  • UX smoothness -> affects engagement
  • Server load -> affects scalability

This isn’t just a developer concern; it’s a revenue factor.

Where Experienced Teams Make the Difference

A well-structured GraphQL layer ensures:

  • Faster storefronts
  • Cleaner codebase
  • Easier feature expansion

That’s why businesses often partner with a BigCommerce Development company like WEDOWEBAPPS, so their data layer is optimized from the start, not patched later.

Headless BigCommerce Checkout (Checkout Channel API Integration That Does Not Break Conversions)

This is where most headless projects either succeed or quietly lose revenue.

Because no matter how fast or flexible your storefront is, checkout is where money is made (or lost).

And here’s the reality:

Going headless on the storefront is easy. Going headless on checkout is where complexity begins.

The Core Decision You Need to Make First

Before writing a single line of code, you need clarity on this: Do you actually need a fully custom checkout?

Because BigCommerce gives you two options:

Option 1: Use Hosted Checkout (Recommended for Most Businesses)

  • BigCommerce handles checkout UI and logic
  • You redirect users from your NextJS frontend
  • Faster to implement
  • Lower risk
  • Optimized for conversions out of the box

Best For: Startups, SMEs, or businesses prioritizing speed and stability

Option 2: Headless Checkout (Checkout Channel API)

  • You build and control the entire checkout experience
  • Full customization of UI and logic
  • Requires deeper API integration
  • Higher development complexity

Best For: Complex checkout flows, Custom pricing logic, Unique user journeys

How Headless Checkout Actually Works

Instead of redirecting users to BigCommerce’s checkout page, you:

  1. Create a cart via API
  2. Manage cart state in your frontend
  3. Generate a checkout session
  4. Control UI interactions
  5. Process checkout using BigCommerce APIs

Everything becomes API-driven.

Step-by-Step: Basic Checkout Flow

Step 1: Create a Cart

</> JavaScript

const createCart = async () => {

const res = await fetch(“/api/cart”, {

method: “POST”,

body: JSON.stringify({

lineItems: [

{

quantity: 1,

productId: 123,

},

],

}),

});

return res.json();

};

Step 2: Retrieve Cart Data

</> JavaScript

const getCart = async (cartId) => {

const res = await fetch(`/api/cart/${cartId}`);

return res.json();

};

Step 3: Redirect to Checkout (Hybrid Approach)

Even in headless setups, many businesses use a hybrid model:

</> JavaScript

window.location.href = `https://store-url.com/cart.php?action=load&id=${cartId}`;

This combines:

When a Full Headless Checkout Makes Sense

Let’s be direct, most businesses don’t need full headless checkout.

You should consider it only if you need:

  • Multi-step custom checkout flows
  • Deep integrations (ERP, subscription logic, B2B pricing)
  • Unique UX that cannot be achieved with hosted checkout

Otherwise, you are adding complexity without a clear ROI.

The Risk Most Teams Underestimate

Custom checkout introduces:

  • Payment integration challenges
  • Compliance considerations (PCI, security)
  • Higher maintenance overhead
  • Potential conversion drops if UX isn’t optimized

This is why many high-performing stores still use BigCommerce hosted checkout, even with a headless frontend.

The Smarter Approach (What Actually Works in Practice)

A hybrid model:

  • Headless frontend (NextJS)
  • API-driven cart
  • Hosted checkout for final conversion

This gives you:

  • Flexibility where it matters
  • Stability where it counts

Where Expertise Becomes Critical

Checkout is not the place for experimentation.

Even small mistakes can:

  • Break the flow
  • Increase drop-offs
  • Impact revenue directly

BigCommerce vs Shopify for Headless eCommerce

At some point in your evaluation, this question naturally comes up:

“Should we go headless with BigCommerce or Shopify Headless?”

And this is not just a feature comparison; it is a business decision that affects flexibility, cost, and long-term scalability.

Let’s break it down the way buyers actually evaluate it.

The Real Difference (Before We Get Into Details)

  • Shopify (Headless) -> Great ecosystem, but controlled environment
  • BigCommerce (Headless) -> More open, API-first flexibility

So the decision is not “which is better,” it is:

Do you want convenience or control?

Key Comparison That Actually Matters

FactorBigCommerce (Headless)Shopify (Headless)
API FlexibilityOpen, robust GraphQL + RESTGood, but more controlled
Checkout CustomizationMore flexibility with APIsLimited unless Shopify Plus
Pricing StructureNo transaction feesTransaction fees (unless using Shopify Payments)
Vendor Lock-InLowHigher
Developer FreedomHighModerate
ScalabilityStrong for complex use casesStrong but structured

1. Flexibility: Where Most Businesses Feel the Difference

With BigCommerce Headless, you are not restricted by platform rules. You can:

  • Build fully custom frontend experiences
  • Control data flow through APIs
  • Integrate with almost any external system

Shopify, on the other hand, offers flexibility, but within boundaries.

For many businesses, that’s enough. For others, it becomes limiting over time.

2. Checkout Control (The Deciding Factor for Many)

This is where the gap becomes clearer.

  • Shopify -> Checkout customization is restricted unless you are on Shopify Plus
  • BigCommerce -> More control via Checkout APIs

If your business requires:

  • Custom pricing logic
  • B2B workflows
  • Advanced checkout experiences

BigCommerce gives you more room to build.

3. Cost Structure (Often Overlooked)

Shopify’s Cost can increase due to:

  • Transaction fees
  • App dependencies
  • Premium plans (for advanced features)

BigCommerce:

  • No transaction fees
  • More features available out of the box

Over time, this difference becomes significant, especially at scale.

4. Developer Experience (Impacts Your Speed to Market)

Shopify is easier to start with. BigCommerce is more flexible to scale with.

If your goal is:

  • Quick launch -> Shopify works well
  • Long-term scalability -> BigCommerce is often the better fit

So, Which One Should You Choose?

Choose BigCommerce Headless If:

  • You need high customization
  • You want full control over the frontend and checkout
  • You are building for scale from the start
  • You want to avoid platform lock-in

Choose Shopify Headless If:

  • You want a faster setup with less complexity
  • Your requirements are relatively standard
  • You are okay working within platform constraints

Get Platform Recommendation

The Buyer Reality Most Blogs Don’t Tell You

Both platforms are good. The real question is:

Which one aligns with your growth plan, not just your current needs?

Because switching later is always more expensive than choosing correctly now.

Where the Right Development Partner Changes the Outcome

No matter which platform you choose, execution matters more than selection.

A well-architected BigCommerce headless setup can outperform a poorly implemented Shopify build, and vice versa.

Deployment Guide (Vercel / Netlify for Headless Storefronts)

At this stage, your storefront works locally.

But here is where many teams run into unexpected issues:

  • Pages work locally but break in production
  • Environment variables fail
  • Performance drops after deployment
  • SEO elements don’t render properly

Deployment in a headless setup is not just about going live; it is about going live correctly.

What You Are Actually Deploying

You are not deploying a static site. You are deploying a dynamic, API-driven frontend that depends on:

  • BigCommerce APIs
  • Environment variables
  • Rendering strategy (SSR / SSG / ISR)

So your hosting platform needs to support this properly.

Why Vercel is the Default Choice for NextJS

Vercel is built by the creators of NextJS, which makes it the most seamless option. It gives you:

  • Native support for SSR, SSG, and ISR
  • Automatic performance optimization
  • Edge network delivery (faster global load times)
  • Simple Git-based deployments

For most use cases, it just works without extra configuration.

Netlify: When Does It Make Sense?

Netlify is also a solid option, especially if:

  • Your team already uses Netlify workflows
  • You prefer its CI/CD ecosystem
  • Your project leans more toward static generation

But for complex headless setups, Vercel usually requires less effort.

Step-by-Step Deployment (Vercel)

Step 1: Push Your Code to Git

</> Bash

git init

git add .

git commit -m “Initial headless setup”

git branch -M main

git remote add origin <your-repo-url>

git push -u origin main

Step 2: Import Project into Vercel

  • Go to Vercel dashboard
  • Import your Git repository
  • Framework will auto-detect as NextJS

Step 3: Configure Environment Variables

Add:

  • NEXT_PUBLIC_BC_GRAPHQL_ENDPOINT
  • BC_STOREFRONT_TOKEN

Important: If this step is wrong, your entire frontend will fail silently.

Step 4: Deploy

Click deploy – Vercel handles:

  • Build process
  • Optimization
  • CDN distribution

Build Configuration (What to Watch For)

Make sure your setup supports:

  • Server-side rendering where needed
  • Static generation for product/category pages
  • Incremental Static Regeneration (ISR) for updates

Example:

</> JavaScript

export const revalidate = 60; // Rebuild page every 60 seconds

This balances:

  • Fresh data
  • Fast performance

Common Deployment Mistakes (And Their Impact)

  1. Missing Environment Variables: API Calls fail -> blank pages
  2. Wrong Rendering Strategy: Slow pages or poor SEO
  3. Over-reliance on Client-Side Fetching: Poor performance and indexing issues
  4. No Caching Strategy: Increased API Load + Slower response times

Performance Reality After Deployment

Going live doesn’t guarantee speed. Your performance depends on:

  • How efficiently you fetch data
  • How well you cache responses
  • How your pages are rendered

Deployment is just the start; optimization is what follows.

The Smart Way to Think About Deployment

Don’t treat deployment as a final step.

Treat it as: The foundation of your live performance, SEO visibility, and scalability.

Performance Optimization in Headless BigCommerce (Where Revenue Actually Improves)

At this point, your storefront is live.

But here is the uncomfortable truth: Most headless builds are not automatically fast.

In fact, without proper optimization, they can be slower than traditional setups.

Because now, performance depends on:

  • How you fetch data
  • How you render pages
  • How you handle caching

And these decisions directly impact:

  • Page load time
  • User experience
  • Conversion rates

The Buyer Reality: Speed is Not a Technical Metric

Speed is a business metric. Even small delays can:

  • Increase bounce rates
  • Reduce conversions
  • Affect SEO rankings

So performance optimization is not optional; it is foundational.

Start With Rendering Strategy (This Changes Everything)

In NextJS, how you render pages determines how fast they load.

Static Generation (SSG)

  • Pages are pre-built
  • Extremely fast
  • Ideal for product and category pages

Server-Side Rendering (SSR)

  • Pages are generated on request
  • Useful for dynamic content
  • Slightly slower than SSG

Incremental Static Generation (ISR)

  • Hybrid approach
  • Pages update periodically without a full rebuild
</> JavaScript

export const revalidate = 60;

Best practice: Use SSG + ISR for most eCommerce pages, SSR only when necessary.

Optimize Your API Calls (Most Common Bottleneck)

Your frontend depends on APIs, so inefficient calls slow everything down.

What to do:

  • Fetch only required fields (GraphQL advantage)
  • Avoid duplicate queries
  • Batch requests where possible

What to Avoid:

  • Calling APIs from multiple components separately
  • Over-fetching unused data

Image Optimization (Quick Win, Big Impact)

Images are often the heaviest part of your storefront. Use:

  • NextJS <Image /> component
  • Proper sizing via BigCommerce image URLs
  • Lazy loading

This alone can significantly improve load times.

Caching Strategy (Where Advanced Performance Comes From)

Without caching, your app keeps hitting APIs repeatedly.

Use:

  • ISR for page-level caching
  • CDN caching via Vercel
  • Edge caching where possible

This reduces:

  • Server load
  • API response time
  • Overall latency

Reduce Client-Side JavaScript

Heavy JavaScript slows down rendering. Optimize by:

  • Using server components where possible
  • Avoiding unnecessary libraries
  • Splitting bundles

Measure What Actually Matters

Don’t guess performance, measure it.

Track:

  • Largest Contentful Paint (LCP)
  • Time to First Byte (TTFB)
  • First Input Delay (FID)

Tools:

  • Google PageSpeed Insights
  • Lighthouse
  • Web Vitals

Where Most Teams Go Wrong

They assume: “Headless = Fast.”

But in Reality: “Optimized headless = Fast.”

Without optimization, you are just shifting complexity, not improving performance.

The Practical Outcome for Your Business

When performance is done right, you get:

  • Faster load times -> higher conversions
  • Better UX -> more engagement
  • Improved SEO -> more organic traffic

The Smarter Approach

Treat performance as part of your architecture, not a post-launch fix.

Because optimizing later is always harder than building it right from the start.

SEO for Headless BigCommerce (How to Rank on Google and Show Up in AI Results)

This is where many headless builds quietly fail.

Not because the product is bad, not because the tech is wrong. But because SEO is no longer “handled by the platform.”

It becomes your responsibility.

The Real Concern Buyers Have (And Rightly So)

“Will going headless hurt my SEO?”

Short answer:

It can, if implemented poorly.

It can significantly improve it if done right.

Why SEO Feels Harder in Headless

In traditional platforms:

  • Meta tags are handled for you
  • URLs are predefined
  • Rendering is server-based by default

In headless:

  • You control rendering
  • You define metadata
  • You manage crawlability

Which means more control, but also more responsibility.

Start With Rendering (This Directly Impacts Rankings)

Search engines (and AI tools) rely on readable HTML.

If your content isn’t visible at load time, it may not get indexed properly.

What Works Best:

  • Server-Side Rendering (SSR) -> For dynamic pages
  • Static Generation (SSG) -> For product & category pages
  • ISR -> For keeping content fresh

Avoid relying purely on client-side rendering.

Metadata Management in NextJS (Non-Negotiable)

Every page should have:

  • Unique title
  • Meta description
  • Open Graph tags
  • Canonical URLs

Example:

</> JavaScript

export const metadata = {

title: “Buy Running Shoes Online”,

description: “Explore high-quality running shoes with fast delivery.”,

};

Without this, your pages lack context for both search engines and AI systems.

URL Structure (Often Ignored, But Critical)

Your URLs should be:

  • Clean -> /products/running-shoes
  • Consistent -> avoid unnecessary parameters
  • Keyword-aligned

Bad structure hurts both:

  • Rankings
  • AI understanding

Structured Data (Helps You Show Up in Rich Results)

Use schema markup for:

  • Products
  • Pricing
  • Reviews
  • Breadcrumbs

This helps:

  • Google displays rich snippets
  • AI tools understand your content better

Content Structure for AI Visibility

This is where SEO is evolving.

AI Tools like ChatGPT, Gemini, and Perplexity don’t just crawl, they interpret.

To improve visibility:

  • Use clear headings (H1, H2, H3 hierarchy)
  • Answer questions directly
  • Keep sections logically structured
  • Avoid fluff and ambiguity

Your content should be: Easy to extract, summarize, and cite.

Internal Linking (Supports Both SEO and AI Understanding)

Link relevant pages using contextual anchor text like:

  • BigCommerce headless development
  • NextJS storefront setup
  • API integration guides

This builds:

  • Topical authority
  • Better crawl paths

Common SEO Mistakes in Headless Builds

  • Relying on client-side rendering
  • Missing or duplicate metadata
  • Poor URL structuring
  • No structured data
  • Slow page performance

Each of these directly affects visibility.

The Bigger Shift: SEO is Now About Clarity

It’s no longer just about keywords. It’s about:

  • How clearly does your content explain a topic
  • How easily systems can extract meaning
  • How structured your information is

What This Means for Your Business

Done right, headless SEO gives you:

  • Faster pages -> better rankings
  • Cleaner structure -> better indexing
  • AI-friendly content -> higher visibility in AI tools

Done wrong, it can:

  • Reduce discoverability
  • Limit organic traffic
  • Waste your development effort

When Should You Choose BigCommerce Headless (And When You Shouldn’t)

By now, everything might sound compelling – flexibility, performance, scalability.

But here’s the decision most businesses struggle with:

“Is headless actually right for us, or are we overcomplicating things?”

This section is meant to give you clarity, not push you toward a decision.

Start With the Only Question That Matters

Are your current limitations technical or just operational?

Because if your growth is being blocked by:

  • Marketing execution
  • Product strategy
  • Traffic acquisition

Then switching to headless won’t fix that.

But if your limitations look like this:

  • You cannot implement the experience your team wants
  • Your site performance is affecting conversions
  • Your platform restricts integrations or workflows
  • Scaling requires workarounds instead of solutions

Then you are dealing with architectural limitations. And that is where headless starts making sense.

When BigCommerce Headless is the Right Choice

You should seriously consider it if:

  1. You Need Full Frontend Flexibility: Your brand experience is not standard, and templates are holding you back.
  2. Performance Directly Impacts Revenue: Even small improvements in speed can significantly affect conversions.
  3. You are Planning to Scale (Not Just Maintain): Your roadmap includes large product catalogs, high traffic, and multi-region expansion.
  4. You Want to Omnichannel Capabilities: Selling across web, mobile apps, and marketplaces, and custom interfaces.
  5. You Need Advanced Customization: Especially for B2B workflows, pricing logic, and checkout experiences.

When You Probably Shouldn’t Go Headless

Let’s be equally clear here. Headless may not be the right fit if:

  1. Your Requirements Are Standard: If your needs can be solved with themes and plugins, keep it simple.
  2. You Need a fast, Low-Cost Launch: Headless requires more upfront investment in time and development.
  3. You Don’t Have a Technical Roadmap: Without a clear plan, headless becomes complexity without direction.
  4. You Do Not Plan to Scale Aggressively: If your business is stable and not evolving rapidly, the benefits may not justify the effort.

The Trade-Off Most Businesses Overlook

Headless gives you control, flexibility, and scalability. But it also requires technical expertise, ongoing maintenance, and thoughtful architecture.

So, the real decision is:

Do the long-term benefits outweigh the short-term complexity?

A Simple Self-Assessment

If you answer “yes” to most of these, headless is worth considering:

  • Do we feel limited by our current platform?
  • Are we planning for significant growth or expansion?
  • Do we need better performance or UX control?
  • Are we ready to invest in a scalable architecture?

The Smarter Way to Approach This Decision

Don’t treat headless as a trend to follow. Treat it as an infrastructure decision that should align with:

  • Your growth strategy
  • Your technical capabilities
  • Your long-term vision

Common Challenges in BigCommerce Headless (And How to Avoid Costly Mistakes Early)

By now, you understand the upside.

But here is what most blogs won’t tell you clearly: Headless does not fail because of the idea; it fails because of execution.

And the issues usually don’t show up immediately. They appear when you try to scale, optimize, or extend your system.

The Pattern You Will Notice

Most challenges fall into one category: Decisions made early without thinking about scale.

Let’s break down where things typically go wrong and how to avoid them.

1. Poor API Strategy (Looks Fine Early, Breaks Later)

What goes wrong:

  • Multiple redundant API calls
  • Over-fetching unnecessary data
  • No central API handling layer

What it Leads to:

  • Slower pages
  • Higher server load
  • Hard-to-maintain code

How to Avoid It:

  • Centralize API logic (as discussed earlier)
  • Use GraphQL efficiently (fetch only what’s needed)
  • Plan queries based on page requirements, not convenience

2. Weak Frontend Architecture

What Goes Wrong:

  • No clear folder structure
  • Logic scattered across components
  • No separation between UI and data

What it Leads to:

  • Difficult scaling
  • Slower development over time
  • Increased bugs

How to Avoid it:

  • Define structure early (pages, components, API layer)
  • Use reusable components
  • Keep business logic separate from UI

3. Checkout Complexity (Underestimate Risk Area)

What Goes Wrong:

  • Trying to fully customize checkout without clear need
  • Poor handling of cart state
  • Broken flows during edge cases

What it Leads to:

  • Cart abandonment
  • Revenue loss
  • Frustrated users

How to Avoid It:

  • Use hosted checkout unless customization is necessary
  • Test edge cases thoroughly
  • Keep checkout logic simple and reliable

4. Performance Issues After Launch

What Goes Wrong:

  • No caching strategy
  • Excessive client-side rendering
  • Heavy JavaScript bundles

What It Leads to:

  • Slow load times
  • Poor SEO
  • Lower conversions

How to Avoid It:

  • Use SSG + ISR wherever possible
  • Optimize images and scripts
  • Implement caching early, not as a fix later

5. SEO Gaps (Often Discovered Too Late)

What Goes Wrong:

  • Missing metadata
  • Poor URL structures
  • Content not rendered properly for crawlers

What it Leads to:

  • Low visibility
  • Indexing issues
  • Missed organic traffic

How to Avoid It:

  • Plan SEO during development, not after launch
  • Ensure server-rendered content
  • Use structured data

6. Underestimating Maintenance Effort

What Goes Wrong:

  • Assuming “build once, done forever.”
  • No plan for updates or scaling

What it Leads to:

  • Technical debt
  • Slower iteration
  • Increased long-term cost

How to Avoid It:

  • Treat your storefront as a product, not a project
  • Plan for ongoing improvements
  • Document your architecture

The Bigger Insight Most Teams Miss

Headless is not harder; it’s just less forgiving.

In traditional platforms, mistakes are hidden. In the headless, they become visible.

What This Means for Your Decision

If you approach headless with:

  • Clear structure
  • Thoughtful architecture
  • Performance awareness

You unlock its full value. If not, you end up:

  • Debugging more than building
  • Fixing instead of scaling

The Practical Takeaway

Headless success is not about writing more code. It is about “Making better decisions earlier.”

How Businesses Actually Implement Headless BigCommerce (Without Overcomplicating It)

By now, you have seen the architecture, APIs, setups, and challenges. But here is the gap most guides leave:

How does this actually come together in a real business scenario?

Because no company starts with a blank slate and perfect clarity. They start with constraints, timelines, and expectations.

The Typical Implementation Journey

Most businesses don’t go “fully headless” overnight. They follow a more practical path:

Phase 1: Identify the Implementation Journey

Not everything needs to change.

  • Is performance the issue?
  • Is customization limited?
  • Is checkout too rigid?

This step defines why you are going headless, not just how.

Phase 2: Decouple the Frontend First

This is where most implementations begin.

  • Keep BigCommerce as the backend
  • Build a custom NextJS storefront
  • Use GraphQL APIs for product and category data

This alone solves performance issues, UX limitations, and branding constraints.

Phase 3: Optimize Core Experiences

Once the storefront is stable:

  • Improve product pages
  • Refine navigation and filtering
  • Optimize performance and SEO

This is where the real gains start showing, in conversion and engagement.

Phase 4: Evaluate Checkout Strategy

Only after everything else is stable:

  • Decide between hosted checkout or headless checkout
  • Introduce customization only if required

This avoids unnecessary complexity early on.

Phase 5: Scale and Integrate

As the business grows:

  • Integrate third-party systems (CRM, ERP, AI tools)
  • Expand to multiple channels
  • Enhance personalization and automation

The Key Insight Most Businesses Miss

You don’t need to build everything at once. Headless works best when implemented as a phased evolution, not a full rebuild.

Where Many Teams Lose Momentum

Not because the technology fails, but because:

  • The scope becomes too broad
  • Architecture is not clearly defined
  • Priorities shift mid-development

This leads to delays, budget overruns, and compromised performance.

The Role of the Right Development Approach

A structured implementation focuses on:

  • Starting with high-impact areas
  • Avoiding unnecessary complexity
  • Building for scalability from day one

This is where working with an experienced team becomes valuable, not just for execution, but for decision-making.

How WEDOWEBAPPS Supports Headless Commerce Builds

For businesses that want to move fast without breaking things later, a structured approach matters.

At WEDOWEBAPPS, the focus is not just on development, but on building systems that scale.

Whether you are looking to handle your backend integrations, headless transitions, or to build a high-performance storefront, the goal is the same:

“Build a solution that supports growth, not one that needs to be rebuilt when growth happens.”

What This Means for You

You don’t need to overcommit. You need to:

  • Start with clarity
  • Build with structure
  • Scale with intention

Because headless is not just a technical shift, it is a long-term growth strategy. Many businesses accelerate implementation by working with an offshore development team for startups experienced in headless commerce architecture.

Conclusion

Choosing a headless approach with BigCommerce and Next.js isn’t about adopting a modern stack; it’s about removing the limitations that slow your business down.

For some teams, those limitations are already visible: slow performance, restricted customization, or growing complexity with every new feature. For others, they appear gradually as the business scales and expectations evolve. In both cases, the underlying issue is the same: your storefront and backend are no longer aligned with your growth.

Headless architecture solves this by separating concerns. It gives you the freedom to build faster, design better experiences, and integrate systems without being constrained by platform boundaries. But that flexibility comes with responsibility. The outcomes depend entirely on how well the system is structured, from API usage and frontend architecture to checkout decisions, performance, and SEO.

That’s why this isn’t a one-size-fits-all solution.

If your business needs speed, control, and scalability, headless BigCommerce with Next.js can be a strong foundation. If your requirements are simpler, a traditional approach may still serve you better without unnecessary complexity.

The key is not choosing what’s more advanced; it’s choosing what aligns with how your business is planning to grow.

Start Your Headless Commerce Project

React Native App Development Timeline: Realistic Phase-by-Phase Breakdown

Introduction

A founder once came to us three weeks before his planned launch date. His previous agency had told him “eight weeks, maybe ten.” He was at week fourteen, the app wasn’t testable yet, and his investor demo was in twenty-one days.

The problem was not the developers. The problem was that no one had given him an honest, phase-by-phase picture of what building an app actually involves, before the contract was signed.

We see this more than we would like to. Clients who were handed a single number (“12 weeks!”) with no breakdown, no risk flags, no mention of App Store review times, or the cost of a scope change in week nine.

This guide fixes that. Below is a complete, realistic timeline for React Native app development, broken into every phase, with honest duration ranges, what each phase actually produces, and the specific things that blow up schedules. Whether you are planning a simple utility app or a multi-sided platform, you will leave this page knowing what to expect, what to watch for, and how to protect your launch date.

What Affects a React Native Application Development Timeline the Most?

Before we get into the phases, it helps to understand the variables that compress or stretch every single one of them.

1. Scope Clarity (the biggest one)

A team that starts with a well-defined scope, clear user flows, agreed features, and defined integrations, will move two to three times faster than a team still demanding requirements in four weeks.

Vague briefs are the single largest cause of timeline overruns. Every time a requirement changes after development starts, you are not just adding a feature, you are often re-architecting something that was already built.

2. Team Size and Structure

A solo developer and a four-person team do not just move at different speeds, they also catch different problems. A solo developer might miss a security gap that a dedicated QA engineer would find immediately.

Our React Native app development services assign a dedicated project manager from day one, a decision that alone cuts communication overhead by 30% or more on projects with multiple stakeholders.

3. Third-Party Dependencies

APIs that do not behave as documented. Payment gateway sandboxes that are down. Map services with unexpected rate limits. Third-party integrations introduce unpredictability that is hard to plan around. Budget two to three buffer days per major external dependency.

4. Client Feedback Speed

This one is underestimated. When a developer pushes a build for review, every day that passes without feedback is a day the developer cannot continue without risking wasted work.

Projects where clients review and respond within 24 hours finish 20-40% faster than those with multi-day feedback loops.

5. Platform Targets

React Native builds for both iOS and Android from a shared codebase, but “shared” does not mean “identical.” Platform-specific UI polish, permission handling, and edge case testing still add time.

Building for both simultaneously adds roughly 15-20% to development and QA phases compared to single-platform development.

The Full React Native Application Development Timeline at a Glance

Here is how a typical mid-complexity project (MVP-range) maps across a 20-week timeline. Each bar represents the phase’s typical duration window.

Full React Native Application Development Timeline

Notice that QA and API integration overlap with core development, they are not separate sequential phases. This is how professional teams actually work. Treating them as “next step” is what causes projects to run three months over schedule.

Not sure which timeline bracket your app

Phase 1. Discovery and Scoping (1-2 Weeks)

Turning your idea into a buildable blueprint

Discovery is the phase most clients want to skip, and the one that saves the most money when done properly. This is where your idea gets translated into a concrete scope, features, user flows, technical requirements, and a realistic timeline for developing an app.

A good discovery phase surfaces the decisions you will otherwise be forced to make mid-development, at five times the cost and twice the delay. It answers: What does the MVP actually need? What can be built in version two? What integrations are required on day one?

Key Deliverables

  • Feature list (prioritized)
  • User flow diagrams
  • Technical architecture overview
  • Project timeline + milestones
  • Risk log

What Causes Delays

  • Unclear business requirements
  • Too many stakeholders with conflicting input
  • Scope that keeps expanding in meetings
  • No decision-maker with final say
Pro Tip

Before the first discovery meeting, write down your three non-negotiable features, the ones the app literally cannot launch without. Everything else goes on a “nice to have” list. This single exercise cuts discovery time in half and prevents scope creep from the start.

Phase 2: UI/UX Design (2-3 Weeks)

From Wireframes to Pixel-Perfect Screens

Design is not just about how the app looks, it is about how it works. A well-designed screen tells the developer exactly what to build and removes ambiguity from every interaction. Apps developed with complete, approved designs move 30-50% faster through the development phase than those where design and development happen at the same time.

UI/UX for React Native includes both visual design (screens, components, typography, colors) and interaction design (transitions, loading states, error states, empty states). Empty states and error screens are the most commonly skipped and the most commonly complained about in app reviews.

Key Deliverables

  • Wireframes for all core screens
  • High-fidelity UI for both iOS and Android
  • Component library/design system
  • Interactive prototype (optional)
  • Asset export for developers

What Causes Delays

  • Branding not finalized before design starts
  • Multiple revision rounds on the same screen
  • Late requests to redesign the navigation structure
  • Waiting for competitor reference apps

Phase 3: Core Development (4-12 Weeks)

Building What Users Will Actually Touch

This is where the app gets built. Screens get coded, navigation gets wired up, business logic gets written, and the app begins to feel real. The four-to-twelve-week range is wide because complexity varies enormously, a simple five-screen utility app and a social media platform with real-time features are both “React Native apps” but have almost nothing in common in terms of development effort.

This phase runs concurrently with API integration and QA testing. A professional team doesn’t finish all development, then write APIs, then test, those activities overlap. As one screen is built and tested, the next is in development. This parallel approach is what keeps projects on schedule.

Key Deliverables

  • All screens built and navigable
  • Authentication (login, signup, sessions)
  • Core business logic
  • Push notification setup
  • Device permission flows
  • Offline handling

What Causes Delays

  • Approved designs changing mid-sprint
  • New features added without timeline adjustment
  • Platform-specific bugs, especially iOS edge cases
  • Poor third-party library compatibility

Many clients add features during development without adjusting the deadline. Every undocumented addition is a hidden cost. Every new feature added in week six is a feature the team designs, builds, integrates, and tests under pressure. Use a change order process, even an informal one, to keep scope and timeline in sync.

The size of your development team directly affects this phase more than any other. When you hire dedicated React Native developers rather than sharing resources with other projects, core development phases routinely run 30-40% shorter, because there is no context-switching, no competing priorities, and no waiting for availability slots.

Phase 4. API Integration and Backend (2-4 Weeks, Runs Concurrently)

Connecting Your App to the World

React Native apps rarely operate in isolation. They connect to backends, payment processors, maps, analytics, push notification services, third-party logins, and more. API integration is the work of making all those connections reliable, secure, and fast.

This phase follows our standard mobile app development process, integrations are planned in discovery, designed in parallel with the UI, and integrated during development rather than bolted on afterwards. The same structure applies whether you are building a simple content app or a transaction-heavy platform.

Key Deliverables

  • REST or GraphQL API connections
  • Authentication tokens and session management
  • Payment gateway integration
  • Push notifications (FCM/APNs)
  • Analytics and crash reporting
  • Map or location services

What Causes Delays

  • API documentation that doesn’t match behavior
  • Payment provider verification taking 3-7 days
  • Third-party sandbox environments going down
  • Backend not ready when frontend needs it

Phase 5: QA and Testing (Runs Throughout Development)

Catching Issues Before Users Do

QA is not a phase you do at the end. That model, build everything, then test everything, is how projects discover critical architectural issues one week before launch. Our quality assurance and testing services run in parallel with development: as a screen is completed, it enters the QA queue. Bugs get caught early, fixed while the code is fresh, and never accumulate into a backlog.

The final 1-2 weeks before submission is a dedicated end-to-end testing round, testing the complete app as a user would actually use it, across multiple devices and OS versions.

Key Deliverables

  • Functional testing (all features work)
  • UI testing (across screen sizes)
  • Performance testing (load times, memory)
  • Regression testing after bug fixes
  • Device matrix testing (iOS + Android)
  • Security and permission testing

What Causes Delays

  • QA starting too late (post-development)
  • Too few test devices available
  • Critical bugs found in final-round testing
  • No staging environment (testing on production)

Phase 6. Team Size and How it Shapes Your Timeline

Your Team Structure is a Timeline Variable

Most timeline guides skip this entirely, which is a mistake. Team composition is one of the most controllable timeline variables, and one of the most misunderstood.

A typical efficient React Native team looks like this:

  • 1 Project Manager: Owns the timeline, client communication, and sprint planning
  • 1-2 React Native Developers: Core app development
  • 1 Backend Developer: API and server-side logic
  • 1 UI/UX Designer: Screens, components, and design system
  • 1 QA Engineer: Concurrent testing throughout development

Running a project with a smaller team does not just take longer, it introduces serial dependencies. When one person is designing, developing, and testing, those activities cannot run in parallel. A five-screen app with one person takes longer than a twenty-screen app with the right team.

Dedicated Team Benefits

  • Parallel workstreams (design + dev + QA)
  • No context-switching or shared priorities
  • Faster review and decision cycles
  • Single accountability point per function

Under-Staffing Risks

  • Serial bottlenecks between phases
  • QA rushed at the end
  • Design decisions made by developers
  • PM work falling on the client

Phase 7. App Store Submission and Launch (1-2 Weeks, Plus the Part Everyone Forgets)

The Finish Line is Further Than it Looks

Every team that has launched an app has a “we were ready and then…” story. App Store submission is the most schedule-disrupting surprise in the entire process, and it is almost entirely outside your control.

THE SURPRISE THAT DELAYS MOST LAUNCHES

Apple’s App Store review typically takes 24-48 hours, but can extend to 5-7 days for first-time app submissions or when reviewers flag issues. Google Play is usually faster (a few hours to 3 days), but can also request additional information. If your app gets rejected, for a missing privacy policy, an incomplete demo account, or a guideline violation, add another 3-5 days for the fix and resubmission cycle. Budget at least two weeks of buffer for this phase alone.

Pre-Submission Checklist

  • App Store/Play Store accounts active
  • Privacy policy published and linked
  • App icons and screenshots prepared
  • App descriptions and keywords written
  • Demo account credentials for reviewers
  • Age ratings completed
  • In-app purchase configs reviewed

Common Rejection Reasons

  • Missing or broken privacy policy link
  • No demo account for reviewers to log in
  • Crashes during Apple’s review
  • Misleading app description or screenshots
  • In-app purchases not using Apple’s system
  • Location/camera permission text too vague

Get a Phase-by-Phase Timeline Estimate

Simple App vs MVP vs Complex Platform: Timeline Comparison

Here is how timelines map to project types. These are real-world ranges, not best-case estimates.

Simple App vs MVP vs Complex Platform

Your Project is an MVP or Full Build

Full Phase Timeline Table

PhaseTypical DurationKey DeliverablesMost Common Delay
Discovery and Scoping1-2 weeksFeature list, user flows, architecture plan, milestone timelineUnclear requirements
UI/UX Design2-3 weeksWireframes, high-fidelity designs, component library, asset exportsBranding not ready
Core Development4-12 weeksAll screens coded, navigation, auth, business logic, device integrationsScope changes mid-sprint
API & Backend Integration2-4 weeks (concurrent)APIs connected, payments, push notifications, analyticsThird-party API issues
QA & TestingOngoing + 1-2 week final roundFunctional, UI, performance, regression, device matrix testingLate QA start
App Store Submission1-2 weeks prep + review waitStore listings, screenshots, privacy policy, submission, approvalApple rejection

How to Speed Up Your React Native Project

Most timeline overruns are not caused by slow developers. They are caused by slow decisions, late deliverables, and creeping scope. Here are the actions that consistently compress timelines without cutting quality.

1. Finalize Your Brand Before Design Starts

If your designer is waiting for logo, font decisions, or color approvals, your project is paused, even if the clock is still running. Have your brand assets locked before the design phase begins. It saves at least a week of back-and-forth.

2. Assign One Decision-Maker

Projects with multiple approvers (two co-founders, a board, several internal stakeholders) routinely take 40-60% longer than those with a single named decision-maker. The team is not slower, they are just waiting for a consensus that never forms quickly. Name one person who can approve designs and unblock decisions within 24 hours.

3. Freeze Scope at the Start of Each Sprint

New ideas are good. New ideas mid-sprint are expensive. Implement a simple rule: feature requests go on a backlog and get evaluated for the next sprint, they don’t enter the current one. This single process change is the highest-leverage thing a first-time app client can do to protect their timeline.

4. Set Up Your App Store Accounts Early

Apple Developer enrollment takes 1-2 days, and sometimes up to a week for business verification. Google Play Console setup is faster, but still requires a one-time fee and verification. Do this in week one, not week eighteen.

5. Use a Dedicated Team

Shared-resource models, where developers split time between multiple projects, introduce scheduling dependencies that add weeks to timelines. A team working exclusively on your project can run all phases in parallel and respond to issues the same day.

Which Bottlenecks Applies to Your Project

Conclusion

React Native app development takes as long as the decisions it is built on top of. A clear scope, fast feedback, a dedicated team, and a realistic understanding of App Store timelines will do more for your project schedule than any technical shortcut.

The teams that consistently launch on time are not the ones with the most developers, they are the ones who make decisions quickly, protect their scope, and treat QA as a continuous process rather than a last-minute checkbox.

If you are planning an app and want a timeline built around your actual feature set, not a generic estimate, we are happy to walk through it with you.

what timeline is realistic for your app idea

How Long Does It Take to Build a Web App? (2026 Timelines by Project Type)

The Short Answer: It Depends on These 5 Factors

Affect the Cost of a Web App

If you are searching for how long does it take to build a web app, the honest answer is: it depends on various factors. No two projects are identical. These 5 variables define your web app development timeline more than anything else, and understanding them before you start will save you weeks of confusion later.

1. Complexity and Feature Scope

A simple web app with basic functionality behaves very differently from the platform with real-time dashboards, third-party API integrations, and custom reporting. The more features you need, the longer it will take to create web apps. Always define what is in scope and what is not before any work begins.

2. Team Size and Structure

A solo developer will take significantly longer than a cross-functional team working together. Team size is one of the most direct levers on how long does it take to develop a web application. Larger and more experienced teams compress timelines but require stronger coordination to avoid rework.

3. Who Is Building It: Agency, Freelancer, or In-House?

This factor is missing from most of the guides that you will look at, but the fact is that this directly shapes your web app development timeline. Here is what each option typically means:

  • Agency: Fastest delivery due to structured teams and defined processes. Best choice for businesses needing reliable web app development services on a deadline.
  • Freelancer: More budget-flexible but slower due to limited capacity and higher coordination overhead.
  • In-house Team: Longest process. Hiring and onboarding before a single line of code is written adds months to any timeline.

4. Technology Stack Choices

Using proven frameworks like React, Next.js, or Laravel significantly reduces the development time compared to building a custom solution from scratch. Stack familiarity within your team also matters enormously when making web apps at speed. The right stack choice is a foundational decision in any custom web development engagement.

5. Clarity of Requirements at Kickoff

Incomplete briefs are the single biggest hidden time killer in web application development. Projects that begin with well-defined user stories, wireframes, and technical requirements move faster and land closer to schedule. Ambiguity creates rework, and rework is the enemy of every web project development timeline.

Ready to build your web app

Simple Web App: 6-10 Weeks

A simple web app includes a handful of screens, basic user authentication, and straightforward data management. Think internal tools, directory sites, basic booking apps, or lead capture platforms. For those asking how long does it take to build a web app at its simplest level, 6-10 weeks is the realistic answer with an experienced team.

What is Typically Included

  • User registration and login.
  • Simple data input and display (CRUD operations).
  • Basic admin panel for content or record management.
  • Responsive design for desktop and mobile.

Phase Breakdown

  • Discovery: 1 week
  • UI/UX design: 1-2 weeks
  • Development: 3-4 weeks
  • QA & testing: 1 week
  • Launch: 1 week

Who This is Right For

Simple web apps are ideal for internal business tools, early-stage startups testing a concept with minimal investment, or businesses that need a focused digital tool without full product complexity. If your project fits this scope, your web app development timeline is the easiest to commit to and the easiest to protect.

MVP/ Proof of Concept: 8-12 Weeks

If you are a startup validating a product idea before raising funding, an MVP is your goal. The web app development timeline for an MVP is tight by design. Those asking how long does it take to make an app for early-stage validation will find the MVP route is always the fastest path to learning whether your idea works with real users.

What an MVP Should Include

  • Core user journey only, nothing beyond the primary value proposition.
  • Clean, functional UI that is not over-engineered.
  • Essential integrations: payments, authentication, or notifications where directly needed.

What an MVP Should NOT Include

  • Advanced reporting or analytics dashboards.
  • Complex admin workflows or multi-role permission systems.
  • Multi-language or multi-currency support.
  • Features not directly tied to validating your core hypothesis.

Phase Breakdown

  • Discovery: 1-2 weeks
  • UI/UX design: 2 weeks
  • Development: 4-5 weeks
  • QA & testing: 1-2 weeks
  • Launch: 1 week

The MVP Mindset

Scope discipline is what keeps an MVP inside the 8-12 week web app development timeline. Everything added beyond the core hypothesis is a week added to your launch date. Ship fast, learn fast, and build the right thing in version two. This is the most powerful timeline strategy available to any founder.

Want to build an MVP

Mid-Complexity Web App: 3-5 Months

This is the most common category when people ask how long does it take to develop an app for a growing business. Mid-complexity apps include SaaS tools with dashboards, multi-role user access, payment integrations, and data reporting features.

If you are creating web apps for an established product or team, this is typically where your build lands.

Features That Push a Project Into This Category

  • Role-based access control including admin, user, and editor.
  • Payment gateway integration, such as Stripe or PayPal.
  • Third-party CRM or API connections.
  • Email notification systems and automated workflows.
  • Custom reporting, filters, and data export.

Phase Breakdown

  • Discovery: 2 weeks
  • UI/UX design: 3-4 weeks
  • Development: 8-10 weeks
  • QA & testing: 2-3 weeks
  • Launch: 1-2 weeks

What to Watch Out For

Mid-complexity projects are the category most prone to scope creep. The feature list that starts at 15 items grows to 25 mid-build because stakeholders see the product taking shape and add requests. A locked scope agreement before development begins is the single most important protection for your web app development timeline at this level.

Full-Scale SaaS Platform: 5-9 Months

When creating web apps at the SaaS level, you are dealing with multi-tenant architecture, complex subscription billing, deep third-party integrations, and the need to build for scale from day one. For anyone asking how long does it take to develop a web application at SaaS complexity, this range is non-negotiable. Engaging a specialist SaaS application development team is the most reliable way to stay on schedule.

Why SaaS Timelines Cannot Be Compressed

  • Security requirements must be architected, not added after launch.
  • Multi-tenant data isolation requires careful database design from day one.
  • Subscription and billing logic adds significant backend complexity.
  • Scalability decisions made early in the build affect the entire codebase.

Phase Breakdown

  • Discovery: 3-4 weeks
  • UI/UX design: 4-6 weeks
  • Development: 14-20 weeks
  • QA & testing: 4 weeks
  • Launch: 2 weeks

SaaS-Specific Considerations

SaaS platforms require uptime guarantees, disaster recovery planning, and performance under load from day one. These are not optional add-ons. They are foundational requirements that take time to build correctly. Any SaaS web app development timeline that promises delivery in under 5 months for a full platform is almost certainly underestimating the scope.

Need a dedicated SaaS development partner

Enterprise Web Application: 9 Months and Beyond

Enterprise-grade web application development is a category most guides ignore entirely. These projects involve legacy system integrations, strict compliance requirements such as GDPR, HIPAA, and SOC2, multi-team coordination, and governance layers that simply do not exist in smaller builds. Making web apps at enterprise scale requires a structured software product development process to manage scope, compliance, and delivery risk effectively.

What Makes Enterprise Builds Fundamentally Different

  • Integration with existing ERP, CRM, HR, or finance systems.
  • Security audits and compliance sign-offs required before any launch.
  • Multiple stakeholder review cycles that extend every approval stage.
  • Custom infrastructure, DevOps pipelines, and environment configurations.
  • Governance documentation and change management processes.

How to Plan an Enterprise Web App Timeline

An enterprise project should begin with a dedicated discovery phase of at least 4 weeks before any design or development starts. This is where legacy integration complexity, compliance requirements, and stakeholder alignment are mapped out. Skipping this phase on an enterprise build is the most expensive mistake a project team can make.

Web App Development Timeline by Phase

Web App Development Timeline by Phase

Phase 1: Discovery and Planning (1 to 4 weeks)

Discovery is where the project is defined. Skipping or rushing it is the most common reason web app development timelines blow out later. Proper discovery covers technical requirements, user stories, architecture decisions, and a realistic project plan that the entire team can commit to.

Every hour of clarity added at this stage removes hours of rework later. A two-week discovery phase that prevents a four-week rebuild is always the right investment.

Phase 2: UI/UX Design (1 to 6 weeks)

Design defines how users flow through the product, how decisions are made, and how errors are handled. Poor design decisions made here affect the entire development phase and are expensive to fix once code is written.

  • For MVPs: Wireframes are sufficient. Keep it lean and fast.
  • For mid-complexity and SaaS: High-fidelity prototypes with interactive flows reduce developer misunderstandings and accelerate the build phase significantly.

Unlimited revision rounds without a defined approval process are one of the most consistent causes of web app development timeline overruns. Lock down a maximum revision cycle before design begins and enforce it.

Phase 3: Frontend and Backend Development (3 to 20 weeks)

Development is the largest phase in every project type and runs two parallel workstreams that must stay coordinated to avoid further issues.

  • Frontend: Everything the user sees and interacts with. Component libraries like Tailwind UI or Material UI reduce frontend time significantly versus building from scratch.
  • Backend and APIs: Business logic, data management, and integrations. REST API design, database schema, and authentication are the most time-intensive backend tasks in most web app builds.
  • Database and Infrastructure: Choosing the right database for the use case and setting up staging and production environments correctly adds 1-2 weeks but prevents costly migrations later.

Phase 4: Testing and Quality Assurance (1 to 4 weeks)

QA is consistently underestimated. Testing should run in parallel with development, not start after it ends. Catching bugs in development is five times cheaper than catching them post-launch.

  • Simple apps and MVPs: Manual testing across key user flows is typically sufficient.
  • Mid-complexity and SaaS platforms: Automated regression testing is strongly recommended to protect the web app development timeline as the codebase grows.

Phase 5: Deployment and Launch (1 to 2 weeks)

Launch is not just pressing a button. It involves configuring production infrastructure, setting up monitoring and error tracking, running pre-launch tests in a staging environment, and, in most cases, managing a soft launch before full rollout.

A soft launch to a limited user group catches production-specific issues before they affect your entire user base. For SaaS and enterprise apps, this is non-negotiable and must be planned into your web app development timeline from the start.

Web App Timeline by Project Type At a Glance

Use this table to quickly map your project type to a realistic web app development timeline across every phase from discovery through launch.

Project TypeDiscoveryDesignDevelopmentQALaunchTotal
Simple Web App1 week1–2 weeks3–4 weeks1 week1 week6–10 weeks
MVP/PoC1–2 weeks2 weeks4–5 weeks1–2 weeks1 week8–12 weeks
Mid-Complexity2 weeks3–4 weeks8–10 weeks2–3 weeks1–2 weeks3–5 months
Full-Scale SaaS3–4 weeks4–6 weeks14–20 weeks4 weeks2 weeks5–9 months
Enterprise App4+ weeks6+ weeks20+ weeks4+ weeks2+ weeks9+ months

Note: Estimates apply to experienced development teams. The timeline also depends on team size, technology stack, and the clarity of scope from the start of development.

Not sure where your project fits

Real-World Web App Timeline Examples by Industry

Understanding how long does it take to develop a web application is much clearer when applied to specific industries. Here is a realistic timeline based on common project types across different sectors.

eCommerce Web App (4-6 months)

A fully functional eCommerce web app includes product catalog management, shopping cart, payment gateway integration, order management, customer accounts, and an admin dashboard. Inventory management and logistics integration push most builds into a 4-6 month range from day one.

SaaS Dashboard or Analytics Platform (5-8 months)

Creating web apps at the SaaS level for analytics or business intelligence is one of the more time-intensive categories. Real-time data visualization, subscription billing, multi-role access, and performance optimization for large datasets all contribute to a 5-8 month web app development timeline. Partnering with a dedicated SaaS application development team from the start is the most reliable way to stay on schedule.

Healthcare Web App (6-10 months)

Healthcare applications add 2-3 months to the standard timeline purely for compliance. HIPAA compliance, audit logging, patient data encryption, and legal sign-offs are non-negotiable requirements. Anyone asking how long does it take to develop a web application in healthcare should plan for the longer end of the range, regardless of functional complexity.

eLearning Platform (4-7 months)

An eLearning platform involves course builder tools, video streaming or embedding, progress tracking, quizzes, assessment engines, certificates, and payment integrations. Video infrastructure alone adds significant complexity and infrastructure cost. Most eLearning builds land in a 4-7 month range when making web apps for education at a production-ready standard.

Internal Business Tool or Admin Portal (6-12 weeks)

Internal tools are the fastest category in web app development because they require no public-facing design polish, SEO optimization, or marketing integrations. Workflow automation tools, reporting dashboards, and role-based admin portals typically land in a 6-12 week range, making them an ideal first project for a team exploring web apps for the first time.

What Slows Projects Down: The Real Reasons

Slows Projects Down Web App Development

Ask any experienced development team why web app development timelines slip, and you will rarely hear purely technical reasons. The most common causes are process and communication failures that are entirely preventable.

Scope Creep: Adding Features Mid-Build

Every new feature added after development begins carries a compounding cost. A feature that takes one week to build in isolation may take two or three weeks mid-project because it requires changes to existing database schemas, API endpoints, and complete UI components. Define your scope before development begins and treat it as locked.

Unclear or Changing Requirements

Vague briefs are the most common real-world delay across all project types. When web developers must interpret unclear requirements, rework becomes inevitable. The clearer your brief from the start, the closer your actual web app development timeline will be to your original estimate.

Slow Feedback and Approval Cycles

Design reviews waiting on stakeholder sign-off, content delays, legal reviews, and slow responses to developer questions all add unplanned weeks to any web app development timeline. Assign a single decision-maker on your side and commit to a 24-48 hour turnaround on all feedback requests.

Third-Party API and Integration Delays

Payment gateways, CRM connections, identity providers, and external data feeds are outside your control. Incomplete API documentation, rate limits that require workarounds, and sandbox environments that do not behave like production can each add 1-2 unplanned weeks. Always budget integration buffer time when calculating how long does it take to develop a web application.

Technical Debt from Early Shortcuts

Moving fast by skipping proper architecture decisions or choosing the wrong database schema early feels like it saves time. It almost never does. Technical debt accumulates interest, and rebuilding poorly structured code mid-project always costs significantly more than doing it correctly the first time.

process for keeping web app projects

How to Reduce Your Web App Timeline Without Cutting Corners

Speed and quality are not mutually exclusive. Here is how experienced teams shorten their web app development timeline without compromising the result. These strategies apply whether you are building web apps for the first time or scaling an existing product.

Start With an MVP

The fastest way to learn whether your web app idea works is to build the minimum version that lets real users experience the core value. Every feature beyond that is a hypothesis. Ship fast, learn fast, and build the right thing in version two. This is the most impactful web app development timeline reduction strategy available to any founder or product manager.

Lock Your Scope Before Development Begins

A locked scope with signed-off wireframes and documented user stories before a single line of code is written is the single highest-ROI action you can take. Teams that begin building web apps with ambiguous requirements consistently miss estimates. Teams that begin with clarity consistently land closer to them.

Use Proven Frameworks and Pre-Built Components

React, Next.js, Tailwind CSS, and Laravel exist because experienced teams have solved the same problems thousands of times. Using battle-tested frameworks when making web apps eliminates weeks of work that would otherwise go into building foundational infrastructure. Reserve your custom build time for what is genuinely unique to your product.

Run Design and Development in Parallel Where Possible

Good agencies and experienced in-house teams do not wait for all design to be complete before starting development. Backend architecture, database design, and API endpoint development can all be produced while UI design is being finalized for later screens. Overlapping phases intelligently compress the overall web app development timeline without creating rework risk.

Choose the Right Team Structure for Your Timeline

Agency teams are faster because they are built for parallel execution. Freelancers offer flexibility but mostly sequential work. In-house teams offer long-term control but slow starts. This decision alone can affect how long does it take to build a web app more than almost any other factor. Match your team structure to your actual timeline goal, not just your budget preference.

Cost vs Timeline: Understanding the Tradeoff

One of the most important and least-discussed dimensions when creating web apps is the relationship between cost, timeline, and quality. Understanding this tradeoff helps you make smarter decisions and set more realistic expectations for your web app development timeline.

Why Faster Does Not Always Mean More Expensive

An experienced agency with a structured team may deliver a web app in 10 weeks that a solo freelancer would take 20 weeks to complete. The agency costs more per hour but less in total calendar time, which reduces opportunity cost, time to market, and often total project cost when you account for your own time spent managing a longer engagement.

Where Cutting Budget Actually Extends Your Timeline

Hiring cheaper developers to save budget often extends your web app development timeline significantly. Inexperienced developers write code that requires more revision, more QA cycles, and more debugging. The cost you save on the hourly rate is frequently spent on extra weeks of work. For web app development, experience is one of the best investments you can make.

How to Balance Speed, Quality, and Budget Realistically

The classic triangle is real: fast, good, cheap. Pick any two. For most projects, the right balance is to define your non-negotiable quality standards, set a realistic web app development timeline based on those standards, and find a team whose budget fits within those constraints. Trying to compromise on all three simultaneously is how projects fail.

Get a Free Timeline Estimate for Your Project

Whether you are in the early stage of planning or ready to start making web apps immediately, knowing your realistic web app development timeline is the first step towards a successful project.

At WEDOWEBAPPS, we specialize in web app development, custom web development, SaaS app development, and software product development. Our team reviews your requirements and delivers a detailed, phase-by-phase web app development timeline within 24 hours, with no commitment required.

Tell us about your project, and we will tell you exactly how long it takes to build a web app for your specific requirements, what it will cost, and what team structure will deliver the best result for your timeline and budget.

Connect with us

eCommerce Website Optimization Strategies That Increase Revenue Fast

Introduction

When a potential customer lands on your eCommerce store, you have seconds – not minutes – to convert interest into action. If your site loads slowly, feels confusing, or makes checkout difficult, they leave. No second chances.

That is exactly where eCommerce website optimization becomes a revenue driver, not just a technical task.

In simple terms, eCommerce optimization is about removing every friction point between a visitor and a purchase. This is where professional eCommerce development services can help identify and fix conversion bottlenecks early.

Why this matters:

  • Users expect pages to load in under 3 seconds
  • Even a 1-second delay can reduce conversions significantly
  • Poor navigation = lost trust and abandoned sessions
  • Complex checkout = cart abandonment (often ~70%)

What eCommerce Optimization Actually Impacts:

  • Revenue Growth -> Higher Conversion Rates
  • Customer Experience -> Easier browsing and buying
  • Search rankings -> Faster, optimized sites rank better
  • Retention -> Better UX increases repeat purchases

What You Will Learn in this Guide:

This is not just a checklist – it is a decision-focused optimization framework.

We will cover:

  • How to optimize eCommerce website performance
  • Practical ways to optimize an eCommerce store for conversions
  • Key strategies for eCommerce performance optimization
  • Step-by-step actions you can implement immediately

The core idea to keep in mind: eCommerce optimization is not about adding more features; it is about removing friction at every step of the buying journey.

getting-traffic-but-not-enough-sales

What is eCommerce Website Optimization?

eCommerce website optimization is the process of improving your online store’s speed, usability, and conversions so more visitors complete a purchase.

It goes beyond making a site faster. The goal is to remove friction across the buying journey and help users move from product discovery to checkout more easily.

What it includes:

  • Performance optimization: Faster load times, lighter pages, better Core Web Vitals
  • UX optimization: Clear navigation, easy product discovery, mobile-friendly design
  • Conversion optimization: Better product pages, stronger CTAs, simplified checkout
  • Technical and SEO optimization: Crawlable structure, clean URLs, internal linking, structured data

Why is it different from general website optimization?

General website optimization improves site performance and visibility.

eCommerce site optimization focuses on improving the shopping experience and increasing revenue from existing traffic.

eCommerce optimization is about turning more visitors into buyers with less friction.

Why eCommerce Optimization Matters for Business Growth

Getting traffic to your eCommerce store is important, but it is not what drives revenue. What actually matters is how efficiently that traffic converts into buyers.

Most eCommerce stores lose revenue not because of low traffic, but because of friction across the buying journey – slow pages, poor navigation, or a complicated checkout experience.

Faster websites = better engagement

Speed is often the first point of failure.

  • Users expect pages to load within 2-3 seconds
  • Delays lead to higher bounce rates
  • Faster sites keep users engaged and exploring products

Even small improvements in load time can directly increase session duration and product views.

Better UX = easier product discovery

If users cannot find what they are looking for quickly, they leave.

  • Clear navigation helps users move through categories effortlessly
  • Structured layouts reduce confusion
  • Mobile-friendly design ensures consistency across devices

A smooth user experience removes decision fatigue and keeps users focused on buying.

Conversion impact = fewer drop-offs

The biggest revenue leaks usually happen at the final stage, i.e., checkout.

  • Long or complex checkout flows increase abandonment
  • Lack of trust signals creates hesitation
  • Limited payment options reduce completion rates

With nearly 70% of carts abandoned, even small checkout improvements can recover significant revenue.

SEO impact = better visibility and traffic quality

eCommerce optimization does not just affect conversions; it also improves your site’s rankings.

  • Faster load times improve search rankings
  • Better UX reduces bounce rate signals
  • Optimized structure helps search engines crawl and index pages efficiently

This means you not only convert better, but also attract higher-quality traffic.

These improvements are typically handled through structured web development services that focus on performance, UX, and scalability.

What this means for your business

eCommerce optimization connects directly to growth:

  • More conversions from the same traffic
  • Lower customer acquisition cost (CAC)
  • Higher lifetime value (LTV) through better experiences

The difference between a growing eCommerce store and a struggling one is rarely traffic; it’s how well the store converts that traffic. Instead of losing revenue over time, many businesses choose to hire ecommerce developers to fix these issues efficiently.”

Core Pillars of eCommerce Performance Optimization

eCommerce performance optimization is not one fix; it is a combination of improvements across key areas that directly influence how users browse, decide, and buy.

Instead of trying to optimize everything at once, focus on these core pillars that have the highest impact on speed, usability, and conversions.

1. Website Speed Optimization

Speed is the foundation of eCommerce performance. If your site is slow, everything else, UX, conversions, and SEO, suffers.

  • Faster load times reduce bounce rates and keep users engaged
  • Even minor delays can impact conversions significantly

Key metrics to track:

  • Time to First Byte (TTFT) – Server response speed
  • First Contentful Paint (FCP) – How quickly users see the content
  • Core Web Vitals – Overall page experience signals

2. User Experience (UX) Optimization

A well-optimized UX helps users find products quickly and move smoothly toward purchase.

  • Intuitive navigation reduces confusion
  • Mobile-first design ensures accessibility across devices
  • Clear product categorization improves browsing
  • Fast product discovery increases engagement

Good UX is not about design; it is about making decisions easier for users.

3. Conversion Rate Optimization (CRO)

CRO focuses on turning visitors into buyers by improving key decision points.

  • Optimized product pages with clear information
  • Trust signals like reviews, ratings, and policies
  • Strong, visible CTAs (Add to Cart, Buy Now)
  • A/B Testing to identify what works best

Small changes in these areas can lead to significant revenue gains.

4. Technical SEO Optimization

Technical SEO ensures your eCommerce site is discoverable and properly understood by search engines.

  • Crawlable site structure and proper indexing
  • Structured data for products and reviews
  • Internal linking to guide both users and search engines
  • Clean, optimized URLs

This pillar connects performance with visibility, helping you store rank and scale.

Key Takeaway

These pillars are interconnected. Improving one often strengthens the others. For example, faster pages improve conversions, which in turn boosts SEO Performance.

hurting-your-conversions-most

How to Optimize eCommerce Website (Step-by-Step)

eCommerce optimization works best when approached systematically. Instead of making random changes, focus on high-impact areas in the order they affect user behavior, from first visit to final checkout.

Step 1 – Optimize Website Speed

Speed is the first impression. If your site is slow, users leave before engaging.

  • Compress images (use modern formats like WebP)
  • Enable browser caching to reduce repeat load times
  • Use a CDN to deliver content faster across locations
  • Minify CSS, JavaScript, and HTML files

Faster pages immediately reduce bounce rates and improve engagement.

Step 2 – Improve Hosting and Infrastructure

Your hosting setup directly affects performance, especially during traffic spikes.

  • Choose scalable hosting (cloud, VPS, or dedicated servers)
  • Reduce server response time (TTFB)
  • Use modern protocols like HTTP/2 for faster data transfer

A strong backend ensures your store stays fast and stable as you grow.

Step 3 – Optimize Product Pages

Product pages are where buying decisions happen. Any friction here reduces conversions.

  • Use high-quality but optimized images
  • Write clear, benefit-driven product descriptions
  • Add customer reviews and ratings for trust
  • Use strong, visible CTAs (Add to Cart, Buy Now)

Well-optimized product pages increase add-to-cart rates. Well-optimized layouts and visuals created through ecommerce website design services can significantly improve engagement.

Step 4 – Simplify Navigation

If users cannot find products quickly, they won’t buy.

  • Organize categories logically
  • Add a fast and accurate search function
  • Use breadcrumbs for easy backtracking

Better navigation improves product discovery and reduces drop-offs.

Step 5 – Optimize Checkout Process

Checkout is the most critical stage; this is where most revenue is lost.

  • Enable guest checkout to reduce friction
  • Minimize form fields and steps
  • Offer multiple payment options

A simpler checkout directly reduces cart abandonment.

Step 6 – Mobile Optimization

A large share of eCommerce traffic comes from mobile devices, but conversions often lag behind.

  • Use a responsive design across all screen sizes
  • Ensure fast mobile load speeds
  • Design thumb-friendly navigation and buttons

Mobile optimization ensures users can buy easily, regardless of device. A frictionless checkout experience often requires custom ecommerce development tailored to your business needs.

Step 7 – Reduce Unnecessary Elements

Heavy or cluttered websites slow down performance and distract users.

  • Remove unused plugins and scripts
  • Limit third-party integrations
  • Reduce unnecessary HTTP requests

Cleaner sites load faster and feel more focused.

Step 8 – Enable Personalization

Personalization helps users find relevant products faster and improves engagement.

  • Show product recommendations
  • Use dynamic content based on user behavior
  • Segment users for targeted experiences

This increases both average order value and repeat purchases.

Step 9 – Run A/B Testing

Optimization should be driven by data, not assumptions.

  • Test layouts, CTAs, and pricing strategies
  • Experiment with product page designs
  • Measure performance and iterate

Continuous testing helps you identify what actually improves conversions.

Step 10 – Monitor & Improve Continuously

eCommerce optimization is not a one-time task; it requires ongoing monitoring.

  • Use tools like Google PageSpeed Insights and Lighthouse
  • Track key metrics:
    • Load time
    • Conversion rate
    • Bounce rate

Regular monitoring ensures your store keeps improving as user behavior evolves.

Key Takeaway: The most effective way to optimize an eCommerce store is to fix friction points in the order users experience them, from landing to checkout.

implement these improvements without trial and error

eCommerce Performance Optimization Best Practices

Once the fundamentals are in place, performance optimization comes down to consistently applying technical best practices that keep your store fast, stable, and scalable.

These are not one-time fixes; they are ongoing improvements that ensure your eCommerce site performs well under real user conditions.

Focus on Lightweight, Fast-Loading Pages

Heavy pages are one of the biggest performance killers.

  • Optimize images and media files without compromising quality
  • Avoid loading unnecessary assets on each page
  • Use lazy loading for images and videos

Lighter pages load faster and improve both UX and SEO.

Use Caching and Content Delivery Networks (CDNs)

Reducing load time is not just about your server; it is about how content is delivered.

  • Enable browser caching for repeat visitors
  • Use a CDN to serve content from the nearest location
  • Cache static assets to reduce server load

This ensures faster performance across different regions and devices.

Minify and Combine Files

Too many or large files increase load time.

  • Minify CSS, JavaScript, and HTML
  • Combine files where possible to reduce requests
  • Remove unused code

Cleaner code leads to faster rendering and smoother interactions.

Optimize Database Performance

As your store grows, your database can become a bottleneck.

  • Clean up unused data (old orders, logs, revisions)
  • Optimize database queries
  • Use indexing where necessary

A well-optimized database improves backend speed and overall performance.

Reduce Redirects and Unnecessary Requests

Every extra request adds delay.

  • Minimize page redirects
  • Avoid excessive third-party scripts
  • Reduce HTTP requests wherever possible

Fewer requests = faster load times.

Enable Compression

Compression reduces file size before delivery.

  • Use GZIP or Brotli compression
  • Compress text-based files (HTML, CSS, JS)

This significantly improves load speed, especially on slower networks.

Key Takeaway: eCommerce performance optimization is about keeping your site fast at scale, not just during testing, but under real user traffic.

Common eCommerce Optimization Mistakes to Avoid

Even well-designed eCommerce stores lose conversions due to avoidable mistakes. These issues often seem minor, but create friction at critical decision points, leading to drop-offs.

Heavy Images Slowing Down Pages

High-quality visuals are important, but unoptimized images hurt performance.

  • Large image sizes increase load time
  • Too many images on a page slow rendering
  • Lack of compression impacts mobile users the most

The goal is to balance quality with speed, not sacrifice one for the other.

Too Many Plugins and Scripts

Adding functionality through plugins is easy, but overuse creates performance issues.

  • Excess scripts increase load time
  • Third-party tools add latency
  • Conflicts between plugins can break functionality

Only keep what directly contributes to user experience or conversions.

Complicated Checkout Process

Checkout friction is one of the biggest reasons for lost revenue.

  • Too many steps discourage completion
  • Mandatory account creation increases drop-offs
  • Long forms create hesitation

A complex checkout flow can undo all the effort spent on acquiring users.

Ignoring Mobile Optimization

A large portion of eCommerce traffic comes from mobile, but many stores still optimize for desktop first.

  • Poor mobile layouts reduce usability
  • Slow mobile speeds increase bounce rates
  • Difficult navigation impacts conversions

Mobile experience should be treated as a primary channel, not secondary. Many businesses also invest in mobile app development services to enhance mobile shopping experiences.”

Not Testing Performance Regularly

Optimization is not a one-time activity.

  • Performance can degrade over time
  • New features may introduce issues
  • User behavior keeps evolving

Without regular testing, small issues turn into major conversion blockers.

Key Takeaway: Most eCommerce losses don’t come from big failures; they come from small, overlooked friction points that compound over time.

Tools for eCommerce Website Optimization

The right tools help you identify bottlenecks, validate improvements, and track performance over time. Instead of guessing what’s wrong, you can rely on data to guide your optimization decisions.

Performance Testing Tools

These tools help you understand how fast your site loads and where delays occur.

Google PageSpeed Insights

  • Measures Core Web Vitals
  • Provides actionable recommendation

Lighthouse

  • Audit performance, accessibility, and SEO
  • Useful for technical diagnostics

DebugBar

  • Monitors real-world performance
  • Tracks performance over time

Conversion Rate Optimization (CRO) Tools

These tools help improve how users interact with your store.

  • A/B Testing platforms to test layouts, CTAs, and flows
  • Heatmaps to track users’ behavior and clicks
  • Session recordings to identify friction points

They help answer: Where are users dropping off, and why?

Analytics Tools

Analytics Tools provide insights into user behavior and performance metrics.

  • Google Analytics
  • Track traffic, conversions, and user journeys
  • Funnel analysis to identify drop-off stages
  • Behavior reports to understand engagement

Monitoring Tools (Real User Monitoring – RUM)

These tools track actual user experiences in real time.

  • Measure load times across devices and locations
  • Identify performance issues under real traffic
  • Monitor site stability and uptime

How to Use These Tools Effectively

Using tools alone is not enough; what matters is how you apply insights:

  • Focus on high-impact issues first (speed, checkout, UX)
  • Track changes before and after optimization
  • Continuously monitor performance trends

Key Takeaway: Tools do not optimize your eCommerce store; they show you where to optimize for maximum impact.

eCommerce Optimization Checklist (Quick Summary)

If you want a quick way to evaluate your store, this checklist covers the most critical areas that directly impact performance and conversions.

Use it as a baseline to identify gaps and prioritize improvements.

Speed Optimization

  • Images are compressed and use modern formats (WebP)
  • CDN is implemented for faster content delivery
  • Browser caching is enabled
  • CSS, JSS, and HTML are minified
  • Unused scripts and assets are removed

User Experience (UX)

  • Navigation is clear and logically structured
  • Categories and filters make product discovery easy
  • Search functionality is fast and accurate
  • Mobile experience is smooth and responsive

Conversion Rate Optimization (CRO)

  • Product pages include clear descriptions and visuals
  • Trust signals (reviews, ratings, policies) are visible
  • CTAs are prominent and easy to understand
  • The checkout process is simple and frictionless

SEO and Technical Optimization

  • Site is crawlable and properly indexed
  • URLs are clean and structured
  • Internal linking supports navigation and SEO
  • Structured data is implemented

Performance Monitoring

  • Load speed is tested regularly
  • Conversion rates are tracked
  • Bounce rates are monitored
  • A/B tests are conducted for continuous improvement

How to Use This Checklist

  • Start with speed and checkout optimization (highest impact)
  • Move to UX and product page improvements
  • Continuously monitor and refine

Key Takeaway

eCommerce optimization works best when approached as a continuous process – small, consistent improvements lead to significant long-term gains.

Conclusion

eCommerce site optimization is not a one-time fix; it is an ongoing process of improving how users experience your store and how efficiently that experience converts into revenue.

The biggest gains don’t come from major redesigns, but from removing small friction points across the journey – faster pages, clearer navigation, better product pages, and a simpler checkout.

Focus on what directly impacts decisions:

  • Speed -> keeps users engaged
  • UX -> helps users find what they need
  • Conversion -> turns intent into purchases

When these elements work together, even small improvements can lead to significant growth in conversions and revenue.

The goal is not just to attract more visitors, but to make sure more of them actually buy. Or you can directly hire ecommerce developers USA to implement these improvements and accelerate growth.”

Ready to turn more visitors into customers

Website Personalization Explained: Strategies, Examples, and Best Practices

Introduction: Why Website Personalization is the Key to Standing Out Online

Most business websites fail for one simple reason: they treat every visitor the same. First-time users, returning customers, high-intent buyers, and casual browsers all see identical content, even when their expectations, goals, and buying readiness are completely different. This disconnect is exactly why many websites struggle with low engagement, high bounce rates, and poor conversions.

Website personalization solves this problem by personalizing content, messaging, and experiences based on user behavior, preferences, location, and intent. Instead of serving static pages, personalized websites dynamically adapt, showing relevant product recommendations, customized calls-to-action, location-specific content, or personalized offers that match what users actually want to see.

For businesses competing in crowded online markets, website personalization is no longer a “nice-to-have” feature; it is a performance strategy. A well-executed website personalization strategy helps businesses increase engagement, improve conversion rates, reduce friction in the user journey, and build long-term customer loyalty. It also plays a growing role in modern SEO, AEO, and AI-driven search, where relevance and user experience directly influence visibility and rankings.

In this guide, we will break down what website personalization is, explore the different types of website personalization, share practical website personalization ideas, outline proven best practices, and review the tools and solutions businesses can use to implement personalization effectively. By the end, you will know exactly how to use website personalization to create a website that feels relevant, performs better, and stands out in competitive search results.

What is Website Personalization?

Website personalization for users

Website personalization is the best practice of delivering personalized content, messaging, offers, or experiences to website visitors based on their behavior, preferences, location, demographics, or intent. Instead of showing the same static content to every user, personalized websites dynamically adapt to each visitor to create more relevant and engaging interactions.

In simple terms, website personalization ensures that different users see different experiences, even on the same website, based on who they are and how they interact with your site.

How Website Personalization Works?

At its core, during the website development process, website personalization relies on data + rules or intelligence. A website personalization solution collects and analyzes user data, such as

  • Pages visited and time spent on site
  • Click behavior and navigation patterns
  • Previous purchases or interactions
  • Device type and browser
  • Geographic location
  • Referral source (organic search, ads, email, and social media)

Based on this data, personalization tools apply predefined rules or AI-driven logic to modify the user experience in real time. This could mean changing homepage banners, highlighting specific products, adjusting CTAs, or displaying content that aligns with a visitor’s intent.

A strong website personalization strategy focuses on using this data responsibly to improve user experience, not overwhelm users with unnecessary customization.

Examples of Website Personalization in Action

To better understand what website personalization looks like in practice, here are a few common examples:

  • Behavior-based personalization: Showing related blog posts or products based on pages a user has previously viewed.
  • Location-based personalization: Displaying region-specific pricing, currency, language, or shipping information.
  • Returning visitor personalization: Greeting repeat users with personalization messaging or recommendations.
  • Traffic-source personalization: Customizing landing page content based on whether users arrive from ads, search engines, and email campaigns.

These examples demonstrate how personalization goes beyond aesthetics; it directly influences engagement, conversions, and user satisfaction.

Website Personalization vs. Static Websites

Traditional websites rely on static content, meaning every visitor sees the same pages regardless of their needs or intent. While this approach is easier to manage, it often leads to generic experiences that fail to resonate with users.

In contrast, website personalization allows businesses to:

  • Respond to user intent in real time.
  • Deliver relevant content faster
  • Reduce friction in the user journey
  • Guide users toward meaningful actions

This shift from static to personalized experiences is one of the key reasons personalization plays a growing role in conversion optimization, customer experience, and modern SEI performance.

Why Understanding Website Personalization Matters

Before exploring types of website personalization, website personalization ideas, or best practices, it is essential to clearly understand what personalization truly means. Businesses that treat personalization as a strategy, rather than a set of tools, are far more likely to see measurable improvements in engagement, conversions, and long-term growth.

Website Personalization in Brief

Website personalization is about showing the right content to the right user at the right time. Instead of treating all visitors the same, personalized websites adapt experiences based on user behavior, preferences, location, and intent to drive higher engagement and conversions.

Here is a quick breakdown to understand the website personalization at a glance:

  • What is it: Personalizing website content, offers, and messaging for individual users.
  • Why it matters: Improves relevance, User experience, and conversion rates.
  • Who is it for: eCommerce brands, service businesses, SaaS companies, and content-driven websites.
  • How it works: Uses behavioral, demographic, and contextual data with rules on AI-driven logic.
  • Business Impact: Higher engagement, lower bounce rates, better ROI from traffic.

From a performance perspective, website personalization directly supports:

  • Better user experience (UX)
  • Stronger Conversion Rate Optimization (CRO)
  • Improved SEO and AEO signals through relevance and engagement
  • Increased visibility in AI-powered and generative search results.

Whether you are running an online store, a service-based website, or a content platform, personalization helps transform passive visitors into active users by aligning the website experiences with a real user intent.

Why Website Personalization Matters for Businesses

Website personalization plays a critical role in how users interact with your site and how effectively your website supports business goals. As user expectations continue to rise, businesses that rely on generic, one-size-fits-all experiences often struggle to keep visitors engaged or guide them toward meaningful actions. Personalization bridges this gap by aligning website experiences with real user intent.

Improves User Engagement and Retention

Users are far more likely to engage with content that feels relevant to their needs. Website personalization allows businesses to surface content, products, or messages that match a visitor’s interests, behavior, or stage in the buying journey. When users quickly find what they are looking for, they spend more time on the site, interact with more pages, and are more likely to return.

From an engagement standpoint, personalized websites help:

  • Reduce bounce rates
  • Increase session duration
  • Encourage deeper site exploration

These behavioral improvements send strong quality signals to search engines and AI-driven platforms, reinforcing your site’s relevance and authority.

Drives Higher Conversion Rates

One of the biggest advantages of a well-executed website personalization strategy is improved conversion performance. By customizing CTAs, offers, and messaging based on user intent, businesses can guide visitors more effectively toward actions such as purchases, sign-ups, or inquiries.

Examples include:

  • Displaying product recommendations based on browsing history.
  • Showing personalized offers to returning visitors.
  • Adjusting CTAs for the first time vs. repeat users.

The personalized experiences reduce friction in the user journey and make decision-making easier, leading to higher conversion rates across key pages.

Build Trust and Long-Term Customer Loyalty

Personalized experiences signal that a business understands its audience. When users see content that align with their needs, preferences, or location, it creates a sense of relevance and trust. Overtime, this trust translates into stronger customer relationships and higher lifetime value.

Consistent website personalization also supports loyalty by:

  • Creating familiar and intuitive user journeys.
  • Reinforcing brand consistency across interactions.
  • Delivering value without being intrusive.

Supports Modern SEO, AEO, and AI Search Visibility

Search engines and AI-powered search experiences increasingly prioritize user experience, engagement, and relevance. Personalized websites naturally perform better across these areas, which can indirectly improve SEO and  AEO outcomes

Personalization contributes to:

  • Better engagement metrics that influence rankings
  • Clear alignment with user search intent
  • Increased chances of appearing in AI-generated answers and overviews

As search continues to evolve beyond traditional blue links, businesses that focus on relevant, user-centric experiences gain a long-term visibility advantage.

Creates a Competitive Advantage in Crowded Markets

In competitive industries, small improvements in engagement and conversion can create a significant edge. Website personalization allow businesses to differentiate themselves not just through design or pricing, but through experience. When users feel understood, they are more likely to choose your brand over competitors offering generic interactions.

Types of Website Personalization

Website personalization methods

To build an effective website personalization strategy, it is important to understand that personalization is not a single tactic. There are multiple types of website personalization, each serving different business goals and user needs. The most successful websites often combine several types to create a seamless and relevant user experience.

Below are the key types of website personalization businesses can implement.

1. Behavioral Website Personalization

Behavioral Personalization uses real-time and historical user behavior to customize website experiences. This includes actions such as pages, visited, clicks, time spent on site, and past interactions.

Common behavioral personalization examples include:

  • Showing product or content recommendations based on browsing history
  • Highlighting recently viewed items
  • Displaying CTAs aligned with a user’s position in the funnel

This type of website personalization is highly effective because it responds directly to user intent, making experiences feel timely and relevant.

2. Demographic Website Personalization

Demographic personalization personalizes content based on user attributes such as age group, job role, industry, or customer segment. This data is often collected through sign-ups, forms, or CRM integrations.

Examples include:

  • Custom messaging for B2B vs. B2C users
  • Industry-specific landing pages
  • Personalized content for new vs. existing customers

When used correctly, demographic personalization helps businesses communicate more clearly with different audience segments without overwhelming users.

3. Geographic (Location-Based) Website Personalization

Geographic website personalization adapts content based on user’s location, such as country, city, or region. This type is especially important for global businesses and online retailers.

Location-based personalization may include:

  • Showcasing local currency and pricing
  • Displaying region-specific offers or promotions
  • Customizing language, shipping details, or contact information

This approach not only improves user experience but also supports SEO-focused SEO strategies by aligning content with local search intent.

4. Contextual and Device-Based Personalization

Contextual personalization focuses on the user’s current situation rather than historical data. This includes device type, browser, time of day, referral source, or traffic channel.

Examples include:

  • Mobile-optimized layouts for smartphone users
  • Personalized landing pages for paid ads or email campaigns
  • Adjusting content for first-time visitors arriving from search engines

Contextual personalization ensures users receive experiences that match how and why they accessed your website.

5. AI-Driven and Predictive Website Personalization

AI-driven personalization uses machine learning to analyze large volumes of user data and predict what content or offers users are most likely to engage with. Unlike rule-based personalization, AI continuously learns and optimizes experiences over time.

This advanced type of website personalization can:

  • Deliver real-time product or content recommendations
  • Predict user intent before explicit actions occur
  • Optimize experiences at scale across large websites

AI-powered personalization is increasingly important for businesses aiming to stay competitive in AI-driven search environments and modern digital ecosystems.

Choosing the Right Type of Website Personalization

Not every business needs to use all types of website personalization at once. The key is to align personalization efforts with:

  • Business objectives
  • Available data
  • User expectations
  • Privacy and compliance requirements

Starting with one or two high-impact personalization types and scaling gradually is often the most effective approach.

Website Personalization Strategy: How to Get it Right

Implementing personalization without a clear plan often leads to fragmented experiences and inconsistent results. A successful website personalization strategy starts with aligning business goals, user intent, and data, before choosing tools or tactics. When personalization is treated as a long-term strategy rather than a quick fix, it delivers measurable and sustainable outcomes.

Define Clear Business Goals and KPIs

Every website personalization strategy should begin with a clear understanding of what you want to achieve. Personalization can support multiple objectives, but trying to optimize everything at once often reduces effectiveness.

Common personalization goals include:

  • Increasing conversion rates
  • Improving user engagement
  • Reducing bounce rates
  • Growing average order value
  • Enhancing lead quality

Once goals are defined, identify measurable KPIs such as click-through rates, conversion rates, time on page, or repeat visits. These metrics help evaluate whether your personalization efforts are actually delivering value.

Understand User Intent and Segment Your Audience

Effective website personalization depends on understanding why users visit your site and what they expect to find. Segmenting users based on intent allows businesses to deliver more relevant experiences without unnecessary complexity.

Common segmentation approaches include:

  • New vs. returning visitors
  • High-intent vs. low-intent users
  • Product browsers vs. ready-to-buy users
  • Content readers vs. lead seekers

By mapping personalization efforts to user intent, businesses can prioritize experiences that have the greatest impact on engagement and conversions.

Identify High-Impact Pages for Personalization

Not all pages require personalization. A smart website personalization strategy focuses on pages that directly influence user decisions.

High-impact pages often include:

  • Homepages
  • Product or service pages
  • Landing pages
  • Pricing pages
  • Checkout or lead generation forms

Personalizing these key touchpoints can significantly improve the overall user journey without overcomplicating site management.

Balance Personalization with Data Privacy

Personalization must always respect user privacy and data protection regulations. Collecting excessive data or using it without transparency can harm trust and create compliance risks.

Best practices include:

  • Being transparent about data usage.
  • Using first-party data wherever possible.
  • Offering users control over personalization preferences.
  • Ensuring compliance with regulations such as GDPR and similar frameworks.

A privacy-first approach ensures personalization enhances trust rather than undermining it.

Start Simple and Scale Strategically

One of the most common mistakes businesses make is trying to implement complex personalization too early. The most effective strategies start with simple, high-impact personalization and evolve over time.

A phased approach might include:

  • Basic behavioral personalization
  • Location-based customization
  • Advanced segmentation
  • AI-driven optimization

This method reduces risk, improves learning, and enables personalization efforts to mature in tandem with business growth.

Website personalization to boost conversions

Website Personalization Ideas That Drive Results

Once a solid website personalization strategy is in place, the next step is to execute it. The right website personalization ideas focus on improving relevance at key touchpoints without overwhelming users. Below are proven personalization ideas that consistently deliver measurable improvements in engagement and conversions across industries.

Personalized Homepage Experiences

The homepage is often the first interaction users have with a brand. Personalizing this space helps businesses make an immediate and relevant impression.

Effective Homepage Personalization ideas include:

  • Displaying different hero messages for new vs. returning visitors.
  • Highlighting products or services based on browsing history.
  • Showing location-specific offers or content

A personalized homepage helps users quickly find what matters most to them, reducing friction and bounce rates.

Dynamic Calls-to-Action (CTAs)

Dynamic CTAs adjust messaging, design, or placement based on user behavior and intent. This ensures that users see actions aligned with their readiness to convert.

Examples include:

  • “Get a demo” for high-intent visitors
  • “Learn More” for first-time users
  • Personalized offers for returning visitors

Dynamic CTAs improve click-through rates by matching the user’s stage in the decision-making journey.

Personalized Landing Pages for Campaigns

Campaign-specific landing pages perform significantly better when personalized. Customizing content based on the traffic source or audience segment increases relevance and conversion potential.

Personalized landing page ideas include:

  • Adjusting headlines based on ad copy or keywords.
  • Custom messaging for email, paid ads, or organic traffic.
  • Personalized content for industry-specific or role-based audiences

This approach strengthens message continuity and improves campaign ROI.

Content and Product Recommendations

Content and product recommendations are among the most impactful website personalization ideas, especially for content-driven sites and online retailers.

Common applications include:

  • Recommended blog posts based on reading behavior
  • Related products based on browsing or purchase history
  • Upsell and cross-sell suggestions

These recommendations guide users toward relevant content and products, increasing engagement and average order value.

Smart Forms and Personalized Onboarding

Personalized forms reduce friction by asking only relevant questions and adapting based on user inputs or past interactions.

Smart form personalization may include:

  • Pre-filled fields for returning users
  • Conditional questions based on previous answers
  • Tailored onboarding steps for different user types

This improves completion rates and creates a smoother onboarding experience.

What Can an Online Retailer Site Do to Increase Personalization?

For eCommerce businesses, website personalization is one of the most effective ways to improve conversions, average order value, and customer loyalty. But personalization needs to go beyond basic name insertion, it should enhance the entire shopping journey.

Personalized Product Recommendations

Personalized product recommendations are the foundation of eCommerce website personalization. By analyzing browsing behavior, past purchases, and user preferences, online retailer sites can recommend products that are most relevant to each visitor.

Examples include:

  • “Recommended for you” sections
  • Frequently bought together suggestions
  • Similar or alternative product recommendations

These experiences reduce decision fatigue and help users discover products faster.

Browsing and Purchase History-Based Suggestions

Using browsing and purchase history allows retailers to personalize experiences across sessions. Returning users can see:

  • Recently viewed products
  • Refill or reorder suggestions
  • Complementary products based on past purchases

This type of personalization makes the shopping experience feel continuous rather than transactional.

Location-Based Pricing, Shipping, and Currency

Location-based website personalization improves clarity and trust for global and regional eCommerce businesses.

Retailer sites can be personalized by:

  • Displaying prices in local currency
  • Showing accurate shipping timelines and costs
  • Promoting region-specific offers or inventory

This reduces friction during checkout and minimizes cart abandonment.

Personalized Cart and Checkout Experiences

Cart and checkout personalization plays a critical role in conversion optimization. Retailers can:

  • Show personalized discounts for returning users
  • Highlight free shipping thresholds dynamically
  • Offer preferred payment options based on location or device

These personalized touches help users complete purchases with fewer obstacles.

Post-Purchase Personalization Strategies

Personalization shouldn’t stop after checkout. Post-purchase experiences help build loyalty and repeat sales.

Examples include:

  • Personalized order confirmation emails
  • Product care tips or usage guides
  • Targeted cross-sell and upsell recommendations

A well-personalized post-purchase journey increases lifetime customer value and brand trust.

Personalized eCommerce shopping experience

Website Personalization Solutions: Tools and Technologies

Implementing personalization effectively requires the right website personalization solution aligned with your business size, goals, and technical capabilities.

Rule-Based Personalization Solutions

Rule-based tools use predefined conditions to deliver personalized experiences. For example:

  • Showing specific content to returning users
  • Displaying offers based on the referral source
  • Personalizing CTAs by page behavior

These solutions are ideal for businesses starting with personalization and wanting predictable outcomes.

AI and Machine Learning-Driven Tools

AI-powered website personalization solutions analyze large datasets to predict user intent and optimize experiences in real time. These tools continuously learn from user behavior and improve personalization automatically.

They are especially valuable for:

  • High-traffic websites
  • eCommerce platforms
  • Businesses scaling personalization across multiple pages

CMS and Marketing Automation Integrations

Many personalization solutions integrate seamlessly with CMS platforms and marketing automation tools. This allows businesses to manage personalized content, campaigns, and user journeys from a central system.

For businesses working with a Website Development Company USA or planning to hire website developers, choosing tools that integrate easily with existing tech stacks reduces implementation complexity.

Analytics, Testing, and Optimization Platforms

Personalization without measurement is ineffective. Analytics and testing tools help businesses:

  • A/B test personalized experiences
  • Track engagement and conversion performance
  • Identify what personalization strategies work best

These insights ensure personalization decisions are data-driven and scalable.

Website personalization for better conversions

Website Personalization Best Practices to Follow

Following proven website personalization best practices ensures your efforts improve performance without harming user experience or trust.

Start Simple and Scale Personalization Gradually

Begin with basic personalization, such as behavioral recommendations or location-based content. As data quality improves, scale toward advanced segmentation and AI-driven personalization.

Avoid Over-Personalization

Too much personalization can feel intrusive. Focus on relevance rather than excessive customization to maintain a positive user experience.

Use Real-Time and Reliable Data

Accurate, up-to-date data is critical. Prioritize first-party data and ensure personalization logic reflects real user behavior.

Maintain Consistency Across Channels

Personalized website experiences should align with email, ads, and other digital touchpoints. Consistency reinforces trust and brand clarity.

Continuously Test and Optimize

Regular testing helps refine personalization strategies and adapt to changing user behavior. Optimization is an ongoing process, not a one-time setup.

Common Website Personalization Mistakes to Avoid

Website personalization can significantly improve performance, but only when implemented correctly. Many businesses adopt personalization tools without a clear strategy, leading to poor user experiences and wasted investment. Understanding these common website personalization mistakes can help you avoid pitfalls that negatively impact engagement, trust, and conversions.

Making Assumptions Instead of Using Real User Data

One of the biggest personalization mistakes is relying on assumptions rather than actual user behavior. Personalization should never be based on what businesses think users want. Instead, it should be driven by verified data such as browsing behavior, interaction patterns, and conversion history.

When personalization decisions are assumption-based, businesses risk:

  • Showing irrelevant content or offers
  • Confusing users with mismatched messaging
  • Reducing trust due to poor relevance

Data-driven personalization ensures experiences align with real user intent.

Ignoring User Privacy and Compliance Requirements

Website personalization depends on data, but collecting and using that data without transparency can damage brand credibility. Ignoring privacy regulations or failing to communicate data usage clearly can result in compliance issues and loss of user trust.

Common mistakes include:

  • Collecting excessive or unnecessary data
  • Lack of consent mechanisms
  • Unclear privacy policies

A privacy-first approach not only protects users but also strengthens long-term personalization effectiveness.

Overloading Users with Excessive Personalization

More personalization does not always mean better personalization. Over-personalized experiences, such as too many dynamic elements or aggressive recommendations, can overwhelm users and reduce clarity.

Signs of over-personalization include:

  • Constantly changing layouts
  • Too many pop-ups or personalized messages
  • Inconsistent navigation experiences

Effective website personalization should feel subtle, helpful, and intuitive.

Failing to Track and Measure Personalization Performance

Without measurement, personalization becomes guesswork. Many businesses implement personalization but fail to monitor its impact on key performance metrics.

Not tracking results can lead to:

  • Inability to justify ROI
  • Missed optimization opportunities
  • Ineffective scaling decisions

Tracking engagement, conversions, and retention ensures personalization efforts remain aligned with business goals.

How to Measure the Success of Website Personalization

Measuring performance is essential to understanding whether your website personalization strategy is delivering tangible value. Success should be evaluated using both engagement and revenue-focused metrics.

Conversion Rate and Engagement Metrics

Conversion rate is one of the most important indicators of personalization effectiveness. Personalized experiences should guide users toward meaningful actions more efficiently than static content.

Key engagement metrics include:

  • Click-through rates (CTRs)
  • Page interactions
  • Time spent on personalized elements

Improvements in these areas indicate stronger relevance and intent alignment.

Bounce Rate and Session Duration

Bounce rate and session duration provide insight into how users respond to personalized content. A well-personalized website should:

  • Reduce bounce rates by showing relevant content early
  • Increase session duration through guided navigation

These metrics are also important SEO signals that influence search visibility.

Average Order Value and Revenue Impact

For eCommerce websites, personalization often aims to increase average order value (AOV). Personalized product recommendations, bundles, and offers can encourage users to add more items to their carts.

Tracking revenue impact helps businesses understand:

  • Which personalization tactics drive sales
  • How personalization affects purchasing behavior

Retention and Repeat Visitor Analysis

Long-term success depends on retention. Personalized experiences encourage users to return by maintaining relevance across multiple visits.

Important retention metrics include:

  • Repeat visit frequency
  • Returning customer conversion rates
  • Customer lifetime value (CLV)

Retention analysis helps evaluate personalization beyond immediate conversions.

The Future of Website Personalization

Website personalization is evolving rapidly as technology advances and user expectations change. The future will focus on smarter, faster, and more ethical personalization approaches.

AI-Powered Real-Time Personalization

AI-driven personalization will increasingly deliver real-time experiences that adapt instantly to user behavior. Instead of predefined rules, websites will continuously adjust content, layout, and recommendations as users interact.

This enables:

  • Faster decision-making
  • Higher relevance at every touchpoint
  • Scalable personalization across large websites

Predictive and Intent-Based Experiences

Future personalization strategies will focus on predicting user intent rather than reacting to actions. By analyzing patterns, websites can anticipate what users are likely to need next and guide them proactively.

Predictive personalization will:

  • Reduce friction in the user journey
  • Improve conversion efficiency
  • Enhance user satisfaction

Privacy-First Personalization Models

As data regulations and user awareness increase, privacy-first personalization will become standard. Businesses will rely more on:

  • First-party data
  • Consent-based personalization
  • Contextual and session-level signals

This shift ensures personalization remains ethical, compliant, and trustworthy while still delivering value.

Final Thoughts

Website personalization is no longer just a marketing trend; it’s a core digital strategy that drives engagement, conversions, and long-term growth. From understanding what website personalization is to implementing the right tools, strategies, and best practices, businesses that prioritize relevance consistently outperform those that rely on generic experiences.

Whether you’re an online retailer, service provider, or growing brand, personalization helps align your website with real user intent. For businesses planning to scale or modernize their digital presence, working with the right partners or choosing to hire website developers with personalization expertise can make implementation faster and more effective.

When executed strategically, website personalization transforms your site from a static platform into a high-performing growth engine that truly stands out.

Advance developers for website personalization

Law Firm Website Design Cost, Services, Design Tips, & More

Introduction: Why Your Law Firm’s Website is Your Best Investment

Your next client could be lost in seconds, literally.

Did you know, 74% of consumers use a search engine to find legal advice before hiring an attorney? In today’s digital-first world, your law firm website is more than just a digital brochure; it is the most powerful tool for building credibility, ensuring SEO visibility, and driving lead conversions.

A structured, well-optimized, polished site does not just look professional; it turns visitors into clients. Those who invest in strong website design usually see measurable gains in trust and inquiries, giving them a real competitive edge in a crowded legal marketplace.

So, what should you focus on when building your digital presence? This guide walks you through everything you need to know, from law firm website design cost to the best law firm website design companies, to must-have design services, and insider tips and trends to maximize ROI.

How Much Does Law Firm Website Design Cost?

When attorneys plan their digital presence, one of the very first questions that arises is: “What is the actual law firm website design cost?” The answer depends on who builds your website and the level of customization required. From DIY website builders to specialized law firm web design companies, the cost can range anywhere between $15 per month to over $20,000 for a full-scale project.

DIY Website Builders ($15-$100/month)

Platforms like Wix, Squarespace, or WordPress templates provide the cheapest entry point. While costs are low, these solutions often lack SEO optimization, advanced security, and legal-industry-specific features (such as attorney bio pages or case result sections). For solo practitioners on a budget, this may work initially, but it often falls short in lead generation.


Example: A small family lawyer in Chicago using Wix may save upfront costs, but struggles to appear in Google searches compared to firms with SEO-optimized websites.

Freelancers ($1,000-$5,000)

Hiring a freelance web designer gives more flexibility in design and functionality. However, reliability and long-term support can be concerns. If your goal is to build credibility and rank in search engines, you may still need to invest in ongoing SEO and maintenance.

Example: A New York immigration attorney might hire a freelancer for $3,000, but later realize they need ongoing SEO, security, and speed optimizations that the freelancer doesn’t cover.

General Agencies ($10,000-$15,000)

A mid-tier option where agencies polished websites with better branding and UX. While you get professional results, many agencies don’t specialize in law firm SEO, meaning the website may look good, but won’t necessarily bring in clients.

Example: A Texas-based law firm paid $12,000 for a sleek agency-designed site but later struggled with low organic traffic due to missing legal SEO strategies.

Best Law Firm Website Design Companies ($2,500-$20,000+)

Specialized law firm website development companies focus on attorney-specific SEO strategies, lead conversion, ADA compliance, and credibility-building features, such as case studies and testimonials. The investment can vary widely based on whether you need just a redesign or a fully SEO-driven site with custom integrations, such as client intake forms or CRM systems.

Example: A California personal injury law firm invested $15,000 in a legal-specific agency and saw a 40% increase in leads within 6 months due to optimized landing pages and strong SEO foundations.

Maintenance & Hosting Costs ($200-$500/month)

Beyond the initial build, law firm websites require continuous hosting, security, and content updates. Skipping maintenance can lead to broken features, SEO drops, or even compliance risks.

Example: A criminal defense lawyer who neglected maintenance faced a hacked site, losing client trust and Google rankings overnight.

Comparison Table: Law Firm Website Design Cost Breakdown

OptionCost RangeProsCons
DIY Website Builders$15–$100/monthCheap, fast setupLimited SEO, poor scalability
Freelancers$1,000–$5,000Flexible, custom designsUnreliable, long-term support
General Agencies$10,000–$15,000Professional branding & UXNot law-specific, weak SEO
Law Firm Website Design Companies$2,500–$20,000+SEO-driven, legal-industry expertiseHigher upfront investment
Maintenance & Hosting Costs$200–$500/monthSecurity, updates, stabilityOngoing cost

At WEDOWEBAPPS, transparency in pricing matters as much as design. Unlike DIY Tools or generic agencies, our approach is SEO-first, conversion-focused, and built to scale with your law practice. Whether you are a solo attorney or a large firm, we structure costs around growth rather than hidden fees, ensuring your investment drives measurable leads.

Factors That Influence Law Firm Website Design Cost

Want to avoid future shock? It is, therefore, important to understand the factors that are influencing your cost of website design for law firms from day one.

1. Platform

The platform on which your website is built affects everything – from its look to its load speed, security, and maintenance needs.

Whether you opt for a DIY builder like Wix or Squarespace, a custom WordPress site, or a fully bespoke CMS, the platform choice heavily influences cost. While DIY tools are cheaper, they often lack the flexibility and long-term SEO benefits that law firms need for growth.

2. Design Complexity

The more complex your website design is, the more time and budget it takes.

If you want animations, interactive elements, and on-brand visual storytelling, choose features that align with your brand’s image and goals. However, more complexity means higher law firm website costs.

That said, a stronger website is not just about looks; rather, it builds immediate trust, signals professionalism, and makes you stand out among thousands of generic lawyer websites.

A simple, template-driven design costs less, but it may not convey the authority your practice deserves. On the other hand, custom UI/UX design, tailored branding, animations, and interactive elements drive up costs but also improve client trust and engagement.

3. Number of Web Pages 

Your law firm’s website costs depend on how many SEO pages you need. A simple 5-page website might launch quickly, but in competitive markets, it will not rank or convert. A fully-optimized site usually includes:

  • Practice area pages 
  • Attorney bios 
  • Office location pages 
  • Blogs 
  • FAQs
  • Long-form service content (optimized for Google)

From a search perspective, we assume one optimized page = 1500 words. If you want to rank in 10 cities or want to cover 10+ legal services, that could easily mean 50 to 100+ pages. More pages mean more time in design, development, and SEO optimization.

4. Content Creation

This is where most of the law firms undervalue the work (and cost) – website content, which ranks on Google and convinces visitors to call.

Professionally written, SEO legal content typically runs between $200 to $400 per page. Website page content consists of research, tone, legal compliance, and conversion-focused copywriting. General filler text won’t rank. Your content has one job – to sell your expertise.

Many law firms outsource copywriting, blogs, SEO-optimized articles, and imagery, which adds to costs but pays off in search visibility and client trust.

Many attorneys outsource copywriting, blogs, SEO-optimized articles, and imagery, which adds to costs but pays off in search visibility and client trust.

5. CRM and Integration Setup

Today’s law firms do not just want a good-looking website; they want a site that works. Whether it is embedding:

  • Lawmatics for lead tracking 
  • Calendly for online appointment scheduling 
  • Secure client intake forms integrated with Clio or MyCase 

Every tool takes planning, setup, and testing. Yes, it adds to your law firm website design cost, but it pays off in operational efficiency and a better client experience.

Law firms increasingly integrate their websites with CRMs (like Clio, HubSpot, or Salesforce), online payment systems, case management tools, and email automation. These integrations streamline client intake but require additional development and setup time.

6. Hosting and Maintenance Fees 

This is where a lot of agencies pull a fast one; they will sell you a website for $10,000, then hit you with $200/month for ongoing costs to keep it online and secure. That is $2,400 a year – for basic updates.

Apart from the initial build, your website needs reliable hosting, security monitoring, regular updates, and backups. Hosting costs typically range from $200-$500/month, and ongoing maintenance ensures your site stays compliant and fast.

7. Advanced Features

A fancy online store is not necessary for the majority of law firms, but features like chatbots, embedded videos, intake procedures, lead magnets, or downloaded instructions can really help.

When done correctly, they increase conversions and improve return on investment, but they also add complexity and will increase the cost of your law firm website.

Your website must be more than just aesthetically pleasing. Whether you want basic or extensive capabilities, we’ll build it with your bottom line in mind.

WEDOWEBAPPS uses a modular development approach, which means that the law firms can start with a solid, SEO-first foundation and add advanced features as their practice grows, keeping the costs transparent and scalable.

Best Law Firm Website Design Companies – What to Look For?

Choosing the right partner for your law firm’s website is not just about hiring a designer; it is about finding a team that understands the unique challenges of the legal industry. The best law firm website design companies go beyond visuals to ensure your website brings in qualified leads, builds trust, and supports long-term growth. Here is what you should look for:

1. Legal Industry Expertise

A law firm website has very different requirements compared to an eCommerce store or lifestyle blog. From showcasing attorney bios to highlighting practice areas and handling client intake securely, agencies with prior experience in legal websites understand compliance and client expectations.

2. SEO-First Approach

More than 74% of legal clients begin their search online, which means your site must be optimized to rank in local and practice-specific searches. The right agency will not only design a visually appealing website but also build it with strong technical SEO foundations, optimized content, and clear conversion pathways.

3. Mobile Optimization 

With over 60% of legal searches happening on mobile devices, your website must provide a seamless experience across all screen sizes. A mobile-optimized site ensures clients can quickly call, fill out a form, or schedule a consultation on the go.

4. Proven Results 

Do not just take an agency’s word for it; ask for case studies, client testimonials, and measurable success stories. The best law firm website design companies can demonstrate how they improved client acquisition rates, boosted SEO visibility, and enhanced credibility for other firms.

5. Ongoing Support

A website is not a one-time project. From regular updates and hosting management to adding new features like online consultations or payment gateways, ongoing support is important. Look for agencies that provide continuous monitoring, security updates, and performance optimization.

WEDOWEBAPPS can help you combine legal-industry insights with a performance-driven approach. Our focus is not only on building sleek, mobile-optimized designs but also on ensuring your firm gets measurable results – higher visibility, stronger credibility, and more client inquiries.

Law Firm Website Design Services You Should Expect

When you invest in professional law firm website design services, you are not just paying for visuals; you are paying for a platform that attracts, converts, and retains clients. A well-rounded package should cover both design and functionality, tailored specifically for the legal industry. Here are the core services you should expect:

1. Custom Design and Branding

Your website should reflect your firm’s identity – professional, trustworthy, and approachable. A custom design ensures your site stands out from generic templates and builds credibility with prospective customers.

2. Content Strategy

From practice area pages to attorney bios and blogs, high-quality content is the backbone of visibility and trust. A strategic content plan ensures your site answers client questions, ranks on Google, and positions your firm as an authority.

3. Local SEO Optimization

Since most legal clients search within their city or state, local SEO is crucial. Optimized Google Business Profiles, local citations, and geo-targeted keywords help you appear when clients search for “lawyer near me” or “best divorce attorney in [city].”

4. Lead Capture Forms & CRM Integration

Stat: Websites with structured lead capture forms see 3x higher conversion rates compared to those without.

Well-placed forms and chat features capture leads while CRM integrations allow you to track inquiries, automate follow-ups, and manage relationships more effectively.

5. Client Portal Development

Many modern firms offer client portals for document sharing, appointment scheduling, and secure communication. This improves client experience while reducing administrative overhead.

6. Security & Compliance 

Legal websites must comply with privacy standards (GDPR, CCPA) and ensure secure client data handling. Features like SSL certificates, encrypted forms, and role-based access are must-haves for maintaining confidentiality.

Our legal-specific workflows include built-in features like secure lead capture, scalable client portals, and compliance-first development. This ensures your site isn’t just attractive, it’s functional, secure, and optimized for long-term growth.

Law Firm Website Design Tips for Higher ROI

When it comes to building a website, law firms should not just think about aesthetics; the real measure of success is return on investment (ROI). A well-designed site should not only attract visitors but also convert them into paying clients. Here are the most effective tips:

1. Client-Focused Content

Prospective clients visit your website looking for solutions to their legal problems. Speak their language, avoid heavy jargon, and clearly outline how your firm can help. Adding FAQs, explainer videos, and service-specific landing pages improves trust and engagement.

2. Showcase Social Proof

Testimonials, client reviews, and case studies build credibility instantly. Featuring verdicts, settlements, or positive feedback can significantly increase trust in your services.

3. Mobile-First Design

Since 60%+ of legal searches happen on mobile, a responsive, mobile-first design is critical. Smooth navigation, click-to-call buttons, and simplified menus ensure a frictionless experience.

4. Speed & Security

Clients will bounce if your site is slow or insecure. Optimize loading speeds, enable SSL encryption, and regularly update security patches to build trust and improve SEO rankings.

5. Strong CTAs

Clear and compelling CTAs like “Book a Free Consultation” or “Call Now” guide visitors toward taking the next step. Place CTAs strategically at the top, within service pages, and at the end of the blogs.

6. Blogging & Resources

Consistent content marketing through blogs, guides, and legal updates boosts your SEO while establishing your firm as an authority in your niche. It also builds long-term trust and organic lead generation.

7. Accessibility

An inclusive website accessible to users with disabilities (ADA-compliant design, alt-text for images, clear typography, voice search readiness) widens your reach and reduces legal risk.

Example: Adding structured CTAs + mobile navigation boosted leads by 45% in just 3 months for a mid-sized law firm.

Our data-driven ROI design ensures your law firm’s website is not just visually impressive – it actively drives measurable business growth.

Law firm website design cost and services with experts building secure, SEO-friendly websites that convert clients

Common Mistakes Law Firms Make With Website Design

Even the most established law firms often fall into avoidable pitfalls when building their websites. A poorly designed website not only hurts credibility but also costs potential clients. Below are some of the most common mistakes law firms should steer clear of:

1. Overloading the Homepage With Legal Jargon

Many law firm websites try to impress visitors with complex legal terms. Instead, this overwhelms prospects who are simply looking for clear, approachable solutions. The homepage should focus on client pain points, easy navigation, and a value-driven message.

2. Ignoring Mobile Users

More than 60% of legal-related searches come from mobile devices. If your website is not mobile-friendly, you risk losing a majority of potential clients before they even read about your services.

3. Weak or Generic CTAs

Generic call-to-actions like “Learn More” or “Submit” don’t persuade users to take action. A strong CTA should be clear, personalized, and action-oriented – for example, “Book Your Free Consultation Today.”

4. No Local SEO Optimization

Law firms depend heavily on local clients. If your website is not optimized for Google Business Profile, local keywords, and map listings, you will struggle to appear in the top results when someone searches “lawyer near me.”

5. Not Updating Content Regularly

A website that has not been updated in months or years signals neglect. Outdated attorney bios, old blog posts, or broken links undermine trust. Consistently publishing fresh client-focused content improves both rankings and credibility.

WEDOWEBAPPS helps law firms avoid these pitfalls with proactive UX audits, CRO (conversion rate optimization) strategies, and continuous SEO support, ensuring your website not only looks good but also consistently attracts and converts high-value clients.

The ROI of Investing in Professional Website Design for Law Firms

A well-designed website is not just a digital brochure; it is a 24/7 client acquisition tool. For law firms, investing in professional web design can directly impact lead generation, brand reputation, and bottom-line growth. Let’s break it down:

1. More Leads Per Month

Outdated websites often act as “leaky buckets” where visitors drop off due to poor navigation, slow load times, or confusing CTAs. A modern, conversion-optimized site can generate 2-3x more qualified leads per month compared to an outdated one.

2. Building Client Trust & Referrals 

Legal services rely heavily on trust. A polished, user-friendly website communicates credibility and professionalism, making prospects more confident in reaching out. In fact, studies show that 75% of users judge a law firm’s credibility based on website design, and happy clients are more likely to refer others.

3. Conversion Benchmarks

The average law firm website converts at 2-3%, but high-performing sites with strong UX, clear CTAs, and optimized lead capture forms often see 5-7% conversion rates. That is more than double the business potential from the same traffic.

4. ROI Calculator Example

Imagine your law firm website gets 2000 monthly visitors:

  • At a 2% conversion rate -> 40 leads -> ~10 clients (25% close rate). 
  • At a 6% conversion rate -> 120 leads -> ~30 clients 

If your average client value is $2000, that is the difference between $20,000 vs $60,000 per month in revenue, all from designing improvements.

We don’t just design websites, we measure their performance. With Google Analytics, heatmaps, and funnel tracking, we help law firms understand exactly where users click, drop off, and convert, ensuring your design investment keeps paying dividends.

Comparing Law Firm Website Design Approaches 

When planning a law firm website, you will likely face different paths to execution. Each approach has its pros and cons, but the decision ultimately impacts cost, quality, and ROI.

DIY vs. Professional 

  • DIY Tools (Wix, Squarespace, WordPress themes): Cost-effective for solo attorneys or new firms, but often lack the polish, SEO strength, and compliance features needed for a legal competitive market.
  • Professional Design: Ensures a custom, branded site optimized for SEO, accessibility, and conversions. While more expensive upfront, professional sites generate significantly higher long-term ROI.

Freelancer vs. Agency

  • Freelancer: More affordable, but limited bandwidth. One person may not cover design, SEO, content strategy, and integrations effectively. Risk of delays and inconsistent quality.
  • Agency: A team of specialists works together, designers, developers, SEO strategists, content writers, and project managers, offering end-to-end execution with scalability and long-term support.

Generalist vs. Law-Specific

  • Generalist Designers: Can build websites but may overlook legal industry nuances like attorney bios, case result pages, lead capture compliance, and ADA accessibility.
  • Law-Specific Designers: Understand client trust signals, conversion strategies for law firms, and legal marketing best practices, delivering websites that actually attract and convert clients.

Why Choose WEDOWEBAPPS

At WEDOWEBAPPS, we combine the agency advantage with law-specific expertise. Our approach is:

  • Data-Driven: ROI tracking with heatmaps, GA, and conversion funnels.
  • Modular & Scalable: Future-ready websites that grow with your firm.
  • Legal-centric: Built with attorney trust, lead capture, and compliance at the core.

Pro Insight: Firms that shift from DIY or generalist designers to law-focused agencies report up to 3x increase in qualified leads within the first 6 months.

How Long Does It Take to Design a Law Firm Website?

When planning your law firm’s website, the timeline depends on who you hire and how customized you want the site to be:

  • DIY Builders: 1 – 2 weeks (template-based, minimal customization)
  • Freelancers: 4 – 8 weeks (depends on revisions and availability)
  • General Agencies: 8 – 12 weeks (multi-step process, but not always legal-focused)
  • Law-Specific Agencies (like WeDoWebApps): Structured process with clear milestones to avoid delays.

WeDoWebApps Timeline Breakdown

  • Week 1 – 2: Discovery & Design Mockups – Branding, layouts, UI/UX tailored for law firms
  • Week 3 – 5: Development – Custom coding, CMS integration, mobile optimization
  • Week 6 – 7: SEO Setup – Legal keywords, schema, on-page SEO, speed optimization
  • Week 8: Testing & Launch – Compliance checks, cross-browser testing, final deployment

Law Firm Website Trends 

The way clients discover and evaluate law firms online is changing rapidly. To stay competitive, modern law firm websites are adopting new trends that enhance trust, accessibility, and client engagement:

  • Voice Search Optimization: With more clients using Alexa, Siri, and Google Assistant, law firms must optimize for conversational queries like “best divorce lawyer near me” or “how to file for a personal injury claim.”
  • AI Chatbots for Intake: Smart chatbots now qualify leads 24/7, answering FAQs and pre-screening cases before handing them to attorneys. This saves valuable time while improving client experience.
  • Video Bios & Testimonials: Authentic video instructions and client success stories build trust faster than text, giving potential clients a personal connection from the first click.
  • Interactive Practice Area Pages: Instead of static text, law firm sites now use visuals, case examples, FAQs, and calculators (like “settlement estimation tools”) to help clients understand legal options.
  • Mobile-First Evolution: Since most searches happen on mobile, websites must load instantly, be thumb-friendly, and feature click-to-call buttons for instant client contact.

At WeDoWebApps, we don’t just follow trends, we anticipate them. Our law firm websites are built with future-ready design, AI-driven features, and SEO strategies so your firm stays ahead of competitors.

Why Choose WeDoWebApps for Your Law Firm Website Design?

When it comes to law firm website design, you don’t just need a vendor; you need a strategic partner who understands how digital presence directly impacts client acquisition and trust. Here’s why WeDoWebApps is the right choice:

Proven Success Stories

We’ve helped solo attorneys, boutique firms, and large law practices build high-performing websites that not only look professional but also drive measurable results. From doubling monthly leads to improving referral rates, our portfolio reflects real ROI-driven success.

Scalability for Firms of All Sizes

Whether you’re a solo practitioner starting small or a multi-location firm with complex practice areas, our designs scale with your growth. We ensure your site can easily integrate with CRMs, intake forms, and case management systems.

Transparent Pricing & Dedicated Support

No hidden fees, no vague timelines, just clear pricing packages tailored to your firm’s needs. Plus, our dedicated support team ensures your website stays updated, secure, and optimized long after launch.

Global Clientele, Localized Expertise

With clients across the globe, we bring a global perspective while customizing solutions for local SEO, state-specific compliance, and your firm’s unique brand identity.

Innovation at the Core

From AI-driven chatbots to interactive client intake tools, we don’t just follow trends; we innovate so that your website stays future-ready and competitive.

Law firm website design cost with free consultation

Conclusion: Your Website is Your Best Lawyer

In today’s competitive legal landscape, your website isn’t just a digital presence; it’s your best lawyer working 24/7. While cost is an important factor, the real question is value: does your website bring you measurable returns in the form of qualified leads, stronger branding, and client trust?

At WeDoWebApps, we focus on ROI-driven website design tailored to law firms of every size. As a trusted website design company, we go beyond aesthetics to deliver functionality, scalability, and innovation, ensuring your investment translates into long-term growth.

Ready to attract more clients and elevate your law firm online? Fill out our consultation form today and let’s build a site that truly represents your practice.

Checklist: Is Your Law Firm Website Ready to Convert?

Before you invest in ads or SEO, make sure your website has the fundamentals that build trust and drive inquiries:

  • Mobile Optimised: Works seamlessly across all devices.
  • Clear CTAs: Direct visitors to book a consultation or contact you.
  • Attorney Bios: Showcase expertise and build credibility.
  • Client Reviews & Testimonials: Establish social proof.
  • Fast Loading Speed: Keep visitors engaged, not waiting.
  • Secure & ADA Compliant: Protect client data and ensure accessibility.

If your site is missing even one of these, it could be costing you clients.

Web Development Technologies That Every Business Should Know

Web Development Technologies for Scalable Websites

Are you also figuring out which web development technology to choose for developing your next website or project?

You are at the right place.

With so many options available for web development technologies, selecting the right one can be confusing and difficult, especially when you need long-term scalability, strong performance, and development efficiency.

As the leading website development company, we possess a comprehensive understanding of all web development tools, frameworks, and programming languages. We have put together a comprehensive guide to help you understand the technologies better.

In this guide, you will find:

  • List of front-end and back-end web technologies
  • Tools for modern app development and programming languages
  • Database and storage options
  • Trends that are effective for building a stronger app

Let’s begin with the fundamentals before getting into the complete tech stack.

Understanding Web Technologies

Web technology includes tools, languages, and systems needed to create webpages and web applications.

Here are some examples:

  • HTML is used to structure content
  •  CSS styles pages
  • JavaScript to make the webpage more appealing
  • Choose React, Angular, or Vue to create a modern front-end
  • Node.js, PHP, or Python to manage the server sites 

Web technologies work together to ensure that the website is functioning properly, is fast, and easily accessible.

Now, let’s just understand the importance of web technologies.

Why Web Technologies are the Backbone of Digital Experience

Web-based technologies are the main factor that helps in maintaining a better user experience. It helps in increasing the interaction towards your website and maintaining the security.

According to a Statista report, over 5.56 billion people, specifically more than 67.9% of the global population, were active internet users.

This makes web accessibility and performance more important to maintain a better business impression.

Examples of heavy dependence on web-based technologies are:

  • An eCommerce site that needs fast product filtering and checkout.
  • SaaS platform for handling dashboards and automation.
  • Content websites for fast loading of blogs and mobile responsiveness.

Using the best web development technologies will help in maintaining consistency and security across the platform.

And to be more clear, there are different types of web technologies available, which are classified based on different categories.

Classification of Web Technologies

The web technologies are classified into four different categories, which are listed below:

CategoryDescription
Front-EndInclude the technology that is used to maintain website visibility with user interactions.
Back-EndManage the server processes that include logic, database interaction, and performance.
DatabasesUsed to store, organize, and manage application data.
ToolsUtilities and platforms that support code writing, testing, versioning, and deployment.

This classification helps web developers to manage their workflow and select the right technology to fulfill the client’s project scope and goals.

Confused Between Frontend and Backend Choices

Front-End Web Technologies Lists

Front-End Web Technologies

Front-end web development technologies handle everything from user visibility to interaction, including maintaining the efficient layout and improving content loading time.

Selecting the right front-end technology stack is important to have a quick site load and understand how easy it is to maintain and scale a web application.

Front-End Technologies

TechnologyTypePurposeNotable Strength
HTML5MarkupStructure content on the webUniversally supported
CSS3StylingStyle web pagesCustomisable layout & design
JavaScriptScriptingAdd interactivityRuns in all browsers
ReactLibraryBuild UI componentsLarge ecosystem & fast
Vue.jsFrameworkProgressive UI developmentLightweight & easy to adopt
AngularFrameworkFull-fledged SPA developmentEnterprise-grade
SvelteCompilerCompile UI to optimised JSFast with minimal code
Tailwind CSSFrameworkUtility-first CSS stylingFast prototyping
TypeScriptSupersetTyped JS for large appsPrevents bugs early

Now let’s discuss each in more detail.

React

React is a JavaScript library which is developed by Meta. Used widely for building interactive user interfaces. Makes it easier to reuse code and manage component-based development. Includes strong features that maintain strong community support to develop scalable and modern applications.

Use case: Web apps like Instagram and Facebook use React to deliver fast, dynamic user experiences.

Vue.js

Vue.js is a progressive framework built with better user interfaces. It is lightweight, easy to learn, and suitable for managing small projects or single application development. Supports two-way authentication and has clean syntax that maintains the speed of development.

Use case: Small to mid-size business application for fast and scalable UI development.

Angular

Angular is an extensive framework backed by Google. Offer all the things that are needed to have robust application development and handling of HTTP client modules. Angular is often the best option when you need scalability, testing, and performance for your application.

Use case: Government portals and enterprise dashboards use Angular for their structure and maintainability.

Svelte

Svelte is one of the recent additions to JavaScript for managing complex processes.It included highly efficient components. And result in a faster page loading and cleaner code.

Use case: Ideal for projects where performance and small bundle sizes are priorities.

Tailwind CSS

Tailwind CSS is a utility-first CSS framework that allows developers to build designs without the need for HTML sheets. Improved the speed of prototyping and maintained design consistency.

Use case: Commonly used in startups and design-driven web apps for quick and scalable UI design

TypeScript

TypeScript is a superset of JavaScript that adds static typing. Helpful for catching bugs during the time of development. It easily handles the larger codebase and is a widely supported framework.

Use case: Widely adopted in enterprise apps and team-based development environments for its error prevention and tooling support.

By understanding these, you can easily look for the different specifications that are needed for your application type.

Back-End Web Technologies to Watch

Back-End Web Technologies

As the front-end technologies are used to maintain the design of the website, the back-end technologies are used to handle the server, databases, authentication, and overall logic of building an application.

The discussed technologies play an important role in ensuring the performance, security, and offering integration flexibility.

Back-End Technologies

TechnologyLanguage/FrameworkUse CaseKey Advantage
Node.jsRuntimeReal-time apps, APIsFast and scalable
DenoRuntimeSecure JS/TS backendsNative TS support
Python (Django/FastAPI)FrameworkAPIs, AI, web appsReadability and speed
PHP (Laravel)FrameworkCMS, business appsMature ecosystem
JavaLanguageEnterprise systemsScalable and secure
Ruby on RailsFrameworkMVPs, startup appsFast to build
.NETFrameworkWindows-based web appsMicrosoft-backed

To have more clarity, here are the detailed versions of each back-end web technology.

Node.js & Deno

Node.js is a popular framework among the different frameworks as it allows for managing the server-side. It is specifically known for its non-blocking and event-driven architecture. Ideal for building APIs, chat apps, and streaming applications.

Deno is part of Node.js with an improved version of Node’s architecture and better security.  It includes built-in tools like a package manager and test runner.

Use case: Effective for real-time applications like messaging platforms, collaborative tools, or API services.

Python (Django / FastAPI)

Python has a rich ecosystem that gives support for better backend technology.

Django is one of the best parts of Python’s framework that supports rapid development. Give support for features like admin panel, ORM, and user authentication.

FastAPI, on the other hand, is better for speed and modern API development. This is perfect for performance-sensitive applications with its supported async programs.

Use case: Business automation platforms, data-driven apps, AI-backed tools, and custom APIs.

PHP (Laravel)

PHP being the most widely used technology for content management systems and custom business applications.

Laravel is a modern PHP framework for web development that supports modern syntax and tools for authenticating and caching.

Use case: eCommerce websites, booking platforms, content-heavy portals.

Java

Java has been effective if you need an enterprise-grade level of application to have better performance, security, and scalability. Better platform to have long-term application development.

Use case: Financial applications, enterprise SaaS, legacy system modernization.

Ruby on Rails

Ruby on Rails is a full-stack framework, offers consistency and maintainsa  better approach. Allow the developer to build with minimal setup. And has been the strong choice for MVPs and fast rollouts.

Use case: Startup applications, internal tools, prototypes.

.NET

Built and supported by Microsoft, .NET is a powerful framework. It is the best option to build secure and scalable web applications. With C# as its primary language and compatibility with cloud-based deployments, it is used for developing advanced enterprise systems.

Use case: Custom business portals, government platforms, Microsoft-integrated services.

These back-end technologies support a wide range of development needs. From building a scalable enterprise application to adding a real-time system, this is the right choice for your application’s goals, budget, and technical team preferences.

Need reliable back-end support for your website

Web-Based Databases and Storage Technologies

Web-Based Databases Storage Technologies

Choosing the right database is important to build a scalable and secure web application. Having access to the right database and technology for development helps in visualization of data.

The database that you select will align with the type of your application handling, including load and how the data will be queried and updated.

Web-based technologies for data storage

DatabaseTypeBest Use CaseKey Feature
MySQLRelationalTraditional web apps, CMSEasy integration
PostgreSQLRelationalData-heavy, analyticsAdvanced features
MariaDBRelationalMySQL alternativeHigh performance
MongoDBNoSQLJSON-like document storageSchema-less
FirebaseNoSQLReal-time apps, mobile appsGoogle-supported

MySQL

MySQL is a widely used relational database that is used to manage blogs, eCommerce websites, and enterprise-level applications.

  • Best for CMS platforms like WordPress.
  • Works well with PHP and Apache.
  • Strong community and documentation.

PostgreSQL

PostgreSQL offers access to advanced features to maintain the performance of the application and ease in handling all types of data.

  • Best for data analytics or financial platforms.
  • Supports geospatial data and full-text search.
  • Highly secure and manage compliance.

MariaDB

MariaDB is a community-developed framework of MySQL. And it is an improved version with better speed and new features.

  • Compatible with MySQL tools and syntax.
  • Suitable for applications needing scalability.
  • Offers Galera clustering for high availability.

MongoDB

MongoDB is a document-based NoSQL database. It offers flexibility in development to make scalable web applications.

  • Ideal for projects with dynamic schemas.
  • Stores data in BSON (Binary JSON) format.
  • Integrate effectively with JavaScript and Node.js.

Firebase

Firebase is a cloud-based NoSQL database service. It is designed for development applications on a real-time basis, particularly for mobile.

  • Great for chat apps, live dashboards, and MVPs.
  • Provides built-in authentication and hosting.
  • Syncs data across devices in real time.

SQL vs NoSQL: How to Choose?

Relational SQL databases such as MySQL and PostgreSQL provide structured data management and are well-suited for application development with the defined schemas. It can easily manage the data with proper data handling and transactional support.

NoSQL databases like MongoDB and Firebase are basically best if you need flexibility, scalability, and rapid development. Suited for managing mobile app development, adding real-time features, and maintaining structured data.

When to choose SQL?

You choose SQL if you need to manage complex processes of finance or data analytics.

When to choose NoSQL?

For developing the distribution for handling work dynamics.

Must-Know Development Tools in Web Projects

Know Development Tools in Web Projects

When working, you require the web developers to work on modern projects, making sure that they are relying on a range of web development technologies for handling the coding, testing, debugging, and deployment processes.

These tools, which are discussed in this section, are the essential components that come under the web technologies list. These tools will help you in improving collaboration, productivity, and code quality.

Technologies for Web Development

ToolTypePurposeWhy It Matters
Git & GitHubVersion ControlCode collaboration & backupsEffective for team collaboration
VS CodeCode EditorWriting and debugging codeSupports lightweight coding and is extensible
NPM & YarnPackage ManagerManaging JS librariesStreamlined dependency management
PostmanAPI ToolTesting & monitoring APIsProvides clear visual of APIs and robust testing
Chrome DevToolsDebugging ToolInspecting and troubleshooting codeBuilt into the browser for convenience
WebpackBundlerOptimize assets for deploymentSupports speed and performance
BabelTranspilerUse modern JS with older browsersEnsures wider compatibility

To be clearer with the technologies for web development, here is a detailed explanation of all.

Git & GitHub

  • Used for tracking changes that are made in code and maintaining team collaboration.
  • Give the proper version control and reduce the chances of errors.
  • GitHub offers additional features that are essential to managing requests for issues.

VS Code, Sublime

  • Visual Studio Code is a popular choice for editing and debugging code.
  • Offers built-in Git support and larger extensions.
  • Sublime is known for its greater speed and usage with a minimum of resources to manage work.

NPM, Yarn

  • Both are managed under JavaScript.
  • NPM comes by default with Node.js, while Yarn offers faster installs and offline caching.
  • Ideal for managing third-party libraries in web applications.

Postman

  • Simplifies management of API testing and has a user-friendly interface.
  • Supports creating applications at a faster speed and automates the various tasks of testing.
  • Useful for debugging RESTful and GraphQL APIs.

Chrome DevTools

  • Built into the Chrome browser to inspect HTML, CSS, and JavaScript.
  • Allow for the simple management of performance, activity, and accessibility issues.
  • Key for debugging responsive layouts and script errors.

Webpack & Babel

  • Webpack bundles JS, CSS, and assets into optimized files before deployment.
  • Babel converts modern JavaScript into a better version for secure loading in browsers.
  • Help modern web apps run reliably across different environments.

These tools are not just an added option, but they are the main part of a technology tool for handling the development with flow. Whether you are managing APIs or debugging live pages, using the right web development applications can easily reduce errors and improve productivity.

When effectively using the given web technologies list for your next project, you can easily make sure code quality is proper and efficiently handle the deployment.

Build Smart, Deploy Faster

Emerging Web Technologies and Trends in 2025

Emerging Web Technologies and Trends

With the continuous development of various specifications, it is important to use emerging web technologies to shape the website and app that you are developing. The use of recent trends allows you to maintain a better experience and build apps at an accurate speed.

Below are the recent trends and technologies that need to be in your mind before you start building any application.

AI in Web Development

  • Offer assistance in code generation, debugging, and documentation.
  • AI will help developers write clearer and faster code.
  • Increase efficiency and reduce repetitive tasks.

WebAssembly (Wasm)

  • Allow to maintain the high performance for running code in different browsers.
  • Useful if you need speed in the app.
  • Support languages like C++, Rust, and more.

Serverless Architecture

  • Reduces the need to manage server infrastructure.
  • Platforms like AWS Lambda handle the backend automatically.
  • Ideal for lightweight APIs, real-time data, or managing microservices.

Progressive Web Apps (PWAs)

  • It can work offline, loads faster, and offers a native-app experience.
  • Easy to install and works with major browsers.
  • Used in the platforms like Twitter Lite and Starbucks.

Micro-Frontends

  • Breaks down frontend codebases by team or feature.
  • Help the developer team work independently without facing errors in code.
  • Encourages scalability in enterprise applications.

Blockchain/Web3 Integration

  • Make it easy to identify management, secure transactions, and handle contracts.
  • Commonly used for finance, real estate, and supply chain applications.
  • Offers with the longer potential to work in development processes.

Headless CMS Adoption

  • Smoothly separated backend and frontend content management process.
  • Allows for flexibility in delivering the content to the web or mobile.
  • Strapi, Sanity, and Contentful are widely adopted platforms.

Motion UI for Dynamic Experience

  • Minor animations and transitions guide user behavior.
  • Improves interaction input without overpowering the displays.
  • Used effectively in dashboards, product demos, and onboarding flows.

Accessibility & Compliance (WCAG)

  • Focus effectively on clear texts, ARIA labels, and keyboard navigation.
  • Follow some standard guidelines and development practices.
  • Companies prioritize accessibility for both legal and ethical reasons.

Cybersecurity-Centric Design

  • Built-in security from the start of development.
  • Involves input validation, HTTPS, authentication protocols, and secure data storage.
  • Proactive security reduces risks and builds user trust.

Staying updated with the current trends in web development technologies will allow you to build secure, accessible, and high-performing applications. These trends show where the web is headed and what developers must prepare for next.

How to Choose the Right Technologies for Web Development

Selecting the right technology for web development is important, but what is more important is that you plan the need as per your project and future growth plan.

Here is what you can do to learn about the different specifications needed.

Choose Based on Project Goals

If the purpose of your website is to guide, then the selection of web development technologies will be:

  • Lightweight technologies for simple websites or portfolios.
  • Use enterprise-grade web development technologies for complex platforms.

Assess Ecosystem and Community

For building a strong support network, use those that give long-term value.

  • Use the technologies for web development that maintain easy access to updated documentation and active communities.
  • Prioritize web development technologies with reliable third-party integrations.

Fit Within Budget and Timelines

Make sure that you consider the technology that fits well with your budget and time for development.

  • Look for the tools that offer faster deployment and fewer issues.
  • Use development technologies that reduce maintenance overhead.

Plan for Security and Scale

Choose solutions that grow with your business.

  • Make use of technology that is secure for managing complex application development processes.
  • Use scalable web development technologies that can handle user traffic spikes.

Choosing the right technologies for web development helps you build solutions that are stable, secure, and ready for growth.

Final Thoughts

The web technology stack that you choose has a direct impact on maintaining the digital presence, scalability, and user experience. By selecting efficient tools or exploring new web-based technologies, you can easily align with the different business goals and technical needs.

With the available variety of web development technology, making the right choice can be quickly challenging. But when guided by the corporate website development services, you can clearly set priorities and manage application performance while maintaining security, support, and scalability for long-term success.

Need help in selecting the right web development technologies

How a Small Business Marketing Agency Can Transform Your Brand

Introduction – The Modern Marketing Challenge for Small Businesses

Are you planning to launch a small business? Running a small business these days means taking on so many roles and responsibilities on your shoulders. Manager, salesperson, accountant, and often marketer, you might need to juggle more roles than ever.

Though digital platforms have brought endless opportunities for small businesses, they have also created several complexities. The shift in algorithms, overnight evolving trends, and your competitors – they seem to be everywhere at once.

You know that your product or your service is great, but presenting that well in front of the right audience, and that too consistently, is a real challenge.

To be honest, marketing these days is more than just putting up a website or posting on Instagram once a week. One needs to have a strategy, a strategy that revolves around their business goals, target audience, and a well-thought-out plan to grow over time.

And this is the phase where most of the small businesses get stuck. They either do not have the time, or don’t know where to start, or even worse, they have tried a few things that did not work, and now they are doubtful of everything.

Does any of that sound similar? If yes, you are not alone. The good news is that you do not need to do it all by yourself. With the right partner who understands small business marketing solutions, business growth becomes less stressful and more predictable.

This blog will walk you through:

  • Why hiring a marketing company personalized for small businesses is a wise move.
  • What important services do you actually need (and what not)
  • How to choose the right marketing agency that fits your goals and budget
  • What are the common pitfalls to avoid
  • And how WEDOWEBAPPS can help you simplify the process

Let’s walk through!

Why Partnering With a Small Business Marketing Agency is a Smart Move?

If you have taken all the roles on your shoulders, from operations to customer support to marketing, you are not alone, and you need to upgrade. Trying to manage your marketing all by yourself on top of everything can quickly go unsustainable. This is where a dedicated marketing agency for small business can help you bring about a difference.

Let’s discuss the reasons why outsourcing your marketing can be a strategic growth move and save your time:

1. You Get a Team of Experts for Less Than the Cost of One Hire

Hiring an in-house marketing executive with full-stack expertise in SEO, ads, content, design, and analytics is expensive and often unprofitable for small businesses. By hiring an agency, you get access to the whole team of specialists without the stress of full-time salaries, training, or extra tools.

2. You Full Focus on Your Core Business Operations

You need to put all your focus on growing your business, not figuring out the ad metrics and keyword research. A trusted marketing agency partner will help you handle the strategy and execution while keeping the process transparent with clear and actionable reports.

3. You Will Benefit With Proven Strategies (Not Guesswork)

A professional marketing company for small business brings data-backed strategies, tried-and-tested frameworks, and insights from their experience in multiple industries. With an agency, you can eliminate the costly trial-and-error that comes with doing it alone.

4. Your Marketing Escalades as You Grow

Launching a new product, entering a new market, or just trying to expand what’s working, a good agency can adapt your process and plan accordingly. As your goals expand, your marketing plans need to evolve with them.

5. You Will See a Measurable ROI

You do not need more posts or pretty ads; it is about getting results. The experienced agency will help you track real business outcomes, that are traffic, leads, conversions, and revenue.

Marketing these days is not optional; it is a necessity, but it is not sustainable to do it all alone. A digital marketing agency for small business can become the driver of a chariot for you, helping you grow with clarity, strategy, and momentum.

Must-Have Marketing Services for Small Businesses (and Why They Matter)

For every small business, having a 20-channel campaign or a six-figure marketing budget is not a necessity. However, every small business must have the right mix of marketing services personalized to where they are and where they want to reach.

Go through the below must-haves your business needs to stay around, compete, and grow in today’s digital market.

1. Local SEO & Google Business Profile Optimization

Do you want to appear at the top when someone searches “mobile app development company near me” or “best digital marketing company in USA”? This is where local SEO works.

  • You need to optimize your website and content for the local keywords.
  • Claim and update your Google Business Profile.
  • Ask for online reviews and respond to them positively.
  • Get your business listed on the local directories.

What Would be the Result? You will show up in local search results and maps, exactly where your customers are looking.

2. Social Media Marketing and Paid Ads

More than just likes, social media is where your customers’ buying decisions begin.

  • Posting consistently will help you build brand trust and engagement.
  • Paid Ads on Facebook, Instagram, and LinkedIn will help you reach your targeted audience fast.
  • Retargeting will bring back visitors who did not convert in the first attempt.

Outcome: You stay at the top of the minds of customers and drive traffic where it matters, i.e., your website, store, or inbox.

3. Content Marketing That Educates and Converts

Different types of content like blogs, videos, case studies, guides, etc, build authority and keep people coming back.

  • Regular blog posts will help you with SEO and long-term visibility
  • Video marketing can help you increase engagement and social shares
  • Posting education content will position you as a go-to expert

As a result, your business will become a trusted resource and not just another seller.

4. Email Marketing and Automation

Your email list is a gold mine if you know how to use it right.

  • Email people with helpful newsletters, offers, and updates.
  • Set up automations. Customers should get welcome emails, cart reminders, and review requests through this automation.
  • Divide your audience into categories so the right people get the right message.

Outcome: You build relationships that turn one-time buyers into repeat customers.

5. Branding and Design That Makes You Memorable

Your business logo is just one aspect of your brand; it is more about how people feel when they interact with your business.

  • Use a consistent look, tone, and message across your online platforms to build trust
  • Create a good website design to make your website feel established, even if you are just getting started.
  • There should be the same visual language across your website, social profiles, and emails.

As a result, people will remember you and choose you over your competitors.

The above marketing services together form the foundation of sustainable small business growth. It is not important to start with all of them, but ignoring them completely can reduce the visibility of your business in a noisy market.

How to Choose the Right Marketing Partner for Your Business

We understand, decision-making is very difficult with hundreds of agencies out there in the market promising “#1 rankings” or “10x results”. But the truth is that not every agency is right for a small business. You need to find a marketing partner who understands your stage, your goals, and your limitations, and build around that.

Below, we will talk about what to consider when choosing the right marketing company for your small business:

1. Small-Business-Specific Experience

Just check whether the agency is working with small businesses or not. Don’t just choose the enterprise brands that have unlimited budgets.

What to Ask: “What results have you achieved for other small or local businesses?”

2. Customized, Not Cookie-Cutter Solutions

Your business is unique, so should be your marketing. Try to avoid agencies that offer fixed packages without even understanding your goals.

Ask: “Will you build a strategy around my audience and budget?”

3. Multi-Channel Expertise

Look for an agency that has multi-channel expertise, i.e., it can think beyond one platform. A great marketing strategy is integrated. How? SEO works with content, which together works with social, and all three together feed into email, and so on.

What to Ask: “Which channels are you specialized in, and how do they work together?”

4. Transparency in Communication and Reporting

You shouldn’t be guessing what is happening behind the scenes; you MUST know it. A good social media marketing agency for small business will keep you informed with simple and honest updates.

Ask: “What kind of reports will I receive?” or “How frequently will we meet or communicate?”

5. Clear ROI Tracking

Marketing for a business is an investment. You deserve to know what your business is getting you back.

Ask: “How will you measure success, and how soon can we expect results?”

Red Flags to Avoid While Partnering With a Small Business Marketing Agency

Eliminate a company if:

  • They give vague answers or unrealistic promises (“We will get you to #1 on Google overnight!”)
  • The company does not mention the strategy or plan; they only talk about tactics
  • They make you sign long-term contracts with no flexibility
  • They do not give clear pricing or process documentation

Choosing the right business-to-business marketing agency isn’t just about flashy portfolios – it’s about finding a strategic partner who gets your vision, understands your customers, and delivers measurable value.

Next, we’ll go over some common marketing mistakes small businesses make – and how to avoid them.

Common Mistakes Small Businesses Make With Their Marketing

Even the most passionate small businesses may make mistakes when it comes to marketing. And the truth is that these mistakes are very common yet very expensive. However, you can avoid every one of those mistakes with the right guidance and strategy.

Below, we have listed the most common mistakes and how you can fix them:

1. Doing Too Much at Once Without a Strategy

The most common mistake you might be making as a small business is to try to be everywhere, Instagram, LinkedIn, YouTube, and Google Ads, without a clear plan. This often leads to burnout or poor results.

How do you fix this?

Focus only on the platforms where you can actually get your kind of audience, and build a strategy underlining clear goals before scaling.

2. Ignoring Local SEO

For a small business, local SEO is a game-changer. But many of the businesses still do not optimize their Google Business Profile, gather reviews, or target the city-specific keywords.

How to Fix This?

Focus on local SEO and treat it as digital real estate. If you do not claim it, your competitors will.

3. Posting on Social Platforms Without Purpose

Random posts without any purpose will not help you build a community or convert leads. Also, inconsistent or off-brand content can hurt your business’s credibility.

How do you fox this?

Create a content calendar with proper themes, goals, and consistent visual branding.

4. Choosing the Cheapest Marketing Option

Choosing the cheapest marketing option, often known as bargain marketing, means using recycled templates, no strategy, and zero results. To you, what looks like a deal NOW may cost you more in the long run.

How do you fix this?

Along with the price, also give priority to value. A smart, ROI-focused agency pays for itself.

5. Not Tracking Results (or Not Knowing What to Track)

If you do not measure what matters, how would you know what is working for your business? Several small businesses invest money in marketing without looking at the ROI.

How do you fix this?

Set clear metrics (traffic, leads, conversions), and review the marketing performance every month.

These mistakes are the most common ones, but can be easily avoided with small business branding services in your corner.

DIY Marketing vs Hiring an Agency: What is the Real Difference?

When you are running a small business, every expense you make matters, and it is common to think, “I will handle the marketing myself for now.”

And in the initial days of your business, this might work. But as your business grows, DIY marketing can cost you more lost opportunities.

Let us now look at the real differences:

DIY Marketing vs Hiring an Agency

A simple side-by-side comparison:

FactorDIY ApproachWith a Marketing Agency
ExpertiseLimited to your own learning curveFull team of SEO, social content, design, and ads pros
Time InvestmentHigh, because you alone are researching, creating, posting, and analyzing.Low, because you focus on your core business operations, while the experts handle the marketing part
Tools & TechYou can only use free or basic toolsPremium tools including analytics, automation, and design
ConsistencyOften inconsistent due to a shorter timeScheduled and monitored campaigns across channels
ResultsUnpredictable, trial-and-error drivenStrategy-led with measurable KPIs and reporting
ScalabilityLimited, because it is hard to expand the efforts aloneDesigned to grow with your business and budget

When Does DIY Make Sense?

  • When you are just getting started or want to learn
  • You have more time, but a limited budget
  • You are just testing strategies with the low-risk channels (eg, organic social)

When You Should Hire an Agency:

  • You want to grow faster, not just ‘get by’
  • You do not have the time to learn every platform, or you do not want to do it.
  • You are ready for consistent, professional marketing that delivers ROI.

Decision:

You can choose DIY for getting off the ground, but once you are serious about scaling your business, whether it is generating more leads, increasing brand awareness, or driving online sales, a small business marketing agency can help. It will bring strategy, structure, and execution – all that your business needs.

Why WEDOWEBAPPS Understands What Small Businesses Actually Need

At WEDOWEBAPPS, we have worked with startups, solo entrepreneurs, and scaling small businesses across multiple industries. And in all these years, there is this one thing that we have learned:

“Small business owners do not need more showoff. They need clarity, consistency, and real outcomes.”

We are not here to make any fancy promises or overwhelm you with jargon; instead, our goal is to become your marketing partner who can help you go from “trying to keep up” to “actually scaling with confidence”. Here is what sets WEDOWEBAPPS apart:

We Build Strategy Around Your Business, Not the Other Way Around

We do not work with a one-size-fits-all approach. No matter if you are a local store, a SaaS startup, or a service provider, we will personalize your marketing plan after studying your audience, goals, and your growth pace.

A Full Team Behind You (Without Hiring One)

Working with WEDOWEBAPPS gives you access to content creators, SEO specialists, social media experts, creative designers, and digital strategists, all in one team working together to get your brand moving forward.

Clear Reporting and Real Conversations

We follow a transparent process to let you know what is happening, why it matters, and how it is performing. We keep you updated with everything so that you can make smart decisions with confidence.

Here is what our clients say:

“WEDOWEBAPPS did not just help us revamp our online presence, they completely changed how we attract and convert customers. We finally have a marketing strategy that works for our business!”

If you want to just start out or level up your business, we are ready to help you grow in a smart and sustainable way.

worried about small business growth

Conclusion: The Growth of a Small Business Does Not Need to Be a Guesswork

Small Business Marketing solutions do not need to be a constant game of trial and error. When you have the right social media marketing agency by your side, an agency that understands the realities of small businesses, speaks your language, and delivers the results that you want, the game turns to your court.

As a small business:

  • You do not need to chase every trend.
  • You do not need to be the master of every platform.
  • And certainly, you do not need to do it all alone.

At WEDOWEBAPPS, we offer online marketing services for small businesses, which can help you make everything easier, smarter, and more effective for a business like yours. No matter if you are starting fresh or ready to scale, we are here to create a marketing strategy that fits your business goals, target audience, and your budget.

grow your small business with less stress and more strategy

How to Use AI eCommerce Personalization to Boost Business Sales

AI Personalization in eCommerce Web Development 

AI is not just transforming eCommerce, it is personalizing it.

In today’s highly competitive digital market, being unique and standing out is not about offering more products; it is about offering smarter, more personalized experiences. That is exactly what AI eCommerce personalization allows you to do. 

With features like AI-powered product recommendations, intelligent and active chatbots that guide the shoppers just like a real assistant, artificial intelligence is redefining how brands connect with their customers. In fact, studies show that 80% of the online shoppers are more likely to purchase from brands that deliver personalized experiences. 

So, what does this mean for your business?

It means that if you are still relying on static product pages and one-size-fits-all type promotions, you are not just lacking behind, you are leaving on the table. The smartest eCommerce brands are using AI-powered personalization in eCommerce to understand customer behavior, deliver real-time recommendations, and optimize every step of the buyers’ journey.

Businesses investing in AI-powered personalization often rely on advanced AI development services to build recommendation engines, automate customer segmentation, and improve shopping experiences across ecommerce platforms.

In this guide, we will talk about how to:

  • Use AI to improve the customer experience 
  • Implement personalization strategies that convert
  • Understand real-world use cases and success stories
  • Decide whether to build AI tools or integrate existing ones

Whether you are a startup, a growing D2C brand, or an enterprise looking to scale, AI-powered eCommerce personalization is no longer a ‘nice to have’, it is a must to have, it is your next competitive edge.

Want to build a smart, personalized eCommerce platform? Talk with an eCommerce development company.

What is AI-Powered Personalization in eCommerce?

Imagine that you walk into a store and the shelves start rearranging themselves based on your preferences, past purchases, and your current mood. That is what AI-powered personalization in eCommerce aims to do, but digitally. 

At its core, this approach makes use of artificial intelligence and machine learning algorithms to collect, analyze, and take action on customer data in real-time. The outcome? A personalized shopping experience that adapts to every visitor. 

How AI Improves Customer Experience

AI does not just automate, it personalizes at scale. Here’s how:

  • It learns from the customer behavior patterns like clicks, searches, purchase history. 
  • It predicts preferences and offers personalized suggestions.
  • It responds to real-time actions, like exit intent or cart abandonment, with dynamic messages and offers. 

Such intelligent interactions make buyers feel understood and valued, which is the ultimate secret behind higher engagement and loyalty.  

How Can Machine Learning Change Customer Experience

Machine Learning lets the system get smarter over time. Let’s say for an example,

  • If a customer is repeatedly skipping certain brands or price points, the algorithm filters them out.
  • If someone prefers to shop more during the sale, the system is trained to push discount-based notifications the next time the buyer comes to the eCommerce website. 

That is the power of AI eCommerce personalization, which means that it keeps on improving and learning each time someone interacts with your range of eCommerce services

What Does This Look Like in Action

  • AI-powered product recommendations, which shows shoppers the most relevant items first. 
  • Personalized email content, providing dynamic subject lines and offering based on browsing history.
  • AI chatbots, assisting your customers 24/7 with smart, contextual responses.
  • Personalized landing pages, serving different home pages to different segments. 

Unlike traditional segmentation, AI creates micro-personalized experiences, based on individuals, not just group behavior. 

In the next section of this blog, we will explore the real-world benefits of this approach and how it translates to higher conversions, better customer satisfaction, and scalable growth.

Benefits of AI and Personalization in eCommerce

In the digital-first world, delivering personalized experiences is not just a competitive edge, it is a customer’s basic expectation. With AI-powered personalization in eCommerce, you can meet these expectations in speed, precision, and measurable results. 

Below is how AI improves the customer experience and your bottom line:

1. Increased Conversion Rates

When shoppers are shown products that are personalized to their needs and preferences, they are more likely to buy. 

  • According to McKinsey, personalization can boost sales by 10% to 15%

How it Works:

  • Display AI-powered product recommendations based on browsing and buying history 
  • Trigger personalized offers when someone is about to leave the website or has idle time
  • Offer smart filters based on user intent.

2. Higher Average Order Value (AOV)

With the right AI logic, upselling and cross-selling become smooth.

How to use AI to improve the customer experience and boost AOV:

  • “Complete the look” suggestions on fashion product pages. 
  • Personalized bundles and volume-based discounts.
  • Recommending complementary items right before the checkout. 

Retailers using product recommendations report a 50% increase in AOV, according to Salesforce. 

3. Stronger Customer Retention and Loyalty

When your eCommerce website remembers preferences and behaviors, customers are more likely to return back to your website. 

AI does this by:

  • Sending behavior-based reminders and restock alerts 
  • Personalizing email campaigns and homepages 
  • Creating dynamic loyalty programs based on purchase frequency. 

This is not just AI eCommerce personalization, this is experience building.

4. Better Marketing ROI

Stop wasting ad spend on your guesswork. AI segments your audience based on real-time behavior and personalizes campaigns accordingly.

Examples:

  • Personalized email campaigns with dynamic product blocks. 
  • Retargeting ads that show products a user actually considered.
  • A/B tested headline optimized via AI. 

5. Enhanced Shopping Experience (UX)

Today’s shoppers expect Amazon-like intelligence. If your store feels static or clunky, you risk shopping cart abandonment. 

AI delivers a smoother user experience through:

  • Visual and voice-enabled search 
  • Intelligent site navigation 
  • Smart chatbots for instant support 

How can chatbots improve customer service?

By handling queries 24/7, recommending products, and even helping with returns – all without the wait.

6. Scalability Without Compromising Personalization

Unlike manual creation, AI handles millions of unique users, simultaneously and intelligently. Whether you have 100 OR 1 million SKUs, AI ensures each customer sees what matters to them. 

Quick Recap – What You Gain from AI eCommerce Personalization

  • More conversions
  • Larger orders per customer 
  • Higher return visits 
  • Smarter marketing 
  • Smoother shopping experience. 

Up next, we will look at real-world examples of AI-powered personalization and how global brands are already leveraging it for explosive eCommerce growth. 

Real-World Use Cases of AI in eCommerce

So far we have explored the what and why of AI personalization. Now, let’s bring it to life with real-world examples that show how to use AI to improve customer experience and drive serious results. 

Here is how brands are leveraging AI eCommerce personalization to improve engagement, increase conversions, and scale efficiently. 

1. Boosting Conversions and Engagement

A. AI-Powered Product Recommendations 

The gold standard of personalization. Show customers exactly what they are looking for, sometimes before they even know it. 

How it works:

  • Based on browsing, purchase, and behavioral data 
  • Updates dynamically in real time 
  • Can be placed on home page, product pages, cart, or emails 

This is the best way AI improves the customer experience, by removing friction and adding value. 

B. Chatbots that Actually Help

Gone are the days with frustrating bots. Today’s AI chatbots use natural language processing to:

  • Answer product and shipping questions
  • Make product suggestions 
  • Upsell or cross-sell intelligently
  • Handle returns or order tracking

How can chatbots improve customer service?

By offering instant, context-aware support, reducing load on human teams, and boosting human satisfaction.

C. Voice and Visual Search

Some shoppers would rather say “red running shoes under $50” than click 10 filters.

AI allows:

  • Voice-enabled product search
  • Visual search (upload a photo, find a match)

These updates streamline the shopping journey, especially on mobile. 

2. Increasing Sales and Profitability

A. Dynamic Pricing

AI tools monitor demand, inventory levels, and competitor pricing to adjust prices in real-time. 

Benefits:

  • Maximize profits without manual work
  • Launch flash sales instantly
  • Stay competitive without undercutting value. 

B. Personalized Promotions and Discounts

AI segments your audience and delivers targeted offers based on:

  • Purchase history
  • Browsing behavior 
  • Cart status (e.g., offer discount on abandoned cart)

It is not just about offering discounts, it is about offering the right one to the right customer.

3. Streamlining Operations

A. Inventory Forecasting

AI predicts stock requirements by analyzing trends, seasonality, and real-time demand. This helps:

  • Prevent stockouts and overstocking 
  • Optimize warehousing and logistics 
  • Reduce dead stock costs

B. Order Fulfillment Optimization

By analyzing shipping data and patterns, AI can:

  • Assign the best fulfillment center for each order 
  • Suggest the fastest and cheapest shipping method 
  • Improve delivery accuracy 

C. Fraud Detection and Risk Management

AI systems can flag unusual behaviors like:

  • Suspicious transactions 
  • Rapid address changes 
  • Multi-country order attempts from same IP

This helps reduce chargebacks and build customer trust. 

Mini Case Study: Fashion Commerce

A fast-growing fashion brand partnered with WEDOWEBAPPS to implement AI-powered personalization features including:

  • Smart product recommendations 
  • Dynamic pricing based on customer segments
  • Behavior-triggered chatbots and popups.

Results within 90 days:

  • +32% repeat purchases.
  • +28% increase in average order value
  • 2.1x return on marketing investments 

Client Said: The AI integration made our customer journey feel curated and seamless. WEDOWEBAPPS delivered more than we imagined. 

Coming Up Next: How top brands use AI in eCommerce and how you can implement similar systems

How Top Brands Use AI to Win in eCommerce

You don’t have to be Amazon to benefit from AI eCommerce personalization, but learning from the giants is never a waste, as this shows the potential of eCommerce development companies. These brands are setting the standard by using AI not just to sell more, but to create experiences that keep customers coming back. 

Here is a look at how some of the world’s most successful eCommerce companies are using AI to improve customer experiences and sales.

1. Stitch Fix – The Personalization Powerhouse

Stitch Fix uses machine learning to deliver fashion choices personalized to individual customer styles and fit preferences. Their AI algorithms analyze body type, style choices, climate, and even user feedback to curate every clothing box.

Takeaway: Personalization goes beyond product recommendations, AI can power entire business models. 

2. Sephora – Virtual Try-Ons and AI Chat

Sephora has blended AI-powered product recommendations with augmented reality through their Virtual Artist tool. Customers can try on makeup virtually and get personalized recommendations based on skin tone, preferences, and purchase history. 

Bonus: Their chatbot provides smart beauty tips and guides users to the right products instantly. 

3. Amazon – Predictive and Personalized at Scale

Amazon’s secret weapon is its AI. From personalized homepages to “Customers also bought” recommendations, Amazon uses AI across the entire customer journey:

  • Anticipating what users might need next 
  • Suggesting bundles 
  • Even optimizing fulfillment with predictive shipping

Result? 35% of Amazon’s sales comes from their AI recommendation engine. 

4. Walmart – Smart Inventory and Fulfillment

Walmart integrates AI to manage inventory across thousands of stores and warehouses. Their algorithms predict demand, prevent overstocking, and streamline restocking. 

They also use AI to improve customer support through voice assistants and smart kiosks. 

5. Target – Dynamic Pricing for Competitive Wins

Target uses AI to adjust pricing in real time, matching competitor prices and optimizing margins based on regional demand and seasonality. 

Impact: Higher conversion rates without devaluing products through excessive discounts.

You Can Do This Too – Without Amazon’s Budget

Big brands spend millions, but small and mid-sized businesses can use the same AI principles with smarter implementation. That is where we come in. 

hiring in house AI team

Next up, we’ll walk through 7 practical steps to implement AI in your eCommerce business, even if you’re starting from scratch.

7 Steps to Implement AI and Personalization in Your Store

If AI feels too complex, or “only for the big giants”, you are not alone. But the truth is: you do not need a team of data scientists to unlock the power of AI eCommerce personalization. 

Below is a simplified, result-driven roadmap to get started:

1. Define Your Goals

Start with what you want to improve:

  • Do you want more conversions?
  • Higher average order value?
  • Lower bounce rates?
  • Smart support?

This will determine whether you need AI-powered product recommendations, chatbots, dynamic pricing, or all of the above. 

2. Audit Your Tech Stack

You need a solid tech foundation to support AI:

  • Is your eCommerce platform flexible enough (Shopify, WooCommerce, Magento, Headless?)
  • Can it integrate with AI tools?
  • Is your product/customer data clean and accessible?

Pro Tip: A customer or headless eCommerce platform offers greater flexibility for AI-driven features. Businesses using Shopify for AI-driven personalization often require expert Shopify development to integrate recommendation engines, customer behavior tracking, and AI-powered shopping experiences effectively.

3. Choose the Right AI Tools – or Build Custom

Based on your goals, follow eCommerce site best practices and select from:

  • Third-party AI tools (Clerk.io, Vue.ai, Tidio, etc)
  • Custom solutions that scale with your brand

Some features like AI-powered product recommendations and chatbots can be plug-and-play. Others may require deeper development. 

custom AI development

4. Start Small, Scale Smart

You do not need to transform anything at once. 

Begin with:

  • Product recommendations on product pages and cart
  • Chatbot on your homepage or help desk
  • Personalized banners or pop ups based on user behavior

Test, analyze, and then expand. 

5. Integrate With Your CRM, Email, and Analytics

To make the most of AI, connect it with:

  • Customer Relationship Management (CRM)O tools 
  • Email Marketing Platforms (for personalized campaigns)
  • Google Analytics or heatmaps to measure behavior shifts

This helps AI collect deeper behavioral insights and personalize smarter. 

6. Monitor and Optimize Regularly

AI learns best when guided:

  • Use A/B Testing to measure performance
  • Monitor key KPIs (conversion rate, AOV, bounce rate, etc.)
  • Feed successful behaviors back into the AI engine.

Retailers that optimize personalization see 6-10% revenue lift, which is 2 to 3x faster than their competitors. – Stated by Boston Consulting Group

7. Stay Ethical and Privacy Compliant

AI uses customer data, therefore always:

  • Get consent for tracking and cookies
  • Comply with GDPR, CCPA, and other privacy laws
  • Let users manage preferences or opt out.

Being transparents builds long-term trust and better results. 

Implementation does not need to be overwhelming – The key is taking smart steps, using the right tools, and partnering with experts who can align AI personalization with your business strategy. 

AI implementation

Do you want a team that handles AI implementation from planning to optimization? WEDOWEBAPPS – an eCommerce development company, would love to help.

Next, let’s explore whether you should build or integrate AI features, and how to choose the path that makes the most sense for your brand and budget.

Now we’re getting into decision-making territory, which is key for conversions. Next section helps the reader answer:

Should I use existing AI tools or invest in custom-built solutions?

Should You Build or Integrate?

When it comes to adopting AI-powered personalization in eCommerce, one major question stands out:

Should you use third-party AI tools or build your own AI solutions from scratch?

Well, there is no one-size-fits-all answer, but in the next section we will help you decide based on your goals, budget, and tech maturity. 

Option1: Integrate Existing AI Tools

This is ideal for:

  • Small to mid-sized businesses 
  • Quick launches with lower investment 
  • Teams without in-house developers 

You can plug AI into your store using tools like: 

  • Clerk.io or Vue.ai for AI-powered product recommendations 
  • Tidio or Landbot for AI chatbots 
  • Optimonk or Persado for personalized pop ups and messaging 

Pros:

  • Fast to implement
  • Low upfront costs 
  • Often comes with dashboard and support 

Cons:

  • Limited customization
  • Pay-as-you-scale pricing can get expensive
  • Integration may feel disjointed on custom platforms

Option2: Build Custom AI Personalization Solutions

Ideal for:

  •  Brands with complex product catalogs 
  • Businesses scaling rapidly 
  • Teams wanting total control over features, data, and performance. 

You can create:

  • Custom recommendation engines 
  • AI-driven content generation and segmentation
  • Machine learning model trained on your own customer data 

Pros:

  • Full control and customization
  • More cohesive experience across the platform 
  • Better long-term ROI for high-volume stores 

Cons: 

  • Requires more time and investment 
  • Needs experienced development and data science teams 
  • Ongoing maintenance and optimization needed.

So, what is right for you?

NeedGo With
Launch quickly with minimal developmentOff-the-shelf AI tools
Unique UX and total controlCustom AI development
Need hybrid (start simple, grow)Mix of both

At WEDOWEBAPPS, we help you evaluate, integrate, or build the right AI solution – customized to your business, your platform, and your future goals. 

Whether you need a quick-start integration or a fully custom AI engine, we are here to 0architect it with performance, personalization, and profit in mind. Book your free AI consultation. 

Next in this blog, we will look at why custom development gives you a long-term edge, especially when you are serious about scaling with AI. 

Why AI Works Better with Custom eCommerce Development?

If you are serious about leveraging AI-powered personalization in eCommerce, you need more than just plug-and-play tools; you need control, flexibility, and scalability.

That is exactly what custom eCommerce development brings to the table. 

1. Off-the-Shelf AI Has Limits

While third-party tools are great to get started, they often:

  • Can’t adapt to unique business logic
  • Limit how deeply you can personalize 
  • Don’t scale well with high traffic or complex workflows 
  • Create data silos, hurting the accuracy of personalization 

Example: Imagine trying to apply dynamic pricing for a 3-tier wholesale system. Most out-of-the-box tools just don’t support that level of nuance. 

2. Custom Development Aligns AI With Your Business Strategy

With a custom-built eCommerce website, AI is not just an add-on – it becomes a part of your platform’s DNA. 

That means:

  • Product recommendations based on real-time inventory and user behavior 
  • AI chatbots trained on your customer data and tone
  • Personalized campaigns that adapt based on past and predictive behavior 

You also get the freedom to:

  • Integrate APIs from multiple AI vendors
  • Train your own machine learning models 
  • Automate backend operations (order fulfillment, shipping, returns)

Large-scale online stores implementing advanced AI personalization often depend on robust Magento eCommerce development to handle complex product catalogs, customer segmentation, automation, and enterprise-level customization requirements.

3. Performance + Personalization = Profit

A custom eCommerce platform helps you:

  • Optimize load speed and UX for AI-driven pages 
  • Fine-tune user journeys with contextual personalization 
  • Increase Average Order Value (AOV), retention, and customer lifetime value (CLV)

A Quick Case Study

One of our retail clients increased their conversion rate by 23% in 90 days after we integrated a custom AI engine with their headless Shopify setup. 

The leveraged AI for:

  • Personalized landing pages
  • Real-time inventory-based product carousels 
  • Automated customer segmentation for email and SMS. 

Let Us Build Your Smart Commerce Future

We specialize in developing custom, AI-ready eCommerce platforms that grow with your business. From Magento and Shopify to headless setup with Next.js, our expert eCommerce developers and AI consultants help you plan, design, and deploy a system that delivers real, measurable impact. 

AI and Personalization Trends to Watch in 2025 and Beyond

The future of eCommerce is not coming, it is already here and is powered by AI and hyper-personalized experiences. 

Below are the top trends shaping how brands engage, convert, and retain customers in 2025 and beyond:

1. Conversational Commerce with GenAI

AI chatbots have evolved from scripted responses to context-aware, emotion-sensitive virtual assistants.

Tools like ChatGPT and Claude AI are being trained on brand tone, customer FAQs, and product catalogs to offer near-human conversations 24/7.

Expect chatbots to take over not just support, but product discovery, cross-selling, and post-purchase journeys. 

2. Predictive Product Discovery

Why wait for customers to search when AI can predict what they want?

Machine learning + behavioral data is powering:

  • Predictive search suggestions 
  • “Before you ask” product placement 
  • Geo-intent targeting 

This can reduce bounce rates by up to 20% according to McKinsey. 

3. Dynamic and Personalize Pricing

AI now allows real-time price optimization based on:

  • Customer type 
  • Time of day 
  • Inventory availability 
  • Competitor trends 

 Price is no longer static, it is a smart variable in the personalization engine. 

4. Hyper-Segmented Email Campaigns 

Forget broad email blasts. AI helps you create micro-targeted campaigns with:

  • Dynamic subject lines
  • Personalized offers based on CLV
  • Send-time optimization

According to Campaign Monitor, this can boost open rates by 26% and revenue by 760%

5. Visual and Voice AI Integration 

Voice search and visual recognition engines are becoming table stakes.

Consumers now expect to:

  • Search with a photo 
  • Ask Alexa for personalized offers 
  • Try products virtually (AR/VR + AI)

Retailers using visual/voice AI see higher mobile engagement and lower cart abandonment.

6. Privacy First Personalization

As third-party cookies fade out, AI-driven personalization will rely more on:

  • First-Party Data 
  • Contextual Signals 
  • Zero-Party Data (voluntarily shared preferences)

Transparency, consent, and ethical AI usage will define which brands consumers trust. 

Brands that embrace AI-powered personalization today will define the eCommerce leaders of tomorrow. 

Future Ready AI Expert

Ready to Build Your AI-Powered eCommerce Experience?

AI and personalization are no longer nice-to-have, they are non-negotiables for any eCommerce business that wants to stay competitive in 2025 and beyond. 

So ask yourself:

  • Do you want more conversions without increasing ads spend?
  • Are you ready to deliver Netflix-level shopping personalization?
  • Would your customers benefit from predictive product discovery and AI-powered support?

If the answer is yes, then you need more than just plugins, you need a strategic eCommerce development partner who can align yours eCommerce goals with AI.

Why Partner With WEDOWEBAPPS?

At WEDOWEBAPPS, we help businesses of all sizes, from startups to enterprise brands, transform their online stores with:

  • Custom eCommerce Website Development – Customized UI/UX, scalable architecture, and secure payment gateways.
  • AI and Machine Learning Integration – From product recommendations to dynamic pricing and chatbots.
  • Ongoing Optimization and Support – We do not just launch. We help you grow and scale with confidence. 
  • Proven Results, Global Clients – We have helped businesses in the USA, UK, UAE, and India turn AI Investments into real ROI. 

Let’s Build the Future of Your Store

Don’t let competitors out-personalize you. Don’t let customers bounce to someone who gets them. 

Let’s build a shopping experience so intelligent that it feels like it was made just for every individual visitor. 

Book Your Free AI eCommerce development consultation today. Let’s explore how we can help you unlock growth through personalization.