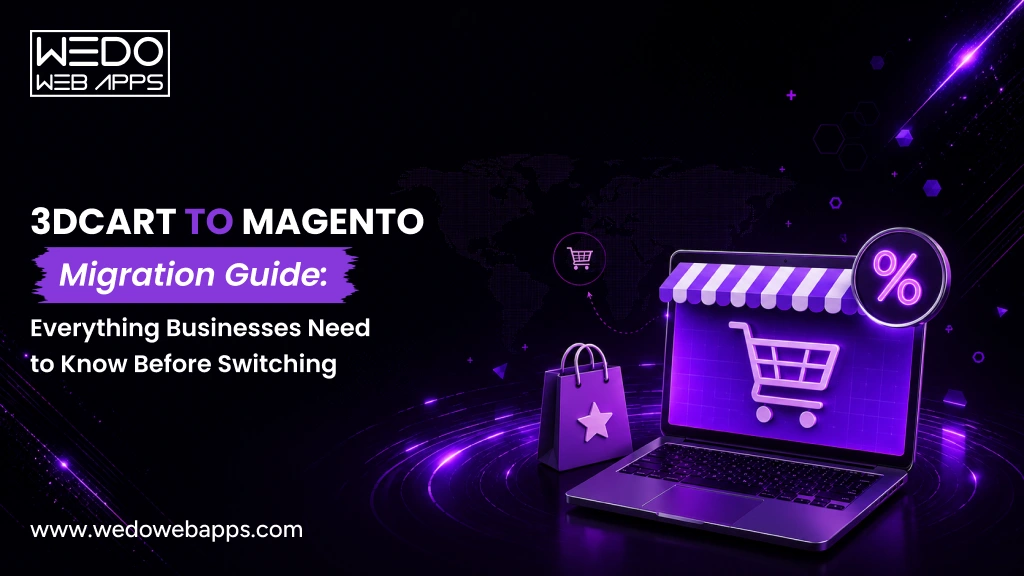
skip to content

3D Cart To Magento 2 Migration: Detailed Guide to Migrate Successfully

Are you looking for an eCommerce platform offering robust customization, advanced scaling, superior support, and SEO? If so, Magento 2 might be a good fit for your business. Although the 3D cart is an effective eCommerce platform, its limitations can frustrate users. With its advanced features and capabilities, Magento 2 addresses these issues, thus making it the ideal choice for businesses that wish to differentiate themselves from the competition and increase sales online.In this blog, we will understand how to migrate from 3D cart to Magento 2 successfully without breaking your site, along with a detailed Magento migration planLet’s get started. 

Why Migrate 3Dcart To Magento 2 CMS?

The Magento 2 administration panel has an intuitive interface and robust configuration controls. Because of Magento’s scalability, scalability, and extensive feature set, the software has been gaining popularity rapidly. This platform best suits businesses with complex websites with thousands of categories and products. Moreover, it offers advanced features like page building and drag-and-drop functionality. In 3DCart, users have limited customization options, which makes it difficult to stand out from competitors while creating a unique online store. In contrast, Magento 2 offers users more extensive customization options, enabling them to create a fully personalized online store with unique design, functionality, and user experience.Moreover, 3DCart has limitations regarding scalability, which can hinder the growth of large businesses. Magento 2 is a highly scalable platform that is capable of handling large amounts of traffic and data, making it an ideal choice for businesses of all types. The advanced scalability features of the system allow users to manage their online store’s growth without experiencing performance problems.Since 3DCart has so many limitations over Magento, store owners may prefer to migrate to Magento 2 and also check best Magento migration services in the USA.  

Comparison Between 3Dcart And Magento 

Currently, Magento has171,162 websites in its ecosystem, and 3dcart has less than 3.2k.Due to its limited free options, 3dcart is far behind Magento in terms of the Top 10K Sites, the Top 100K Sites, the Top 1M Sites, and the Entire Web. Here are the diagrams illustrating our favorite e-commerce platform’s superiority:Market share by top websitesCompared to its competitors, Magento has better coverage across 21 domains of websites, including Shopping, Business & Industry, Arts & Entertainment, and Health. Conversely, 3Dcart isn’t ahead of Magento in any website category.In terms of geographical distribution, Magento leads the way. For more information, check out the map below:3dcart and magentoLet’s discuss this in more detail now

1. B2B Functionality

For small, medium, and large businesses, Magento offers 3 editions: Open Source (free), Commerce, and Commerce Cloud (paid). Two paid licenses, among them, include essential B2B features. While Magento has should-have features for serving your advanced business needs, there is still a jungle of third-party extensions you can choose from.It is important to note that if you are using Magento Open Source 2, and it does not include the B2B features, you don’t have to worry about it, as there are plenty of Magento 2 B2B extension providers out there that are affordable for you to choose from. Depending on which provider you choose, the flow for the B2B Solution may differ slightly, but mostly, it follows the primary circuit that complies with the well-known B2B customer journey, which is generally the same.On the other hand, the best way to activate all the B2B features of 3dcart is to purchase the Shift4Shop B2B eCommerce plan for $379 per month. Overall, the 3dcart B2B plan’s operational flow is almost similar to that of Magento’s, though its extensibility and stability are slightly more limited than that of Magento’s.Magento migration services

2. Hosting

There are a lot of differences between 3dcart and Magento when it comes to hosting. For instance, Magento is a self-hosted platform, meaning you – as users – are required to download and run the software on your own hosting server to begin using the software.This way, you can enjoy customized functions without sacrificing total ownership and control. In contrast, 3dcart (Shift4Shop) is a hosted solution. This means that 3dcart manages the entire server. While this solution allows you to publish content quickly and easily, your customization options are limited. Another disadvantage to using a 3dcart store is the limited number of free themes that are less attractive and less adaptable than those available with a premium account. 

3. Pricing

Pricing-wise, 3dcart is more competitive than Magento. 3dcart charges around $29/month (minimum), while Magento charges over $1000/month (minimum). There are pricing plans available for retailers of all sizes at 3Dcart. Smaller online sellers can benefit from features like a site builder and an easy-to-use control panel. In contrast, larger retailers can choose a comprehensive premium plan or several enterprise plans (for those which turn over millions of dollars).PricingConcerning Magento, its Open Source edition is totally free. You are only required to pay fees when installing extensions from Magento or other Magento solution providers. Each provider charges a different fee based on the price of their products.Switching from Magento Commerce or Commerce Cloud will incur charges, as shown in the following table.Costs of each magento edition

How To Perform 3Dcart To Magento 2 Migration?

Here is a step-by-step guide for migrating 3dcart to Magento 2. The easiest method is based on third-party solutions.The default import tools of 3dcart are the simplest and most obvious way to migrate between 3dcart and Magento 2. However, we strongly suggest using a third-party solution for this task, since the default import tools will result in many unpleasant circumstances that cannot be changed. For instance, some entities cannot be imported manually using the standard Magento 2 tools. Furthermore, using the Magento admin, you cannot map third-party properties or automate data transfers. Therefore, we recommend retailers use a third-party solution to migrate to 3dcart Magento 2 efficiently.There are a couple of essential requirements for Magento 2 to enable data import seamlessly with 3dcart or other external systems.

  • The selected module should support all Magento 2 entities.
  • It should automate data transfers.
  • The chosen solution should resolve the disparate attribute standards issue.

In other words, many more factors affect each business case. However, Magento 2’s most of the extension integrates all these factors seamlessly to enable automated data transfers. Thus, this is the solution for a 3dcart to Magento 2 migration and to integrate your store with databases, marketplaces, and customer relationship management systems.

Migrating From 3Dcart To Magento 2 Through Data Files

  • From your 3dcart website, you can export products, orders, customers, catalogs, and other entities using XML or CSV files.
  • You can use additional solutions from 3Dcart apps if the functionality you’re looking for isn’t available.

You can then import data files from the Magento 2 website using the extension you installed.

  • You can create an import job under System > Import / Export > Import Jobs.
  • Configure the job under General Settings > Import Settings > Import Behavior > Import Source.
  1. General Settings: In the Job Title field, you can choose a job title and other options.
  2. Import Settings: Select a 3dcart entity to import into Magento 2. The Magento 2 extension is designed to modify all the elements on your Magento 2 website: Products, Categories, Customers, Advanced Pricing, Orders, Attributes, Cart Price Rules, CMS Pages, and Blocks. Some of them have other features. For instance, the Import Settings section allows you to remove obsolete categories or product associations.
  3. Import Behavior: Choose an import behavior choice from the list. Next, add separators and select a validation approach appropriate to Magento 2 3dcart.
  4. Import Source: Choose the file type and source under Import Source. Configure more settings, submit the data file, and check it.
  5. Mapping: Convert external 3dcart attributes to Magento 2 attributes. Alternatively, you can use the mapping presets or the matching grid of the extension.

Ensure that each entity has its own separate import job; otherwise, the 3Dcart Magento 2 transfer will not be successful for more Magento data migration explained.

Migrating From 3Dcart To Magento 2 Using API

The extension enables users to use an API to connect directly to 3dcart via their new extension module as an alternative method for executing the 3dcart to Magento 2 migration more easily and quickly. For example, you can use the instructions below to change over from file transfers to REST or SOAP connections:

  1. You can create a new import job in your Magento 2 admin by going to System -> Improved Import / Export -> Import Jobs.
  2. It is necessary to configure general settings, import settings, import behavior, and import source configuration. Please note that this is a different process to export data from what we discussed previously.
  1. General Settings: Enter the job title and other preferences in the General Settings field.
  2. Import Settings: In the import settings, set “Use API” to “Yes” to enable API transfers for entities migrating from 3dcart to Magento 2.
  3. Import Behavior: Choose an import behavior and a validating strategy. Select separators to complete this section’s setup.
  4. Import Source: Select the import file format when migrating data from Magento 2 to 3dcart. The next step involves setting up parameters for REST or SOAP. You can choose either XML or JSON as your source. Validate the data file to finish.
  5. Mapping: Use presets or a manual grid to map 3dcart attributes to Magento 2. This will prevent further import procedures.

To migrate from 3dcart to Magento 2 using an API, you will need to create a new import job for each entity and run multiple import processes simultaneously.Migration service

Magento 2 vs. 3dcart: What platform should you choose?

Who Should use Magento 2?

A smaller business, especially one that needs more coding experience and is on a budget, is best served by 3dcart or another more user-friendly solution instead of Magento because of the complexity of this system. In short, this platform is most effective when it is used by large corporations and medium-sized companies with sufficient funds to cover the costs of running it.

Who Should use 3D Cart?

This is an excellent solution for those online stores anticipating a fast growth rate and who wish to work with a platform that will scale well and can handle whatever number of customers and sales they will experience over the course of the next few years. Read also about PSD to Drupal and Magento Conversion

Conclusion

Unlike 3DCart, Magento 2 offers many benefits, including enhanced customization options, superior scalability, robust support, and improved SEO. These features make Magento 2 an excellent choice for businesses that want to start a branded online store, grow, and drive sales. To ensure a smooth and successful migration process from 3DCart to Magento 2, you should work with an experienced developer. At Wedowebapps, our talented developers can help you easily migrate your online store to Magento 2 and enhance its performance. With our Magento developers for hire by your side, the migration process will occur as smoothly and efficiently as possible, ensuring your store can run on Magento 2 as soon as possible. Our team can assist you if you want to increase your business’ performance online or expand your customer base. Get in touch with us today to learn about our migration services and how we can help you.

What Is The Best Way To Migrate From WooCommerce To Magento 2?

WooCommerce and Magento are two of the most widely used content management systems for eCommerce store in the eCommerce world!Magento offers more comprehensive features but can be challenging to modify or maintain, requiring the assistance of a skilled professional for your Magento store. On the other hand, WooCommerce is relatively simple to customize and manage, making it a more attractive choice for many users.If you are running your store on WooCommerce and want to expand your business by switching to Magento, this blog post is for you. Read on to discover the best way to migrate from WooCommerce to Magento.

What is WooCommerce?

WooCommerce is a powerful eCommerce website developer, open-source software program designed to help users build e-commerce websites using WordPress. This versatile program can quickly create an online store with all the features and functionalities necessary for running a successful business. With WooCommerce, anyone can quickly turn a regular website into a fully functioning e-commerce store.WooCommerce eCommerce website developer plugin is an excellent choice for businesses due to its user-friendly interface and the lack of expertise required. As one of the most popular e-commerce platforms, it holds a market share of 27%, powering 13% of all e-commerce websites.

Pros of Woocommerce

  • Open-Source And Free Usage: Since WooCommerce is built on top of the free and open-source WordPress platform, it has access to the same features. WooCommerce with WordPress is a combination that only few can beat.
  • Simple Developer Documents:  Your developers can quickly grasp the inner workings of the plugin due to the precise documentation, enabling them to begin the customization process immediately.
  • Multi-Payment Gateway Support: This plugin offers a variety of payment gateways, from PayPal, Square, and Stripe to other options, so you can pick the one that works best for you.

Cons of Woocommerce

  • Premium Offerings Of Useful Features And Extensions: If you want to expand your functionality with some significant features, you’ll have to fork out premium extensions.
  • Execution: WooCommerce is a plugin with enough power to influence your store’s performance. Additionally, the more third-party plugins you link to your store, the slower it will run, decreasing the speed of loading pages.

 Magento 2- Brief Overview

Magento is a powerful e-commerce platform that uses open-source technology to give its users complete control over their online store’s design, functionality, and content. It makes it easy to customize the shopping experience without sacrificing product quality. Magento eCommerce includes helpful tools and features like marketing, SEO, and catalog-management capabilities. In 2020, Magento was one of the top three most popular platforms for store owners to migrate to, while only a few merchants chose alternatives.

Pros

  • Superior Conversion Flexibility: The Magento eCommerce community is a great resource, providing a platform to unite individuals with similar interests. Through events, meet-ups, and more, its members can network, collaborate, and ask questions, helping to further their knowledge and expertise.
  • Enthusiastic Community Support: The Magento community is a great resource, providing a platform to unite individuals with similar interests. Through events, meet-ups, and more, its members can network, collaborate, and ask questions, helping to further their knowledge and expertise.
  • Improved Security And Scalability: Magento for eCommerce is an ideal platform for businesses looking to grow, with its flexible structure and high scalability capabilities. It also offers top-notch security and regular updates to safeguard your store from malicious attacks and hacking. No matter what stage of growth you’re at, Magento won’t let you down.

Cons

  • Resource-Centric Program: Magento requires a more significant amount of server resources.
  • Time Constraints: Magento is an eCommerce platform necessitates a considerable amount of effort to be devoted to the upkeep of the store regularly. Should any issues arise, this investment of energy and resources increases significantly to address the problem.

Why Should You Migrate WooCommerce To Magento 2?

Magento 2 has been released as an upgraded version of Magento 1 and has quickly become a popular choice among eCommerce platforms, surpassing WooCommerce in terms of sales and business performance. Its superior features, customization options, and improved SEO have made it a desirable choice for many businesses. It is why many enterprises are looking for ways to WooCommerce to Magento 2 data transfer to take advantage of its superior capabilities. Below are some of the reasons:

  • Improved Performance: WooCommerce is free and straightforward, which draws in small business owners worldwide. On the other hand, Magento offers powerful paid features that give users more flexibility, scalability, extensibility, and performance to use the eCommerce platform. Migrating to Magento 2 is essential because of its impressive performance and scalability. It boasts a full-page caching system that boosts the speed of web pages when enabled. It will significantly improve loading times and give customers a better overall experience.
  • Superior Features and Processing: Magento eCommerce platform is quicker as compared to WooCommerce due to its superior front-end features that are compiled and processed with AJAX. This improved speed will help you to increase your sales and conversion rate. Furthermore, Magento has discontinued support for Magento 1 as of June 30th, 2020.
  • Mobile-friendly Approach: Magento for eCommerce is designed to be mobile-friendly, allowing users to access your online store from their phones with ease. It also offers enhanced responsiveness, improved visuals, and simplified checkout processes for mobile users, making it an excellent choice for businesses that want to provide a high-quality mobile experience.

With a large number of smartphone users worldwide, estimated to be around 3.5 billion in 2020, it is critical to migrate to Magento 2 to ensure you are on the same platform as your customers.

Step By Step WooCommerce To Magento 2 Data Migration Process  

Stage 1: Data Backup Preparation Before Migration

Both experienced, and novice store managers need to regularly back up their websites. This helps make it easy for you to export data from WooCommerce. The critical components of any database, like those used in e-commerce, need to be safeguarded to protect against data loss during the data migration processes. There are three ways to backup WooCommerce store information. Below are some of them:

1. Backup Using Web Host

Many WordPress hosting providers offer backups as part of their standard package or as an additional service. Usually, they provide daily backups, but getting a host that offers real-time backup service can be more challenging. If you’re looking to back up your database through your hosting company, you may have to do extra work to find the right one. Below are the steps:

  • First, contact your web hosting provider and get the most recent backup for the data migration processes.
  • Alternatively, a MySQL manager can manually export your database and save it to a local folder.

2. Manual Data Backup

For manual data backup, and to export data from WooCommerce, you need to download your WordPress website to your computer. Use an FTP tool such as the File Manager or FileZilla in the cPanel of your web host account. Once you have done this, you must back up your database by accessing phpMyAdmin via your host database panel. From there, select the database from the wp-config.php file and select all the tables before clicking the Export button to back up the data.

3. Backup Via WordPress Plugin

Backing up a WordPress website is easy with the help of a backup plugin. Installing one is a straightforward process, and there are a variety of plugins available to choose from, like BackupBuddy BlogVault, and UpdraftPlus, that make the process of conducting and managing backups quick and effortless.

Stage 2: Install The Magento 2 Solution

The Magento platform needs installation to export store data from the WooCommerce store to the Magento 2 store (Adobe Commerce). For the data migration processes, one should follow these steps:

  • Download the Magento software package;
  • Configure FTP;
  • Upload the Magento archive to the hosted system using FileZilla;
  • Run the Setup Wizard.

Stage 3: Types Of Methods To Migrate WooCommerce To Magento 2

There are three distinct methods to move your WooCommerce store to Adobe Commerce: doing it yourself manually, employing a professional company, or utilizing an automated shopping cart migration service. We will look at these approaches in detail, and you can decide which is best for you.

Method 1: Manual Migration Process

When you manually migrate store data, you must take two steps. First, export the data from WooCommerce, and then import it into Adobe Commerce (Magento).

Step 1: Export WooCommerce Store Data

  • To export data from WooCommerce plugin of WordPress, open the admin panel, select the output file as CSV, and click the Export button. It will download a CSV file with all the orders.
  • To export data from WooCommerce, log into the WooCommerce admin panel, then select Product Import-Export. There will be several options for product export to choose from after that step.
  • Choose the product attributes you wish to export, then click the ‘Export Product’ button to complete the process.
  • We can export customer data from the WooCommerce store to finish up. To do this, navigate to the Customer Import-Export section of the admin panel in WooCommerce.
  • You can choose the specific checkboxes you want to export from the WooCommerce admin panel. Additionally, you can export all customer data by clicking on the Export Users option. It will allow you to export customer information successfully.

Step 2: Import Data into Magento 2

To import the exported WooCommerce data into Magento, you need to break it down into smaller parts:

  • You can import files of customer data that involve customer information, such as names and email addresses.
  • You can import product photos and details, such as prices, descriptions, and inventory.
  • You can import store data information on advanced pricing and other features.
  • Once you have broken down the data, you can easily import it into Magento.

Method 2. Automation-Based Shopping Cart-Centric Migration Tools

This service makes transferring from WooCommerce to Magento straightforward, even if you need more technical expertise. Transferring all types of entities (including custom fields, orders, product categories, and customers in your store) to your new home is simple and efficient. The process is straightforward and hassle-free. In this stage, you can also opt for an extra option that will help in extending the data import functionality.Magento store

Step 1: Choose Your Preferred Shopping Cart Migration Tool And Access It

To connect WooCommerce as the Source Cart Type, enter the WooCommerce URL in the designated space, then click the Connector button to download the connector. Unzip the file and upload the connector to the root folder of the Source Store.

Step 2: Setup Source/Target Store Connectors

You can migrate your data to Magento eCommerce platform or just specific aspects such as Orders. Target store connectors also provide additional options to extend your migration Products and Customers possibilities. In addition, it includes the “Customer Password Migration” feature, which allows you to transfer your customers’ passwords to the new store. Thus, they can log in generally after the migration is complete.

Step 3: Complete The Migration Process

Begin your trial migration with a set number of entities. You will observe the same steps as the accurate migration. Press the “Skip Demo Migration” button to initiate complete migration immediately. Please be aware that when the migration has been started, it will proceed automatically on the server.

Step 4: Check If the Migration Successful

Once the migration is completed, verifying that all the data has been transferred correctly during the data migration process to your Magento store is essential. Make sure to inspect your data both in the back and front of your store.

Method 3: Hire Dedicated Experts

Moving all the data from your WooCommerce with WordPress store manually is not only time-consuming, but also carries a lot of potential risks. Hiring a professional web developer or freelancer who is experienced in this may be a good idea.

WooCommerce to Magento Migration Experts

Despite all the positives of WooCommerce for services, the truth is that it’s not meant for substantial business websites. You might face problems with WooCommerce regarding scalability, design freedom, and creative exposure.After all, WooCommerce is only limited to WordPress-based websites. It is where you can decide to shift to Magento for its advanced features that WooCommerce cannot provide for your business website.Magento is simply a much bigger platform and one that can change the way you do business. These are some of the best WooCommerce to Magento 2 service providers in the market:

1. WeDoWebApps LLC

Wedowebapps LLCWeDoWebApps is a leading player in Magento migrations. It offers expert eCommerce website development. They are a global business and have helped multiple businesses and company websites migrate from one platform to another. WeDoWebApps offers customized solutions when it comes to website development for eCommerce to make it suitable for specific niche services and business ideas. Their website Magento development services are empowered with in-built capabilities to make the website of your e-commerce store more adaptive and responsive. Their eCommerce website development cost is much affordable They offer several Magento services to their customers, such as-

  • Magento Consulting
  • Magento E-commerce
  • Custom Magento Development
  • Magento Support and Maintenance
  • Magento Extension Development
  • Magento Theme Development
  • Magento PWA Development
  • Magento 2 Website Development
  • Migration Services to Magento

They provide the best service in the field and have a comprehensive experience regarding the various challenges involved in the process. They come highly recommended by all rating services and other critics. Thus, they can be a valuable partner in your e-commerce venture. 

2. React Native App Development Company 

React native app development companyReact Native App Development Company was one of the first agencies in the market to adopt Magento 2 when it appeared in 2015. They are providing stellar services in digital domain migration, website development for eCommerce and working with leading global brands to improve their e-commerce business capacity and market share. They are working with companies to improve their e-commerce visibility and marketing problems through various e-commerce platforms. Furthermore, they are a multi-award-winning agency and one of the best regarding WooCommerce to Magento migration. Read also about Grow your E-Commerce business with best Woocommerce Development Services

Conclusion

WooCommerce and Magento 2 are the two big names in the Ecommerce world. They are two powerful content management platforms that dominate the industry. However, with some latest upgrades, Magento 2 or Abode Ecommerce has become more significant in the market. Comprehensive features like security, better performance, and scalability have recently attracted enormous attention. As a result, it simplifies the data migration process with these features.Woocommerce to magentoIf you are considering transitioning from WooCommerce to Magento 2 to increase your business’s potential, WeDoWebApps is here to help. We specialize in both Ecommerce Website Development and Mobile App Development and have completed 500+ projects, all of which have resulted in satisfied customers. Many of our customers have come back to us for more projects or to recommend us to others. It is an accomplishment of which we are very proud.

Salesforce Commerce Cloud To Magento 2 Migration: Everything You Need To Know

Migrating important data of your e-commerce store from Salesforce Commerce Cloud to Magento 2 is one of the most beneficial decisions you’ll ever make!

Here’s why. 

Salesforce’s commerce cloud has many limitations that are not present in Magento 2. Customization capabilities being one of them. 

Magento 2 shines here. It’s backed by advanced technical support and capabilities, unmatched flexibility, and a vast ecosystem of plugins and extensions that’s remains unmatched till date. 

So, if you want to migrate from Salesforce commerce cloud to Magento 2, we are here to help. We make the entire Salesforce migration process effortless with right tools and guidance. 

This blog post will highlight the key advantages of switching from Salesforce Commerce Cloud to Magento 2 and offer empathetic support to address your concerns with easy migration processes.

What is Salesforce Commerce Cloud?

Salesforce commerce cloud

An e-commerce platform based on cloud computing, Salesforce Commerce Cloud is a tool that allows companies to create online stores. 

In addition to product catalogs, shopping carts, order status and management, payment gateways and shipping options, personalized promotions, and other features, Salesforce Commerce Cloud allows businesses to create and customize their online stores. Additionally, the platform provides tools for managing product data, inventory, fulfillment, and customer service.

With Salesforce Commerce Cloud, you can create a seamless customer experience across all touchpoints by integrating it with other Salesforce solutions, such as Marketing Cloud and Service Cloud.

The small startup company, large enterprise, and ecommerce brands use Salesforce Commerce Cloud in fashion, retail, consumer goods, and manufacturing industries.

As part of Salesforce Commerce Cloud, you can also manage inventory, fulfillment, and customer service. The platform was built on a cloud-based, multi-tenant architecture and can be customized through templates, themes, API integration, and development tools. 

Besides SEO and mobile responsiveness, the platform also includes analytics and reporting capabilities as well as a way to integrate with Salesforce products, such as Marketing Cloud and Service Cloud.

Why Migrate From The Salesforce Commerce Cloud To Magento 2?

Despite its popularity with businesses of all sizes, Salesforce Commerce Cloud may not be right for all businesses. Many companies may find the platform lacking certain features and capabilities crucial to their success. 

Magento 2 is the answer to that problem. With Magento 2, businesses can grow and thrive online with more comprehensive and flexible e-commerce tools and features. However, here are some areas where Salesforce Commerce Cloud falls short.

Salesforce Pitfalls

Salesforce simplifies the sales process and provides an excellent omnichannel experience, but a few disadvantages can cause you to overlook its strengths. Here they are:

  • Unpredictable ownership cost

A Salesforce subscription costs a percentage of your overall revenue, meaning the more successful you become, the more Salesforce charges. Such policies make it difficult for merchants to plan ahead.

  • Separate B2B and B2C capabilities

The Salesforce platform does not offer the ability to combine B2B and B2C operations. Therefore, unless you require a CMS that gives B2B and B2C functionality, Salesforce may not interest you.

  • Insufficient customization opportunities

There is limited customization possible with Salesforce SaaS. As a result, delivering a unique user experience is challenging, which is an essential component of a successful online business.

Magento vs salesforce commerce cloud

  • Small commerce-focused community

An extensive CMS community can be a valuable resource for solving platform-related issues. Unfortunately, there aren’t enough Salesforce users with the expertise necessary for a particular niche or location in the Salesforce community. Thus, Salesforce support is more challenging to rely on without a dedicated support team during an emergency.

How Can Magento 2 Be Fit For Your Needs?

With so many e-commerce platforms, choosing which will fit your business’s unique requirements can be challenging. However, Magento 2 is gaining popularity among businesses of all sizes because of its scalability, flexibility, and customization capabilities.

With Magento, many sellers have already skyrocketed their sales, notably:

  • Delivering diverse user experiences allows online entrepreneurs to gain a competitive advantage, Complete control, and unconditional flexibility;
  • Technology and tools for advanced business intelligence;
  • The Magento community is large, with many user cases, making it an excellent partner for e-commerce;
  • The architecture and infrastructure are modern and optimized.

Magento vs Salesforce Commerce Cloud – Overview

  • Medium- and large-sized businesses can benefit from Magento Commerce (now Adobe Commerce) and Salesforce Commerce Cloud (formerly Demandware).
  • Powered by PaaS (Platform as a Service), Magento offers flexibility and customization. Magento offers B2B and B2C platforms optimized for market segments.
  • With over 300,000 stores, Magento is one of the oldest and most widely used eCommerce platforms.
  • Magento provides maximum flexibility to brands for creating bespoke experiences.
  • Since Magento is an open-source platform, developers can download and modify its code. Due to this, it has the largest community of third-party developers. Magento may not offer a feature you need, but a plug-in can provide it.

Salesforce Commerce VS Magento 2 Pricing

You can choose from three versions of Magento: Magento Open Source, Magento Commerce, and Magento Commerce Cloud. 

Using Magento Open Source costs nothing, but customizations are likely needed to meet customer expectations, which means you’ll spend money on the development, which can be costly. 

In addition, additional costs, such as hosting ($10–50/month) and domain registration ($10–400/year), can add up.

A Magento Commerce Cloud subscription includes a hosting fee. Also, a license fee is negotiable for the premium versions (contact a Magento sales representative for a quote based on your specific business requirements).

Here are the license costs for Magento Commerce and Magento Commerce Cloud.

Magento 2 Pricing Based on Gross Revenue
Gross revenue-generating companiesMagento 2 CommerceMagento 2 Commerce Cloud
$0 – $1 million$22,000.00$40,000.00
$1 – $5 million$32,000.00$55,000.00
$5 – $10 million$49,000.00$80,000.00
$10 – $25 million$75,000.00$120,000.00
$25 – $50 million$125,000.00$190,000.00

On the other hand, even though Salesforce Commerce Cloud license costs are negotiated based on the enterprise’s size and revenue, there is a starting price tag. 

Salesforce offers three plans for B2B: commission fees per order, gross merchandise value (GMV), and Subscription-based model. 

With the starter packs, you have all the essential features that will enable you to go to market quickly. However, as you move up the ladder, other features, including support for multiple channels and multiple storefronts, are available.

Here is Salesforce Commerce Cloud’s pricing plan:

Pricing Plans by Market Segment
Market SegmentsPlans
StarterGrowthPlus
B2B Commerce$4 Price Per Order (billed annually)$6 Price Per Order (billed annually)$8 Price Per Order (billed annually)
B2C Commerce1% Gross Merchandise Value (billed annually)2% Gross Merchandise Value (billed annually)3% Gross Merchandise Value (billed annually)
B2B2C Commerce1% Gross Merchandise Value (billed annually)

Plugins And Extensions For Magento Vs Salesforce Commerce Cloud

Don’t worry if either platform does not contain a feature you require out-of-the-box; Magento and Salesforce Commerce Cloud offer clear technical documentation for developers and extensions and plugins.

With both the free and premium extensions marketplaces, there is no doubt that the extensions in the marketplaces are of high quality, as both platforms evaluate each extension submitted by a third-party developer for compliance with coding standards and development best practices.

However, Magento has a significant advantage when it comes to extensions. Having a large customer base and more solution partners, Magento has more extensions designed for specific uses. Check out this detailed Migration checklist and start worry-free with Magento 2 migration.

For merchants, Magento offers over 5,800 free and paid extensions to help them with challenges related to marketing, checkout, fulfilment, inventory, order management, etc.

Read more: 18 Best Magento Migration Companies All Over The World

What Is The Best Way To Migrate Salesforce Commerce Cloud Online Store To Magento 2?

  • Getting Started with the Third-Party Extension App

Creating an account or logging in on a website for a third-party migration service is quick and easy. Alternatively, you can use your Google or Facebook account to log in quickly.

  • Getting Started with Your New Migration

Here are two simple steps you must follow:

Providing data from the Source store (Salesforce Commerce Cloud)

Data from the Target store (Magento 2)

  • Providing source store data to Salesforce Commerce Cloud

Click the Create New Migration button on the Migration Page to begin a new migration. Next, choose Source Cart Type, then enter the URL of the source store.

  • Provide target store data using Magento 2

Once the Target Cart Type option has been selected, enter the URL of the source store.

You can choose the connection for your third-party app after downloading the connector, unzipping it, and uploading it to the Target Store’s root folder.

This screen automatically displays the Connector Installation without requiring any manual intervention.

  • Select the Source Store Entities you want to migrate.

Select all entities or specific data to move—for instance, only Products, Customers, and Orders.

You can extend your migration options by selecting your third-party app (if your extension app offers these options). In addition, the new store will match languages, order statuses, and customer groups to display information appropriately.

Follow the instructions in the form that appears to export your data files from your source store and upload them into this form.

Magento 2 commerce cloud

Start the full migration immediately, or try the demo first.

  • Use The Demo

Ensure you have a manageable number of entities when starting your demo migration. Alternatively, you can skip demo migration by clicking “Skip Demo Migration”. 

  • Executing The Complete Migration

To perform complete migration immediately, please click “Skip Demo Migration”. During your data move, please be patient; once completed, your chosen third-party app system will notify you by email. Now, your data will be migrated to your new preferred store.

Custom Themes and Extensions Migration

Migrating custom themes and custom-developed extensions from Salesforce Commerce Cloud to Magento 2 is a critical step in ensuring your online store maintains its unique look and functionality. For a detailed guide on this process, refer to our article on migrating custom themes and extensions.

Magento Store Cpanel to Cloud Migration

Migrating your Magento store from Cpanel to cloud can significantly enhance your store’s performance, scalability, and security. Learn more about the benefits and process of Magento store Cpanel to cloud migration.

Read also:-Important Segments An Android Application

Conclusion

To conclude, migrating your Salesforce Commerce Cloud store to Magento 2 has the potential to be challenging, but it can also be transformational. You can take your online store to the next level by choosing Magento 2, a platform with the technical capabilities, flexibility, and customizability you need. 

However, migrating to a new platform can be challenging and requires planning and execution. Choosing an ecommerce migration services provider with a proven track record of successful migrations is crucial to a business’s ecommerce migration.

Work with WeDoWebApps as we can handle the entire migration process from start to finish. With us, you can make an informed decision about your e-commerce business’s future and ensure it’s successful in long term. 

An In-Depth Magento 2 Migration Guide For 2026: Build an effective E-Commerce Store

Introduction

Magento officially ended support for Magento 1 in 2020, leaving many Magento store owners at a crossroads.

Due to complications involved in the migration process, most vendors have not yet migrated to Magento 2. If you are one of them, you are in the right place.

Let us convince you that Magento 2 is worth giving a shot, all thanks to the incredible features that are totally missing from version 1.

You won’t regret the migration, we promise.

So, we won’t take much of your time. Here we present the most comprehensive guide (literally) to help you understand the Magento data Migration tool and enable migration to Magento 2 smoothly to build a successful e-commerce platform with the help of Magento development services.

This Magento 2 migration guide will brief you on two things:

  • Data Migration steps
  • Magento database migration tool

And if you are too afraid, too busy to migrate it yourself, don’t worry. Hire a Magento migration company to do it for you.

So, let’s begin.

What Is Magento 2?

Magento, at the start of its journey, met with resistance from vendors. And why not? Migrating large stores to new platforms can bring unnecessary issues.

However, Magento 2’s extremely powerful features cannot be sidelined. It’s not just a march for something new, as Magento 2 definitely provides superior features.

The Rise of Magento 2 Can Be Due To Various Factors.

  • Extraordinary Architecture
  • Full Page Caching
  • Enhanced SEO
  • Multilingual Support
  • Payment Gateways
  • Exceptional Enterprise Features

Three Types of Magento Migration: Which One Is Better For You?

Three Types of Magento Migration

Method #1: Manual Migration

Manual Magento Migration is the process of manually transferring data, configuration, and customization from a Magento 1 installation to a Magento 2 installation. There are usually several steps involved in this process, such as:

  • Data Backup
  • Media file and Data Transfer
  • Theme and Extension Migration
  • Customization and Configuration Migration
  • Testing and Debugging

Manual Magento Migration can be a time-consuming and complex process, but it can be a cost-effective solution for businesses with limited budgets or custom requirements.

However, it is recommended to seek assistance from a professional Magento developer to ensure that the migration is done correctly and to minimize potential risks in building an E-commerce platform.

Method #2: Assisted Migration

Assisted Magento Migration is a process of migrating from Magento 1 to Magento 2 with the assistance of a professional migration service provider.

Assisted Magento Migration provides a more streamlined and efficient process than manual migration, as the migration service provider takes care of all the technical aspects of the migration, freeing up the business to focus on more pressing matters.

Additionally, assisted migration can reduce the risk of data loss or other migration-related issues. However, choosing a reputable and experienced migration service provider is important to ensure a successful migration.

Method #3: Automated Migration

Automated Magento Migration is a process of migrating from Magento 1 to Magento 2 using an automated Magento migration tool and software. This type of migration typically involves the following steps:

Automated Magento Migration is the most efficient and quickest way to migrate from Magento 1 to Magento 2, as the automated Magento data migration tool handles most of the technical aspects of the migration, freeing up the business to focus on other important tasks.

However, choosing a reliable and tested automated Magento migration tool is important to ensure a successful migration and minimize the risk of data loss or other migration-related issues.

Get your Magento migration plan in 48 hours

Why Choose Magento 1 Over Magento 2?

Why Choose Magento 1 Over Magento 2

Reason #1: Not Mobile Friendly

Migrating to Magento 2 can improve the mobile-friendliness of your website or E-commerce platform for several reasons:

  • Responsive Design: Magento 2 has a responsive design framework, which automatically adjusts the layout and display of the website to fit different screen sizes and devices.
  • Mobile-Optimized Checkout: Magento 2 has a mobile-optimized checkout process that is faster, simpler, and more convenient for customers to use on mobile devices.
  • Enhanced User Experience: Magento 2 has improved navigation and mobile-friendly interface design to provide a better user experience on mobile devices.
  • Advanced Mobile Features: Magento 2 includes features like touch-friendly product sliders, swipe-to-delete in shopping carts, and mobile-specific promotions and discounts, which enhance the mobile shopping experience for customers.

Overall, migrating to Magento 2 can help you deliver your customers a better and more mobile-friendly eCommerce experience.

Reason #2: More Opportunities For Growth

Migrating data to Magento 2 can provide growth opportunities for your business in several ways:

  • Improved Scalability: Magento 2 is designed to support high-traffic websites, making it easier for businesses to handle increased customer traffic and growth.
  • Advanced Marketing and Sales Tools: Magento 2 offers a range of tools to help businesses increase sales and customer engagement, such as customer segmentation, dynamic product bundles, automated email marketing campaigns, and Magento catalog price rules that streamline promotional strategy.
  • Improved Search Engine Optimization (SEO): Magento 2 includes built-in SEO tools, such as rich snippets and improved URL structure, which can help improve search engine rankings and visibility, leading to more organic traffic and sales.
  • Access to the Latest Technology: Magento 2 is designed to work with the latest technologies, including PHP 7 and HTML5, which can help improve website performance and provide new opportunities for innovation and growth.

Reason #3: Solid Support And Functionalities

Migrating to Magento 2 can address the issue of no support and missing functionality in Magento 1 in several ways:

  • Technical Support: Magento 1 has reached end-of-life and is no longer receiving technical support from Magento. Magento 2, on the other hand, continues to receive regular security updates and technical support from Magento.
  • New Features and Functionalities: Magento 2 includes exceptional enterprise features and functionalities that are not available in Magento 1, such as improved checkout process, enhanced reporting and analytics, and better customer engagement tools.

By migrating to Magento 2, you can take advantage of these benefits and ensure that your E-commerce store and website continue to be supported and functional, providing a better experience for your customers and helping your business grow.

Reason #4: Security Patches And Updates Are No Longer Available In Magento 1

Migrating to Magento 2 is a good solution for security patches and updates no longer available in Magento 1.

  • Ongoing Support: Magento 1 has reached end-of-life and is no longer receiving technical support or security updates from Magento. Magento 2, on the other hand, continues to receive regular security updates and technical Multilingual Support.
  • Improved Security Features: Magento 2 includes enhanced security features, such as protection against cross-site scripting (XSS) and cross-site request forgery (CSRF) attacks, making it a more secure platform for your eCommerce website.
  • Compliance with Security Standards: Magento 2 is built to comply with current security standards and best practices, helping to protect your website from potential security threats.

By migrating to Magento 2, you can ensure that your website continues to be secure and protected from potential security threats, providing a better experience for your customers and helping your business grow.

Magento 2 has additional website categories with improved usage coverage. It consists of 13 other categories aside from lifestyle, home & garden, e-commerce & shopping, computers, and electronics & technology.

Magento 1 vs Magento 2 Market Share by Category

CategoryMagento 1 Market ShareMagento 2 Market Share
Lifestyle3,166 websites5,232 websites
Home & Garden2,024 websites3,926 websites
E-commerce & Shopping2,444 websites3,220 websites
Sports1,250 websites1,911 websites
Gambling78 websites62 websites

How to Avoid Migration Failure: Risks & Solutions

How to Avoid Migration Failure

Ignoring Magento 2 migration puts your store at serious risk. And below are the comprehensive breakdowns of every major risk, its business impact, and exactly how to avoid it.

Magento Migration Risks, Business Impact, and Solutions

RiskBusiness ImpactSolution
PCI ComplianceFines up to $100,000/month; loss of payment gateways.Migrate to Magento 2 for ongoing PCI DSS compliance.
ScalabilitySite crashes under traffic, limiting growth potential.Use Magento 2 layered architecture and MySQL clustering.
Performance & SpeedHigh bounce rates; lost sales due to slow load times.Deploy Varnish Cache and CDN alongside migration.
Incompatible IntegrationsPayment, delivery, and CMS tools stop working.Audit all extensions and map to Magento 2 Marketplace equivalents.
Lost ConversionsMagento 1 converts at 1.1% vs Magento 2 at approx. 2%.Prioritise UX and mobile optimisation in migration plans.

Risk 1. PCI Compliance Violations

Every business accepting card payments must comply with the Payment Card Industry Data Security Standard (PCI DSS). With Magneto 1 now end-of-life and receiving no security patches, maintaining PCI compliance becomes increasingly difficult and costly.

Penalty structure for non-compliance:

Penalties for PCI Non-Compliance Based on Duration

Duration for Non-ComplianceSmall Business PenaltyLarge Business Penalty
1–3 months$5,000/month$10,000/month
4–6 months$25,000/month$50,000/month
7+ months$50,000/month$100,000/month

How Magneto 2 solves this:

  • Regular security patches and updates from Adobe/Magento.
  • Built-in protection against XSS and CSRF attacks.
  • Compliance with current PCI DSS security standards.
  • Ongoing technical support ensures vulnerabilities are patched promptly.

Risk 2. Scalability Issues

Magento 1 was designed for static, low-traffic stores. As your business grows, more products, more customers, and more orders cannot be kept on Magento 1. It lacks the infrastructure needed for a modern and high-volume eCommerce store.

Magento 2 scalability advantages:

  • 50% more scalability than Magento 1.
  • Support multiple master databases and manage database assignments.
  • MySQL cluster support for high availability.
  • Can process over 10 million page views per hour.
  • Independent scaling of components: clients, products, databases, etc.
  • Handles 135,000 more orders per hour than Magento 1.

Risk 3. Performance and Speed

Slow page load times directly damage sales. Most of the studies show that even a 1 second of delay reduces the conversion by 7%. Magento 1’s monolithic architecture makes meaningful performance improvements extremely limited.

Magento 2 performance improvements at a glance:

Magento 1Magento 2
  • Limited full-page caching.
  • No native Varnish integration.
  • Slower backend operations.
  • Lower order throughput.
  • No Redis support.
  • Built-in Full Page Cache (FPC).
  • Native Varnish HTTP accelerator support.
  • Optimized backend, shorter load times.
  • 135,000 more orders per hour.
  • Redis for database object caching.

Recommended performance setup post-migration:

  • Implement Varnish as your HTTP accelerator.
  • Pair Varnish with a CDN for global image and asset delivery.
  • Use Redis to cache database objects for dynamic content.

Risk 4. Incompatible Integrations

A typical Magento store relies on at least 10 third-party integrations. As Magento 1 approaches complete obsolescence, vendors are progressively discontinuing their Magento 1-compatible versions. Once they do, your store loses critical functionality.

Common integrations at risk:

  • Payment gateways (Stripe, PayPal, Braintree, etc.)
  • Shipping and delivery providers (FedEx, UPS, DHL)
  • Content Management Systems
  • Search tools and product filters
  • CRM and ERP integrations
  • Marketing automation platforms

Action plan to avoid integration loss:

  1. Audit all current extensions and integrations before migration.
  2. Check the Magento Commerce Marketplace for Magento 2 equivalents.
  3. Identify gaps where third-party replacements or custom builds are needed.
  4. Drop unnecessary extensions to reduce migration cost and improve performance.

Risk 5. Lost Conversions

Conversion rate is directly tied to platform capability. Magento 1 stores are falling behind as competitors on Magento 2 offer faster, more intuitive, and more mobile-friendly shopping experiences.

Conversion Rate Comparison Across Platforms

PlatformAverage Conversion RateRevenue Impact
Magento 11.1%Significantly below the eCommerce industry average.
Magento 22%Up to 2× increase in online revenue reported post-migration.
eCommerce Average (2024)3.65%Industry benchmark.

What drives the Magento 2 conversion improvements:

  • One-page, mobile-optimised checkout reduces cart abandonment.
  • Faster page speeds keep shoppers engaged.
  • Advanced product search and filtering improve product discovery.
  • Customer segmentation enables personalized promotions.

Avoid costly Magento migration mistakes

How Long Does Magento 1 to Magento 2 Migration Take?

Magento 2 migration is considered to be one of the most complicated processes when it comes to web development. This is because several people are involved: a project manager, a designer, a developer, and a quality assurance engineer.

In the process, a few patterns are explained in this detailed checklist.

It explains what stages it includes and how to handle every milestone in the migration from Magento 1 to Magento 2.

The question is, how long does it take to migrate from Magento 1 to Magento 2? Several factors will influence the duration:

  • Number of third-party extensions.
  • Specifications for the design and theme.
  • A new additional feature.
  • Amount of views on a store.

Duration Estimates For Magento Migration

  • The Planning Stage: 40-60 hours
  • Putting together a CJM: 30-40 hours
  • UX and UI (mobile/tablet/desktop design): 120-250 hours
  • Post-release work, data migration, and frontend and backend work: 640-800 hours (which is 4-5 months)
  • Grand Total: Approximately 830-1150 hours (which is 4-7 months)

Migration components

Migrating Magento 2 involves the following components: data, extensions, and custom code, as well as themes and customizations.

Data

For migrating products, customers, orders, store configurations, promotions, and more to Magento 2, several Magento migration tools are available to perform Data Migration. You will also receive a guide on how to use the tool and best practices for migrating data.

Extensions And Custom Code

Major companies have worked hard with the development community to make Magento 2 extensions compatible with Magento.

Now, there are several Commerce Marketplaces ready to offer the latest versions of your favourite extensions for download or purchase.

Themes And Customizations

As a result of Magento 2, merchants can create innovative shopping experiences and scale to new levels using new approaches and technologies.

It will be necessary for developers to make adjustments to their themes and customizations to take advantage of these advancements.

Documentation is also available online for designing Magento 2 themes, layouts, and customizations.

Tips For A Successful Magento 2 Migration

You need to keep a few things in mind as you plan your Magento 2 migration.

Audit The Site For Errors

The first step is to review your data and look for any errors or discrepancies. You should especially take this step when migrating from an older version of Magento, as data can sometimes become corrupted over time. Ensure you know the data you need to migrate and how Magento 2 will handle it.

Decide The Tools

The next step is to decide what tool you will use to migrate your data. Different options exist with various advantages and disadvantages. Consider your needs before choosing one.

Proper Software Configuration

A successful migration also depends on hardware and software configuration. Ensure your server meets Magento 2’s minimum requirements and has a backup plan if something goes wrong.

Work with an experienced partner

Migrating your store yourself can be disastrous. Instead, consider working with a Magento development partner who has experience migrating to Magento 2. In addition to helping you plan and execute your migration, they will ensure everything goes smoothly.

Test, test, test

Ensure you thoroughly test your new Magento 2 store before it goes live to ensure everything is working properly. Ensure all products, orders, customer accounts, etc., are correctly migrated over.

Follow these tips to ensure a successful migration from Magento to Magento. With the right tools and careful planning, you can make the migration process as seamless as possible.

Process Of Migrating From Magento 1 To Magento 2 (From The Developer’s Perspective)

Migrating from Magento 1 to Magento 2 involves upgrading a merchant’s existing e-commerce platform.

A seamless transition requires careful planning, testing, and execution from a development perspective to ensure minimal disruption to online store operations. Here is a step-by-step process for Magento 1 to Magento 2 Migration.

Step 1. Preparation Works

To begin the Magento 1.9 to 2.0 migration, the development team must ensure that all the necessary software and setups are in place. The software requirements will vary depending on the version of Magento used.

Magento System Requirements

VersionRequirements
Magento 2.3.x
  • Minimum PHP version: 7.3.x
  • MySQL 5.7 or MariaDB 10.2
  • Required PHP extensions: bc-math, ctype, curl, dom, gd, hash, iconv, intl, json, libxml, mbstring, OpenSSL, PDO/MySQL, SimpleXML, soap, spl, xsl, and zip
Magento 2.4.x
  • Minimum PHP version: 7.4.x
  • MySQL 5.7.9 or 8.0, or MariaDB 10.2 or 10.4
  • Required PHP extensions: bc-math, ctype, curl, dom, gd, hash, iconv, intl, json, libxml, mbstring, OpenSSL, PDO/MySQL, SimpleXML, soap, spl, xsl, and zip
  • Elasticsearch 7.9.x (required for advanced search)

In terms of hardware, it is recommended that you have at least 2 GB of RAM. Otherwise, the code will not be able to be compiled. A combination of SSD technology with 24 GB+ will further enhance the store’s performance.

You must install the latest version of Magento, which is currently 2.4.2, to migrate to Magento 2. You can download the Open Source edition from the official website or GitHub.

Step 2. Configuring the Magento Data Migration Tool

The standard Magento 1 to Magento 2 data migration tool is recommended for moving your store.

To move and merge data correctly from the source platform, you will need to write custom logic. You will also need to change the code to transfer any custom data. Magento 2 doesn’t include these tables or columns.

You can follow this short Magento 2 data migration tool tutorial to get started with the Magento composer https library.

Here is the code for installing the Magento database migration tool:

root# composer require magento/data-migration-tool:2.4.2
./composer.json has been updated
Loading composer repositories with package information
Updating dependencies (including require-dev)
Package operations: 1 install, 0 updates, 0 removals
– Installing magento/data-migration-tool (2.4.2): Downloading (100%)
Writing lock file
Generating autoload files

Change the data migration tool for Magento 2 in the corresponding directory in the Magento 2 root folder. Then, copy the configuration file for your Magento 1 version.”

vendor/magento/data-migration-tool/etc/opensource-to-opensource/1.9.x

In the XML file, follow this — “In the config.xml file, specify where to store and retrieve migrated data from as shown in the following example:”

<source>
<database host=”localhost” name=”m1″ user=”m1″ password=”m1″/>
</source>
<destination>
<database host=”localhost” name=”m2″ user=”m2″ password=”m2″/>
</destination>

Step 3. Settings Migration Configuration

After migrating the data, the next step is to migrate the settings. Do the following in the Magento 2 root folder:

php bin/magento migrate:settings
vendor/magento/data-migration-tool/etc/opensource-to-opensource/1.9.x/config.xml

As a result, we got:

[2021-02-17 18:22:22][INFO][mode: settings][stage: integrity check][step: Settings Step]: started

100% [============================] Remaining Time: < 1 sec

[2021-02-17 18:22:22][INFO][mode: settings][stage: integrity check][step: Stores Step]: started

100% [============================] Remaining Time: < 1 sec

[2021-02-17 18:22:22][INFO][mode: settings][stage: data migration][step: Settings Step]: started

100% [============================] Remaining Time: < 1 sec

[2021-02-17 18:22:24][INFO][mode: settings][stage: data migration][step: Stores Step]: started

100% [============================] Remaining Time: < 1 sec

[2021-02-17 18:22:24][INFO][mode: settings][stage: volume check][step: Stores Step]: started

100% [============================] Remaining Time: < 1 sec

[2021-02-17 18:22:24][INFO][mode: settings][stage: volume check][step: Stores Step]: Migration completed

The example above was relatively simple.

If your case requires more in-depth configuration than just installing the stock, please change the configuration file.

(vendor/magento/data-migration-tool/etc/opensource-to-opensource/1.9.x/config.xml) as shown below.

Make sure that the settings.xml code is copied from the XML file before you make edits.

<settings_map_file>etc/opensource-to-opensource/settings.xml.dist></settings_map_file>

Step 4. Customize Magento 2 functionality.

Custom functionality for a new Magento 2 store takes a good part of the time. Hiring experienced Magento developers at this stage is essential. You can minimize the risk of running into bugs caused by ham-handed “specialists” work.

There is a lot of manual work involved with Magento 2.x, but you can migrate some custom code from Magento 1.x to Magento 2.x.

The Magento Code Migration Toolkit provides scripts to convert custom M1 code into M2 by moving the following aspects of code to Magento 2’s structure and format:

  • Layout XML files;
  • Config XML files;
  • PHP files;
  • Module directory structure.

It is important to note that some generated files still need to be manually edited.

Step 5. Identify and create replacement modules for the existing modules

If you migrate from a completely different platform, you may have to make a few compromises to find the same functionality.

Your existing custom functionality has three main alternatives you can choose from.

  • The Magento Marketplace contains both versions of Magento 1 extensions and Magento 2 extensions. However, the functionality may differ.
  • Previously exclusive extensions that are now available through third parties.
  • Customizations that require a complete rebuild for Magento 2.

Rank all the customizations in order of priority before you migrate from Magento 1 to Magento 2. Make a list of all the extensions you have before you upgrade.

When migrating from one platform to another, try dropping as many unnecessary extensions as possible. This can reduce migration costs and improve performance in the future.

Step 6. Configure the Servers

When migrating from Magento 1.x to Magento 2, the server configuration is essential to the development phase.

In addition, Magento’s second version is considered slower than its predecessor, so full page caching tools play a vital role in keeping the website running smoothly.

Therefore, Varnish, an HTTP accelerator, helps the user to see the page almost instantly, optimizing Magento performance and enhancing your store’s speed. Additionally, it creates an extra layer between the web server and the user.

As a result of caching images, Varnish can help improve Magento 2 performance even further when combined with a CDN. In addition, Redis can cache database objects for dynamic database-driven websites.

Step 7. Magento 1 to Magento 2 Data Migration Steps

You will migrate five core data categories. The time required for each depends heavily on the level of customisation in your store.

Estimated Magento Data Migration Time by Category

Data CategoryEstimated TimeKey Considerations
Customer Data1–8 hoursCustom fields and attributes increase complexity significantly.
Product Data1–8 hoursProduct attributes, images, and configurable product rules.
Orders Data1–8 hoursOrder history, statuses, and related invoices and shipments.
Store Settings1–8 hoursTax rules, shipping, currencies, and store configuration.
Third-Party Extensions Data1–8 hoursMust be verified individually; not covered by the default migration tool.

Important notes before starting data migration:

  • Creating your Magento access keys before starting migration will prompt for them.
  • A standard account table migration takes approximately 1 hour.
  • Heavily customised data can take up to 8 hours per entity.
  • Total estimated data migration time: 20-40 hours.
  • Custom attributes must be migrated manually, which cannot be transferred automatically.

Order Import specifics:

  • Order data includes order history, invoices, shipments, and credit memos.
  • Ensure order IDs and customer associations are preserved during migration.
  • Run a post-migration data audit to verify order counts match between M1 and M2.
  • Use the Delta Migration feature to sync any new orders placed during the migration window.

Step 8. Make Tweaks

It is important to remember that the store launch is not the end of development. You’ll often have to log time to make tweaks, fix bugs, and develop new features as requested by stakeholders. You should also plan for feedback and technical emergencies.

Talk to Our Specialists

The Risks of Ignoring Magento 2 Migration

Let’s take a closer look at what Magento 1 stores can expect if they don’t migrate to Magento 2. When you don’t migrate to Magento 2, your online store becomes vulnerable to security threats and is at a disadvantage in terms of functionality and innovation.

Risk #1: PCI Compliance

what is PCI Compliance

Businesses must comply with the Payment Card Industry Data Security Standard (PCI) to protect their online stores’ security.

Each merchant should review its PCI compliance at least once a year. On average, these tests are conducted every three months.

By not following the rules, you will be subject to severe penalties and unable to use the most popular payment gateways.

Typically, small businesses face a $5,000 monthly penalty, and large corporations face a $10,000 monthly penalty if they fail to address security issues within 1–3 months.

A fine of $25,000 per month will be imposed on small businesses for violating the legislation for 4–6 months, while a penalty of $50,000 per month will be charged to large eCommerce businesses.

Companies that ignore the regulations for more than seven months will be charged $50,000 for small businesses and $100,000 for big companies.

Risk #2: Scalability Issues

Scalability is an essential factor to consider when choosing an eCommerce business. As the number of customers, orders, and products on your website grows, you may need to scale it.

Unfortunately, Magento 1 cannot do this because it is already outdated and lacks specific capabilities.

While Magento 2 was developed specifically to meet the needs of dynamic businesses, Magento 1 was designed to meet the needs of static companies.

In a short period, you can scale from hundreds to thousands of products using layered architecture, multiple database masters, and MySQL cluster support.

The scalability of Magento 2 is 50% better than that of Magento 1. Several master databases can be added, and slave databases can be assigned to them. It can process over 10 million views per hour.

As a result of the extraordinary architecture, different components can be scaled independently, including clients, products, databases, etc.

Risk #3: Performance and Speed

Slow loading speed and long page load times are among the significant drawbacks of Magento 1. This was Magento’s primary motivation for building an entirely new platform that comes ready to use.

Magento 2 provides unmatched performance and pace, which is impossible with Magento 1.

With the most recent version of the platform, response times have been improved, loading times have been shortened, and backend operations have been simplified.

As Magento 2 can handle 135,000 more orders per hour than Magento 1, it is an excellent choice for even the most prominent businesses.

Risk #4: Incompatible Integrations

This platform is highly adaptable and heavily relies on third-party integrations.

For example, a simple store usually has at least ten integrations. This includes:

  • Payment Gateways
  • Delivery Options
  • A Content Management System
  • A Search Tool, etc.

These integrations would likely disappear if Magento 1 stopped working altogether.

As time goes on, more and more businesses will cease to offer Magento 1-based solutions. It’s the same with add-ons and extensions.

Your Magento 1 store will be outdated in no time. You must provide your users with an excellent data migration service experience, as your competitors do on M2, to keep your company afloat.

Therefore, Magento 2 migration is one of the most suitable options for your business, and you should consider doing it.

Risk #5: Lost Conversions

Consider upgrading your company’s conversion platform if you feel your company is not converting customers enough. That’s what Magento 2 can help you do.

Studies have shown that Magento 1 conversion rates average 1.1%, while eCommerce conversion rates averaged 3.65% in 2022. Additionally, Magento 2 has more benefits than Magento 1. Magento 2 has a conversion rate of about 2%.

According to Magento 2, users’ online revenue increases by x2 after migrating to Magento 2. Migration can boost many metrics, such as website speed, business performance, conversions, and competitiveness.

Post Magento Migration Checklist: Top Things To Check Post Migration

Post Magento Migration Checklist

Congrats on a successful Magento migration!

But…

The journey doesn’t end here.

Start it off right with this comprehensive post-Magento migration checklist, which covers all the critical aspects of a successful launch.

Post Magento Migration Checklist

#Checklist ItemPriorityRecommended Tool
1Audit Current Website StateCriticalGoogle Analytics + Google Search Console
2Verify Data Catalog IntegrityCriticalMagento Admin Product Grid
3Review Indexing StructureHighScreaming Frog / Sitebulb
4Check Canonical, ALT, & hreflang tagsHighSEO Browser Extension
5Audit XML SitemapHighGoogle Search Console
6Implement Structured Data MarkupMediumGoogle Rich Results Test
7Verify 301 RedirectsCritical.htaccess / Magento URL Rewrites
8Thorough QA TestingCriticalStaging Environment + QA Team
9After-Launch VerificationCriticalGoogle Search Console + Google Analytics

#1. Current State Of Your Website

Of course, it is necessary to use enhanced SEO tools to assess the web page’s performance. Tools such as Google Analytics and Google Search Console, as well as a Crawling tool, will allow you to measure your business’s success regarding Google searches.

These tools show the website’s tags, revenue, conversion rate, and other information about its search engine optimization (SEO).

To ensure that your website performs better after migration, you should carefully and objectively estimate its current state.

#2. Data Catalog

The first thing you should do before migrating your data is to review your data catalog so that the meta descriptions, meta titles, and page descriptions you will migrate are well-prepared and well-fitting.

Next, ensure images are properly migrated with products, and check the process of image migrations. Often, pictures disappear during migrations.

You should also double-check the product data in the system, as it might be broken or incomplete.

#3. Indexing Structure

Indexing Structure Ecommerce

A database with many filters requires a careful review of the indexing structure. In most cases, you’ll want to avoid indexing many pages.

When you wish to block crawlers and not let them onto the page, you need to use the “no index, no follow” directive.

As a result, when you have too many pages, you must choose which ones are worth spending crawling budgets on them and which ones are not worth spending crawling budgets on.

#4. Check Tags

Check Tags in website

If you don’t use canonical tags on your website, Google might not recognize your pages correctly.

Thus, the tags for the website need to have real canonicals, and the images need to have ALT tags.

Also, make sure you implement hreflang tags if you have a multistore to ensure that the correct version of your store is displayed to the right customers.

All these measures will help your store achieve good search engine rankings. Just remember that they should all be in line with your SEM strategy.

#5. XML Sitemap

Check XML Sitemap

As part of the process, reviewing your XML sitemap is also very advantageous to ensure that all pages have been adequately prepared and customized. This customization can often require some attention from the developers, but it is well worth it when done correctly, as it simplifies access to your store.

#6. Structured Data Markup Implementation

Magento 2 has both good news and bad news. First, Magento 2 comes with a product structure out of the box.

Second, you need to prepare microdata and be prepared for additional customizations.

Finally, by putting in the proper metadata and rich snippets, you will be able to increase your chances of Google ranking your pages higher.

#7. 301 Redirects

Check 301 Redirects

The 301 redirect process is crucial to avoid losing non-working links and ensure customers are redirected to a better website.

It is possible to migrate 301 redirects through the Magento admin or the .htaccess file, but the number of redirects should not exceed a certain threshold.

In addition, many redirects will likely need to be rewritten during the migration process, so be careful when migrating your site and checking your redirects.

#8. Test

You should pay attention to intensive testing! Remember that when you don’t do intense testing, it is easy to miss the issues that might drive away your customers.

Further, you should perform a quality analysis of the store’s website so that you can evaluate and improve the speed and performance of the website.

#9. After-Launch

After launching a migrated Magento store, the robots.txt file and the new website console must be uploaded to Google Search Console. Once you have done these, you need to check your tracking.

If it doesn’t work, you won’t receive data about your performance. As a final step, check all the indexed pages, keywords, traffic, and reports. If you follow all the steps, you’re much more likely to succeed in your migration.

Start Your Project Today

Conclusion

Migrating from Magento 1 to Magento 2 is not just an option; it has become a necessity with growing market demand. With support ended, staying on Magento 1 increases security risks, limits performance, and affects growth.

Magento 2 offers better speed, improved checkout, and stronger scalability. These changes directly impact on user experience and conversions.

The migration process does require planning, the right data migration tool, and proper testing. For complex stores, working with an experienced Magento developer can reduce risks and save time.

If you are planning the move, start with a clear audit and timeline. A well-executed Magento 2 data migration sets the foundation for a stable and high-performing eCommerce platform.

We hope this guide helps you with your Magento migration. If you are looking for Magento migration services, drop us a message. At WEDOWEBAPPS, our Magento team is here to help you migrate your store seamlessly without a hitch.

Why Did My Website Crash, and How Do I Fix It?

Introduction

One of the most irritating aspects of having a website is that it may sometimes break unexpectedly. For example, one day, a web page was working fine, and the very next day, it did not. Understand this with an example, “One day your Contact Us form is working successfully sending emails to your sales team, and suddenly the very next day it stopped working fine.”

Other examples of Website Crash may include: One day, a link on your website to some other website worked fine, but on the next day, it did not. Or today, a customer is able to complete the buying process, and the other day your website broke, and no customer could buy anything. Annoying, right?

But do you know why websites crash? There may be many reasons for a website to break, like improper hosting, lack of updates, and outdated software. It is a question of thought about how a crashed website or a site with problems may affect your business. But, if your website visitors are not able to access the homepage or if they encounter an error message while signing in, you are probably losing money by losing customers.

When you are investing in a new website, you should know that there will be some additional costs in the long run. It can be frustrating when your website breaks automatically, even when you did not do anything wrong. Another problem is that when you start a new business, you believe that it will run seamlessly in the long run and will not require any maintenance.

However, this is not true. For the people with such thinking, their sites usually start malfunctioning with time without giving any warning. This is aggravating since the site developers promised that everything up and down was done correctly. Even after this, something fishy happens and leaves you with only one solution, support. Often one of the most time-consuming things.

Being the best responsive website design company for decades, we are experts in web design and development. We are here with a few reasons why your website suddenly crashes or stops working. Before that, let’s discuss some of the common website errors we have seen throughout our experience.

How to Detect Website Issues Before They Turn Into Crashes

Many website crashes do not happen suddenly. Small warning signs usually appear first, such as slow loading pages, random errors, or short downtime periods. Identifying the issues early can help you fix problems before visitors even notice them.

Using uptime monitoring tools allows you to keep track of your website’s availability around the clock. These tools send alerts whenever your site goes offline. Performance testing platforms like Google PageSpeed Insight or GTmetrix help you measure speed and server response time. Error logs and server reports also highlight technical issues that may otherwise go unnoticed.

Tools such as Google Search Console, Google Analytics, and UptimeRobot provide clear insights into traffic drops, crawl errors, and downtime events.

Regular monitoring works like a health check for your website. Fixing minor issues early prevents costly breakdowns later.

website crash support offering updates

Some Common Website Errors

Some Common Website Errors Overview

1. HTTP Errors

HTTP errors can be pretty frustrating at times. We all might have experienced these HTTP errors at least once to date, and we can tell how annoying it could be to browse a website and suddenly hit a wall of HTTP errors.

These error messages are from the web server, indicating that there is something wrong with the website. Common HTTP errors are 401 unauthorized, 403 forbidden, 404 Not Found, 500 Internal Server Error, and 504 Gateway Timeout.

2. Long Metadata

The primary purpose of the page title is to tell visitors what the page is about. The page’s title will be cut off by the search engines if it is longer than 70 characters. Likewise, if we talk about meta descriptions, the character count is a maximum of 155 characters. If the word count exceeds the limit, the extra content will be cut and replaced with “…”. Cutting off the meta is not as enticing for young consumers to visit your website.

Fortunately, these errors are an easy fix and involve brainstorming for you to come up with keyword-rich meta titles and descriptions. Also, you can tell compact yet detailed information of what your web pages are about.

While understanding why websites crash and how to fix them, stay informed with the latest iPhone app development trends to keep your mobile projects on the cutting edge.

3. Too Long or Too Short on Text

This is a standard error most of the websites have. You don’t want too much or too little text on your website. A wordy or busy page may look spammy and can overwhelm the readers. A page with less content may look unprofessional, incomplete. And a sparse website can negatively impact your SEO.

To avoid this, what you can do is to ensure each page has keyword-rich content that provides the users with value and relevant information. Avoid adding content just for the sake of increasing the text unless it provides value to the customers.

4. Duplicate Page Content

Duplicate page content can only compete with each other on your website, and the search engine will give results for only one page instead of all of them. To resolve this error, avoid using the same metadata for more than one web page. Use some online tools to identify any duplicate data that can be edited.

5. Expiring Domain Name

Search engines give results for websites that are trustworthy and established for a long time. If your business has been registered for so many years, it shows your commitment to your business, website, and content.

Keep reviewing your domain registration and get it renewed annually to make sure that your website is not considered spammy.

6. Images with No ALT Text

Search engines tend to process text more than images. So, if your website images are without the ALT text, they would be missed by the search engines. This is another easy fix; simply give keyword-rich descriptive titles to every image of your website. If you want to make this step easier, ensure naming and saving your images properly before uploading.

These were the most common errors you might have or will face at least once in your life. Resolving these may help you get better sales and conversion rates in your business. Next, let us discuss the main reasons why your website breaks and what you can do to fix the crash.

Reasons Why Your Website Breaks All by Itself

Reasons Why Your Website Breaks or Crashes

Below are a few reasons why your website appears to break all by itself sometimes:

1. User Error

Content Management Systems these days are powerful things. With the use of CMS like WordPress or Drupal, even inexperienced developers get the potential to manipulate the website as per their choice. Despite the intention of developing the best website, developers sometimes make a change to their website, unaware of the consequences it may have on other parts.

Sometimes it can be very difficult for the support to track the problem and bring it back to action. Too many admins can enable a place for errors in the website. Therefore, we suggest you limit the roles to one or two primary people.

2. Browser or Version Changes

This means the changes in the software that people use to view your website. A website can be future-proof only to some extent. For example, a website may work perfectly fine in Internet Explorer 9 but may show a subtle change in another version of the same browser. This might cause your website to misbehave.

Remember, there are many other browsers, many versions of those browsers, many operating systems, and versions these websites run. In addition, there are several hardware systems on which these software runs. Therefore, changes in any of the above may impact how your website will behave.

3. Hardware Failure

Hardware problems on the server side can interrupt your website without any warning. Issues such as disk crashes, overheating systems, or power supply failures may stop your server from responding properly. When this happens, your website may load slowly, show errors, or go completely offline. Choosing a reliable hosting provider with backup hardware and failover systems helps reduce these risks and keeps your website available.

4. Firewalls

Some organizations, especially government organizations, have very private IT environments. This causes a website to work perfectly outside the organization but may not work or misbehave properly inside the organization.

5. Software Updates

Software updates like security patches specifically need to occur on your website or a software environment present around them. By software environment, we mean operating system, web server, database, or programming language used in your website. Ultimately, changes to any of these components have the rare but true potential to crash your website somewhere somehow.

6. Updates to Third-Party Software or Systems

Even though your website’s Contact Us form is working absolutely fine, the third-party mail server that receives and stores the emails is not working correctly. Or maybe your website is integrated with Facebook or any other social media, but social media made a change to the rule.

A third-party software that processes credit cards is facing technical difficulties, or the web page on some other website that you linked to your website is broken as that website went through an update. All these factors may affect your website and can lead to a website crash.

7. Computer Viruses

Viruses or malicious scripts can damage your website files, slow down performance, or redirect visitors to unsafe pages. These infections may enter through outdated plugins, weak passwords, or unsecured hosting environments. Once affected, your website may behave unpredictably or get blocked by browsers. Running regular security scans and installing protection tools helps detect and remove threats early.

8. Pop-up Blockers or Environment-Specific Software

A pop-up blocker or software especially related to the IT environment of the website visitor may hinder your website. For example, anti-virus or parental control software can cause problems on the website. It can even make the website completely disappear even without the user understanding why.

Above are the reasons why you may face a website crash or observe broken links on your website. Next is how you can fix the broken links on your website.

9. Traffic Spikes and Server Overload

A website may also crash when too many visitors try to access it at the same time. This situation is common during festive sales, paid ad campaigns, product launches, or promotional events. While increased traffic is good for business, a limited server capacity can struggle to take the load.

Shared hosting environments often allocate fixed resources. When memory or CPU usage crosses the limit, the server may slow down or stop responding. The visitor then faces errors such as pages not loading or checkout failure.

To avoid these issues, choose a hosting plan that allows resource scaling. Cloud hosting, VPS servers, and load balancing help distribute traffic more evenly. Adding a content delivery network also reduces pressure on your main server. Preparing for peak traffic ensures your website stays accessible when customers are ready to buy.

Above are the reasons why you may face a website crash or observe broken links on your website. Next is how you can fix the broken links on your website.

technical audit to diagnose website crash issues

Steps to Fix Broken Links of Your Website

Steps to Fix Broken Links

Here are some ways you can use to fix the broken links on your website:

1. Use an Online Link Checker

Firstly, use an online link checker tool to identify whether or not there are any broken links on your website. If yes, the next step is to go to the relevant pages and remove the available broken links. You can also set a reminder for every few months to check and keep the links up to date.

2. Test New Links

Any new blog or a web page link should be tested to ensure they work properly before you publish them on your website. The same can be done with the links in newsletters, emails, or social media.

As you learn how to troubleshoot website crashes, don’t miss out on understanding iPhone app development to ensure your mobile apps are built on a solid foundation.

3. Set Up 301 Redirects

If you change or update the URL of any page on your website, ensure setting up 301 redirects. This will help anyone clicking on the old links redirect automatically to the new one. If you are using WordPress, there are plenty of plugins available to set up 301 redirects.

4. Make Clear Restricted Access Pages

The restricted access pages on the website should be made clear. This is to make the users prepared. For example, if a web page is only for admins, add a “member login required” note beside the link.

5. Use Simple URLs

When creating new web pages for any specific products, events, or campaigns, make sure to use simpler URLs so that the users can easily remember and type that particular page.

What Should You Do if Your Website Crashes

The very first thing you can do is not to panic. Just like sometimes electricity goes out, your mobile phone goes out, and even your television sometimes breaks. Everything in this world ultimately has an outage. Website crashes happen, but it is not something to panic about. Instead, try to identify whether it is a web hosting issue, a temporary issue that may get resolved on its own, a technical issue that will require professional help, or your website has been hacked.

It is possible that your website hosting company may be facing an outage. Contacting the web hosting company will quickly resolve your problem, and your website will be back in action. Almost every web host shoots for 99.9% uptime, but sometimes there may be some unforeseen events, and we cannot do anything rather than wait.

If your website shows an “Internal Server Error” message, contact your web hosting company to confirm whether there is any server problem. Probably MySQL server is down, or there was a planned update that caused a problem. Submitting a request to the web hosting company may get your issue resolved quickly.

There is a possibility that there is a plugin update or theme update. Also, the core may have caused the problem, or the developer might have made a mistake. In such cases, it is recommended to contact the web developer who has developed the website.

If your website has been hacked, we would suggest you work with a professional and get your website remediated as soon as possible.

WeDoWebApps LLC is a dedicated, responsive website design company USA offering many other services like mobile app development, digital marketing, and most importantly, we are helping businesses across the globe to improve the security and performance of their websites. Is your website facing a problem? Contact us and share your query; we will do our best to help you resolve the issues on your website.

Website Security Practices That Reduce Downtime

Website Security Practices That Reduce Downtime

Security issues are a common reason websites stop working without warning. Malware infections, weak access controls, or outdated software can slow down pages or even take the entire site offline.

Taking preventive measures reduces the risk of sudden failure and protects both your business and users.

1. Install SSL and Secure Data Transmission

An SSL certificate encrypts the data shared between your website and visitors. This protects login credentials, payment details, and form submissions while also building user trust.

  • Enable HTTPS across all pages.
  • Renew certificates before expiry.
  • Fix mixed content warnings.
  • Redirect HTTP URLs to HTTPS.

2. Keep Software and Plugins Updated

Old CMS versions, themes, and plugins often contain bugs or compatibility issues. Regular updates patch these gaps and keep your website stable with the latest server environments.

  • Update the CMS core regularly.
  • Remove unused plugins and themes.
  • Test updates on staging first.
  • Monitor plugin compatibility.

3. Run Regular Malware Scans

Hidden malware can inject harmful code, redirect users, or damage files. Routine scanning helps to detect suspicious activity early so you can act before visitors are affected.

  • Use trusted security scanning tools.
  • Schedule automatic weekly scans.
  • Monitor unexpected file changes.
  • Remove infected files immediately.

4. Create Reliable Backups

Backups give you a recovery option when something breaks. Instead of rebuilding the site, you can restore a working version quickly and reduce downtime.

  • Set daily or weekly automated backups.
  • Store copies off the main server.
  • Test restoration periodically.
  • Keep multiple backup versions.

5. Strengthen Admin Access

Too many admin users increase the chances of accidental changes or unauthorized access. Limiting permissions keeps your system safer and easier to manage.

  • Use strong and unique passwords.
  • Enable two-factor authentication.
  • Assign role-based responsibility.
  • Delete inactive accounts.

Consistent security practices act like routine maintenance. Small checks today prevent larger issues later and help your website stay available for every visitor.

Website crash prevention

Quick Checklist to Fix a Crashed Website Fast

Checklist to Fix a Crashed Website

When your website suddenly stops working, time matters. Every minute of downtime can lead to missed inquiries, lost sales, and frustrated visitors. Following a simple troubleshooting checklist helps you identify the cause faster and restore operations with less stress.

1. Check Hosting and Server Status

Sometimes the issue is not within your website but with your hosting provider. Server outages or maintenance can temporarily make your site inaccessible.

  • Log in to your hosting dashboard.
  • Check server uptime status.
  • Review outage notifications.
  • Contact hosting support if needed.

2. Clear Cache and Test the Website

Cached files in browsers or servers may display outdated or broken versions of your pages. Clearing the cache often resolves loading issues quickly.

  • Clear browser cache and cookies.
  • Flush server or CDN cache.
  • Test in incognito mode.
  • Check on multiple devices.

3. Disable Recent Plugins or Updates

New plugins or recent updates may create conflicts with your theme or CMS. Rolling back changes helps isolate the problem.

  • Disable recently added plugins.
  • Revert the latest updates.
  • Activate the default theme temporarily.
  • Test after each change.

4. Restore from Backup if Needed

If the issue persists, restoring a previous working version can bring your website back online quickly. This is often faster than manual fixes.

  • Choose the most recent clean backup.
  • Restore files and the database.
  • Verify forms and links.
  • Monitor site performance.

5. Run Security and Error Checks

Technical or security issues may still exist even after restoration. Running quick checks ensures the site remains stable.

  • Scan for malware.
  • Review server error logs.
  • Check database connectivity.
  • Confirm all pages load correctly.

This checklist works like first aid for your website. Addressing these steps calmly and in order often resolves most crashes without major disruption.

Conclusion

Website crashes are frustrating, but they are rarely random. In most cases, the cause is linked to hosting limits, outdated software, security gaps, or missed maintenance. Identifying these issues early and following preventive practices can keep your website stable and accessible for visitors.

Regular monitoring, timely updates, strong security checks, and reliable backups work together to reduce downtime. When these steps become part of your routine, your website runs more like a well-maintained system rather than something that breaks unexpectedly.

If managing all of this feels overwhelming, working with an experienced web designer team can save both time and revenue. Professional monitoring and maintenance ensure your website stays online, secure, and ready to serve customers every day.

free consultation for website monitoring

Website Speed Testing – Importance, Tools & Performance Evaluation

Website Speed Testing: Why It Matters

Have you ever clicked a website and had to wait for a long time before anything appeared? Chances are, you did not stick around. Most users expect the web pages to load faster or within a second, and if not, then the website loses the traffic, leading to lower engagement, and a missed opportunity.

Now let’s just be honest,we all have used websites at least once in our lifetime, and we know how impatient we are when it comes to the loading speed of a website. Thus, the performance and ability of your website to load quickly are essential for its usability and success. This is where website speed testing becomes important.

Just understand it by taking your example. Have you ever visited a website and waited for a long time for it to load? You felt frustrated, right? The same thing happens when visitors come to your website, and it takes longer than usual; they will probably feel frustrated and return back searching for your competitor’s website.

Loading speed not only affects user experience but also directly impacts your website’s SEO, and on this website, performance testing plays an important role in maintaining the responsive website design. So, whether you are a jewelry merchant, a school, a college, or in any other industry, your website should be optimized for search engines. Therefore, Website Speed and Performance are crucial.

In this guide, we’ll look at why speed matters, which performance tests are most effective, and what tools can help you measure and improve how your website performs under different conditions.

What Is the Importance of Website Speed?

Speed can either make your website or break it. This is the reason why website developers, marketers, analysts, and IT departments are more focused on website speed testing tools. Improving your website speed and performance metrics can significantly impact your overall website performance, thereby helping you achieve your success goals.

Page speed impacts your website in almost every area, from user experience to search engine optimization and website speed optimization. We have seen that most website users will not wait for more than 4 seconds on a web page to load before moving on to some other store. And this is a fact that faster loading websites will perform better in the market.

But how to determine the speed of your website? Just sitting in front of your computer, looking for your website to load to determine the speed. Is it the solution? Absolutely Not. That is why most of the developers and testers will take advantage of the wide range of performance testing tools for thoroughly testing scenarios.

Before knowing various tools for speed testing your website, you should know that there are many other kinds of performance tests that need to be performed on a website. Read further to learn more about the types of website performance tests.

Types of Website Performance Testing

Before you begin improving the performance of your website, it is important for you to understand about the different types of website performance testing options to evaluate how your site is working under various conditions.

Each type of website performance testing maintains the focus on different specifications, which are speed, stability, and responsiveness.

Performance tests are the non-functional tests done to check the responsiveness, scalability, and throughput of the website under test. This mainly helps in increased revenue generation and enhanced user experience.

Below are the key test types used by QA teams and developers to ensure reliable and fast-loading websites:

  • Performance Testing

This test allows you to measure how quickly and effectively a website responds under various situations. The test will help in verifying your website for managing various processes like page loads, user requests, or form submissions within the acceptable limits.

  • Load testing

Load testing allows you to test your website when it comes to performance, and ensure the multiple users accessibility. It helps in determining the upper limit of website traffic and can handle it without affecting the user experience.

  • Stress Testing

This method pushes the website beyond the normal traffic limit by seeing the behaviour under extreme conditions. It helps in identifying the weak points, such as memory leaks, server crashes, or timeout issues.

  • Capacity Testing

Capacity testing is best when comes when to measure how many users your website can handle and what the limit is for that. This is useful when it comes to managing the planning of resources and scaling the business infrastructure efficiently.

  • Soak Testing (include missed label)

Soak testing allows you to evaluate the performance of a website while maintaining the accuracy over an extended period. Helps in identifying the performance without reducing the performance and increases the amount of visibility.

Testing Test Cases Example

For understanding how these tests can be applied in real-world scenarios, here is an example for your reference:

In a load test case, 1000 users are supposed to simulate the process while maintaining the product category, adding items to the cart, and the checkout process. The goal is to observe how the site manages simulation toward the actions of users across various key features.

By applying this combination of various tools or processes, these tests allow developers and testers to maintain the complete picture of how the website is performing under different conditions and allow them to make informed decisions for site optimization.

How to Perform Performance Testing for Web Applications

Before you make the plan for testing your website for the application, you should prepare for the various aspects. Successfully testing a web application starts with having clarity towards the business goals, access to the right tools, and a testing environment that accurately reflects how the website is properly functioning in real-world scenarios.

Here are the key points to consider before launching a test:

1. Understanding the website’s functional scope

Identify the core functions of your web application, if it includes payment gateways, APIs, and third-party integrations. These components include the various aspects of managing the test performance.

2. Define the purpose of testing

Allow you to clarify the accuracy of the measures, whether it is loading time, system responses towards user actions, scalability, or stability in high traffic for the website. This helps in selecting the right website performance testing.

3. Set clear KPIs

Determine what success looks like with handling the common performance metrics, including:

  • Response time (in seconds)
  • Number of simultaneous users
  • Throughput (request per second)
  • Error rates during peak usage

4. Know your user expectations

Consider how quickly your end users are expecting from your website, what they hope to interact with the site, and what features are most important to them.

5. Check test environment readiness

Be sure about the need for tools, hardware, and QA support. The testing environment should closely match your website setup in terms of server configuration and software stack.

6. Project timeline and QA schedule

Make an effective plan for testing activities to fit within the website development timeline, leaving enough room to fix issues and retest if necessary.

Taking these factors into account helps in creating a well-structured website speed testing strategy that reveals the real bottlenecks and guides performance improvement with precision.

start with performance testing

Step-by-Step Process for Website Speed Testing

Once your performance goals are clear and your testing operation is ready, you can begin by starting with the structured website speed testing. This involves setting up conditions to simulate real user behaviour and evaluating how your website performs under various workloads.

Here are the steps that you can follow while website speed testing:

Step 1: Set up the testing environment

Prepare physical and software components that are needed for testing. This includes various specifications like hardware, browser, automation tools, testing data, and network configurations that reflect your website’s performance.

Step 2: Define test plans and scenarios

Plan the design test case that covers all the key required actions for the website. Ensure that all criteria are being covered while handling all possibilities of visiting product pages, submitting forms, logging in, or completing transactions. Your plan should cover all normal, peak, and stress-level usage.

Step 3: Run a baseline test

Now, test the website while covering all the key actions. Test your website server with a single user to ensure the setup is functioning correctly. This will serve as a baseline for comparison with more complex tests.

Step 4: Simulate realistic workloads

Use performance testing tools to simulate multiple user sessions. By accessing these tools, you can easily apply for the concurrent requests and manage how users from different locations interact with your website.

Step 5: Monitor key metrics during testing

You should keep track of response time, server usages, memory load, and error rates. Website speed testing tools will help in capturing data while your test cases are being executed.

Step 6: Analyze results and identify issues

Know about the data of the website regarding slow-loading elements, that are larger images, unoptimized scripts, or server response delays. Look for patterns of your website issues in terms of handling load and pain point areas for the need of improvements.

Step 7: Document bugs and performance issues

Make sure you discover the issues during the testing by knowing the clear details. Some website speed testing tools also provide suggestions for fixing performance issues.

This was all about website testing, its importance, and the steps to test a website or a web app. Now that we know how important it is to test the website before launch, many tools can help you test your website and get it ready for launch. Read further to gain some knowledge about Website Speed and Performance Testing Tools.

Best Speed Testing Website Tools You Can Use

Now that you have a lot of understanding about the best speed testing website, check out these tools for testing your website’s speed. Each tool offers its unique features, reporting, and different ways to show results.

It is essential to know that the DNS lookup will be slower when you are running these tools for the first time. Therefore, it is recommended to run the tests multiple times and take an average of the overall results.

1. Pingdom

Pingdom is the best speed testing website tool for managing reports. The test results in Pingdom are usually divided into four sections:

  • Waterfall breakdown
  • Performance grade
  • Historical performance tracking
  • Page analysis

The page analysis features a website overview with additional information like size analysis, size per domain, requests per domain, and what type of content had more requests.

Pingdom’s speed test tool enables you to test your website from around 70 different locations. The results are provided with the speed insights that tell you where you need improvements. The result is broken down into four sections: Page size by domain, page size by content type, requests by domain, and requests by content type.

2. Site 24×7

Your page speed is often determined by the amount of HTML, CSS, and JavaScript you have implemented on the front-end. In other cases, your host or the server environment can directly impact your page speed. The site 24×7 page is specially designed to evaluate server environment performance.

It integrates with other system administrator tools and provides a readable waterfall graph that displays what and when is loading every page. Its integration with system administration tools can make it a great addition to the list of top website speed testing tools.

3. Dotcom-Monitor

Dotcom-Monitor offers you 25 different locations and 7 different browsers, including BlackBerry. Once you run the test on the dotcom monitor, you will get the results based on the load time and get details on your server response. With this tool, you will also be able to check how your website looks to the people visiting for the second time and have cached resources on their system.

It helps you see how your load time varies as per the location and what difference users are experiencing on your website worldwide. It is a perfect tool if you want to know how people experience your website from different geographical regions of the world.

4. Google PageSpeed Insights

Google PageSpeed Insights is a website page speed testing tool that grades your website from 1-100. The higher grade it gives you, the more optimized your website will become. If, after testing, you get a grade of more than 85, that means your website is performing well. In addition, it gives you reports for both mobile and desktop versions of your website.

You can view suggestions for improvements, such as the need to minify your CSS, optimize your images, or any other enhancements required. In addition, the mobile version report includes an extra section known as “User experience” that is involved in the scoring of your website.

5. GTmetrix

GTmetrix goes into detail, assigning your website a grade from F to A. Its report is divided into five sections. It includes metrics from Google Lighthouse Tool, video, history, and waterfall breakdown. By doing a free registration, you can test your website from different locations. You can test your website across various browsers, connection types to see how it impacts your website.

GTmetrix replaced YSlow and PageSpeed metrics in 2020 with tabular data from Google Lighthouse. Lighthouse is the golden standard for modern website performance improvements. You only need to create a Google account, and most of the features are free to use.

6. Uptrends

Uptrends offers 226 different locations to choose from when you are executing your speed test. You can even choose to test it with a desktop or a mobile device. You can select the different screen sizes and whether or not to throttle the virtual connection speed.

Uptrends used to be a very basic tool, but they have upgraded their services over time. Uptrends’ website testing report is broken down into two sections: waterfall graph and domain groups. The domain group comes with a different perspective, i.e., it categorizes the resources into other sources.

7. WebPage Test

WebPage Test is an open-source tool for website performance testing. It allows you to test your website across 40 different locations and a wide range of devices. Additionally, the tests can also be executed over both slow and fast 4G mobile networks. The test reports will include a grade from F to A.

It will also include additional information like compression information, caching, TTFB, waterfall charts for the load speed, etc. It also has a unique feature where the test is executed 3 times, and data sets of all three times are displayed. This will help you identify whether the DNS or CDN is causing any delay.

8. DareBoost

DareBoost is a performance testing tool that gives a detailed analysis across multiple locations around the world for both mobile and desktop versions. It has a simple dashboard yet shows various information like the moment it starts testing the page to the end, and gives tips on how you can improve to make it search engine friendly.

The above-mentioned were some of the top performance testing web applications that will help you to test your website and optimize it according to the search engines.

But, don’t you think this is kind of manual work for you to do? Since the industry is rapidly growing, testing has also been automated. What is meant by an Automated test?

Automated Performance Testing for Web Applications

Suppose your website is growing with complexity, and manual testing becomes time-consuming and inconsistent. This is where the automation tools make the greatest difference.

Automated performance testing web applications allows the team to run repeatable, accurate tests that simulate real user activity across various conditions.

What is automated website testing?

Automated website speed testing include use of software, tools, and frameworks which allow to handle user behavior, monitor system performance, and detect issues easily.

Tools like Selenium, Apache JMeter, and Google Lighthouse are commonly used to maintain an easy setup for test cases such as browsing, form submission, and cart checkouts.

This approach helps in testing:

  • Website responsiveness across browsers and devices.
  • Server response time under different traffic loads.
  • Scalability of your application over time.

Why choose automation over manual testing?

Manual testing has its different place during the initial development stages, but now to maintain the scalability and consistency of traffic. Automated tests offer several advantages:

  • Faster execution of repeated tests.
  • Early detection of bottlenecks after code changes.
  • Offer continuous support for integration and deployment (CI/CD) pipelines.
  • Reduced costs over time.

When should you automate performance testing?

  • After each development sprint.
  • Before a major release or product launch.
  • When traffic is expected to spike (campaigns, festivals, etc.).
  • As part of regular quality assurance for high-traffic websites.

By including automated performance testing in your workflow, you reduce the risk of unexpected slowdowns, broken elements, or server crashes during peak usage.

It also provides the accuracy and consistency needed to make informed decisions about performance improvements.

Checklist: When and How Often to Test Website Speed

Regular website speed testing helps keep your site fast and reliable. Here’s when you should run tests:

  • After every major update or redesign
  • Before launching new features or pages.
  • During high-traffic periods (sales, events, promotions).
  • Monthly or quarterly being the part of routine maintenance.
  • When users report slow performance.

These checkpoints ensure your website stays responsive, performs well under load, and meets user expectations consistently.

Conclusion: Improve Website Speed to Stay Competitive

Fast-loading websites lead to better user engagement, improved search visibility, and stronger conversions. Regular website speed testing helps you identify performance issues early and optimize for long-term results.

Whether you’re managing an online store, a service platform, or a content-based site, using reliable website speed testing tools and running scheduled performance testing for web applications can help maintain a high-quality user experience.

If you’re unsure where to start or need help improving your site’s performance, partnering with a specialized team can save time and reduce technical challenges.

help with testing and speed optimization

How WordPress Changed Web Development: History, Evolution, and Industry Impact

Introduction

Creating a website used to be complicated. Every page had to be coded manually. Even small edits meant touching HTML files and uploading changes one by one. For businesses and creators, maintaining a website was time-consuming and expensive.

As the internet grew, this approach no longer made sense. People needed a simpler way to publish content, update pages, and manage websites without technical barriers. This demand led to the rise of content management systems and marked an important phase in content management system history.

Among these solutions, WordPress quickly stood apart. What began as a blogging platform gradually expanded into a flexible system that anyone could use. This evolution of WordPress, supported by its open source nature and growing ecosystem, changed how developers built websites and how businesses established their online presence.

In this guide, we will discuss how WordPress changed web development, often placing the platform at the center of modern publishing. Explain its journey and popularity while highlighting how it continues to shape the way websites are created and managed.


High performance WordPress website development

Content Management System History Before WordPress

Before WordPress, managing a website was far from simple. Websites were primarily static, requiring developers to code each page manually. Updating content was slow, technical, and often expensive. These challenges created the need for tools that could make publishing faster, easier, and more accessible.

The development of these early systems is a key part of content management system history. Understanding their limitations explains why WordPress became such a transformative platform in web development.

Static HTML Websites and Manual Updates

In the early days of the internet, most websites were built using static HTML. This approach created several challenges:

  • Each page had to be coded manually in HTML and CSS.
  • Even minor changes required editing files and uploading them through FTP.
  • Non-technical users had little to no control over their websites.
  • Maintaining content was time-consuming and prone to errors.

These constraints meant that creating and updating websites was expensive, slow, and difficult to scale, especially for small businesses or individual creators.

Early CMS Platforms and Their Limitations

To address these problems, some early content management systems were developed. However, they came with their own set of issues:

  • Most were expensive and designed for large enterprises, not small users.
  • Customization was limited, and adding new features often required technical expertise.
  • Supported communities were small, making troubleshooting difficult.
  • Flexibility in design and functionality was minimal.

These early attempts marked the beginning of open source CMS evolution, as web developers started experimenting with shared code and community-driven improvements.

Why Simpler Publishing Systems Were Needed

The limitations of static websites and early CMS platforms highlighted the need for simpler solutions:

  • Tools that allowed anyone to update content without coding.
  • Faster and more efficient website maintenance.
  • Greater flexibility in design and functionality.
  • Community resources for templates, plugins, and collaboration.

This demand created the perfect environment for WordPress, a platform that would later redefine the content management system history by making web publishing accessible to millions.

WordPress History and Its Early Adoption

WordPress was launched in 2003 as a simple blogging tool designed to make publishing online easier for writers. Its initial goal was to offer a user-friendly platform that required minimal technical knowledge, while still allowing developers to extend functionality through codex and resources.

The platform’s accessibility and flexibility quickly gained attention, and WordPress began gaining traction beyond personal blogs. Its history reflects not just the story of a software tool but also show about the beginning of a movement that would reshape web development practices for creators, businesses, and developers alike.

Launch of WordPress and Its Blogging Roots

WordPress started as an improved version of an earlier blogging platform called b2/cafelog. Its focus was simple:

  • Providing a clean interface for writers to publish online.
  • Allowing users to manage content without touching code.
  • Enabling developers to customize features through plugins.
  • Introducing themes for basic design flexibility.

These early features made WordPress popular among bloggers, who appreciated a platform that was easy to set up and maintain.

Key Milestones in the First Few Years

In the early years, WordPress released several updates that shaped its growth, which are:

  • 2004: Introduction of the plugin architecture, allowing easy feature expansion.
  • 2005: Themes were introduced, letting users customize the site’s appearance.
  • Later in 2005: Media management improved, making image and video handling simpler.

These milestones marked WordPress’s evolution from a simple blogging tool to a versatile content management system, attracting both casual users and developers.

Growing Popularity Among Publishers and Small Websites

WordPress adoption expanded quickly due to its simplicity and flexibility:

  • Bloggers and small businesses could launch websites without technical help.
  • Communities began sharing plugins and themes, enhancing functionality.
  • Its open-source model encouraged collaboration and global contribution.

This early growth laid the foundation of WordPress to become a central platform in modern web development, influencing WordPress history and the broader evolution of WordPress.

The Evolution of WordPress From Blog Tool to Full CMS

WordPress began as a simple blogging platform but quickly evolved into a powerful content management system. Its development over the years introduced new features and flexibility, which allow individuals, businesses, and developers to create websites beyond simple blogs. Understanding this evolution shows how WordPress became a central part of modern web development.

Introduction of Themes

Themes have transformed WordPress from a basic blog to a visually flexible platform. Before the theme, customizing the appearance of a site required coding skills. Theme allowed:

  • Users can select a pre-built design without any programming knowledge.
  • Developers create custom themes for unique branding.
  • Consistent page layout across websites.
  • Easy adaptation for blogs into professional business websites.

By making design accessible, themes expanded WordPress’s user base far beyond bloggers.

Plugin Architecture and Expanding Functionality

Plugins allowed WordPress to grow in capabilities without altering its core software. This was a major step in the evolution of WordPress. Plugins enabled:

  • Adding features like SEO tools, forms, and galleries effortlessly.
  • Developer to build and share solutions within a growing community.
  • Customization of the website without touching the core code.
  • Website to scale as needs change, making WordPress adaptable for different industries.

Plugins created a dynamic ecosystem, allowing WordPress to serve small blogs, corporate websites, and complex content-driven platforms alike.

Expansion into Business and eCommerce Websites

Over time, WordPress became a platform suitable for businesses of all sizes:

Its evolution enabled:

  • Quick setup of corporate and professional websites.
  • Integration with eCommerce plugins like WooCommerce for online stores.
  • Easy management of content-driven websites.
  • Support for custom solutions, themes, and plugins for specialized needs.

This stage established WordPress as more than a blogging tool. It became a versatile CMS central to the evolution of WordPress and modern web development practices.


we handle complete WordPress development

Open Source CMS Evolution and Community-Driven Development

The success of WordPress was not only due to its features but also its foundation in open source principles. By allowing anyone to view, modify, and share the code, WordPress benefited from a collaborative development model. This approach fueled rapid innovation and created a robust WordPress ecosystem.

The rise of open source CMS platforms highlighted how community-driven development could drive software evolution, shaping modern content management systems.

Open Source Philosophy and Collaborative Development

Open source principles became central to WordPress’s growth:

  • Developers worldwide could contribute to improving the platform.
  • Users could customize and share plugins, themes, and tools.
  • Continuous collaboration accelerated innovation and problem-solving.
  • Transparency ensured the platform remained secure and adaptable.

This open source CMS evolution allowed WordPress to improve faster than proprietary systems and gain trust from users and businesses alike.

Community Contributions and Plugin Ecosystem

The WordPress community played a crucial role in expanding its functionality:

  • Thousands of free and premium plugins enhance websites.
  • Theme developers created designs for diverse industries.
  • Online forums and documentation helped new users and developers.
  • Community-driven projects ensured compatibility and continuous updates.

The result was a vibrant WordPress ecosystem that empowered anyone to create complex websites without heavy technical skills.

Impact on Modern CMS Platforms

The community-driven, open source approach of WordPress influenced other content management systems:

  • Encouraged the adoption of open source models by new CMS platforms.
  • Showed the value of plugins, themes, and modular architecture.
  • Established a collaborative development standard for modern web tools.
  • Demonstrated how community support drives rapid platform evolution.

This stage cemented WordPress’s position as a leader in the open source CMS evolution, shaping both its own growth and the broader CMS industry.

Understanding the WordPress Ecosystem

WordPress is more than just a platform. It is a vast, interconnected WordPress ecosystem made up of themes, plugins, developers, agencies, and community resources. Its ecosystem allows anyone from bloggers to large businesses to build websites, customize functionality, and get support easily. Understanding the components of this ecosystem shows why WordPress has remained the most popular CMS worldwide.

Theme Marketplaces

Themes are the foundation of a WordPress site’s design. The WordPress ecosystem offers both free and premium themes through official and third-party marketplaces:

  • Users can select from thousands of designs to match their website goals.
  • Premium themes often include built-in customization tools and support.
  • Developers can create and sell themes, contributing to the ecosystem’s growth.
  • Theme marketplaces allow rapid deployment of professional-looking websites.

This makes website design accessible to anyone, regardless of technical skill.

Plugin Libraries

Plugins extend WordPress functionality, adding features without modifying core code. The WordPress ecosystem thrives on an extensive library of plugins:

  • Thousands of free and paid plugins are available for SEO, security, eCommerce, and more.
  • Developers can create, share, and update plugins globally.
  • Plugin libraries allow sites to scale and adapt as needs change.
  • Community reviews and ratings help users choose reliable solutions.

Plugins are a key reason WordPress can support everything from blogs to complex business websites.

Developers, Agencies, and Contributors

The WordPress community consists of a wide network of professionals who help maintain and expand the platform:

  • Freelance developers and agencies build custom solutions for clients.
  • Contributors improve WordPress core, create themes and plugins, and maintain documentation.
  • Global collaboration ensures continuous updates, security, and innovation.
  • Participation in events like WordCamps strengthens the ecosystem.

These contributors are a vital part of the WordPress ecosystem, keeping it dynamic and sustainable.

Documentation and Community Support

Support is a core component of the WordPress ecosystem:

  • Extensive documentation guides beginners and experienced users alike.
  • Online forums, Slack groups, and social media communities allow users to ask questions and share solutions.
  • Tutorials, blogs, and videos help users maximize platform potential.
  • Community-driven support ensures problems are resolved quickly and effectively.

Strong documentation and active support networks make WordPress approachable for everyone.

WordPress Impact on Web Development Workflows

WordPress has fundamentally changed how websites are built and managed. Its flexibility, open source approach, and ecosystem of themes and plugins have streamlined development, allowing teams to work faster and more efficiently. Understanding the WordPress impact on web development helps explain why it became the preferred platform for developers, designers, and businesses alike.

Faster Builds and Reusable Components

WordPress introduced reusable components that accelerated website development:

  • Pre-built themes and templates reduced design time.
  • Plugins added ready-to-use functionality without custom coding.
  • Developers could create custom components for repeated use across projects.
  • Faster builds allowed businesses to launch websites more quickly.

These improvements transformed web development workflows, making projects faster and more predictable.

Reduced Technical Barriers

WordPress lowered the technical knowledge required to build websites:

  • Non-developers could manage websites without coding skills.
  • Teams could implement changes and updates via intuitive dashboards.
  • Developers could focus on advanced customization while handling repetitive tasks efficiently.
  • Open source tools encouraged experimentation and learning.

By reducing barriers, WordPress made web development accessible to a wider audience, expanding its adoption globally.

Easier Content Publishing for Teams

WordPress simplified content management, which reshaped team workflows:

  • Editors and marketers could update pages without developer intervention.
  • Scheduling, version control, and collaborative editing improved team efficiency.
  • Media management streamlined publishing for blogs, eCommerce, and corporate sites.
  • Built-in roles and permissions helped teams maintain control and security.

This collaborative approach changed how development and content teams interacted, demonstrating the WordPress impact on web development across organizations.


Our team designs, builds WordPress website

How WordPress Changed Web Development for Businesses and Creators

Web development once required significant time, technical expertise, and budget. Building even a small website meant hiring developers, writing custom code, and managing updates manually. WordPress simplified this process by introducing ready-to-use tools, flexible designs, and easier content management.

Understanding how WordPress changed web development helps explain why businesses, startups, and creators can now launch professional websites faster and with fewer resources.

Lower Development Costs

WordPress reduced the overall cost of building and maintaining websites:

Instead of developing everything from scratch, users can rely on pre-built resources:

  • Free and premium themes eliminate the need for custom design work.
  • Plugins provide advanced features without expensive development.
  • Open source licensing removes software costs.
  • Ongoing updates reduce long-term maintenance expenses.

These advantages make WordPress accessible for small businesses, independent creators, and growing brands.

Faster Launches

Speed became one of the most noticeable benefits of WordPress adoption:

Websites that once took months to develop can now be launched much faster:

  • Pre-designed templates shorten design and setup time.
  • Built-in dashboards simplify configuration and publishing.
  • Reusable components streamline repeated development tasks.
  • Teams can update content without waiting for developers.

This efficiency clearly shows how WordPress changed web development, shifting projects from lengthy builds to quicker releases.

Flexibility Across Industries

WordPress adapts to different industries and website types with ease:

Its modular structure supports a wide range of use cases:

  • Blogs, portfolios, and business websites.
  • eCommerce stores and online marketplaces.
  • Educational platforms and membership sites.
  • Corporate portals and content-heavy publications.

This flexibility allows organizations to scale and modify their websites as needs grow, reinforcing how WordPress changed web development across industries.

Challenges and Limitations of WordPress

While WordPress offers flexibility and ease of use, it is not without challenges. Understanding its limitations helps users make informed decisions about when and how to use the platform. Addressing these issues properly ensures smoother development and long-term website performance.

Performance Concerns

WordPress sites can sometimes face performance-related challenges:

  • Using too many plugins can slow down page loading times.
  • Complex themes or poorly optimized code may affect speed.
  • Large media libraries can increase server load.
  • Regular optimization and caching are necessary for high-traffic sites.

Awareness of performance considerations helps maintain a fast, responsive website.

Security and Maintenance Issues

Security is a critical aspect of managing WordPress websites:

  • Outdated themes, plugins, or core software can create vulnerabilities.
  • Regular updates and backups are essential to protect data.
  • User permissions must be managed carefully to prevent unauthorized access.
  • Security plugins and monitoring tools can mitigate common risks.

Being proactive with maintenance ensures a secure and stable environment.

When Custom Solutions Are Required

Some website requirements may go beyond what WordPress can offer out-of-the-box:

  • Highly specialized functionality may require custom development.
  • Large-scale enterprise applications may need additional architecture planning.
  • Integrations with proprietary software may require developer intervention.
  • Over-reliance on plugins for unique features can complicate long-term maintenance.

Recognizing when custom solutions are needed helps teams plan effectively and avoid potential issues.

WordPress Today and the Future of Content Management Systems

WordPress continues to be the most widely used content management system worldwide. Its WordPress ecosystem has grown to include thousands of plugins, themes, and professional developers, making it suitable for websites of all sizes.

The platform’s open source foundation and strong community support ensure it continues to adapt to modern web development practices. Its flexibility, ease of use, and collaborative nature have allowed it to remain relevant even as new technologies emerge.

Modern Features and Updates

Recent updates have improved performance, security, and user experience:

  • The Gutenberg block editor introduced visual, modular content editing.
  • Core updates enhance speed, accessibility, and security.
  • Improved APIs allow developers to build more complex and interactive applications.
  • Integration with tools for eCommerce, SEO, and analytics continues to expand.

These features demonstrate WordPress’s ongoing evolution and its role in shaping modern development workflows.

Trends Shaping WordPress’s Future

Several emerging trends indicate where WordPress is headed:

  • Headless WordPress enables content delivery to multiple platforms beyond websites.
  • Advanced page builders and AI-assisted tools streamline design and content creation.
  • Continuous growth of the WordPress ecosystem through plugins, themes, and community projects.
  • Emphasis on accessibility, speed, and mobile-first design aligns with evolving web standards.

These trends suggest that WordPress will remain central to web development for years to come.

WordPress’s Continuing Impact

The platform’s influence on web development is ongoing:

  • Teams can build faster, reusable, and scalable solutions.
  • Small businesses and creators gain access to professional website tools.
  • Developers benefit from a flexible, collaborative environment.
  • WordPress continues to set standards for CMS design, workflow, and community collaboration.

Its enduring presence confirms the significant WordPress impact on web development and its place in the broader digital ecosystem.

Key Takeaways

WordPress has transformed the ways websites are created, managed, and scaled. From its early days to a blogging platform to becoming a full-featured content management system. Its journey highlights the WordPress impact on web development and the growth of a collaborative WordPress ecosystem.

By lowering technical barriers, providing reusable components, and supporting a vibrant community of developers, contributors, and users. WordPress has reshaped the web development workflow for individuals and businesses alike. Its evolution demonstrates the power of open source platforms to drive innovation, accessibility, and scalability in modern web design.

For anyone exploring web development, understanding the history, evolution, and ecosystem of WordPress provides valuable insight into how content management systems have changed over time and why WordPress remains central to this transformation.


Expert WordPress development support

Should You Build an Android App? Pros, Cons & Business Considerations Explained

Introduction: Why Platform Choice is a Strategic Business Decision

Mobile application development plays a crucial role in the digital transformation strategy of a business. Businesses of every size and type are already investing more and more in mobile solutions to optimize their internal operations, enhance customer engagement, and boost their digital presence. Choosing the right mobile application development platform is an important, strategic decision in this journey.

Many businesses consider Android a strong contender because of its global market dominance and open-source flexibility. However, like any strategic technology-related decision, Android app development has its pros and cons. From device fragmentation to lower revenue per user (RPU), businesses need to consider factors like these carefully.

This blog will talk about the advantages of Android app development along with its disadvantages, providing valuable insights to help businesses develop a mobile strategy. This blog will be helpful for businesses of all sizes, from startups seeking cost-effective solutions to an enterprise looking for scalable, globally-ready solutions.

What Is Android App Development?

Android app development means building applications that run smoothly on devices based on the Android operating system. Application developers use programming languages like Java and Kotlin and use tools like Android Studio and Jetpack libraries.

According to the Android Developers Guide, modern Android apps are encouraged to use Jetpack Compose for UI, Kotlin for logic, and Firebase or Room for backend/database support.

The Dominance of Android App Development in 2025

Is Android Development a Business Opportunity?

Let’s know this with insights on Android market share and user base.

Android covers more than 70% of the global mobile phone market. This is why it is the most popular mobile operating system in the world. The dominance of Android is particularly evident in emerging markets such as the USA, India, the UK, and others, driven by the rapid adoption of affordable Android devices. For companies seeking global adoption or budget-conscious consumers, Android provides an unmatched market reach.

Trends Driving Android Popularity

  • Introduction of low-cost smartphones.
  • Google Play Store and Android App Ecosystem expansion.
  • Adoption of Android Tablets and smart devices. 
  • Android OS features supporting enterprise needs. 

Your business may reach a wide audience with Android’s substantial user base, attracting users who might not be available on other platforms.

Top Advantages of Android Application Development for Businesses

1. Expansive Market Reach

Android has attracted 70% of the smartphone market, making it the widely used operating system. This adoption is particularly observed in developing economies like the USA, India, Africa, and more.

Why Android’s Market Reach is Revolutionary?

  • Businesses may reach a larger audience by developing Android apps. 
  • Increases user engagement by enabling local features and regional customization
  • Due to Android’s large user base and availability through the Google Play Store and other third-party marketplaces, it raises awareness. 

Real-World Implications: Companies that want to launch low-cost products or aim for widespread market adoption benefit greatly from Android’s high reach.

2. Seamless Integration with the Google Ecosystem

Android applications seamlessly integrate with the Google Ecosystem, which includes tools such as Google Maps, Google Drive, and Google Ads.

Benefits of Android and Google Ecosystem’s Seamless Integration

  • Real-time location tracking with Google Maps APIs
  • You can use Firebase for powerful backend functions like performance monitoring, real-time databases, and cloud messaging. 
  • You can make use of Google Ads and analytics to streamline user statistics and monetization. 

Business Benefit of Android – Google APIs Integration: Android apps are faster to market and have stronger infrastructure support for app scalability and user retention.

3. Open Source Flexibility for Customization and Innovation

Android’s open-source nature provides developers with a unique level of freedom. This platform is developed on the Linux Kernel and allows for substantial customizations, which is not possible on platforms like iOS.

Why this matters for businesses:

  • Android allows for customized UI/UX, which is unique for your brand. 
  • It efficiently integrates with specialized third-party services and custom hardware.
  • Ideal for vertically specific solutions like smart devices, kiosks, or POS systems. 

We, at WEDOWEBAPPS, have built Android apps with custom kernels and modified system features for enterprise clients, something not easily possible with closed-source platforms like iOS.

4. Cost-Effective Development and Larger Talent Pool

Android app development is usually more cost-effective than iOS. With a larger pool of developers and open-source tools and frameworks, app development costs are usually lower.

Factors reducing cost:

  • Lower publishing fees on the Google Play Store as compared to the Apple App Store. 
  • Android supports cross-platform tools such as Flutter and React Native. 
  • Android’s preferred language, Kotlin, offers crisp syntax and lower bug rates, which leads to faster development cycles. 

Perfect for: Startups and SMEs who are looking for budget-friendly app launches without compromising on functionality.

5. Faster MVP Launch and Agile Development

Because of Android’s adaptability, companies can quickly prototype and launch minimal viable products (MVPs) and test ideas in actual market settings without having to make significant upfront investments. Android’s agile development cycles enable ongoing iteration in response to user feedback.

6. Developer-Friendly Tools

Android Studio, Kotlin, Jetpack Compose, Firebase, and Material Design offer a comprehensive and evolving development ecosystem.

Disadvantages and Business Risks to Consider

1. Device Fragmentation and Testing Complexity

Device fragmentation is the largest technical obstacle in Android development. Maintaining a consistent user experience is challenging given the hundreds of devices running different OS versions, screen sizes, and hardware specifications.

Key disadvantages:

  • Requires thorough debugging and testing of the gadget.
  • Multiple resolutions and performance capabilities must be accommodated in the design.
  • increases post-launch maintenance and QA cycles.

2. Security and Privacy Concerns

Security vulnerabilities are also introduced by Android’s open-source nature. Malware is more likely to be found in the Google Play Store since its app review procedures are rigorous than those of Apple’s App Store.

What companies must do:

  • Use HTTPS for all network operations and adhere to secure coding guidelines.
  • To fix vulnerabilities, do routine app audits and upgrades.
  • For further security, use programs like SafetyNet and Play App Signing.

3. Lower Average Revenue Per User (ARPU)

Android frequently generates less revenue per user than iOS, despite its larger user base. The popularity of free apps and user behavior in emerging markets are the primary causes of this.

Effect on business: 

  • Dependence on freemium or ad-based revenue models can be necessary.
  • Android users are less likely to make in-app purchases, particularly in areas with lower incomes.

4. Maintenance Overhead and Longer Support Cycles

Updates for the Android OS are rolled out inconsistently among devices. Because some users might never update, it might be challenging to add functionality or address bugs on all devices.

Challenges for developers:

  • Longer support for older Android versions is required.
  • Regression testing was given more attention.
  • Untested versions run the risk of app crashes or feature malfunctions.

Strategic Considerations for Businesses

When planning Android app development, align the strategy with your broader business goals.

  • Audience Geography: If your users are in cost-sensitive or emerging markets, Android provides the best coverage.
  • Budget and Resources: Android’s affordability makes it ideal for startups and growing businesses.
  • Industry Fit: Android’s flexibility serves well in sectors like healthcare (telemedicine apps), education (e-learning platforms), and logistics (fleet tracking solutions).
  • Future-Proofing: Android’s support for wearables (Wear OS), cars (Android Auto), and smart TVs (Android TV) makes it ideal for multi-device roadmaps

When Android App Development Makes the Most Business Sense

Android app development fits businesses that:

  • Target large, diverse user bases, especially in emerging markets or budget-conscious segments.
  • Want to leverage the Google ecosystem for marketing, analytics, and cloud infrastructure.
  • Need highly customizable apps that integrate with custom hardware or enterprise systems.
  • Are startups or SMEs aiming for quick MVP launches with limited budgets?
  • Seek to maximize reach rather than immediate revenue per user.

Case Study: Real Challenges from Our Kotlin-Based Android Project

In 2024, our team at WeDoWebApps developed a warehouse inventory management app using Kotlin, Jetpack Compose, and Firebase. A major challenge was ensuring stable payment integration across different Android versions (10 to 14).

“We used Firebase Test Lab to simulate real-device behavior and caught a critical bug on Samsung devices running Android 12. Without it, we would have missed a major compatibility issue.”

We reduced load time by 45% by optimizing Jetpack Compose layouts and implementing lazy lists effectively.

When You Might Want to Consider iOS or Cross-Platform First

Conversely, consider iOS or cross-platform if:

  • Your audience consists primarily of premium users in developed markets (the US, the UK, Canada, and Australia).
  • You prioritize a consistent UI/UX experience with minimal device variations.
  • Your revenue model depends heavily on subscriptions or in-app purchases (higher on iOS).
  • You want to reduce maintenance by building a single app for both platforms (using React Native or Flutter).
  • Security and privacy regulations favor iOS’s closed ecosystem for sensitive applications.

Android vs iOS: Comparison Table

FeatureAndroidiOS
Market Share~72% (Global)~27%
Development LanguageJava, KotlinSwift, Objective-C
Testing ComplexityHigh (fragmentation)Lower
App Store RestrictionsFewerStricter
Monetization PotentialModerateHigh
Hardware VarietyExtensiveLimited to Apple devices

How to Strategically Choose the Right Mobile App Platform

Selecting the right platform depends on a clear understanding of your:

  • Target Audience: Analyze demographics, geography, and device preferences.
  • Business Model: Consider revenue streams – ads, subscriptions, e-commerce.
  • Budget & Timeline: Evaluate your development resources and speed-to-market needs.
  • Technical Needs: Assess required integrations, customization, and security.
  • Long-Term Maintenance: Plan for updates, bug fixes, and OS upgrades.

Use this strategic framework to prioritize your platform choice, whether Android-first, iOS-first, or cross-platform.

Our Consultative Approach to Platform Strategy

At WEDOWEBAPPS, we understand that no two businesses are alike. Our consultative approach means we start with your business goals and challenges, not just technology specs. We help you:

  • Analyze your target market and user personas.
  • Benchmark competitors and industry trends.
  • Evaluate platform pros and cons for your specific context.
  • Recommend cost-effective, scalable development strategies.
  • Provide end-to-end mobile app development, from ideation to launch and maintenance.

choose the right platform for your business

Expert Insights & Tips

  • Use Kotlin over Java: Kotlin offers null safety, extension functions, and cleaner syntax.
  • Adopt Jetpack Compose: For modern UI development with less boilerplate code.
  • Invest in QA automation: Use tools like Espresso and Firebase Test Lab.
  • Plan for backward compatibility: Ensure support for older OS versions.

Don’t underestimate testing on low-end devices. In many markets, they make up your biggest user base.

Conclusion: Aligning Platform Choice with Business Goals

Android app development offers undeniable advantages: massive market reach, flexible development, and lower costs. But it also presents hurdles like device fragmentation, security issues, and inconsistent monetization.

The key lies in understanding your business goals and matching them with Android’s strengths. If you prioritize scale, flexibility, and innovation, Android could be your platform of choice.

Looking ahead: Choose Android when you need global scalability, seamless Google integration, or hardware-level control. And always work with an experienced Android app development company to navigate its complexities.

launch a high-performing Android app

Importance of Responsive Web Design for Modern Businesses

Introduction

Most users visit websites from their phones. If a site loads slowly or looks difficult to use on a small screen, users leave within seconds. That lost visit often means a lost customer.

This explains the importance of responsive web design. A responsive website adjusts automatically to mobile, tablet, and desktop screens, so every visitor gets a smooth experience. It improves usability, supports search rankings, and builds trust.

When you understand why responsive web design is important, the business value becomes clear. The benefits of responsive web design include better engagement, lower maintenance costs, and higher conversions. For companies aiming to grow online, a mobile-friendly website is no longer optional. It is a basic requirement.

In this guide, you will learn the mobile friendly website importance, the key benefits of responsive web design, and how responsive web design for businesses leads to higher traffic, better leads, and stronger sales outcomes.

What Is Responsive Web Design

Responsive web design is an approach where a website automatically adapts its structure, content, and visuals to match the screen size of the device being used. Instead of creating different versions for mobile and desktop, one flexible layout serves all users.

This method keeps the browsing experience consistent. Visitors can read, scroll, and interact easily, whether they are on a phone or a large monitor. For businesses, it means one website that works everywhere without extra maintenance.

Simple Definition with Example

In simple terms, responsive web design means a site reshapes itself to fit the user’s screen.

Think of it like text flowing inside a container. On a desktop, content may appear in multiple columns. On a mobile device, the same content stacks into a single column for easier reading. For example, an online store might show four products per row on desktop and one product per row on mobile.

How Responsive Layouts Adjust to Different Screen Sizes

Responsive layouts rely on flexible UI/UX, scalable images, and CSS media queries. These elements allow the page to resize and rearrange automatically.

Menus may turn into a compact icon. Images scale without distortion. Text blocks reposition to remain readable. This adjustment happens in real time, so users do not need to zoom or scroll sideways.

The result is a smooth and mobile-friendly browsing experience across devices.

Responsive vs Separate Mobile Websites

Some businesses create a separate mobile site, often hosted on a different URL. This means managing two designs, two codebases, and two sets of updates. It increases cost and often leads to inconsistent branding.

Responsive web design uses one website for all devices. Updates are easier, SEO performance improves, and users get the same experience everywhere. For most businesses, this single-site approach is more practical and efficient.

Is Your Website Perfect for Every Device

Why Responsive Web Design Is Important Today

A website is often the first interaction a customer has with your business. If it looks broken or difficult to use on mobile, visitors leave quickly. That single moment can cost you a lead or even a sale.

This explains why responsive web design is important. It ensures your website works smoothly across all devices, improves usability, and supports measurable business growth.

Growth of Mobile Users and Browsing Habits

Most users now browse with the help of their mobile devices rather than desktops.

  • They search for products.
  • They compare services.
  • They make purchases on the go.

If your site is not mobile-ready, you may lose a large share of potential customers. Responsive mobile app design keeps your pages accessible and easy to use on every screen.

Google Mobile First Indexing and Ranking Impact

Search engines evaluate the mobile version of your website before ranking it. This means:

  • A clear structure helps indexing.
  • Fast-loading improves rankings.
  • Mobile-friendly pages attract more traffic.

A responsive website meets these requirements naturally, which supports better SEO performance.

User Expectations for Speed and Usability

Visitors expect quick results and simple navigation. They want to:

  • Read content without zooming.
  • Tap buttons easily.
  • Move between pages smoothly.

Responsive layouts are built to match these expectations, which increases satisfaction and trust.

How Poor Design Leads to Lost Opportunities

A non-responsive website creates friction.

  • Slow pages increase bounce rate.
  • Cluttered layouts confuse users.
  • Broken elements reduce credibility.

Each issue pushes customers away. Responsive web design removes these barriers and helps convert visitors into inquiries, sign-ups, and sales.

Mobile-Friendly Website Importance for User Experience

Mobile-Friendly Website Importance for User Experience

Most users now access websites through their phones. They expect pages to load quickly and content to fit their screen without any issues. If a site feels complex to use on mobile, visitors leave almost immediately.

This clearly shows the mobile-friendly website importance. A responsive and mobile-ready layout improves comfort, builds trust, and encourages users to stay longer and take effective action.

Easy Navigation on Small Screens

Navigation should feel simple and direct on a small display. Users must find what they need without confusion or extra taps.

Key practices include:

  • Clear and compact menus.
  • Large and easy-to-tap buttons.
  • Important links are placed within easy reach.
  • Minimal clutter on each screen.

When movement across pages is smooth, visitors are more likely to continue browsing.

Clear Readable Content Without Zooming

Content should adjust naturally to the screen size so users can read everything comfortably. They should not need to zoom in or scroll sideways.

A responsive structure ensures:

  • Text remains readable.
  • Sections stack vertically.
  • Images scale correctly.
  • Layouts stay clean and aligned.

This keeps the experience relaxed and frustration-free.

Faster Loading Pages

Speed plays a major role in keeping mobile users engaged. Even a short delay can cause them to exit.

A mobile-optimized website focuses on:

  • Compressed images.
  • Lightweight design elements.
  • Clean and efficient code.
  • Reduced unnecessary scripts.

Faster pages lead to lower bounce rates and stronger first impressions.

Better Engagement and Longer Session Time

When users enjoy the experience, they interact more with your website. A smooth mobile interface encourages deeper exploration.

As a result:

  • Visitors view more pages.
  • Time on site increases.
  • Form submissions grow.
  • Purchases become more likely.

This direct connection between usability and action proves why mobile responsiveness supports both user satisfaction and business growth.

Is Your Website Truly Mobile Friendly

Key Benefits of Responsive Web Design

benefits of responsive web design

Once a website works smoothly across devices, the advantages go beyond appearance. Responsive web design improves performance, simplifies management, and supports long-term growth.

For businesses, this means fewer technical issues, lower costs, and better results from the same website. These practical gains clearly show the benefits of responsive web design.

Lower Development and Maintenance Costs

Managing separate desktop and mobile websites requires extra time, money, and resources. Every update must be repeated twice.

This helps you:

  • Reduce development expenses.
  • Save time on updates and fixes.
  • Avoid duplicate content management.
  • Lower long-term maintenance costs.

A single system keeps operations simple and efficient.

Single Website for All Devices

Responsive web design uses one layout that adapts to every screen size. This creates a consistent experience for all visitors.

It ensures:

  • Uniform design and branding.
  • Same content across devices.
  • Consistent functionality.
  • Easier testing and monitoring.

Users get the same quality experience whether they visit from mobile or desktop.

Consistent Branding and Layout

Brand trust depends on consistency. If your mobile site looks different from your desktop site, it can confuse users. Responsive design keeps colours, fonts, and layouts aligned across screens.

This consistency:

  • Strengthens brand identity.
  • Builds credibility.
  • Makes your business look professional.
  • Improves customer confidence.

A clear and familiar design encourages users to stay longer.

Simplified Updates and Content Management

Content should be quick-loading and straightforward. Updating multiple versions slows down your team.

With one responsive website:

  • Content is updated once.
  • Changes reflect everywhere instantly.
  • Errors are reduced.
  • Management becomes easier.

This allows your team to focus more on strategy rather than technical tasks.

Improved SEO Performance

Search engines prefer mobile-friendly websites. Responsive design supports better indexing and ranking by keeping everything under one URL.

Key SEO advantages include:

  • Faster page loading.
  • Lower bounce rate.
  • Better crawlability.
  • Stronger search visibility.

Higher visibility leads to more traffic, which ultimately brings more leads and sales.

Responsive Design Benefits for Business Growth

Responsive Design Benefits for Business Growth

A well-designed website should not only look good. It should help your business generate more leads, sales, and measurable results. This is where the responsive design benefit for business becomes clear.

When users can browse comfortably on any device, they are more likely to trust your brand and complete the action that supports your goals. A responsive setup removes barriers and creates a smooth path from visitor to conversion.

Higher Conversions and Inquiries

A mobile-friendly experience makes it easier for users to take the next step. Forms are simple to fill out. Buttons are easy to tap. Calls to action are clearly visible. This convenience increases the number of inquiries, sign-ups, and contact requests without additional marketing effort.

Key outcomes include:

  • More form submissions.
  • Higher lead generation.
  • Improved conversion rates.

Better Online Sales Performance

For eCommerce websites, usability directly impacts revenue. If the checkout process feels complicated on mobile, users abandon the carts.

Responsive web design helps in:

  • Displaying products clearly.
  • Simplifying navigation.
  • Making checkout smooth and fast.
  • Reducing cart abandonment.

A seamless shopping experience encourages more completed purchases.

Improved Lead Generation

Many users research services on their phones before making decisions. If your website loads quickly and presents information clearly, they are more likely to connect with you.

Responsive layouts support:

  • Easy access to contact details.
  • Click to call and quick action buttons.
  • Faster landing pages.
  • Better engagement with content.

These small improvements help turn visitors into qualified leads.

Stronger Customer Trust and Credibility

First impressions matter. A website that looks outdated or broken on mobile can make your business seem unreliable. A clean and consistent design across devices signals professionalism.

This builds:

  • Customer confidence.
  • Brand credibility.
  • Positive perception.
  • Higher return visits.

Trust often influences buying decisions more than pricing.

Clear Tracking and Measurable Results

Managing one responsive website makes performance tracking easier. All user data comes from a single platform, which improves accuracy.

You can measure:

  • Traffic sources.
  • User behavior.
  • Conversions.
  • Sales performance.

These insights help you refine marketing strategies and improve overall business outcomes.

Struggling to Keep Mobile Visitors Engaged

Responsive Web Design for Businesses Across Industries

Responsive Web Design for Businesses Across Industries

Every industry serves users who browse on multiple devices. Customers may search on their phones, compare options on tablets, and complete actions on desktops. If your website fails to adjust, you risk losing them at any step.

This is why responsive web design for businesses is valuable across sectors. It ensures consistent access, better usability, and smoother interactions for every type of customer.

eCommerce and Retail Websites

Online shoppers expect quick browsing and simple checkout. Any friction can lead to abandoned carts.

Responsive design helps by:

  • Displaying products clearly on small screens.
  • Making filters and categories easy to use.
  • Simplifying cart and checkout steps.
  • Supporting faster page loading.

These improvements directly increase completed purchases and revenue.

Service-Based Companies

For service providers, websites often act as the first contact point. Users check services, reviews, and pricing before reaching out.

A mobile-ready layout ensures:

  • Easy access to service details.
  • Clear calls to action.
  • Click to call or quick contact forms.
  • Better readability of content.

This makes it easier for visitors to turn into inquiries and leads.

Startups and SaaS Platforms

Startups rely heavily on online presence to explain products and capture sign-ups. A complex or slow interface can push users away.

Responsive web design supports:

  • Clear product demonstrations.
  • Smooth onboarding flows.
  • Faster landing pages.
  • Easy sign-up forms.

This creates a strong first impression and improves user adoption.

Healthcare and Education Portals

Users often search for important information such as appointments, schedules, or learning resources while on the move.

Responsive websites provide:

  • Quick access to essential information.
  • Simple navigation menus.
  • Clear content structure.
  • Comfortable reading on mobile devices.

This improves accessibility and user satisfaction.

Local and Small Businesses

Local customers frequently search on mobile devices for nearby services. If the website is not mobile-friendly, they may choose a competitor.

Responsive design ensures:

  • Contact details are easy to find.
  • Maps and directions load correctly.
  • Calls and bookings happen quickly.
  • Trust is built through a professional layout.

For small businesses, these small advantages can lead to steady growth and more walk-ins or inquiries.

Core Elements That Make a Website Responsive

Core Elements That Make a Website Responsive

Responsive web design is not achieved by shrinking a desktop layout to fit a smaller screen. It requires a structured approach where every element adjusts naturally to the device. When these components work together, the website feels smooth, readable, and easy to use.

Understanding these building blocks helps businesses see how responsive web design delivers consistent performance across all devices.

Fluid Grid Systems

A fluid grid forms the base of any responsive layout. Instead of fixed widths, the design uses flexible proportions that adapt to the screen size.

This allows content to resize automatically.

Key characteristics include:

  • Percentage-based widths instead of fixed pixels.
  • Flexible columns that rearrange smoothly.
  • Balanced spacing across devices.

As a result, layouts look organized on both large and small screens.

Flexible Images and Videos

The media should scale without breaking the layout. Oversized images can slow down pages or overflow on mobile devices.

Responsive media ensures:

  • Images resize according to screen width.
  • Videos adjust without distortion.
  • File sizes remain optimized for speed.
  • Visual quality stays consistent.

This keeps the website visually appealing while maintaining performance.

CSS Media Queries

Media queries allow the website to apply different personal website styles based on screen size or device type. They help the design respond intelligently.

For example, the layout can change when the screen becomes smaller.

Common uses include:

  • Adjusting font sizes.
  • Stacking columns vertically.
  • Hiding unnecessary elements.
  • Repositioning menus and buttons.

These small adjustments improve usability without changing the core content.

Mobile First Design Approach

Mobile-first design starts with the smallest screen and then expands to larger devices. This keeps the experience focused and clutter-free.

It encourages teams to:

  • Prioritize essential content.
  • Simplify navigation.
  • Reduce unnecessary elements.
  • Improve loading speed.

Starting small often results in a cleaner and more efficient website overall.

Performance Optimization

Responsiveness is not only about layout. Speed and stability matter just as much. A slow website can drive users away, even if the design looks good.

Performance improvements include:

  • Image compression.
  • Minified code.
  • Reduced scripts.
  • Fast hosting setup.

Together, these optimizations create a faster and smoother experience for every visitor.

Want Visitors to Stay Longer on Your Website

Responsive vs Adaptive Design: Which Is Right for Your Business

When building a mobile-ready website, businesses often compare responsive and adaptive design. Both approaches aim to improve usability across devices, but the way they are built and maintained is different.

Responsive web design uses one flexible layout that adjusts automatically. Adaptive design creates multiple fixed layouts for specific screen sizes. The comparison below makes the differences easier to understand.

FactorResponsive Web DesignAdaptive Web Design
Layout structureSingle flexible layoutMultiple fixed layouts
CodebaseOne website for all devicesSeparate templates for each device
Development costLowerHigher
MaintenanceEasy to manage and update onceUpdates needed for each version
SEO performanceStrong with one URLCan create duplicate or split URLs
User experienceConsistent across screensCan vary between devices
ScalabilityAdapts easily to new screen sizesRequires new layouts for new devices
Time to launchFasterSlower
Best suited forMost businesses and growing brandsComplex or highly customized interfaces

For most companies, responsive web design for businesses is the practical choice. It reduces cost, simplifies maintenance, and delivers consistent performance across devices. Adaptive design may suit very specific use cases, but it often adds unnecessary complexity for standard business websites.

Common Mistakes That Hurt Mobile Experience

Common mobile website mistakes

Even after investing in responsive web design, small mistakes can weaken the mobile experience. These issues frustrate users, increase bounce rates, and reduce conversions.

A website may look fine on a desktop but still perform poorly on phones. Fixing these common problems protects usability and helps you get the full value from your mobile-friendly setup.

Slow Loading Pages

Mobile users expect quick access. If a page takes more than a few seconds to load, many visitors leave before it opens.

Common causes include:

  • Heavy images.
  • Too many scripts and plugins.
  • Unoptimized code.
  • Slow hosting servers.

Improving speed keeps users engaged and supports better search rankings.

Tiny Buttons and Hard to Click Links

Small buttons create frustration on touch screens. Users may tap the wrong link or struggle to complete actions.

Good mobile design should include:

  • Large tap-friendly buttons.
  • Proper spacing between links.
  • Clear call to action placement.
  • Simple forms.

Easy interaction encourages users to continue browsing.

Popups That Block Content

Pop-ups that cover the entire screen can interrupt the browsing experience. On mobile devices, they often feel intrusive.

This can lead to:

  • Higher bounce rates.
  • Lower engagement.
  • Missed conversions.

Using subtle banners or well-timed prompts keeps the experience smooth without disturbing users.

Poor Content Structure

Long paragraphs, cluttered sections, or cramped layouts make content difficult to read on small screens.

To improve readability:

  • Break content into short paragraphs.
  • Use headings and subheadings.
  • Add white space.
  • Highlight key points.

A clean structure helps users scan information quickly.

Lack of Testing Across Devices

A design that works on one phone may break on another. Without proper testing, issues go unnoticed.

Businesses should test on:

  • Multiple screen sizes.
  • Different browsers.
  • Various operating systems.
  • Real devices, not only simulators.

Regular testing ensures your responsive web design delivers a consistent experience for every visitor.

Avoiding these mistakes strengthens the mobile friendly website importance and ensures your website supports both usability and business performance.

How to Implement Responsive Web Design Successfully

process to implement responsive web design

Creating a responsive website works best when handled step by step. A clear process reduces errors, saves time, and ensures your website performs smoothly across devices. For companies investing in responsive web design for businesses, this structured approach leads to better usability and measurable results.

Step 1. Audit Your Current Website

Begin by reviewing how your existing website behaves on mobile devices. Identify areas that create friction for users.

Check for:

  • Slow loading pages.
  • Layout or alignment issues.
  • Hard to use navigation.
  • High mobile bounce rates.
  • Low conversions.

This assessment highlights what needs immediate attention.

Step 2. Define User Journeys and Goals

Understand what visitors want to accomplish when they land on your site. Your design should guide them naturally toward those actions.

Common goals include:

  • Browsing products or services.
  • Reading key information.
  • Filling out contact forms.
  • Making purchases.
  • Booking appointments.

Clear journeys help you place content and calls to action effectively.

Step 3. Choose the Right Tools and Technology

Select frameworks or platforms that support responsive web design from the start. This simplifies development and future updates.

Consider:

  • Responsive front-end frameworks.
  • Mobile-optimized CMS themes.
  • Flexible design systems.
  • Custom development when required.

The right setup makes scaling easier.

Step 4. Design with a Mobile First Approach

Start with the smallest screen and expand outward. This keeps the layout clean and focused.

Prioritize:

  • Essential content first.
  • Simple navigation.
  • Large tap-friendly buttons.
  • Fast loading elements.

Once mobile works well, adapting for larger screens becomes straightforward.

Step 5. Develop Flexible Layouts and Media

Use responsive techniques that allow the design to adjust automatically.

Include:

  • Fluid grid systems.
  • Flexible images and videos.
  • CSS media queries.
  • Scalable typography.

These elements ensure your website looks balanced on every device.

Step 6. Test Across Devices and Browsers

Testing prevents unexpected issues after launch. What works on one device may fail on another.

Test on:

  • Multiple screen sizes.
  • Different browsers.
  • Android and iOS devices.
  • Real devices along with simulators.

This ensures a consistent experience for all users.

Step 7. Monitor Performance and Optimize Continuously

Responsive design needs regular improvement. Track how users interact and refine accordingly.

Monitor:

  • Page speed.
  • Bounce rates.
  • Session duration.
  • Conversion rates.

Ongoing optimization strengthens both user experience and business results.

Following these steps helps businesses build a mobile-friendly website that supports engagement, improves conversions, and delivers long term value.

Upgrade Your Website for Mobile Success

How Professional Responsive Web Design Services Help Your Business

Professional Responsive Web Design Help Business

While basic responsive adjustments can be handled internally, building a high-performing website often requires expert planning and execution. Professional teams understand how design, speed, usability, and SEO work together to support growth.

For companies looking at responsive web design for businesses, working with specialists reduces risks and delivers stronger results in less time.

Step 1. Strategy and Requirement Analysis

Every business has different goals. A professional team begins by understanding your audience, industry, and objectives before designing anything.

This includes:

  • Studying user behavior.
  • Identifying target devices.
  • Reviewing competitors.
  • Defining conversion goals.

A clear strategy ensures the website supports real business outcomes.

Step 2. Custom UI and UX Planning

Templates may not fully reflect your brand or user needs. Experts design layouts that match your identity and make navigation simple.

They focus on:

  • Clean page structure.
  • Intuitive navigation.
  • Clear calls to action.
  • Consistent branding across devices.

This improves both usability and trust.

Step 3. SEO Ready and Performance Focused Development

Responsive design works best when combined with technical optimization. Professionals build websites that load fast and rank well.

Key improvements include:

  • Mobile-friendly coding practices.
  • Optimized images and scripts.
  • Clean URL structure.
  • Search engine-friendly architecture.

These factors increase visibility and attract more organic traffic.

Step 4. Cross-Device Testing and Quality Checks

Experts test the website thoroughly before launch. This reduces errors that could affect user experience.

Testing covers:

  • Multiple screen sizes.
  • Browsers and operating systems.
  • Forms and checkout flows.
  • Speed and stability.

This ensures your site performs reliably for every visitor.

Step 5. Ongoing Support and Continuous Improvement

Websites need regular updates to stay effective. Professional services provide long-term support instead of one-time delivery.

This often includes:

  • Performance monitoring.
  • Security updates.
  • Design improvements.
  • Feature enhancements.
  • Conversion optimization.

Continuous improvements help you stay competitive and achieve better results over time.

Partnering with experienced teams allows businesses to fully realize the responsive design benefits for business, from better user engagement to higher leads and sales.

Conclusion

A website should work smoothly for every visitor, no matter which device they use. When pages adjust naturally to different screens, users stay longer, interact more, and complete actions with ease. This clearly shows the importance of responsive web design for any business that depends on online traffic.

From better usability to stronger search visibility, the benefits of responsive web design directly impact performance, and the designing services from trusted companies can play an important role. Faster pages, simple navigation, and consistent layouts help reduce bounce rates and improve conversions. Instead of managing multiple versions, businesses control one flexible website that supports growth and efficiency.

If you want steady traffic, higher engagement, and measurable results, investing in responsive web design for businesses is a practical step. A mobile-friendly website is not just a design choice. It is a smart business decision that supports long-term success.

encouraging businesses talk to experts