skip to content

Basics of Mobile App Design – The Difference Between UI and UX

Have you ever used a mobile app and wondered what the next step was? 

Or you tried to click that tiny link, the CTA button, but failed several times? 

If you answered yes, welcome. You have just come across what we call a common “UX mistake.” Don’t worry if you don’t understand what it means. Because we have simplified it for you! 

This article will go through the following: 

  • Why are UX and UI not the same thing?
  • What’s UX exactly? 
  • What are the most common mistakes businesses and designers make while designing the UI and UX of mobile apps?
  • And finally, UI trends have been rising in popularity. 

Read also: 45 Stellar Mobile App Ideas that will Kickstart your Business

Stop! UX is Not UI 

Think of UX and UI in terms of the human body. UX is your skeletal structure, whereas UI is the visual elements like hair and skin. They are not the same. But they are different parts of the same body. 

Both cannot function without each other. You won’t be able to move or take any action if you don’t have skeletons (UX). And same goes for skin and hair. You would simply be bare-bones!

Here’s how Don Norman and Jakob Nielsen of Norman Nielsen Group define the difference between UI and UX…

It’s important to distinguish the total user experience from the user interface (UI), even though the UI is obviously an extremely important part of the design. As an example, consider a website with movie reviews. Even if the UI for finding a film is perfect, the UX will be poor for a user who wants information about a small independent release if the underlying database only contains movies from major studios.

Now that you know how UX and UI work, let’s see their definitions. 

What is User Interface(UI) Design?

User interface(UI) design is the visual look of your mobile device. A UI designer will design a mobile app interface that fits with the user experience designed by a UX designer. A great UI design attracts users and retains them longer. 

So, what are the essential elements of User interface design?

  • Documents
  • Texts
  • Images
  • Videos
  • Forms 
  • Buttons, tags, text fields, checkboxes, dropdown lists, etc.

In other words, if you see an app that gets the “wow, that’s beautiful” reaction from you, thanks to a UI designer. 

What is User Experience(UX) Design?

User experience design

UX has five major elements:

  • Strategy:  It’s a phase of gathering information and laying a solid foundation by understanding the needs of both businesses and users.
  • Scope: In this phase, the designer will set the scope for the idea and type of content they will be designing. It’s further divided into two parts – functional(features, functions) and content (images, themes, audio, videos) requirements. 
  • Structure: This phase decides how the design is organized and how it will behave when the user interacts with it. 
  • Skeleton: This phase is where the UX designer will combine everything created till now to decide the flow of information and movement from one screen to another.
  • Surface: It’s the final layer. The designer finalizes everything that will go on the screen that users will see. 

In other words, if you see an app that gets a “wow, that was quick and easy” reaction, thanks to a UX designer. They succeeded in simplifying your user experience. UI UX design services take your mobile app design to the next level and make it user-friendly as well as pleasant.

Don’t Make These Mistakes When Designing Your Mobile App 

1. Overloading users for information 


mobile app design services

The main motive of the mobile app design should be to reduce user frustration. So, when you use two three-page long forms. It can create a painful experience for users, leading them to abandon it. 

Here’s what you can do instead: 


  • Keep the forms short. Only include the most critical information and remove any unnecessary fields. 
  • Use intelligent features like autocomplete to fill the form automatically. This would instantly reduce the friction that most users friction while filing the information. 

2. Use jargon 

ui ux design services

The worst thing you can do while designing a mobile app is to fill it with jargon that most users won’t even understand! Clear communication should always be a priority. After all, if users don’t even understand what you want them to do, how will they continue?

How to avoid these scenarios: 

  • Keep it simple to avoid confusion. 
  • Learn the understanding level of your audience. A 15-year-old would have a different understanding from a 40-year-old. 

3. Bad onboarding Experience 

Mobile users are susceptible to bad first-time experiences. So much so that almost 21% of users will never app if they had a not-so-good first-time experience.  

So, how to make the first experience pleasant?

Simple, leverage contextual onboarding. Contextual onboarding is when you provide instructions only when users are using the app. The best thing about contextual onboarding is that it does not overwhelm users with information like those user manuals do. 

Duolingo mobile app design services

Duolingo is the perfect example of well-designed contextual onboarding. Once the users sign up for the app, it asks them to choose between beginner and non-beginner, after which they are immediately sent to the core product. There, too, the app guides the users with little information.

Users are also encouraged to do a quick text. This is just one of the strategies to create a pleasant first-time experience with your mobile app. However, the end goal remains the same – make it easy for users without overwhelming them with information. 

Current Trends in Mobile App Design 

Let’s delve into current trends in mobile app design.

1. Keep it minimalistic 

mobile app design services

If you ever find yourself overwhelmed with the options, you know how tiring it can be to make a choice. To remove this paradox of choice, mobile app designers have been keeping the app interface as minimal as possible, meaning easy navigation, no extra details, more free space, clear color schemes, etc. 

2. Sphere, Sphere, Everywhere

behance mobile app design services

Behance

We can’t avoid circles. They are everywhere, be it eggs, planets, or domes. However, these spherical objects do have a visual appeal that, when used in app design can give a soft, inviting experience. You can also play around with these spherical shapes to add depth to backgrounds and create a personality. 

3. Microinteractions

dribble mobile app design services

Dribble

Micro-interactions have been definitely trending this year. Tapping the heart button to turn from gray to red, swiping emails into the archive, swiping products, and status updates are all examples of micro-interaction. These little things (we don’t pay enough attention to) are what make our experience intuitive. You will immediately know when they are missing.

4. Border-Defined Design

behance mobile app design services

Behance

Borders are essential to the design as they separate two UI elements. Borders are old school, as Apple Macintosh System 6 and Windows 3 relentlessly used borders to define and separate their elements. So what are they doing in app design now? That’s a debating question. However, the border-defined design does stand out from all the modern designs we see today. And isn’t standing out from competitors the ultimate business goal?

Hire Reliable Mobile App Design Company Within 5 minutes

There are plenty of mobile UI UX design services for iOS and Android on the internet. However, it can be overwhelming to find the “right match”. 

Not to mention, you will have to see their portfolios, shortlist them, interview them, and see whether they are the right fit. If not, you again have to go through the vicious cycle of the interview process.

Read more about New Trends In Mobile App Development

That’s why WeDoWebApps bring you trusted, reliable mobile app design and development services where experts are with you. We have spent a lot of time filtering these best app designers so that you can start your projects instantly! Don’t wait. Chat with us and find yourself a match!

Vital Elements Every Website Homepage Must Have

Imagine a situation – You go to a store in your area’s local mall, there you meet a frowning sales assistant. The atmosphere is unpleasant, and the store is overcrowded and disorganized. What will you do next? You will probably walk out of the store and look for some other place to shop at. Isn’t this what you’ll do? Likely, if a customer forms a wrong impression of your online website, they will bounce back and search out for your competitor’s website looking for a good user experience. Speaking of the fact, the homepage of your website is the actual representation of the soul of your brand. It establishes reliability and trust and tells customers about what you sell. It is also the place to showcase your important call to action.  Providing your customers with a great user experience on your site is very important to establish brand credibility. So, not only your homepage but the whole design of your website needs to be responsive as well as engaging. We recommend you take help from a responsive web design services company to develop an out-of-the-box website to accelerate your business.  It would not take more than just 50 milliseconds for a visitor to form an impression of your website. In that concise moment, they will decide whether to stay or to leave. Therefore, if your homepage is crafted correctly, it becomes an excellent opportunity to increase visitor engagement and conversion rate.  Elseways, ignoring the crucial homepage elements will cause you to lose potential customers as the visitors will leave your website if they cannot find the essential information they are looking for. Therefore, here we have collected some of the crucial website homepage elements for you to leverage and increase conversion.

Critical Elements Every Website Homepage Should Include

Critical Elements Every Website Homepage People put their best efforts into cracking a job interview, from getting a fresh haircut, putting on the best suit, making sure that teeth do not have a piece of spinach stuck. This is all done to form a good impression in front of the job interviewer. Just like that, every time a new visitor visits your website, it goes through a sort of “job interview.” People evaluate what they see, form an opinion of your brand, and determine if you are trustable enough to do business with. So, to establish a good impression on your visitors, ensure adding the following elements on your website’s homepage. 

1. A Unique Value Proposition(UVP)

Your website needs to have a unique and clear value proposition to set you apart from your competitors. Failing to display an enticing value proposition is clearly a blunder you are doing. Unfortunately, new businesses often commit the mistake of displaying a value proportion on their site. A value proportion is a sort of tagline that tells your customers why they should buy from you instead of your competitors. Thereby increasing the website’s conversion. How to develop your own UVP? In order to create your own UVP, determine what sets you apart from your competitors.  Does your service solve a unique problem, or do you offer better quality services to your customers? What are the benefits that cannot be found anywhere else? Also, ask your customers what makes them buy a product or service from you. This will give you real insights about your brand.  Then create a UVP and display it on your homepage to inspire increased purchases. 

2. Instinctive Navigation

Customers need to find what they are looking for quickly and easily. A Baymard Study says that poor navigation leads to customers’ bad impressions. They think that you don’t sell the product they want. Due to this false conclusion, users will abandon your website and probably won’t ever come back.  This is the exact opposite of what you want your customers to do. Therefore, your homepage should have easy and clear navigation. Your navigation should always be on the top of the homepage so that the visitors can easily find it. Also, make sure to make the destination of every link clear. 

3. A Clear Call-to-action

Your website’s homepage aims to drive the customers to dig deeper into your website and move them down to the sales funnel. Include at least one call-to-action on the homepage that can direct people to wherever you want. Place the CTAs at the place where they are easy to find.  These CTAs should be visually appealing, usually in the color that contrasts your website’s color palette. Keep them brief, not more than 5 words on one CTA, and should be action-oriented to drive your customers to do what you’re offering. 

4. Easy Access to your Learning Centre 

Since content is the crucial part of your inbound marketing strategy, motivate people to view, read, and subscribe to your content by showcasing it on your homepage. Your podcast, blog articles, webinars all show your level of expertise and offer users the safest option to convert and start a long-term relationship with your brand. 

5. Supporting Images

Gone are the days when people used to read the content of the service they wanted. People these days prefer scanning the websites rather than reading every single text on the website. Since people love to see visual content, it is recommended to post relevant images (also videos) rather than written text.  Use images that catch emotions, drive action, and digitally tell your brand story. To optimize your website for mobile devices, use high-quality images with reduced file size. Also, always remember to add ALT text on your images to make them more beneficial for the users who use screen readers and take your SEO efforts to the next level. 

6. Social Proofs

Typically, your website should build trust in your visitors, especially if you are running a business. One of the best ways to gain your visitors’ confidence is to show them that you’ve got good feedback from your past customers. To achieve this, a lot of online businesses showcase their client reviews on their website’s homepage. You can include social proof elements like client testimonials, reviews, and ratings. If you want to showcase a social proof element on your homepage, we recommend you to showcase only a handful of client reviews, so it doesn’t look like you are overselling yourself. Adding a name and the client’s headshot gives more credibility to your website. Hence, this is one of the most important elements to showcase on your homepage. 

7. Headlines and Subheadlines

As said earlier, a customer needs to understand what your business does in order to convert. As soon as a visitor comes on your website, the very first thing he does is understand your business. There is nothing more frustrating than a landing page offering zero understanding about the business.  To let your customers understand your website, you need to cut short your business motive into a headline of not more than 5 words. Cutting down everything your business does in just five words is a difficult task, but once it is done, searchers can use it to find your business online. Also, as it is short, it would be easy for your customers to remember.  Not just a headline, a well-structured business website also should contain subheadings to make it easier for the consumers to understand. 

Ensuring these homepage elements are in place is crucial, but don’t forget the importance of ongoing website maintenance and renovation to keep everything running smoothly.

8. Feature your Best Products 

Recommending products on the homepage gives suggestions to the customers what to buy. You can showcase your best products on the homepage to help them make a purchase decision. And it makes sense to help your customers buy what you offer the best.  Even if you take an example of your tinder profile, you will post the best pictures of you, not the ones your friends captured randomly, and you look like a monster. And add new products down the page.  You can test the set of pictures that best suit your homepage in the matter of conversions. The set of images can be your best sellers, seasonal products, or anything relative. The key here is to be competent in order to get more conversions. 

9. Make your Search Bar Stand Out

Probably no website is complete without a search bar. Potential visitors are most likely to use the search bar to find out what they are looking for. A search bar helps a visitor to find their information at lightning speed from the homepage itself. That is why adding a prominent search bar can increase conversions by approx 50%. But this is only when your search bar works properly.  Unfortunately, it is a big challenge to find what your visitors are looking for. On average, 34% of the search results do not show appropriate results. To resolve this, your search software should be robust to be able to recommend related products. Additionally, if your website search software has an autocomplete feature, you will likely receive six times more conversions. 

10. Demonstrate Website Security 

Consumers these days think that Google robots are always ready to grab their personal information. Therefore, you need to prove to your customers that your website is absolutely secure to shop. According to the surveys, approx 17% of the customers leave the products in the cart due to a lack of trust.  You can add widely trusted certificates or seals on your homepage to build trust in your customers. You can display your security seals in the footer, but use the recognitions that are widely famous. You should also have an SSL certificate as Google flags the websites as “Not Secure” if they don’t have their SSL certificate.  Nobody would want to hand over their credit cards to unsecured websites. Therefore, you need to convince people that your website is safe to shop for. 

Having the right homepage elements is essential, but sometimes a full business website redesign is necessary to stay ahead of the competition.

Bonus Tip: Video Content

Now, this is something that you can do apart from these elements. Implementing video content, but you certainly cannot go wrong with making the introductory videos. Having a short introduction video of what your business offers, showcasing your office, and/or introducing your entire team is one of the easiest ways to raise conversions.  Keep your videos shorter, i.e., 3 minutes or less, so that your customers don’t lose interest in your company. The idea behind implementing video content is to give an overview of what your business is about and what services/products it offers.

Conclusion

The homepage of your website is the very first impression each visitor will have of your business. Before they make up their mind to convert into a customer, they will thoroughly go through your website homepage to get an idea of what you sell, why your services matter to them, and how they can benefit from what you sell.  You should make a brilliant first impression by crafting a homepage that integrates the elements mentioned above. In addition, a good homepage has the ability to attract customers and keep them on your website. Therefore, the motive of your website should not just be an excellent design, but it should clearly communicate your value and services to your customers. Read more about How to Choose the Best Responsive Website Design Services But keep in mind, your homepage should not be set in stone; instead, it should always be fresh to keep the users engaged. Constantly keep an eye on your webpage especially focusing on the bounce rate to know whether the customers are staying on your website or immediately leaving.  With a team of designers, developers, digital marketing professionals, and content writers, WeDoWebApps LLC can help you not only develop an intuitive homepage but an absolutely enticing website that will take your business to the next level. Contact us, and we promise you to offer the best responsive web design services across the globe.

Android Apps Developer

In this world of fast-moving and daily evolving technology, the demand for good Android Apps Developer has been increasing day by day. The Android App Development is getting evolved as a new and paid discipline nowadays. In today’s world, millions and millions of people are getting themselves updated with the latest technology. It is becoming a part of their everyday life. As a result, there are a lot of employment opportunities for Android App Developers.

Working as an Android Apps Developer can be a thrilling experience and challenging at the same time. But once a person gets to know its core, it can be beneficial and fun in the long run teamed up with the right amount of rewards. To start with this profession as a career, one needs to have specific skills and knowledge of some essential things like Java, Android SDK, etc. These things may sound a bit complicated and look tough to grasp, but it’s much more comfortable, then one can think and adapt quickly.

Android Apps Developer – Skill Requirements

For starting with Android App Development, sure there is a requirement for specific technical skills which are as follows:

java do well in this field. One should have some knowledge of Java. Although the understanding of other technologies can help in developing the apps as well.

It is excellent and beneficial to know about the recent developments in the technology and science sector. But in Java, understanding the basic structure, syntax, and functions, programming, structures of control, class and static method, and other necessary things are the main things one should know as an Android Apps Developer. Java helps in precise work and avoids ambiguity in the functions of each component.

Other than Java, knowing Ruby, C Language, Jason can be beneficial as well.

  1. Getting Aware of XML

XML allows the passing of information between the devices. It is usually applicable for designing the layout, declaring UI, and for encoding the data between internet applications or providing Web Service. It has various designs, plans, screen orientations, and sizes according to the devices, which makes it easy to visualize the app and make changes accordingly. With the vocabulary of XML, designing the UI layouts becomes very simple and easy. One can also use the Java code and JavaScript for modifying the layout elements during runtime. Although knowing XML can open prospects for applying new things to the app.

  1. Android SDK

Android SDK stands for Android Software Development Kit, which provides developer tools to build, debug, and test the android apps. It includes a library, emulator, Android application program interface (APIs), and sample projects for creating the applications. The applications are usually written in Java, so prior knowledge of it is a prerequisite.

  1. Android Studio

Android Studio is an Integrated Development environment designed for Android App Development. It is available for Windows, Linux, and macOS operating systems. This system acts as excellent support for Android SDKs. Moreover, it helps in building and developing the apps of the highest quality for Android devices. The tools are beneficial and include code editing, which gives autocomplete suggestions as one types, debugging features that help in identifying the source of errors, Instant Run, which delivers changes without restarting the app and many other features. It supports C++ and NDK as well other than Java.

5.APIs

APIs are a set of tools and protocols for building software applications. There are different APIs according to the operating systems, websites, and applications. It focuses on how the components of software will interact. It includes features for devices and applications as well. For instance, The YouTube API allows YouTube to integrate with other applications and websites. Whereas, the Google API based on location can help the users to search and get to various places with the help of a map. It is possible to use the facilities of infrastructure with online stores for creating unique web stores. APIs allow one to copy and paste the text from one application to another, thus making it easy to function.

Read also: Android App Development: History Tools, Benefits and Future Trends

6.Flexible User Interaction and visual effects.

An app must have an appropriate android design and attractive outlook. The app has to be user-friendly. Whereas, the criteria such as notifications, android standards, permissions, location, graphics, security, navigation, promotional features should be there in a precise manner to sustain the app in the long run.

7.Handling the Database

In case the app is feeling a large amount of data, some external application is necessary for managing it carefully. The user’s data is easy to store securely. Either one can use services from Cloud, which provides simpler APIs or SQL. It is an inbuilt feature of the Android database or any such other external application. Many such platforms provide the Java Library as well, helping in caching the user’s data. Handling database is also essential if one wants the users to use the app offline while syncing data between local storage and the database. It can effectively help in providing users with the best results.

The Material Design

For developing an app, it is preferable to follow specific guidelines related to the designs for providing an appealing visual design along with proper technology. Material Design is a guide for designing Android Apps. It includes instructions for themes, motion, the adequate placing of elements on the screen, adding Widgets, different APIs for shadows and effects, animations, and much more. Effectively using Material Design makes an app compatible with the other competitive apps.

These are the core things during Android App Development, and if you know of these, then starting your career as an Android Apps Developer won’t be difficult. In addition to the things mentioned above, if one knows additional languages such as PHP, Python, Objective C, Adobe Flash, HTML, and Xcode for Apple, it can be worthwhile.

If you are looking for a Kotlin expert contact us today.

Apple Developer Program Benefits, Tools, and Business Impact Explained

Apple Developer Program Advancing iOS App Development

The mobile app development company is constantly evolving, and so is the use of iOS. This leads to continuous improvement in quality, profitability, and innovation. So does the Apple Developer Program play an important role in advancing iOS app development? This provides developers and businesses with access to cutting-edge tools, resources, and support.

As per the study, iOS users contribute around 65% of global app revenue. Despite having a small share of global smartphone users compared to Android, this highlights Apple’s premium market position and the power of its user base.

iOS app development has been the top choice for businesses because of its advanced development and innovation. iOS development refers to the process of building applications exclusively for Apple’s iOS platform using Swift or Objective-C.

By leveraging the Apple Developer Program, businesses can tap into this lucrative ecosystem, ensuring faster development, enhanced app performance, and seamless integration with Apple’s advanced features.

If you want to launch a business or improve the existing business performance, it is important to have a clear understanding of the benefits of iOS app development and what leads to Apple’s premium ecosystem. All these details will be covered in this blog.

What Makes iOS Development Ideal for Businesses?

You must be aware that iOS application development is a simple process of creating a software application for creating specialized Apple iOS operating system. This also appears to be the strong choice, as this allows businesses to act as a premium user base with access to strong features.

This is widely favoured by the startups and global businesses to maintain the improvements. Businesses are preferring this because Apple users are supposed to be spending more on a high-quality experience. This makes iOS a strategic choice for companies aiming to scale quickly and profitably.

Benefits of Hiring an iOS Developer

With development processes advancement it has become essential to hire a professional iOS developer for businesses.

Let’s know about the different possible benefits of bringing an iOS developer within the business:

  • Faster time-to-market

Apple’s SDK and developer tools streamline the process of development while helping businesses to launch apps quickly and efficiently.

  • Strong Security Standards

Allow enforcer to Apple’s security standards while following the strict guidelines and offer advanced features like FaceID, End-to-End Encryption, and secure data storage. Helps in simply handling the sensitive information.

  • Better integration with iOS-native features

iOS developers can easily tap into the powerful features like Siri, ARKit, CoreML, and Apple Pay to maintain a better experience for users.

  • Consistent User Experience

With limited device variation compared to Android, iOS allows for smoother QA, fewer bugs, and better performance across all supported devices.

These advantages make iOS development a smart investment for businesses requiring quality, scalability, and user satisfaction for their businesses.

iOS Developer Kit: What You Need to Get Started

iOS developer kit is basically the software development kit that includes a collection of tools for creating an efficient app for Apple’s mobile operating system. This offers a comprehensive guide to developers with access to libraries, frameworks, and application programming interfaces.

Here’s what the iOS developer kit included and why each element is important:

Checklist:

  • Mac with macOS 13 or later: Apples require to make use of Xcode for running on Apple. A Mc with an M1/M2 chip is being recommended more to maintain the better performance.
  • XCode Latest Version: This includes access to various tools from SwiftUI for UI design to XCTest for testing.
  • Apple Developer Account: With this, developers can have free access to basic tools with the $99/year plan, which unlocks the App Store distribution, TestFlight, and beta release.
  • Physical iPhone or iPad: Using these devices, testing core functionality will become easy, like FaceID, push notifications, and tracking of location.

Why this matters:

By making use of the iOS developer kit, you ensure that compatibility is maintained by following Apple’s strict guidelines. Offer access to the latest software development kit and APIs. This enables real-device testing and maintains a smooth experience for users.

This foundational setup is the first step toward building reliable, scalable, and App Store-ready iOS applications.

Inside the Apple Developer Program (2025)

The Apple Developer Program is not just a membership; it is more about having access to the advanced ecosystem for developers. This will allow simpler options for testing, maintaining the high-quality appearance of iOS apps. There are several Apple Developer Program benefits listed below so that you can have better knowledge.

7 Benefits of Apple Developer Program

Different benefits are being offered by the Apple Developer Program, and here is a list of some of the benefits that maintain the interest of developers.

  • Publish App on the App Store

Gain the accessibility of disrupted apps of the users and allow them to maintain Apple’s trusted and revenue-rich store platform.

  • Access to the beta iOS Version

This program stays ahead of the trend by allowing easy access to iOS, iPadOS, and visionOS beta versions, along with the latest developer tools and APIs.

  • Use of TestFlight for private app testing

You can easily invite up to 10,000 testers to test your app, which is developed by you, before launch. This will allow you to know about the possible bugs and fine-tune the user experience.

  • Track Performance with Built-in Analytics

Monitor how your app is performing with access to the real-time data on installations, retention, crashes, and in-app behaviour, and does not require any third-party tool.

  • Speed Learning with Exclusive Resources

With access to Apple’s complete library of WWDC sessions, best-practice guide, code samples, and UI design framework allows it to improve app building performance.

  • Get Direct Help from Apple Experts

Submit support tickets and get guidance straight from Apple engineers, plus connect with the global developer community via Apple’s forums.

  • Build Next-Gen Apps with visionOS Support

Start developing for Apple Vision Pro using visionOS tools included in your membership—future-proofing your skills and offerings.

Whether you’re building your first iPhone app or expanding to watchOS and Vision Pro, the Apple Developer Program gives you the professional-grade tools and platform access to make it happen.

Advanced Tools & Best Practices Used by iOS Developers

Building an advanced, high-performing iOS requires more than just coding. It required the use of demanding tools, smart workflow, and proven techniques of development. Their development tools offer Apple developer benefits, which maintain the specific services.

Here are several iOS tools that can be used by developers to deliver a seamless user experience and scalable apps:

Tools That Power Modern iOS Development:

  • SwiftUI – Allows to create the responsive user interface with less code and real-time previews. This is ideal for handling prototypes and maintaining UI consistency across Apple devices.
  • Combine – This makes it simple to synchronize data for streamlining tasks like networking, state management, and event handling.
  • XCTest & TDD (Test-Driven Development) – This ensures the reliability of the code before it is tested. This reduces the chances of bugs and guarantees each feature works well.
  • Xcode Cloud (CI/CD) – Automates builds, runs tests, and deploys apps faster using Apple’s integration services.
  • SwiftLint – Maintain consistency with supporting different coding styles and detect potential issues with automating the linting of your code development pipeline.

All the discussed tools not only improve app performance and code quality. They also speed up the cycle of development, reduce technical debt, and support long-term maintenance requirements.

How iOS App Development Benefits Businesses

Businesses investing in iOS app development allow them to have more than just access to the ecosystem of Apple. It delivers real-time business value.  Here’s how it helps you grow faster, smarter, and more securely while having the benefit of iOS app development:

Top 5 Benefits of iOS App Development for Businesses:

  • Maximize the Revenue – iOS users constantly generate revenue with their in-app purchases and subscriptions. This makes it ideal for the revenue-generating opportunity.
  • Reach High-Intent User base – Maintain a better user base while offering premium iOS application development. Also, Apple users are known for their loyalty and willingness to pay for quality experiences.
  • Accelerate Quality Experience – With the limited number of variations on the devices compared to Android, iOS app testing and optimization take less time and deliver more consistent results.
  • Delivery Outstanding Performance – Maintain the standardized approach with the apps built for iOS, benefit from tight hardware-software integration, resulting in smoother functionality and better battery efficiency.
  • Integrate Seamlessly with Apple Services – Use of built-in tools like Apple Pay for secure transactions, Healthkit for understanding fitness data, and maintain future engagement with Apple’s ecosystem.

Why Partner with an iOS Development Company?

Businesses like a startup or a growing business should have a clear connection with an iOS app development company. This not only offers technical proficiency but also gives a deep understanding of what makes the app appear to be more successful. While connecting with the right iOS development partner, you can easily transform the idea into a successful application that users prefer.

Benefits offered by an app development company:

  • Better UX/UI strategy for Apple devices – Make an advanced interface for the user to maintain the smooth appearance and build a sleek design that retains users.
  • App Store compliance and submission expertise – Minimize delays and rejections with expert guidance through Apple’s strict review and approval process. This also maintains the app optimized for the long term.
  • Scalable architecture and performance tuning – Create apps engineered for speed, stability, and future scalability from the ground up. The professionals make it easy to handle growth and traffic effectively.
  • Access to the latest Apple SDKs (watchOS, visionOS) – Professionals stay ahead of the trend while following the early integration of Apple technologies like watchOS, visionOS, and spatial computing capabilities.

reliable iOS app development partner

What Clients Are Saying

Real-world success stories offer a glimpse into the value of expert iOS development. Here’s what our clients have experienced by partnering with WeDoWebApps:

“WEDOWEBAPPS helped us achieve exceptional results with their outstanding services of mobile app development services. They also allowed us to explore the real-time success in our business. Their team’s technical precision and proactive support made all the difference.”

This client testimonial not only highlights our capability but also shows that we maintain the trust and impact on every iOS project.

Take the Next Step in Your iOS App Journey

iOS app development remains a powerful option for businesses to become more successful, and this also offers a better standard opportunity to meet the desired outcome. This allows to maintain better user engagement and seamless integration within Apple’s premium ecosystem. By leveraging tools like the iOS Developer Kit and the Apple Developer Program, businesses can deliver secure, scalable, and innovative apps that stand out in the App Store.

Ready to turn your idea into a high-performance iOS application?

Partner with WeDoWebApps and let our experienced iOS developers bring your vision to life.

Explore Our iOS App Development Services

How to Build an iPhone App: No-Code, Low-Code & Custom Development Explained

iPhone App Development 

In a world where attention is currency and convenience is king, developing an iPhone app is no longer a luxury, it is a business necessity.

Whether you’re launching a startup, building a new product, or expanding your company’s reach, an iOS app helps you connect with millions of high-value users, right in their pockets. Knowing how to build an app for the iPhone allows you to validate ideas faster, reduce outsourcing costs, and maintain control from day one.

And while iOS development services were once provided by seasoned engineers, today’s tools, frameworks, and no-code alternatives have made the process more possible than ever.

In this blog, you will learn:

  • The important technical stack and Apple ecosystem requirements
  • A structured, step-by-step development process using Swift and Xcode
  • How to use no-code or low-code platform for MVPs and testing
  • Deployment strategies, App store compliance, and marketing best practices 
  • Common pitfalls to avoid when building for high-expectation iOS user base

Whether you are launching a new digital product, prototyping a mobile-first idea, or expanding your existing SaaS offering, this guide gives you the practical foundation to build and ship an iPhone app that delivers business value.

Let’s get started.

What You Need to Know Before Creating an iPhone app?

Before you jump into coding, you need to understand the ecosystem you are going to enter. Developing an iPhone app  is not just about writing code, it is about solving a problem, designing intuitive interfaces, and following Apple’s ecosystem guidelines.

iPhone App Development: Who it is For?

iPhone app development is ideal for:

  • Entrepreneurs wanting to launch a startup idea.
  • Freelancers looking to expand their services 
  • Developers entering the iOS ecosystem 
  • Businesses digitizing services or building customer engagement apps 
  • Students learning mobile development skills 

You do not need to be a tech genius, thanks to modern tools and no-code platforms, anyone can create an app for iPhone with the right guidance.

Why Build an iPhone App?

Are you still wondering if it is worth it? Here is why iOS apps continues to dominate:

  • Revenue Potential: The app store generates more revenue per user than Android
  • User Base: Over 1 billion active iPhone users globally
  • Premium Audience: iOS users tend to spend more and are loyal
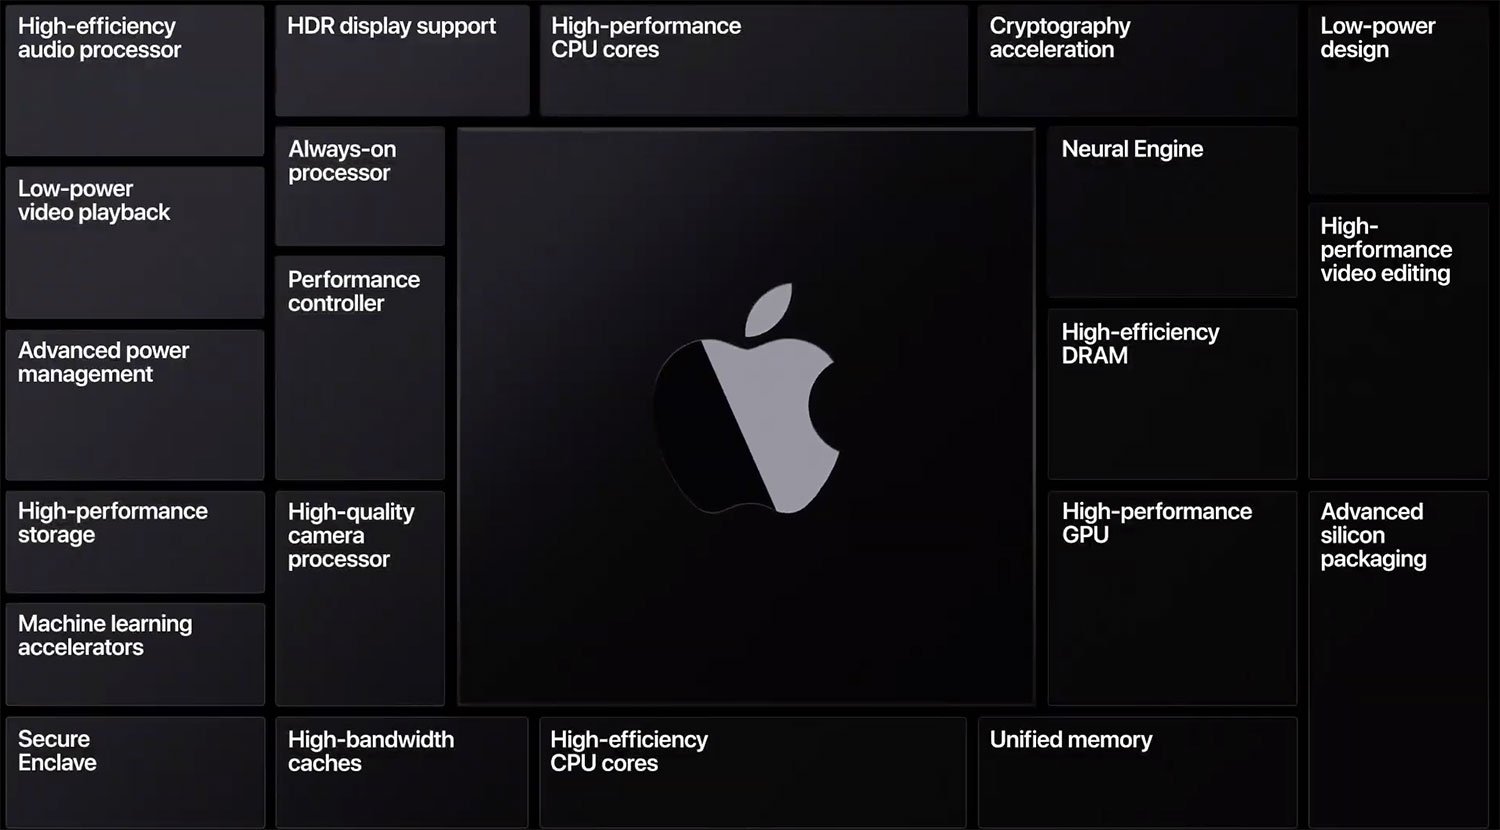
  • Ecosystem Quality: Apple provides top-tier tools, SDKs, and support

Building an iOS app is a future-proof move if you are aiming for quality, performance, and reach.

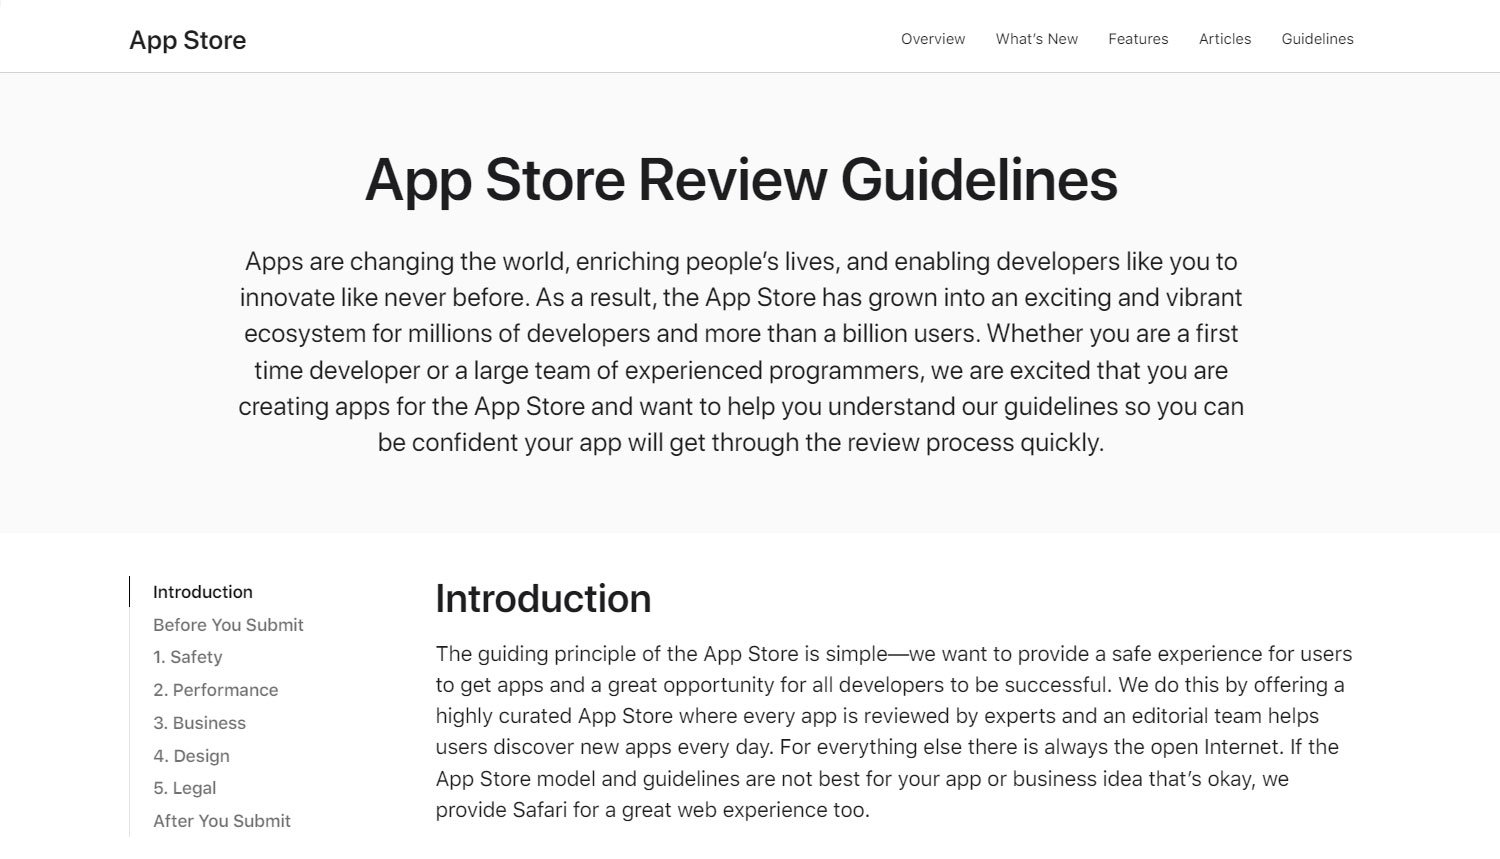
App Store Guidelines You Must Follow

Apple maintains strict App Store Review Guidelines to ensure a safe and high-quality experience for users. Some essentials are:

  • No spammy or low-quality apps 
  • Transparent data usage policies 
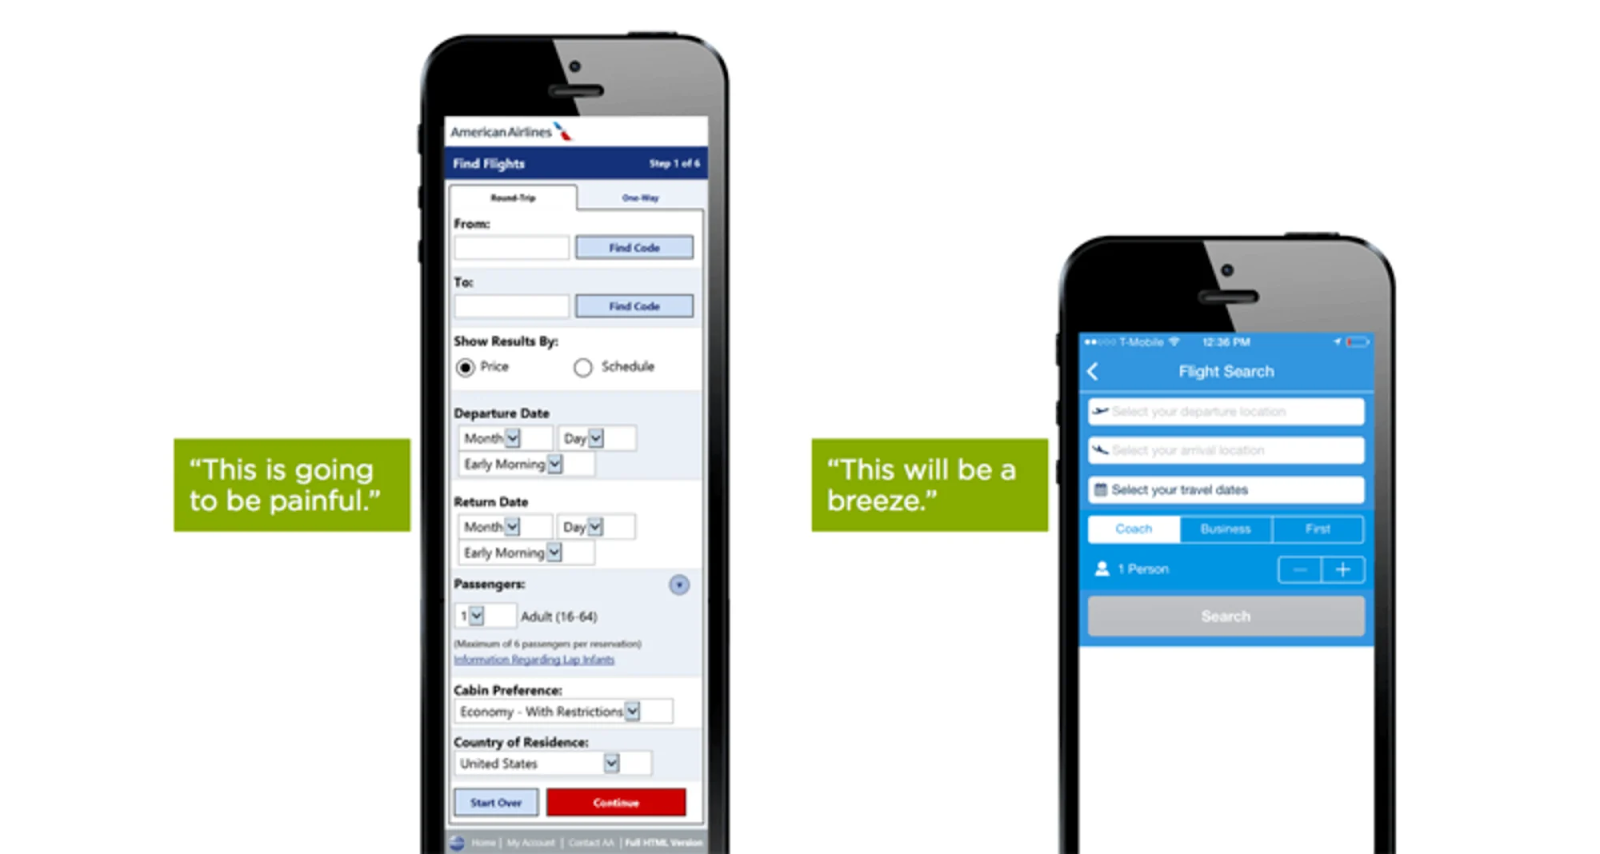
  • Clean, intuitive UX
  • Must work without crashing or bugs.
  • Adhere to Apple’s content and safety policies.

Pro Tip: Review Apple’s App Review Guidelines before you start development to avoid rejections.

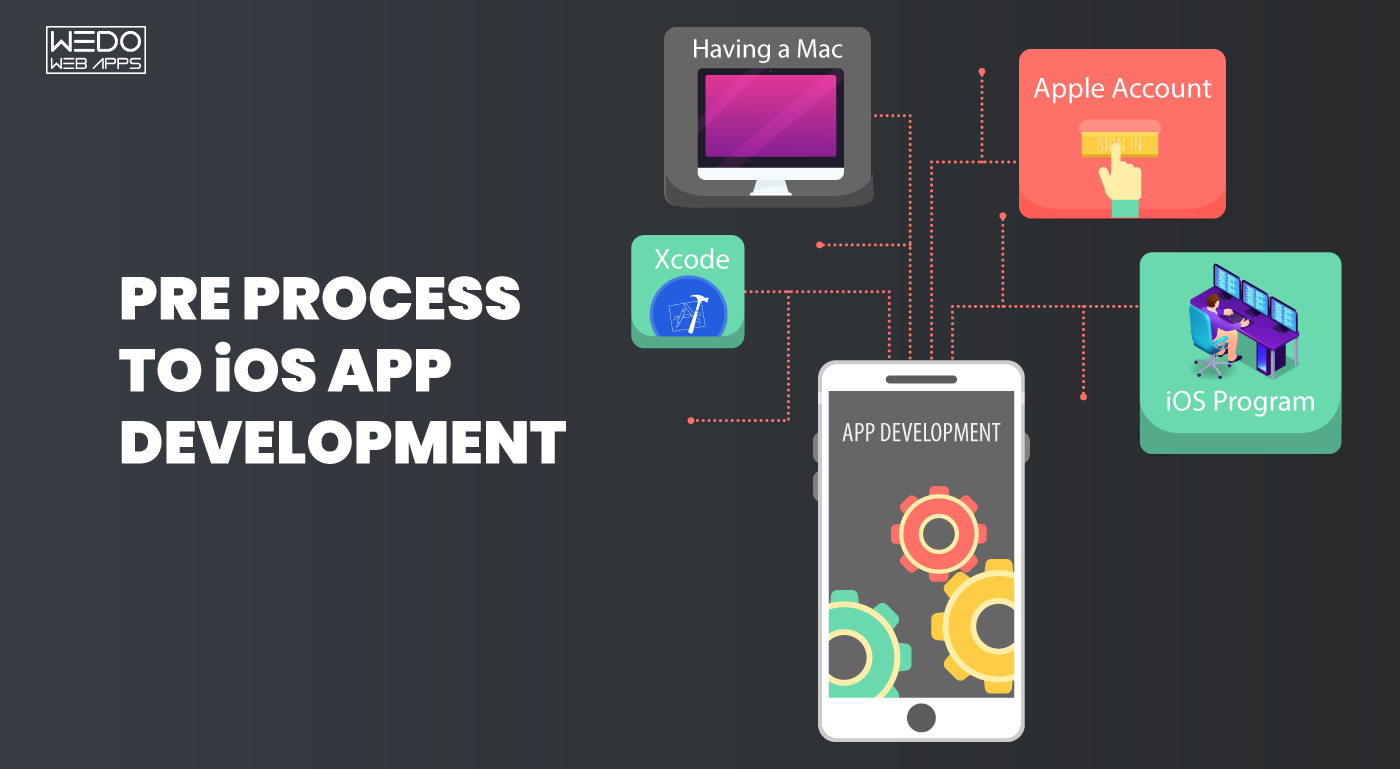
Tools and Requirements to Start iOS App Development 

Before you start your first line of Swift code or design your application’s interface, there are a few essential tools and requirements to set up. Apple’s development requirement is highly optimized, but you will need to meet some prerequisites to build an app for iPhone effectively.

Mac System vs Windows: What Do You Need?

To develop an app for iPhone, you will need access to a Mac. Apple’s official development tool XCode runs only on macOS.

System Feasibility for iOS Development
Mac Ideally and fully supported
Windows Possible with workarounds like virtual machines or local cloud setups

Tip: If you are on a Windows PC and not ready to  invest in a Mac, you can explore MacStadium or MacInCloud for remote Mac access.

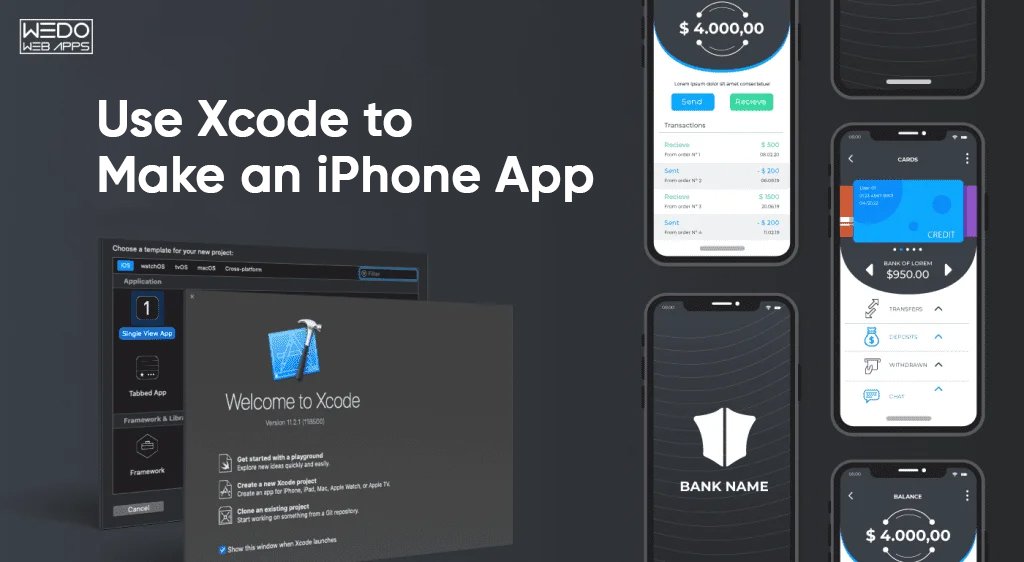
Install XCode – Apple’s IDE for iOS

Xcode is Apple’s official Integrated Development Environment (IDE) for building apps on iOS, macOS, iPadOS, and more. It comes with:

  • A code editor
  • iOS Simulator 
  • Interface builder 
  • Debugging tools 

To install:

  • Visit the Mac App Store
  • Search for Xcode 
  • Click install (it is free)

Once installed, you are ready to build your first project, run app previews, and test directly on iPhone simulators.

Create an App Developer Account

To publish your app on the App Store, you need to enroll in the Apple Developer Program.

Requirement Details
Account Type Individual or Organization
Annual Fee $99/Year (As of 2025)
Benefits App store submission, TestFlight beta testing, access to SDKs and documentation

Even if you are just experimenting or learning, registering early is a good idea to access development and deployment tools.

Programming Language Options (Swift, Objective C)

Apple supports two primary languages for iOS development:

Language Best For
Swift Modern, clean, beginner-friendly, Apple-recommended
Objective C Legacy apps or developers familiar with C/C++

For new developers, Swift is highly recommended. It is safe, fast, and built specifically for Apple platforms.

If you are exploring no-code platforms instead, you might not need to worry about languages, but it is always helpful to understand the basics.

Step-by-Step Process to Create Your First iPhone App

Creating iPhone apps may seem intimidating at first, but when broken down into a clear process, it is absolutely achievable, even if you are not from a coding background. Below is a detailed roadmap that takes you from a raw app idea to seeing your creation live on the app store.

Step 1 – Define Your App Idea and Target Audience

Every successful app starts with a strong, purposeful idea. Before you start building anything, ask yourself:

  • What problem does my app solve? For example, if you are building a budgeting app, is it for students, families, or freelancers?
  • Who is the target user? Knowing whether you are building for tech-savvy teens or working professionals will shape your app’s design and functionality.
  • Is there a similar app already? If Yes, what can I improve? Use platforms like the App Store, Product Hunt, or even Reddit to see what’s trending and what users are complaining about.

Tip: Do not try to build “everything”. Focus on a single powerful feature first. That is your MVP (Minimum Viable Product).

Step 2: Sketch Features and Create a Wireframe

Once your idea is validated, it’s time to put it on paper or screen. This stage is not about beauty, it is about structure.

Wireframing is like creating a skeleton of your app. You’ll sketch out major screens like:

  • The home screen 
  • User login/registration 
  • Navigation menu
  • Settings or features area

You can use free tools like Figma, Balsamiq, or even pen and paper for the first version.

Example: Let’s say you are building a goal-tracking app. Your wireframe might include:

  • A dashboard showing daily goals
  • A calendar view
  • A goal creation screen with input fields

Wireframes help ensure your app is easy to navigate before any design or coding begins.

Step 3: Design the App UI (Tools to use)

With wireframes ready, you will move into designing the visual layer of your app, what users will actually interact with. Great design is not about fancy colors, it is about usability, clarity, and consistency.

Use tools like:

  • Sketch: a popular Mac-based design tool tailored for iOS. 
  • Figma: great for collaboration and browser-based work.
  • XCode’s Interface Builder: lets you drag and drop UI elements like buttons and labels. 

Design tips:

  • Stick to Apple’s Human Interface Guidelines to match the iOS ecosystem 
  • Use high-contrast colors and clear fonts 
  • Test tap areas – are buttons big enough for thumbs?
  • Keep the consistent layout across all screens. 

Pro Tip: Use pre-built iOS UI kits available online to speed up the process and maintain standard iPhone design patterns.

Step 4: Set Up Xcode and Your Project Environment

Now that your designs are ready, it is time to bring that to life. The first step is opening Xcode, Apple’s official development environment. When you launch Xcode, you will be prompted to create a new project. Choose the iOS App template, and then fill in key project details like:

  • App Name (eg., “FocusBuddy”)
  • Team (from your Apple Developer Account)
  • Interface (Storyboard or SwiftUI)
  • Language (Swift)

Once set, Xcode creates a workspace where you code, design files, assets, and configurations will live. At this stage, you are essentially setting the foundation of your app, just like creating a new file in Word or Google Docs, but for app development.

Beginner Tip: Stick with Storyboard + SwiftUI if you are new. SwiftUI is more modern but has a steeper learning curve.

Step 5: Code the App Using Swift

Swift is the preferred programming language for iOS app development. It’s powerful, beginner-friendly, and designed specifically for Apple devices. You will write Swift code to control how your app behaves when users interact with it.

Let’s say you have a “Start Timer” button in your productivity app. You can write a function like this in your ViewController:

@IBAction func startTimer(_ sender: UIButton) {     print(“Timer started!”) }

This code connects to your UI and triggers actions when the button is tapped. Over time you will build multiple functions for navigation, data input, calculations, animations, etc.

Learning Tip: Use Apple’s Swift Playgrounds for interactive practice if you are new to coding.

Step 6: Connect UI to Code

Now it is the time to bridge the gap between your UI elements and your logic. In Xcode, use the Assistant Editor to view both your Storyboard and code side by side.

From here:

  • Control-drag a button into your ViewController to create an IBAction. 
  • Control-drag a label or text to create an IBOutlet.

This tells the app how to react when a user taps, scrolls, or types. For example, a login button should check credentials, or a progress bar should update after a task. 

Common elements to connect:

  • Buttons 
  • Text Fields
  • Labels 
  • Switches 
  • Table Views 

Pro Tip: Always label your outlets clearly (eg., loginButton, userInputField) to avoid confusion in larger apps.

Step 7: Test Your App on Simulators and Real Devices

Before you even think about launching your app, testing is non-negotiable. Xcode comes with a built-in simulator that lets you run your app on virtual iPhones, iPads, or even different screen sizes (like iPhone SE vs iPhone 15 Pro Max).

To run the simulator:

  • Choose a device from the toolbar (eg., iPhone 14)
  • Press the Run Button (Play Icon)

You will see your app come to life just like it would on a real phone. But do not stop there, real device testing is essential to catch bugs that simulators miss.

To test on an actual iPhone:

  • Connect it via USB
  • Trust the computer on your iPhone
  • Enable developer mode (from iOS 16+)
  • Select the iPhone as your build target

Also Try: Apple’s TestFlight platform lets you share beta versions of your app with testers before publishing it.

Step 8: Submit to the App Store

This is the moment you have been working toward: launching your app.

Before you submit, you will need:

  • App name, description, and keywords
  • App icon (1024*1024 pixels)
  • Screenshots for iPhone sizes 
  • App privacy policy URL

Here is a simplified process:

  • Archive your build in Xcode (Product > Archive)
  • Upload it to App Store Connect
  • Fill in the meta data and pricing details 
  • Submit your Apple’s review. 

Apple’s review typically takes 1-3 days. If your app violates any guidelines, like having broken features, unclear privacy use, or crashes, it will be rejected with feedback for correction.

Step 9: Market Your App for Visibility

Even the most brilliantly developed app won’t succeed if no one knows about it. Once your app is live, you need to get it in front of the right users.

Effective marketing tactics include:

  • Social media promotion (Instagram, Twitter, TikTok)
  • Posting on Product Hunt or Reddit 
  • Partnering with micro-influencers in your niche 
  • Running App Store Ads
  • Launching on forums or niche communities 

Most importantly, implement App Store Optimization (ASO) by including high-value keywords in:

  • App title 
  • Subtitle 
  • Keyword field 
  • Add description 

Pro Tip: Ask friends, beta testers, and early adopters to leave positive reviews. Rankings matter a lot in App Store ranking algorithms.

Step 10: Gather Feedback and Update

Your first release is not the end, it is the beginning of your product’s life.

Start collecting feedback from:

  • In-app surveys
  • App store reviews 
  • Social media comments
  • Support emails or tickets 

Track bugs using crash reporting tools like Firebase Crashlytics or Sentry, and make regular updates to improve performance, add features, and stay compatible with new iOS versions.

Apps that evolve based on user needs build loyal communities and higher retention over time.

turn your iPhone app idea into reality

No-Code and Low Code iPhone App Creators 

Not everyone wants to (or needs to) learn Swift or set up Xcode. If you are a non-developer, a startup founder, or someone who just wants to validate an idea quickly, no-code or low-code platforms offer a faster, simpler idea to bring your idea to life.

These platforms provide drag-and-drop interfaces, pre-built modules, and automated publishing tools, so you can focus on building your idea rather than writing code.

Best Platforms to Make an iPhone App Without Coding

Here are some of the top tools for building iPhone apps without writing a single line of Swift:

Platform Best For Key Features
Adalo MVPs, startups Drag-and-drop builder, in-app payments, publish to iOS
Thunkable Educational apps, prototyping Block-based logic, real-time testing
Glide Data-driven apps Turns Google Sheets into mobile apps
Bubble Web apps packaged for iOS Advanced logic, database, plugin system
Bravo Studio Design-to-app workflow Turns Figma designs into native apps

These tools are great for:

  • Entrepreneurs testing a startup idea
  • Small businesses creating internal tools 
  • Event apps, loyalty programs, or community platforms 

Pros & Cons of Using App Builders vs Custom Development

While no-code platforms can save time and money, they’re not always a perfect fit—especially for apps requiring deep functionality or complex backend integrations.

Pros:

  • No coding knowledge required
  • Fast deployment
  • Ideal for prototypes and MVPs
  • Budget-friendly for early-stage projects

Cons:

  • Limited customization (compared to native Swift apps)
  • Performance may not match fully coded apps
  • You’re dependent on the platform’s pricing and uptime
  • Limited access to Apple APIs and advanced hardware features

If your app requires ARKit, CoreML, HealthKit, or deep camera/accelerometer integration, you’ll likely need to go the native iOS route using Swift and Xcode.

Real-World Example:

Let’s say you want to launch a local food delivery app for your city.

  • With Adalo, you could design the full app interface, add user login, restaurant listings, and Stripe payments—all without coding.
  • Later, if you decide to scale it nationwide or integrate machine learning-based suggestions, that’s when custom development becomes necessary.

Common Challenges in iPhone App Development (and How to Overcome Them)

Creating an iPhone app opens new doors, but it also comes with unique challenges, especially if you are doing it for the first time. From strict App Store Guidelines to technical limitations, many great app ideas fall short not because they are bad, but because the process was not planned well.

Here are the most common hurdles teams face when trying to create an app for iPhone, along with proven ways to overcome them.

1. Getting Rejected by the Apple Store

The Problem:

Apple has one of the strictest app review processes in the industry. Apps can get rejected for poor performance, vague privacy policies, irrelevant content, or even small UI glitches.

How to overcome it:

  • Follow Apple’s App Store Review Guidelines from day one
  • Use real devices to test performance and eliminate bugs 
  • Make sure your app has a clear purpose and provides values to users
  • Include a working privacy policy link and accurate app metadata

Pro Tip: Use Apple’s TestFlight to catch issues before submitting your final build.

2. Understanding Time and Budget

The Problem:

Businesses often assume iPhone apps are quick and cheap to build. But depending on features, UI complexity, and testing, even a basic app can take 4-12 weeks and a significant budget, especially with custom development.

How to Overcome it:

  • Start with a Minimum Viable Product (MVP), only core features first
  • Use no-code platforms for quick validation 
  • Plan for time beyond launch: updates, marketing, bug fixes 
  • Set realistic expectations across your team or stakeholders 

A good MVP gets you user feedback early without overinvesting upfront.

3. Navigating Apple’s Developer Ecosystems

The Problem:

If you are new to iOS, setting up certificates, provisioning profiles, and build configurations in Xcode can feel overwhelming.

How to Overcome it:

  • Apple’s Developer Documentation is detailed, bookmark it.
  • Enroll in the Apple Developer program early 
  • Use Xcode’s auto-manage settings for provisioning if you are unsure 
  • Watch free WWDC (Apple Developer Conference) videos for deep dives 

If you have a team, assign this setup to someone familiar with DevOps or CI/CD.

4. Making the App Too Complicated

  • Focus on solving one key problem really well
  • Limit your launch versions to 3-5 core features
  • Use analytics (like Firebase or Mixpanel) to learn what users actually use
  • Roll out features in updates based on real user behavior 

Overcomplicating your first version increases the chance of failure.

5. Testing Only on Simulators 

The Problem:

Xcode’s iPhone Simulator is great, but it does not always reflect how your app will perform on a real device, especially for gestures, notifications, camera, GPS, or performance.

How to Overcome it:

  • Test on at least one real iPhone (ideally across different screen sizes)
  • Use TestFlight to beta test with friends or internal users 
  • Check performance on low-power mode, poor network, and different orientations

Thorough testing = fewer App Store rejections + better user experience.

6. Neglecting App Store Optimization (ASO)

The Problem:

You build the app. It is on the App Store. But nobody is downloading it.

How to Overcome it:

  • Use relevant keywords in your app name and subtitle 
  • Write a clear, benefit-driven description 
  • Include high-quality screenshots and a video preview 
  • Encourage early users to leave positive reviews

ASO is like SEO for your app, get it right, and visibility improves significantly.

Cost and Time Involved in iPhone App Development

Before you dive into development, it is important to understand what kind of investment, both in terms of time and money, is required to bring an iPhone app to life. Whether you are building it yourself, working with a freelance developer, or hiring an agency, the scope and complexity of the app will directly influence the total cost and timeline.

Let’s break it down.

Cost Breakdown – DIY vs Hiring Developers

The cost of developing an iPhone app can vary greatly depending on how you approach it:

Approach Cost Range Ideal For
DIY (with Xcode + Swift) $0-$300 (mainly time, Apple Developer fee, tools) Developers, tech-savvy founders
No-code/Low-code Platforms $25-$200/month MVPs, non-technical founders
Freelancers $3,000-$15,000+ Small to Medium Projects
Development Agencies $10,000-$100,000+ Full-scale apps with complex features

Additional Costs to Consider:

  • Apple Developer Program: $99/year 
  • App design tools (Figma, Sketch): Free – $12/month 
  • Third-party integrations (eg., payment gateways, APIs)
  • Backend services (Firebase, AWS, custom databases)

Pro Tip: Start with a lean MVP to validate your idea before investing heavily in a fully-featured product.

How Long Does it Take to Make an iPhone App?

Just like cost, the timeline depends on your app’s complexity, features, and development approach.

App Type Estimated Development Time
Simple app (to-do list, calculator) 2-4 weeks
MVP with user login, API, push notifications 4-8 weeks
eCommerce, marketplace, or social platform 3-6 months
Enterprise-level app with backend, dashboards, integrations 6-12+ months

Factors that Affect Timeline:

  • Team size and expertise 
  • UI/UX complexity 
  • Number of features and platforms (iPhone only vs iPhone + iPad)
  • Revisions, testing, and App Store approval time 

Reminder: The timeline doesn’t end at launch. Post-launch updates, maintenance, and feature expansions are ongoing efforts that require both time and budget planning.

Conclusion: Start Building Your iPhone App With Confidence

Creating an iPhone app is not just for silicon valley startups or giant tech teams, it is for anyone with a strong idea, a clear goal, and the right roadmap.

Whether you plan to code it yourself, use a no-code builder, or partner with an experienced iPhone app development company, the process is now more accessible than ever. With Apple’s robust tools, widespread user base, and a supportive ecosystem, iOS remains one of the best platforms to launch high-quality, high-performance apps.

By following this guide, you have learned:

  • What tools and skills are needed to get started 
  • How to build, test, and publish an app from scratch 
  • Ways to avoid common pitfalls 
  • Alternatives for non-developers and early MVPs 
  • Time and cost expectations for different project types. 

If you are serious about turning your vision into a scalable iPhone app, now is the time. The App store is open. The market is ready. All that is missing is your app.

our experienced team can turn your concept into a high-performance iOS app

Build iPad App

The iOS platform has become a staple in the mobile app development market. All iOS devices may be targeting the premium users more, but it is nonetheless a quite beautiful piece of software. Apple has made it easier for developers to create iOS apps. Even beginners can start developing apps more comfortably than ever before utilizing the iPad Application Development Services. They have lowered the entry barriers, and the development process is easier than ever before.

The iPad caters to a premium kind of customer segment, and so it becomes somewhat of a necessity that businesses look into developing iPad Applications. There is a lot of scopes there, and one can produce all kinds of apps and games. Here is a basic understanding of how to Build an iPad App with the help of iPad Application Development Services.

How to avail the Build iPad App Services

Android has a higher market share in the market as per studies, and it is also pretty evident. But, the iPad has yet to see a worthy competitor in terms of performance and all other things when it comes to the tablet market. Its popularity and demand have been steadily increasing. As a result, businesses are leaning towards iPad Application Development Services. Here are a few of the basics to build iPad apps.

The basics are pretty simple, and the to-be developers should consider these points if they are looking to develop an application. The process may have been made more accessible, but the development still isn’t natural, as some may think. Let us see how the event works and how to build an iPad app.

Signing Up

The first step is signing up as a developer on Apple. This will give developers access to support materials, and they can also connect their iOS devices so that Apple can test the apps. Signing Up is free unless the developer is looking to sell apps. Then it would cost £69 per year for selling apps on the iTunes Store. One can use an existing Apple ID or make a new one altogether. There are also some programming skills that one needs to know before developing applications.

Set a clear objective

There is a need to set a fixed objective before one goes for Build iPad App. A developer needs to map out what kind of an app or a game they want to build. Decide what the ultimate motive of the app is. Devise its features, scope out its theme, and then gather the assets to start developing it. Please keep it simple and map out a strategy on how to get started. Focus on what features to include and also not too many features.

Looking to build an iPad app? Discover whether native or hybrid app development is the best fit for your project.

Coding the App

If someone is looking to move into iPad Application Development Services, they should think about coding their app. It may or may not be accessible, depending on how much they know about coding. Nonetheless, Apple has reduced the barriers for iPad app coding with the release of iOS 8. Along with that, they also lowered the barriers for Swift back in 2014. Swift is the official programming language of Apple in which the code of the iPad App is written. iOS development companies are thoroughly acquainted with it.

Hiring a Developer

Many companies in the market offer iPad Application Development Services. If coding is impossible, then hiring an experienced developer may be the best course of action. iOS Development Companies have experienced developers with enough expertise to deliver a top-notch application for a business. They keep in mind all the specs and requirements and create an app that stays true to those needs.

Read also: App Programming iOS

Benefits of Building iPad App

When someone wants to Build an iPad App, they usually have something in mind. What leads them towards it is the benefits that it offers. The iPad is considerably higher on the list of popular tablets; it is at the top. It also has a vast user base, and that is why one should cater to those customers. That, in turn, helps one grow the scope of a business and thus grow. There are a lot of benefits, but here are some of them.

  • Paying Clients: iOS has more clients that pay for in-app purchases and buy apps. Unlike Android, Apple Apps rake in more money than the average Android Application. They usually cover the expenses which come from the premium segment of users.
  • Consumer Experience: Customers who use iPad apps have a great experience because the apps are elegantly designed to be user-friendly. Moreover, the user interface is leaps and bounds ahead of anything in the market. It makes it easier to use the apps and reach more potential customers.
  • Interface: As tablet users have come to know, the user interface of Apple is much better than its competitors in terms of design and performance. The app’s design makes a significant impact on business growth as the customers are inclined to use it and even recommend it to others.
  • Tech-Savvy Audience:iPad apps have always been attracting tech-savvy Audiences, increasing the number of future customers. How this happens can be understood by looking at the user base of Apple devices. Those customers would never settle for something less, and that can be a great asset to a business looking to build iPad Applications.
  • Security:This is one of the most critical aspects when keeping customers and businesses in mind. Apple’s own operating system’s security measures remove threats like phishing and hacking effectively. Even the transactions are encrypted to avoid any data loss in case something goes wrong, which never happens.

With this, we have explained the basics of iPad Application Development Services and also its benefits. Build an iPad App can be very helpful for a business or an individual looking to make a name in the tablet market. We hope that this post has been of enough help to you in this matter.

Planning to build an iPad app? Ensure success by securing top services from a mobile development company to guide you through the process.

Are iOS Apps The Future Of Mobile App Development?

In 2008, Apple launched App Store, and in a year, it had just 500 applications and hardly any prominent iOS app development company to deliver leading digital products. 

But in early 2022, several iOS app development services providers entered the market, and the number reached 2.2 million apps for iOS, making it the 2nd largest app store (Android is the first with 3.5 million apps).

But why are the popularity of iOS-exclusive devices, web apps, and iOS applications increasing daily and close to Android? It is because of the innovation and value that the iOS apps bring to the business. Therefore, iOS app UI/UX design and development has always been a lucrative idea for any business.

In this article, we will look at some key reasons iOS app development services are the future of mobile apps.

History of iOS Mobile App Development Services

Initially, iOS app development was limited to desktop computers, as the iPhone SDK was available for Macs. This wasn’t a problem for most developers since their primary machines were Macs, but it was a limitation for many people. 

The launch of Xcode on iPad Pro in 2019 made it possible to develop full-service iOS applications directly on the iOS machine (with an external keyboard and an Apple Pencil connected), which is a big step forward.

Key Reasons Why iOS Development is the Future of Mobile Apps 

Now that we have briefly discussed the history, let’s look at why iOS app development and digital transformation are here to stay.

1. Wearable devices and IoT

iOS App Development Company

The WatchOS platform continues to grow and gain popularity, but the world of IoT is still in its infancy. While we have all the necessary resources to create IoT devices and custom iOS apps, we lack usable devices. The potential of IoT is also limited by its lack of adoption and use. 

This is another field where iOS applications can bridge the gap in the adoption of new and innovative product development; as a result, this development area is still up-and-coming and has potential that iOS developers should explore. 

2. Security Issues with Android Apps

Several security experts report that Apple has done a great job with iOS security features. However, Apple strictly defines what devices are eligible to run a particular version of iOS. 

Most Android manufacturers take their time to release updates and have customized Android versions, making it hard for developers to cover all devices. 

Unlike this, in the case of iOS, the upgrade is distributed only by Apple. This closed environment adds to the security of iOS devices and applications. 

While Google continues to battle malware in its efforts to secure the Android mobile operating system, iOS has the advantage in this aspect.

3. Cross-Platform Development

Most companies have to manage iOS and Android apps regarding cross-platform development. However, many tools, such as Flutter and React Native, support this process. 

These frameworks provide a unified workflow for a developer when building cross-platform apps. Although apps created this way aren’t usually made for iOS, Android is given priority. 

Therefore, it is recommended to use the native platforms of Apple and Google when developing applications.

4. iOS Users Spend More

Another reason iOS development is more rewarding is that iOS users spend more money frequently. According to a survey by AppsFlyer, the average monthly app spend for a paying user is $9.60 for iOS users. 

In contrast, an Android user’s monthly average spending is only $5.20. Another benefit of business apps is that nearly 35% more iOS users spend on business apps.

5. User Loyalty

Apple User Loyalty

iOS is known for its brand loyalty, and Apple’s customers are known for their loyalty and are likelier to stick with the same ecosystem and hardware for long periods. 

This reliability translates to more revenue for developers, as each new project only needs to focus on the latest operating system and hardware version. Also, it minimizes the required testing and speeds up the development process.

6. Ease of development

You will find many options when you want to develop an architecture for your iOS application. And you can consider using one of the standard approaches, such as MVC or MVVM, or you can go further and create a one-way architecture, such as Redux or Flux. 

Whatever you choose, developing apps for iOS is much easier than for Android or any other mobile platform. Android has a very fragmented market, so mobile app developers will have to test and iterate their apps for multiple devices. Instead, mobile app developers find creating apps for iOS much simpler.

7. iOS App Store’s Review Policies

iOS App Store’s Review Policies

Apple also has a stringent review policy for the iOS App Store, meaning you will not find any spam apps or phishing attacks in the App Store. This is crucial to ensure that iOS users do not get viruses or malware on their devices. 

In addition, developers/publishers have to pay a yearly fee to put their apps on the store, and even then, they are subjected to some quality standards; as a result, iOS apps are fast and less buggy.

8. iOS Is More Prevalent In The Enterprise

One of the main reasons iOS app development is the future of mobile apps is that iOS devices are more prevalent in the enterprise. 

Companies prefer their employees to use iOS devices over Android because they feel it is more secure. 

9. Apple Swift

Initially, developers were offered to write applications in Objective C. The Swift programming language appeared in 2014 as an alternative, along with the loss of support for Adobe Flash. 

Creating iOS apps in Objective C is still possible, but it’s almost never a good idea, especially for new project management. 

With the Swift language, the whole approach to application development has changed. The language is much easier to learn and use, leading more and more people to switch to iOS development.

Apple Swift ios app development

It is a modern language that has several advantages over Objective-C. Here are some benefits Swift offers:

  • Automatic memory management
  • Improved readability
  • Closures are easier to use in Swift
  • Easy to build a library and frameworks using Swift because of its open-source nature
  • There are options in Swift to use Apple’s “Unit Testing” and “Behavior Testing.”
  • Swift and Objective-C can work together and let developers write iOS and macOS code.

Since its initial open-source release in 2015, Swift has become one of the most popular languages ​​in active development on GitHub. In the first week, more than 20,000 users had starred it on GitHub, the highest for any language on GitHub at that time. 

Read also: iOS App Development Tools and Remarkable Apple Store Apps

Swift is a powerful language in enterprises today for creating iOS applications. This programming language was developed to make a better and enhanced platform for developers to establish Apple devices, and many companies use Swift to build iOS apps. 

10. Apple

Apple is not giving up in the field of mobile devices, as well as being a leader in desktop computing. The company is also venturing into AR/VR with the recently announced Apple Glasses. Nevertheless, the company’s devices need a solid background for their development, and that’s when the apps come into play.

Apple’s support for developers is one of the critical reasons iOS development is the future of mobile apps. Apple has released a new developer tool: the so-called Developer Transition Kit. 

aaple mobile app development company

This new kit contains all the features required to build apps for the Mac, which is a part of the “Universal App Quick Start Program.” The program includes full access to beta software and tools required to develop apps, the Developer Transition Kit (DTK), learning resources, technical support, and private forums.

Conclusion

iOS is an excellent environment for iOS app development services. If you have some targets in mind to build a mobile app for your business, it’s time to hire dedicated teams of iOS developers. In this article, we looked over why iOS apps can spearhead the future of mobile app development. 

If you are an iOS developer yourself, then it’s now time to provide your clients with customer-centric iOS apps. 

If you’re interested in learning more about iOS application development or getting your business’ mobile app off the ground with expert iPhone app developers, the IOS app development company at  WeDoWebapps can help you! 

We are an award-winning Mobile app development company providing a wide range of digital products in mobile app development services such as UI/UX design, web apps, product development, testing, project management, etc. Contact us today!

How to Create an App for iPhone: Tools, Steps, and Tips

Introduction – What it Means to Create an iPhone App Today

Want to create an app for iPhone but are not sure where to start or which path to choose?

Today, you can create an iPhone app using multiple approaches, from coding it natively to using cross-platform frameworks to building with no-code tools. Choosing the right path early determines how successful your app can become.

Creating an iPhone app is no longer limited to professional programmers. Beginners, entrepreneurs, and small teams can now turn ideas into real iOS applications using accessible tools and structured processes. However, Apple’s ecosystem, technical requirements, and App Store rules still require careful preparation. This guide explains how to create an app for iPhone step by step, including what you need, the available creation methods, and the common mistakes to avoid.

What You Need Before Creating an iPhone App?

Before writing any code or selecting tools, it is important to understand the basic prerequisites for iPhone app creation. These essentials ensure you can build, test, and publish your app without unnecessary roadblocks.

App Developer Account

To publish an app on the App Store, you must enroll in the Apple Developer Program. This account allows you to:

  • Access development tools and SDKs
  • Test apps on real devices
  • Submit apps for App Store review
  • Manage certificates and app identifiers

Without this account, you can experiment locally, but you cannot distribute your app publicly.

A Mac Computer

iOS apps are built using Apple’s development environment, which runs only on macOS. A Mac is required to:

  • Install Xcode (Apple’s IDE)
  • Compile iOS applications
  • Run simulators and device testing

If you do not own a Mac, cloud-based Mac services can sometimes be used, but a native Mac setup is more reliable.

A Validated App Idea

Many beginners jump into building without confirming whether their idea solves a real problem. Basic validation helps reduce wasted effort.

You should clarify:

  • What problem the app solves
  • Who the target users are
  • How the app is different from existing options

Simple validation methods include competitor research, surveys, or building a small prototype.

Basic Technical Understanding

You do not need to be an expert developer, but some familiarity with mobile concepts is helpful:

  • What an interface screen is
  • What APIs do
  • How data is stored and retrieved

If you plan to code natively, learning Swift fundamentals is recommended. If you plan to use tools or no-code platforms, understanding app structure still improves results.

Basic UI/UX Awareness

Apple users expect clean, intuitive interfaces. Even simple apps should follow:

  • Clear navigation
  • Consistent layouts
  • Readable text and spacing

Studying a few popular iOS apps provides a strong reference point.

Ways to Create an iPhone App

There is no single “best” way to create an iPhone app. The right approach depends on your technical skill level, project complexity, long-term goals, and budget tolerance. Most creation methods fall into three main categories.

Understanding these options early helps you avoid choosing a path that limits your app later.

1. Native iOS App Development

Native development means building the app specifically for iOS using Apple’s official technologies, primarily Swift and Xcode.

Best suited for:

  • High-performance apps
  • Complex features or animations
  • Long-term scalable products

What it involves:

  • Writing Swift code
  • Using Apple’s iOS SDK
  • Designing interfaces with Storyboards or SwiftUI

Advantages:

  • Full access to iOS features
  • Best performance and stability
  • Strong App Store compatibility

Limitations:

  • Requires programming skills
  • iOS-only (separate build needed for Android)

Native development is the most flexible way to create an iPhone app, but it also has the steepest learning curve.

2. Cross-Platform Development

Cross-platform frameworks let you build a single codebase and deploy it to both iOS and Android.

Best suited for:

  • Startups targeting multiple platforms
  • Moderate complexity apps
  • Faster development cycles

What it involves:

  • Using frameworks like Flutter or React Native
  • Writing shared code across platforms

Advantages:

  • Single codebase
  • Faster initial development
  • Lower maintenance effort

Limitations:

  • Slight performance overhead
  • Some iOS-specific features may require native plugins

This option balances efficiency and capability for many projects.

3. No-Code / Low-Code App Builders

No-code platforms let you create apps using visual editors instead of traditional programming.

Best suited for:

  • Simple apps
  • Prototypes and MVPs
  • Non-technical founders

What it involves:

  • Drag-and-drop interfaces
  • Prebuilt components
  • Platform-managed hosting

Advantages:

  • No coding required
  • Fast setup
  • Beginner-friendly

Limitations:

  • Limited customization
  • Platform dependency
  • Scaling constraints

No-code tools are useful for validating ideas, but may become restrictive as your app grows.

How to Choose the Right Method

A quick decision guide:

  • Want full control and scalability → Native
  • Want faster multi-platform release → Cross-platform
  • Want the quickest validation → No-code

Choosing the right creation method prevents costly rebuilding later.

Tools to Create an iPhone App

Choosing the right tools makes the iPhone app creation process easier, faster, and more reliable. The tools you need depend on whether you are building natively, using cross-platform frameworks, or working with no-code platforms.

Below are the most commonly used tool categories.

Native iOS Development Tools

These tools are used when building apps specifically for iOS.

  • Xcode (Apple’s official IDE)
  • Swift programming language
  • Interface Builder or SwiftUI
  • iOS SDK

Best for: Creators who want full control, high performance, and access to all iOS features.

Cross-Platform Development Tools

These tools allow one codebase to run on iOS and Android.

  • Flutter
  • React Native
  • Xamarin

Best for: Startups and teams targeting multiple platforms with shared code.

No-Code / Low-Code App Builders

These platforms use visual editors instead of traditional coding.

  • Drag-and-drop app builders
  • Prebuilt UI components
  • Integrated backend services

Best for: Simple apps, prototypes, and quick MVPs.

Backend and Database Tools

Most apps require data storage and user management.

Common options include:

  • Cloud databases
  • Authentication services
  • API platforms

These tools handle data, users, and server-side logic.

Design and Prototyping Tools

Used for creating layouts and user flows.

  • Wireframing tools
  • UI design software
  • Prototyping platforms

Good design tools improve usability before development begins.

Testing Tools

Testing tools help find bugs and performance issues.

  • iOS simulators
  • Device testing platforms
  • Crash reporting tools

Testing early reduces App Store rejection risk.

How to Choose the Right Tool Stack

A simple rule:

  • Learning or experimenting → Native tools or no-code
  • Multi-platform launch → Cross-platform framework
  • Business-grade product → Native plus backend services

Selecting iOS app development tools based on project goals prevents unnecessary rebuilds later.

Step-by-Step Overview of the Creation Process

Once you’ve selected how you will build your app, the creation process generally follows a predictable sequence. These steps apply whether you choose native development, cross-platform tools, or no-code platforms.

Following a structured flow reduces confusion and rework.

Step 1: Define the App’s Purpose

Start by clearly stating:

  • What problem the app solves
  • Who will use it
  • What the main outcome should be

A focused purpose prevents unnecessary features from creeping into early versions.

Step 2: Choose Your Creation Method

Decide between:

  • Native development
  • Cross-platform framework
  • No-code builder

Base this decision on your skills, timeline, and scalability needs.

Step 3: Plan Core Features

List the minimum features required for the first version.

Examples:

  • User login
  • Profile management
  • Content display
  • Basic notifications

This becomes your MVP (minimum viable product).

Step 4: Design Basic Screens

Create simple layouts for each screen.

You should define:

  • Navigation flow
  • Button placement
  • Input fields

Wireframes or rough sketches are enough at this stage.

Step 5: Build the App

Begin implementation:

  • Write code or configure components
  • Connect backend services if needed
  • Integrate third-party APIs

Focus on functionality before polish.

Step 6: Test the App

Testing ensures stability and usability.

You should test:

  • On multiple devices or simulators
  • Core user flows
  • Error handling

Fix issues before moving forward.

Step 7: Prepare App Store Assets

Apple requires specific assets:

  • App name and description
  • Screenshots
  • App icon
  • Privacy policy link

Prepare these in advance.

Step 8: Submit to the App Store

Upload your build through App Store Connect and submit it for review.

Apple reviews:

  • Functionality
  • Content policies
  • Privacy compliance

Approval typically takes a few days.

Following this sequence provides a clear path for anyone learning how to create an app for iPhone step by step.


Get iOS Development Help for iPhone App

Apple App Store Guidelines and Submission Basics

Many first-time creators successfully build an iPhone app but struggle at the final stage. App Store submission is strict. Understanding Apple’s review standards early prevents unnecessary rejections.

This section explains the essentials without going too deep into legal or compliance details.

Apple’s App Review Guidelines

Apple maintains a detailed set of App Store Review Guidelines that every app must follow. These rules focus on:

  • User safety and privacy
  • App performance and stability
  • Honest functionality and content

Apps that mislead users, crash frequently, or misuse data are commonly rejected.

Privacy and Data Usage Requirements

If your app collects any user data, Apple requires transparency.

You may need to provide:

  • A privacy policy URL
  • Clear explanations of data usage
  • Permission prompts for sensitive access

Even simple apps using analytics or user accounts must declare data practices accurately.

App Store Connect Basics

App Store Connect is Apple’s platform for managing apps.

You will use it to:

  • Upload app builds
  • Enter app metadata
  • Manage TestFlight testing
  • Track review status

Proper configuration reduces review delays.

Common Reasons Apps Get Rejected

First-time submissions are often rejected due to:

  • Incomplete app functionality
  • Broken links or placeholder content
  • Missing privacy disclosures
  • Poor user experience

Reviewing these areas before submission improves approval chances.

Review Timeline Expectations

After submission, Apple typically reviews apps within a few days. Rejections include detailed feedback, allowing you to fix issues and resubmit.

Understanding this process helps set realistic expectations when creating an iPhone app.

Common Mistakes Beginners Make When Creating an iPhone App

Many first-time app creators fail not because their idea is bad, but because of avoidable mistakes during planning and execution. Being aware of these pitfalls early can save significant time and effort.

Starting Without a Clear Goal

Building features without a defined purpose leads to bloated, unfocused apps.

Instead:

  • Define the main problem first
  • Limit the initial feature set
  • Build for one core use case

Clarity drives better design and development decisions.

Choosing the Wrong Creation Method

Selecting a method that does not match your goals creates future limitations.

Examples:

  • Using no-code for a complex product
  • Choosing native when you need multi-platform quickly

Match the tool to the project, not personal preference.

Ignoring User Experience

A functional app can still fail if it feels confusing.

Common UX issues include:

  • Too many steps
  • Poor navigation
  • Inconsistent layouts

Simple, intuitive design improves retention.

Skipping Testing

Relying only on simulators or visual inspection often leaves hidden bugs.

You should test:

  • Real device behavior
  • Edge cases
  • Slow network conditions

Testing early reduces rejection risk.

Underestimating App Store Requirements

Many beginners assume submission is automatic.

In reality:

  • Metadata must be complete
  • Privacy disclosures must be accurate
  • App must function as described

Preparation prevents last-minute delays.

Avoiding these mistakes improves your chances of successfully launching an iPhone app.

Creating an iPhone App: DIY vs Professional Development

One of the most common questions beginners ask is whether they should create an iPhone app themselves or involve professional developers. Both paths can work, but each serves different situations.

Understanding the differences helps you choose a realistic approach.

DIY (Do It Yourself) App Creation

DIY means building the app on your own using native tools, cross-platform frameworks, or no-code platforms.

Best for:

  • Learning projects
  • Simple apps
  • Early idea validation

Strengths:

  • Full personal control
  • No dependency on external teams
  • Great learning experience

Trade-offs:

  • Steep learning curve (for coded apps)
  • Limited scalability (for no-code tools)
  • Slower progress for complex features

DIY creation works well when your primary goal is experimentation or building a small MVP.

Professional Development

Professional development involves working with experienced iOS developers or a development team.

Best for:

  • Business-critical apps
  • Complex functionality
  • Long-term scalability

Strengths:

  • Faster execution
  • Better architecture decisions
  • Higher reliability

Trade-offs:

  • Requires budget
  • Less hands-on technical control

This option is typically chosen once the app concept is validated and growth is expected.

Which Option Should You Choose?

A simple guideline:

  • Validating an idea → DIY
  • Building a product business → Professional development

Many successful apps start with DIY prototypes and transition to professional development later.


Talk to iOS App Experts for iPhone App

When Businesses Usually Move to Professional Development

Most businesses do not start with a full development team. They move to professional developers when their app requirements exceed what DIY tools or limited coding skills can support.

Here are common signals that indicate it may be time to involve experienced professionals.

The App Needs Advanced Features

Examples include:

  • Real-time messaging
  • Payment processing
  • Complex integrations
  • High-level security

These features require strong architectural planning.

Performance Issues Appear

If the app becomes slow, unstable, or crashes under load, deeper technical optimization is required.

Professionals can:

  • Improve performance
  • Refactor inefficient code
  • Optimize backend systems

Scalability Becomes Important

Growing user bases introduce challenges such as:

  • Database scaling
  • Server optimization
  • Load balancing

These areas benefit from experienced engineering.

You Want a Production-Ready Product

Businesses aiming for monetization, partnerships, or investment usually require:

  • Clean architecture
  • Maintainable code
  • Security best practices

At this stage, working with a trusted WEDOWEBAPPS iOS app development team can help transform an early prototype into a reliable product.


Validated iPhone App Idea with Developers

Conclusion

Creating an app for iPhone today is more accessible than ever. Success still depends on making the right early decisions. From validating your idea and choosing the correct creation method to following Apple’s guidelines and avoiding beginner mistakes, each step plays a role in shaping the outcome.

If you are experimenting, learning, or validating a simple concept, DIY tools and frameworks can be an excellent starting point. As your app grows in complexity, user base, or business importance, partnering with an experienced iOS app development team or professional iOS developers can help ensure your product remains stable, scalable, and future-ready.

The most effective approach is often a phased one. Start simple, prove your idea, and evolve your development strategy as your goals expand.


Start Your iOS App Journey from Idea

11 Stunning Website design ideas for creating a standout site

Website design is such a concept that it has limitless ideas. Well, especially if you are not a website designer! It is a challenging task for a designer to find a new design inspiration every time something new comes up. Undoubtedly, if you are not a professional designer, you will be left clueless.

It is a known fact that designers are artists, and every artist has a different approach when it comes to finding work inspiration. It is better to contact a responsive website designing company because designers here get huge industry exposure. It is essential to consider responsive designs in this fast-paced market where competition is everywhere. If your website is adaptable to various screen sizes and mobile devices, you have a higher chance of improving search rankings. 

With ample website types and designs, designers are often perplexed; from where to start? A designer would want to give their best because a website is a virtual forefront that reflects the image of your business. Therefore, it should be as pleasant as it could get with the required smoothness, robustness, and functionalities. Design and development are crucial aspects of a website and should work in favor of user experience. 

Whether you are a business owner or a website designer, the list of website design ideas can come in handy for anyone. Do check them out before availing of any responsive website design services for your business.   

Website design ideas for creating a standout site

1. Communicate your brand identity

Your website plays a vital role in displaying who you are and what you do to create a brand identity. Therefore, it should be designed to communicate with visitors and customers and reflect the correct image. The logo, designs, layouts, fonts, imaginary, and colors, everything you put in shows the value and integrity of your business. 

Let your design speak to your customers and convey the message you want them to understand. If the design can catch the visitor with smooth navigation and quick information findings, visitors will stay. Your forefront should show the visitors ‘who’ and ‘what’ within seconds to turn them into customers and boost your conversion rates.

2. Effective and adaptive design

We all have been there; you clicked on a website and got lost in its clutter of buttons, poor directions, not-so-connected links, and whatnot. Furthermore, it is not a mobile website, so you have to zoom in and out frequently, which is annoying. A website ruins its screen resolution and invites increased bounce rates with such design projects. 

Always have an effective and adaptive website to build trust with your customers. Avail responsive web design services if you must, but ensure to have a mobile site that is easily accessible by customers. User experience is of utmost importance, and so, little details can take you a long way. Make sure to have compelling design layouts, sufficient white space, measured and easy-to-read copy, etc., to grab consumers’ attention and secure them for your business growth.

3. Value and Virtue

When a person lands on your home page, they should be compelled to stick around and have a look. If the design is not convenient and cooperative, it becomes a challenge to make them stay longer. The home page of any website is the first page to show the value proposition and virtue of your business. 

The decency of design, color combination, things you highlight are elements that speak out loud about your brand. Visitors feel intrigued to know more about your services or products when finding information on your well-designed site is a seamless procedure. In that way, you can turn those visitors into customers who are “just browsing”!

4. Attracting your audience

A brand is identified by an efficient website and design; hence, the design should be created keeping the targeted audience in mind. Everything you choose and decide about your website design should answer their needs. Try to create memorable, unique, and exciting experiences with your design. You can also add or remove images or imagery graphics to stay ahead of your competitors. 

If your audience is around and visits frequently, you have won half of the race. So, make sure to include colorful and exceptional elements that hold the audience’s attention. It could be colors, animation, videos, or infographics; brainstorm a few ideas and keep the audience up on their toes. 

5. Pop up illustrations

Illustrations give your website an alluring look, and when it is a pop-up, it works like a charm. The illustration is an old yet evergreen trick because from children to adults, everyone loves it. As a designer, you can add sparkling colors, themes, or fonts to convey the message of the business. It could be hand-written or designed, abstract art, or a combination of conventional and modern art. 3D and moving graphic design are also trending for illustrated designs as it gives your website a unique feel and looks to capture users’ attention. 

6. Using cozy colors

Some brands speak well through cozy color choices as it renders easy-on-eyes color schemes. It consists of light shades like warm blue, sky blue, other pastel or neutral colors. It gives a sense of relaxation and influences calmness while browsing through such websites. Warm browns, pastel blues, neutral greens, sand tones, and cool greys are the colors that give customers a seamless and lasting browsing experience regardless of smartphones or tablets. 

One can also use brighter background color with the design process to make the entire look catchy and pleasant. By using contrasting colors, you draw users’ attention exactly where you want them to; it can be a discount offer, holiday sale, newly launched services or products, and much more. Your website can attract more customers and improve ranking if you seek help from a responsive web design company for an enhanced user experience. 

Read also: How to Choose the Best Responsive Website Design Services

7. Trending abstract art

Using creative geometric designs is a trending art form as not only on websites, but even wall-pieces are a big sell with it. Abstract art is fun for both designers and users. It is a treat to eyes that can be used in photography and digital design. Several award-winning companies use abstract designs for personal or professional branding. Being a form of modern art, people love it for its unpredictability of shapes and colors.

The best part is, this abstract design can be used in 3D and 4D as well. Simple shapes of circles, triangles, and squares can rotate in a three-dimensional way and offer the information your users are looking for. Startups can contemplate this idea as they need to capture an audience at the beginning of their business to kick-start marketing and selling. Make sure to hire experienced designers and website developers for long-term benefits.

8. Evergreen vintage style

A design that brings nostalgia, warmth, and a sense of familiarity, vintage is an evergreen style to design your website. Old-school style with blurred images, fonts, black and white or brown and white themes, and real faded pictures gives something to be connected to. Whether it is about your baking services or 60s fashion apparel, whether it is writing a blog or a designer portfolio, vintage web design gives your visitors comfort and connectivity. 

Responsive web designs can easily show typewriter fonts, faded page colors, cracks, and weariness. You can add real vintage photographs or the latest photos with vintage effects given to make them seem old. Such components of design communicate with the visitors and inspire them to be customers.

9. Electric colors

Radiating electric and neon colors give your website a distinctive look among thousands of other websites providing the same services or products. It is one of the cutting-edge design ideas as millennials like it vividly vibrant. It gives an elegant aesthetic look to your website, which capture’s visitors’ attention. You can use 3D effects and fine shading to accomplish the desired look and feel. You can have glamorous visual effects by giving subtle and softer neon color contrasting, and you can create an energetic and unforgettable website look.  

You can also combine retro and contemporary styles to blend colors or give visual effects to create a certain kind of atmosphere. It is crucial to keep in mind that to create a memorable design, one has to choose the colors suitable to the brand. For example, you cannot choose bright neon blue for a florist’s website, but it can be a great choice to promote sports gear or apparel.

10. Prompt directions

Conventionally, homepages have a sidebar or a sign in some corner that leads you to other pages of the website. In modern websites, designers take chances to break the chain and bring out a new concept of prompt directions. It means you can navigate right from the homepage without having to look for directions. There can be buttons or attractive icons that list out the things your customers need; what is better than turning your menu into a visual delight of services or products you want to sell.

Often customers feel it is a tedious procedure to navigate through various options and look for what they want. This task becomes a lot easier with options appearing as icons, especially when the color synchronicity is right. In addition, it renders an amazing user experience by giving a separate brand identity of the site providing similar services or products to your customers. Anything making your website stand out is worth a try, right?

11. A little more text is fun

Well, a little more text and a slightly less design are cost-effective for startups, and why not if it looks alluring. Instead of just designs, add some texts and let it do the talking for your brand. Many brands have experienced being more effective with a wide variety of sizes, colors, fonts, and layouts. By considering a minimalist approach, you can play safely while providing all the details your customers need on one page. 

It comprises a lesser amount of colors and more combinations for texts to come out as an effective asset of the website. Such designs are calm in nature and, thus, more cherished by the users. With lots of room to breathe, one can get away from not-so-essential elements of the website, which makes it simpler for users in the long run.

To sum up, know that design ideas can be plenty, but executions should be clever. You can have ample inspiration from social media platforms or by looking at the top-ranking websites in specific niches. When it comes to branding, think logically because your customers would not! They go through your web pages through their eyes and heart, and if they did not like it at first, they might not return at all. 

Your design should always meet your business niche; else, all the project management, time, money, and resources invested are for nothing. Before choosing a particular design, do in-depth research and understand what your customers like. Web design ideas mentioned above will lead you in the right direction; you can use design idea inspirations from the beginning to make it right till the end. Follow the tips, and you will surely land with qualified designers and exceptional design to get people clicking through your website.

Explore these stunning single page application websites that showcase the potential of modern web design.